![]()
| Discovery 1 CDL into a Discovery 2 "Manual and Automatic" | ||||
|
|
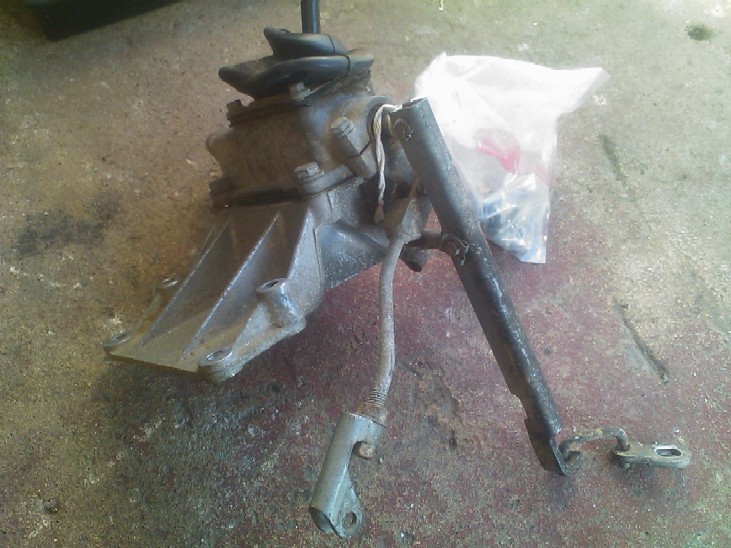
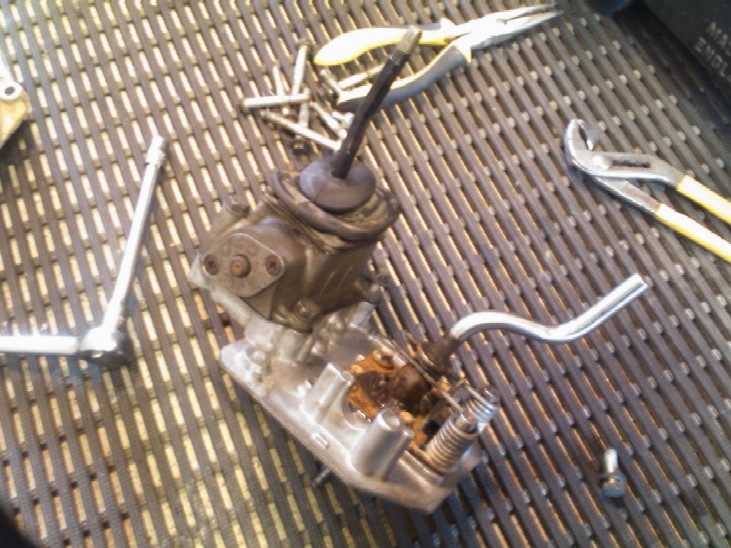
Here is some photos of the install, its not a comprehensive write up, the dis-assembly will be the same as for fitting the D2a linkage into a Discovery 2. NOTE :- The MOST important thing is, you MUST get a linkage from a series 1 Discovery that has the same transmission as yours, manuals will NOT fit auto's and vice versa. One of the pictures below will show the significant difference. *The following photo's are from both a manual and auto conversion* Here is what you basically need for the install, the differences between the manual and Auto are explained further down the article. The "top" section (lever) is the same for both models Automatic assy / components in picture!!
So strip out the interior / console as in my "full" write up. This is what a manual D2 looks like NOTE:- the small "hole" where the lever comes through the plate
The transfer lever is mounted the same as in the auto on a D2 from the "factory" Again follow the removal procedure for the lever, but in a nutshell, you have to remove the 4 bolts to undo the lever from the plate, then drill out the 13 pop rivets to remove the tunnel access cover. Once the rivets are out, remove the gear lever knob, then the extension by undoing the clamping bolt
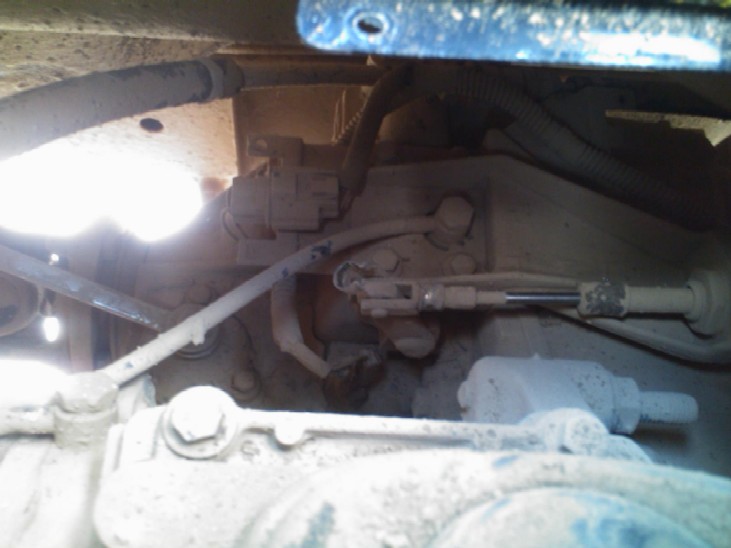
Once that's off, you can remove the whole transfer cover / plate with gaiter intact, this is what you will see on a MANUAL car, check My D2 install for AUTO info. Now is a VERY good time to get the old hoover out and give the are a good going over as you will be soon "opening" up the gearbox. This is what you will see............maybe less dirt!!! depends if you "offroad" your Disco or not ;o)
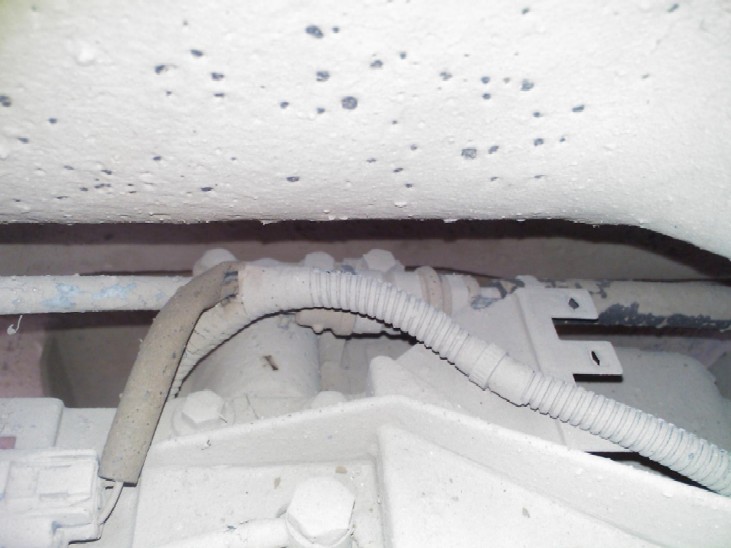
Next remove the cable for the High / Low lever, you have to remove the "P" clip which is shown below
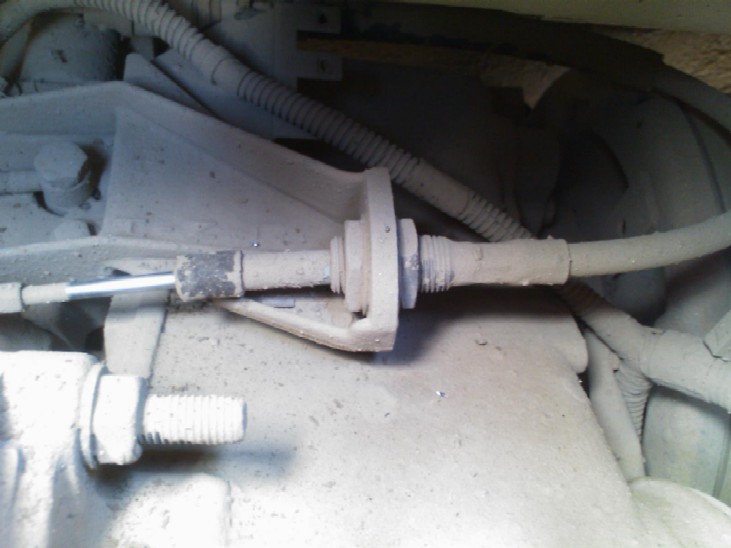
The 2 large locknuts that secure it to the bracket shown below
And finally the Pin at the cable end.
Now you have this removed from the car
next remove the 4 outer bolts from the gear lever ........"manual car"......For Auto, see offroad addons page.
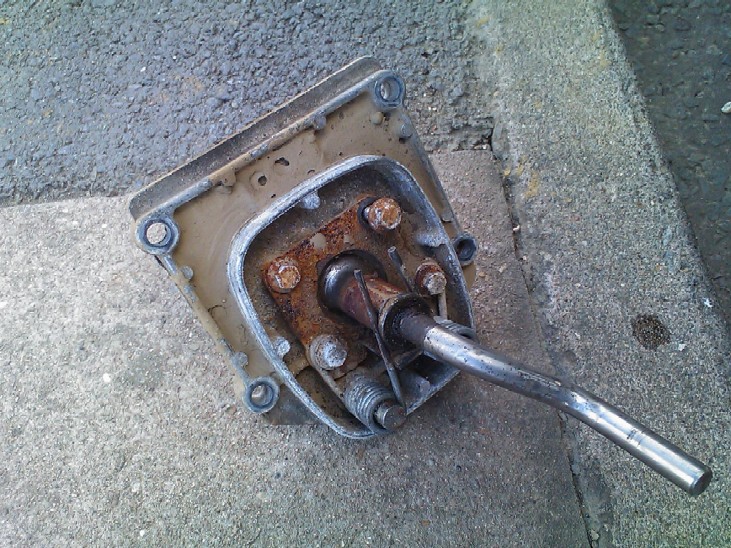
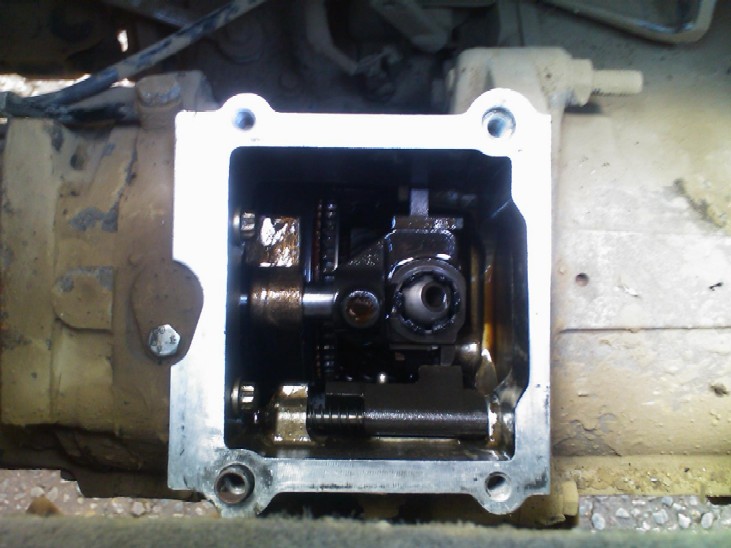
The lever and plate simply lift out, it may need a small tap to free up the sealant holding it down......... this is what you have
and this is what you see..........BE CAREFUL not to drop any tools, or knock any dirt into the gearbox!!
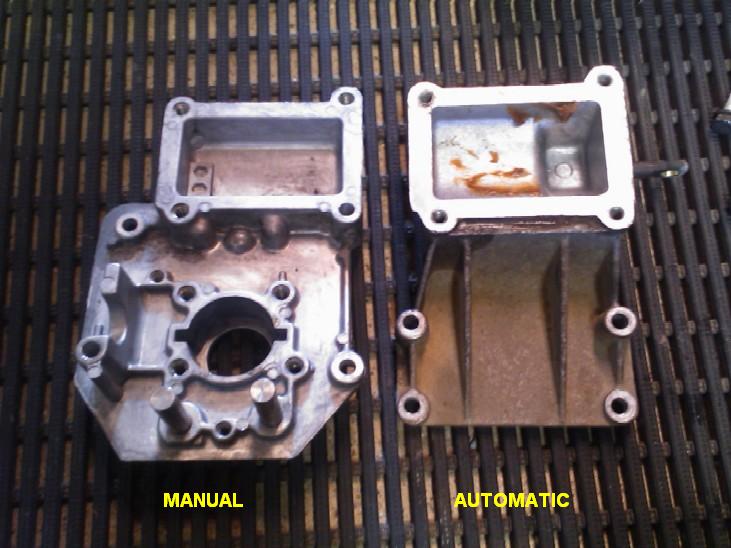
Now, below you can see the difference between the 2 gearbox variants, the Manual mounts "with" the lever, and the auto model just bolts to 4 holes already in your gearbox, you will seem them on an auto as soon as you remove the tunnel cover plate
The actual transfer lever is the same, but the attaching parts are different. The lever assy mounts to the upper 4 holes on both plates. With this manual conversion, the gear lever must be transferred from its old plate to the Disco 1 plate
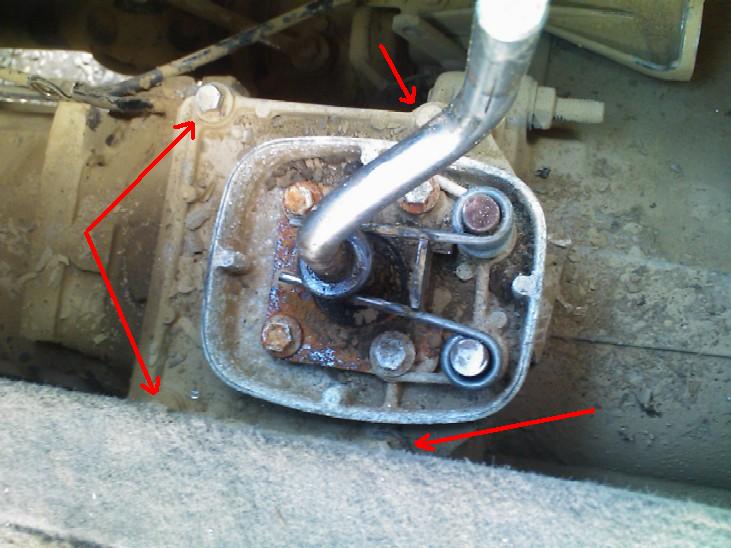
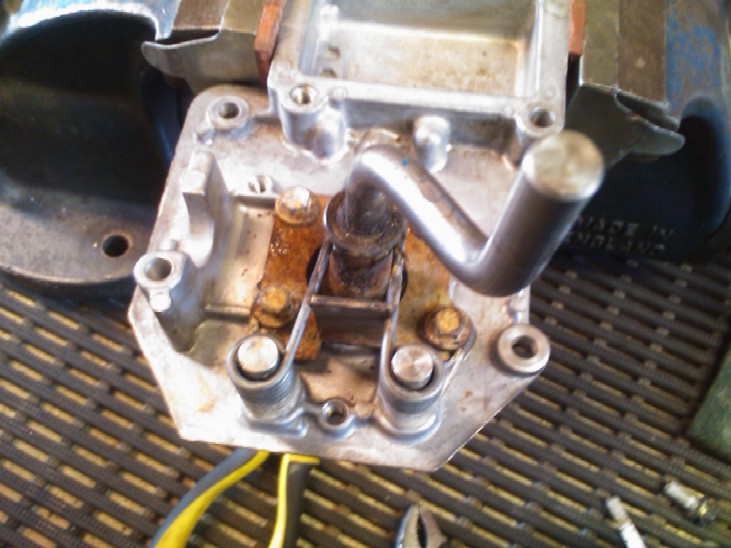
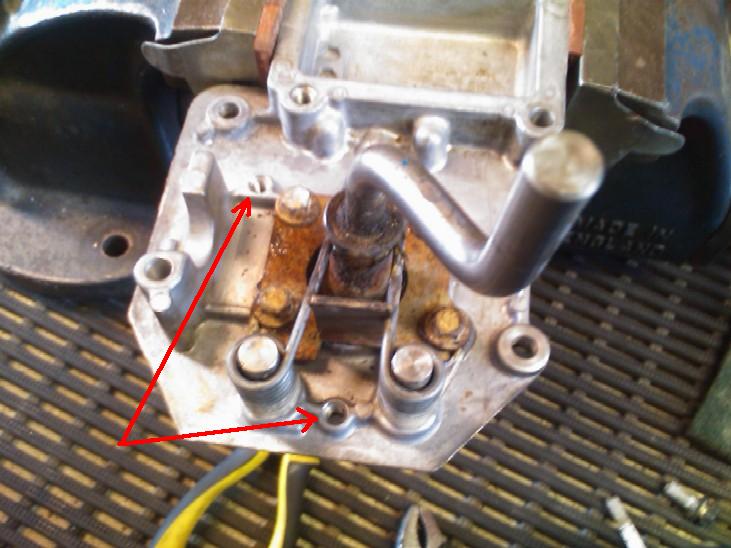
Here's the lever and springs etc transferred over, the springs are quite tuff, so be careful when removing / fitting those NOTE :- The 2 bolt holes arrowed below need to have just a short bolt installed to "fill" the holes up.
Install the bolts with either Hylomar or a small touch of thread lock. Next you have to fit your "new" transfer lever to the mounting plate. There is supposed to be a paper gasket between the lever and the mounting, if its in bad condition or not there, then use Hylomar here as well.
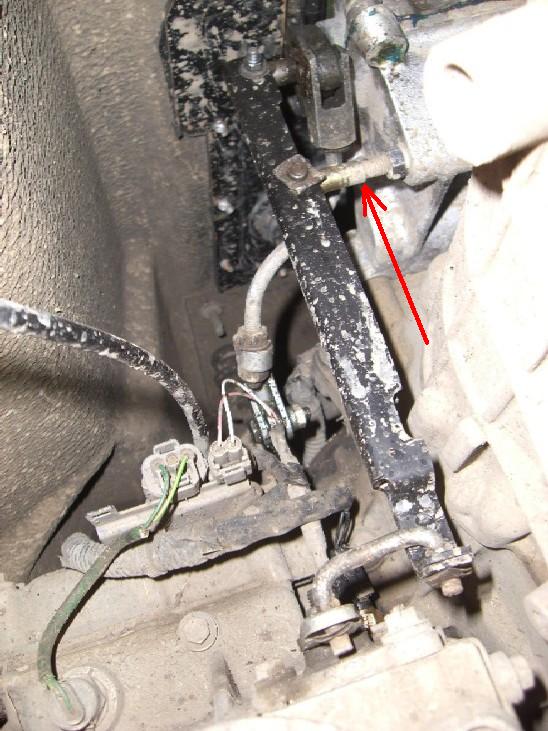
Install that in the car using instant gasket or Hylomar where the new plate sits on the gear box, refit with the 4 bolts you removed, you "may" need 1 or 2 longer ones, but you "should" have those from when you removed it from the Series 1 car. If you intend to do this mod, and don't physically remove it yourself, ensure who ever takes it off for you gets EVERYTHING!! I would HIGHLY recommend, that unless you have removed a transfer / difflock linkage from a discovery before, that you remove it all yourself, so you can see how it goes together. Right, some of the bits I don't have pictures of, but I will try to explain, The manual car does not have the Rod end for the difflock lever mounted to the plate, its actually mounted on the gearbox. If you removed it you should have an idea what I mean. The Automatic car has the rod end fitted to the mounting plate, so that "should" have come with it as well. On the manual, it mounts below where I'm removing the 10mm bolt.
Below is the Rod end arrowed, screwed into the automatic mounting,
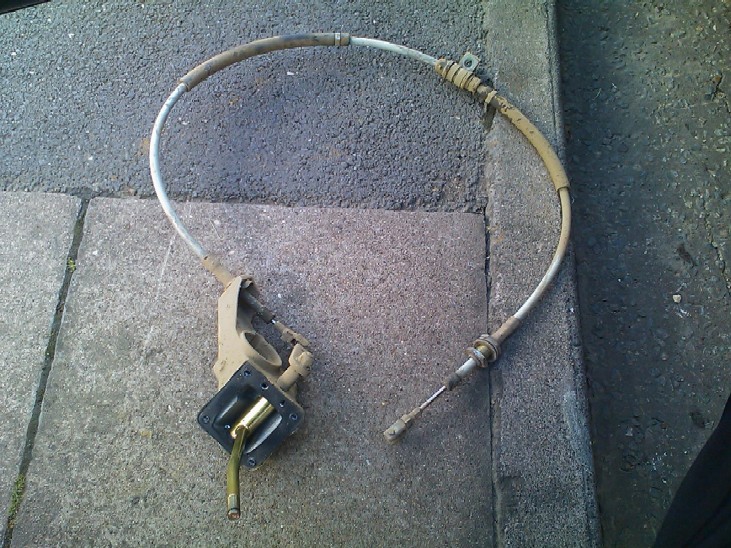
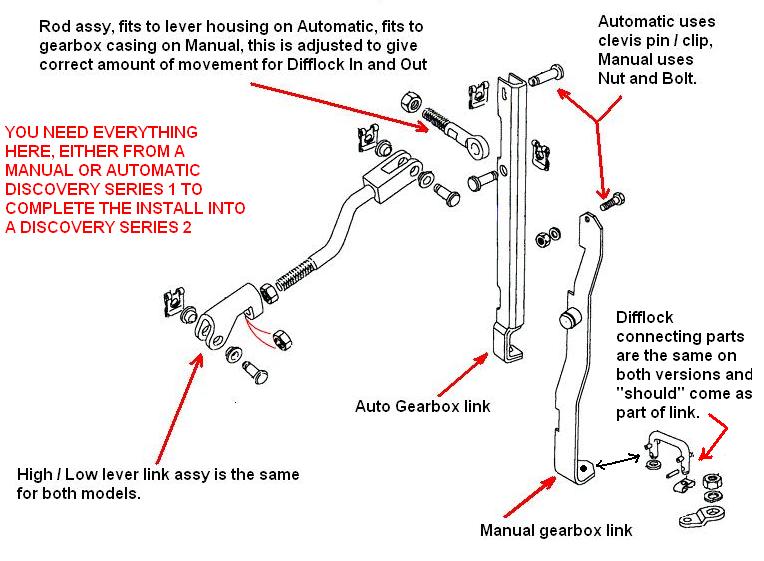
Here's a diagram of EVERYTHING you must have to do the conversion, either from a Manual or Automatic model depending on what your Discovery 2 is.
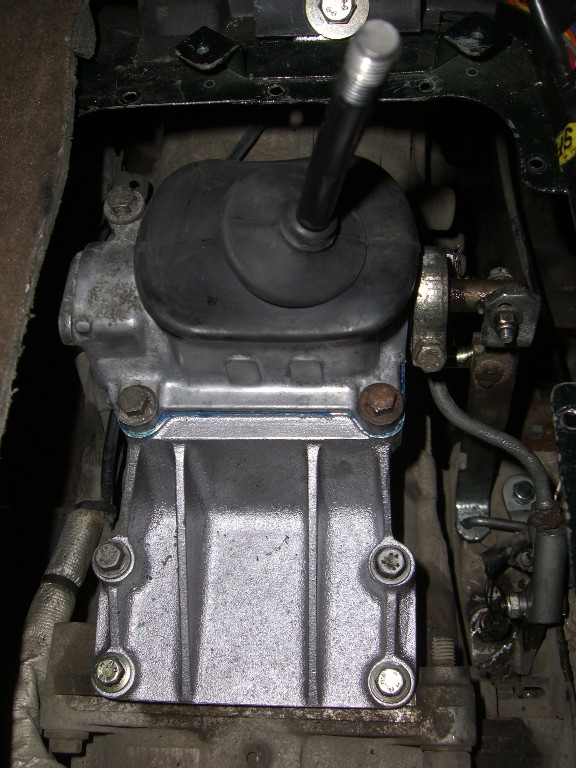
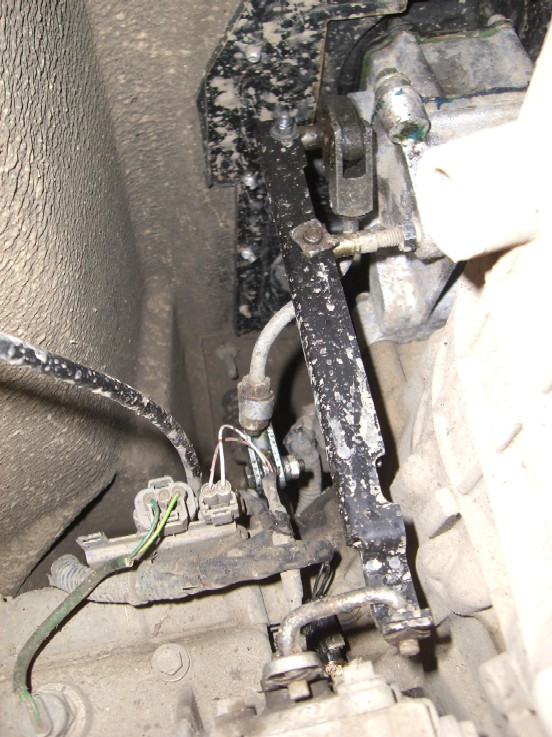
Here's the lever + mounting fitted in an AUTOMATIC D2
NOTE, the lever assy runing down to the transfer case in the picture above is one from a MANUAL car, the Auto one is different, This is how I came to find out they are different as the manual link wont line up correctly with the Automatic housing. The Auto one goes around the Rod end and is of a "U" shape construction and is held by a Pin and clip, the manual one is just a flat bar type with a "spigot" welded on it to connect it to the rod end.
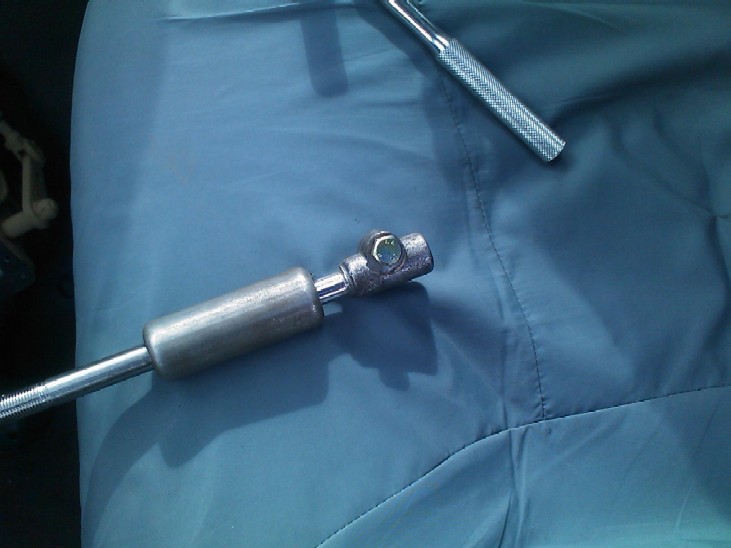
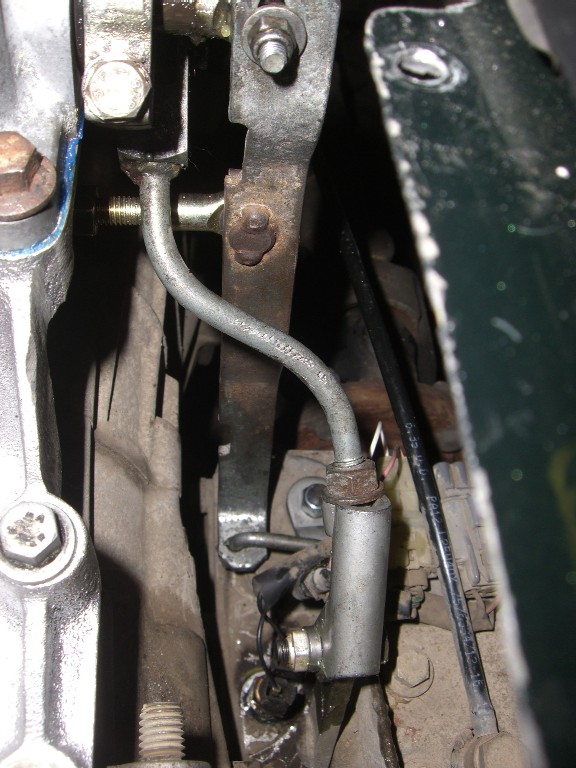
Note the CORRECT orientation of the difflock spigot plate and rod at the bottom where it actually fits onto the transfer case spigot. All the differences between the 2 types may sound confusing, all of that can be avoided if you make sure you get the whole lot from a vehicle that has the SAME transmission as yours does. The Rod end on BOTH types should not need that much adjustment, in particular on the Auto as it comes "with" the mounting plate, on the manual, "if" you remove the assy from the donor car, take note of the distance the rod end protrudes from the gearbox. The linkage is attached to the difflock spigot with a simple 10mm Nylock nut on ALL vehicles, D1,D2, manual or auto. Next is the High low part of the transfer lever, On both models of D1, it will be to long to directly connect to the D2 Transfer box, but a little bit of thinking and tapping with a hammer in a vice, you can simply re shape it to fit nicely. Here's the High / low lever, it is simply attached to the Transfer lever via splines and bolt. The Re-shaping is not difficult at all to do. When it comes to doing it, make sure the transfer box is in high and the Transfer lever is held in High (back) when you come to work out how much to "bend" it.
Next, the Disco 2 transfer box lever that's ON the box itself, has a smaller diameter hole than the Disco1 lever / rod, so you will have to "open" up the whole slightly and fit a suitable nut and bolt to connect them together. I used a small dremmel type tool with little grinding stone to do this as its about the only thing that you can get "In there" to do it with.
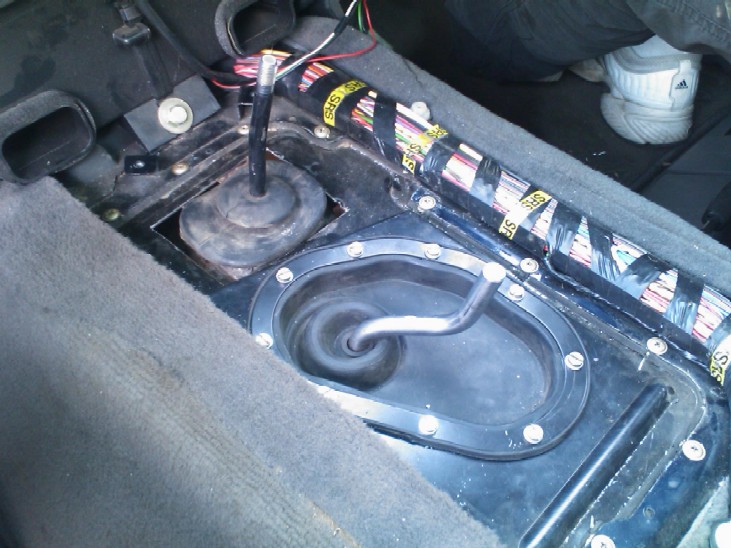
Now test your linkage to make sure it moves freely and selects High / Low and difflock in and out, the light on the dash should now also be working. You "may" have to drive the vehicle to get it all to work smoothly etc. Any adjustment needed for the difflock itself is made by adjusting the threaded rod end, for High / Low, then its the amount of re-shaping you do on the High / Low rod, moving it on the splines may help to, but you want to try and avoid that as mush as possible so you don't reduce the amount the transfer lever actually moves forwards and backwards Last of all before the "refit", you need to cut the transfer tunnel mounting plate. It needs to be cut quite a bit around the new transfer lever for 2 reasons, 1) so you can actually get the plate back into position, and 2) so it does not touch the lever assy and possibly cause vibrations when driving. This is because the lever is now mounted directly to the transfer case and the engine / gearbox can move on its mounts differently to the body. the cut must allow the gaiter to come through as well. Below is the whole cut for the new lever assy to fit through etc.
Once that's done, you need to fit the large rubber gaiter and where it now is not screwed down, use some silicone etc to seal it all in place. The rest of the refit is the reverse of the removal procedure. For refitting the plate over the tunnel, Pop rivets are obviously a good choice, but for future dismantling, you could use speed clips and screws to make it less permanent.
I may well have missed some details, most of the install is pretty simple, and all becomes more familiar as you take it apart, as I stated not a comprehensive guide , but it should be enough for you to go and tackle it. |
|||