![]()
| WORKSHOP :- TD5 Fuel Pressure Regulator (updated 25/05/2008 see bottom of page) |
|
|
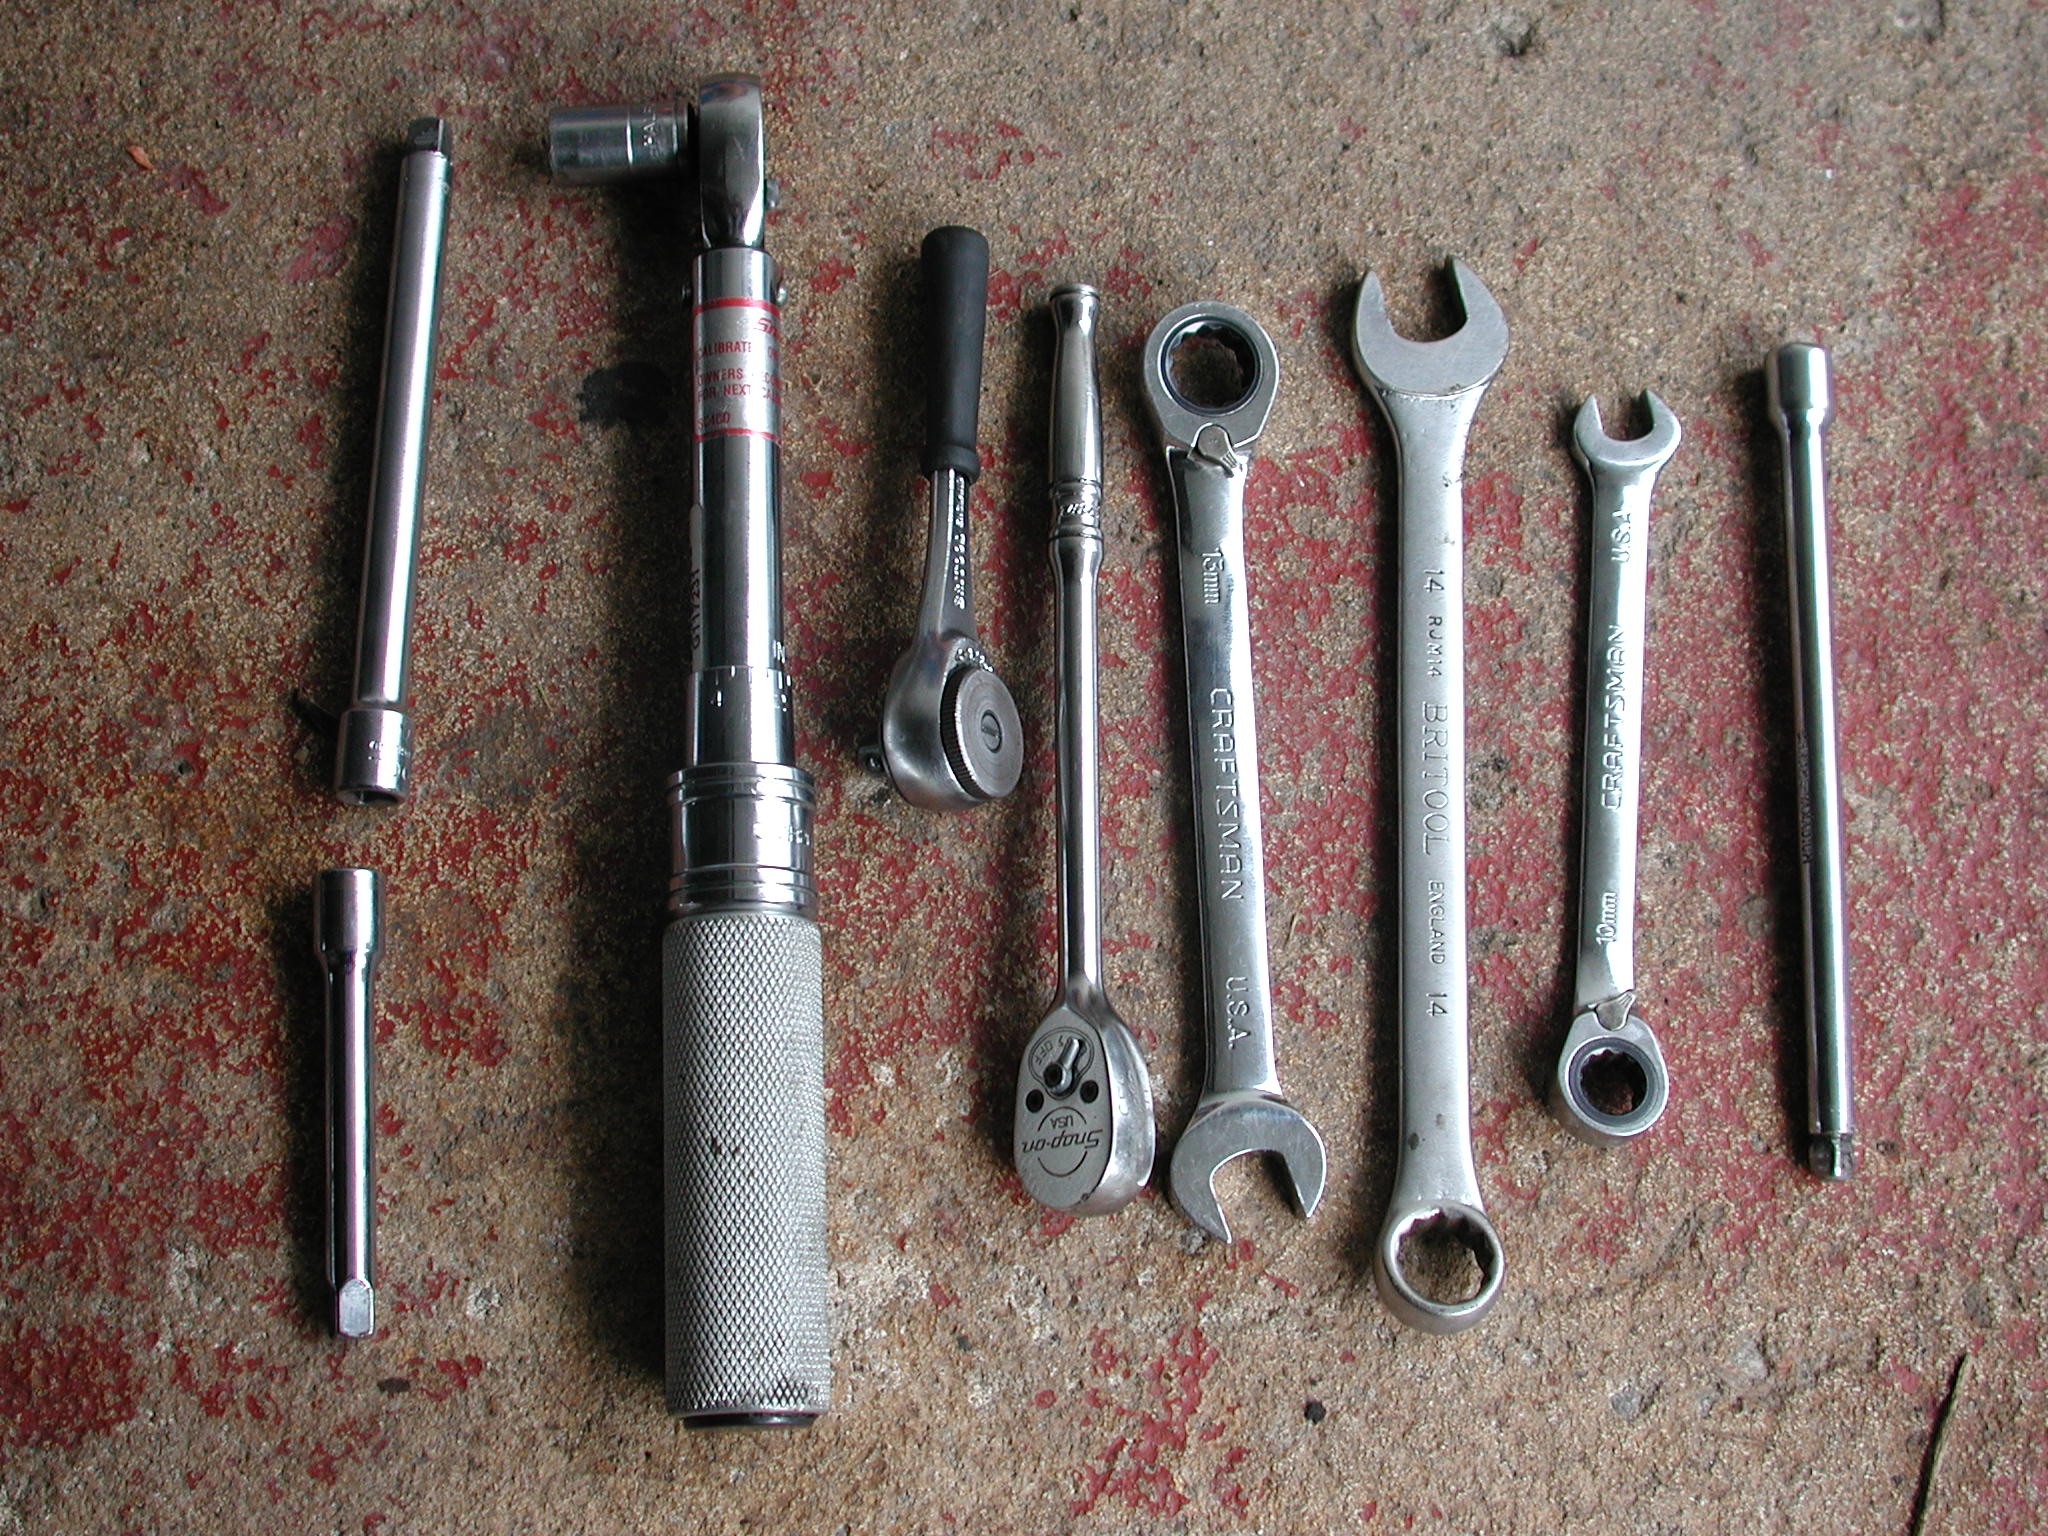
As with most if not ALL cars, they all have their "common" problems that you can read and hear about and then its just a matter of time before they catch up with you!! The first real common issue I had with my TD5 is a leaking Fuel pressure regulator. This is a well documented problem, and if you have a leak of diesel from around the back drivers side of the engine, its a VERY good chance that this is your problem as it was for me. The FPR was modified later in the production run of the D2 to probably combat the common failure issue, from 2003 the FPR was modified again to add an additional pipe that is more than likely to do with more stringent emissions. When you buy one, make sure you get the correct number ref your Chassis number. They cost around £80, but as usual bargains on Ebay can be found for a lot less ;o) Its quite a fiddly job, and having a "good" toolkit will help a lot and it can be done in a hour. TOOLS I USED / NEEDED:- 1/4" Drive Ratchets , Torque wrench up to 250lbs in, 10mm socket, 10mm & 13mm Ratcheting spanner, and a selection of diff length 1/4" extensions.
I fully appreciate that not everyone has 1/4" drive sockets / ratchets etc, but they make the job so much easier as access is limited. Ratcheting spanners are worth their weight in gold!! so if you do work on your own car, at least a 10mm and 13mm are well worth the investment !! So, first of all remove the acoustic engine cover by removing the 3 x 13mm bolts, 1 on the drivers side and 2 on the passenger side
Next, to give your knuckles some room, remove the 2 x 10mm bolts from the engine lifting bracket and remove that
This leaves the maximum space you can get to do the job !!
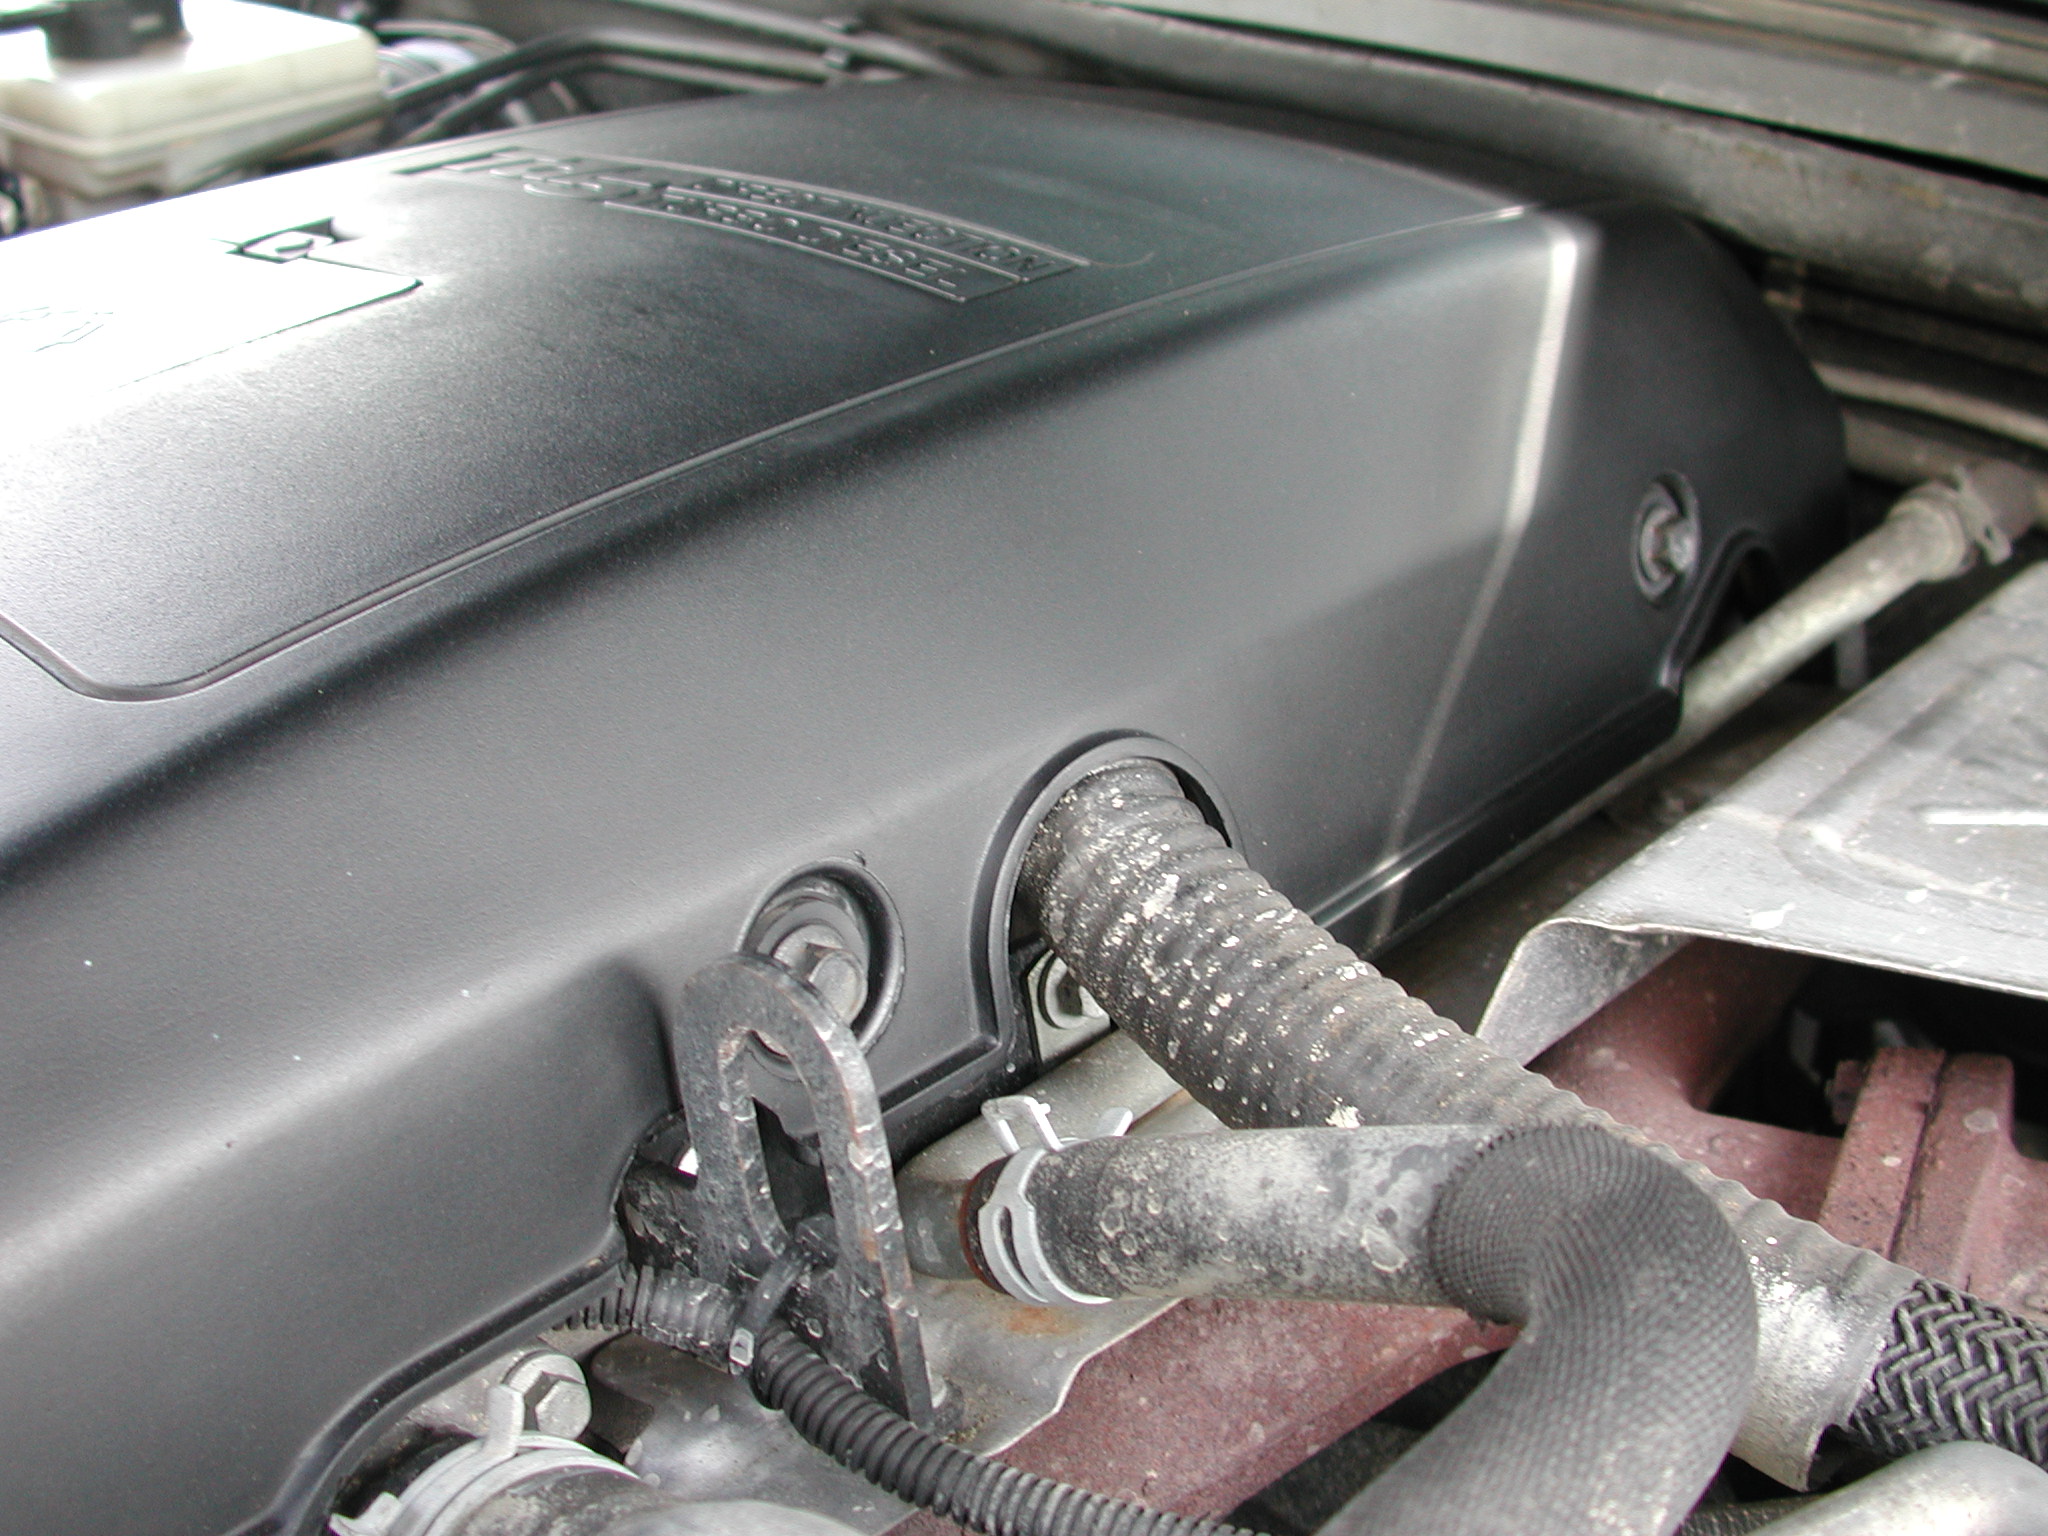
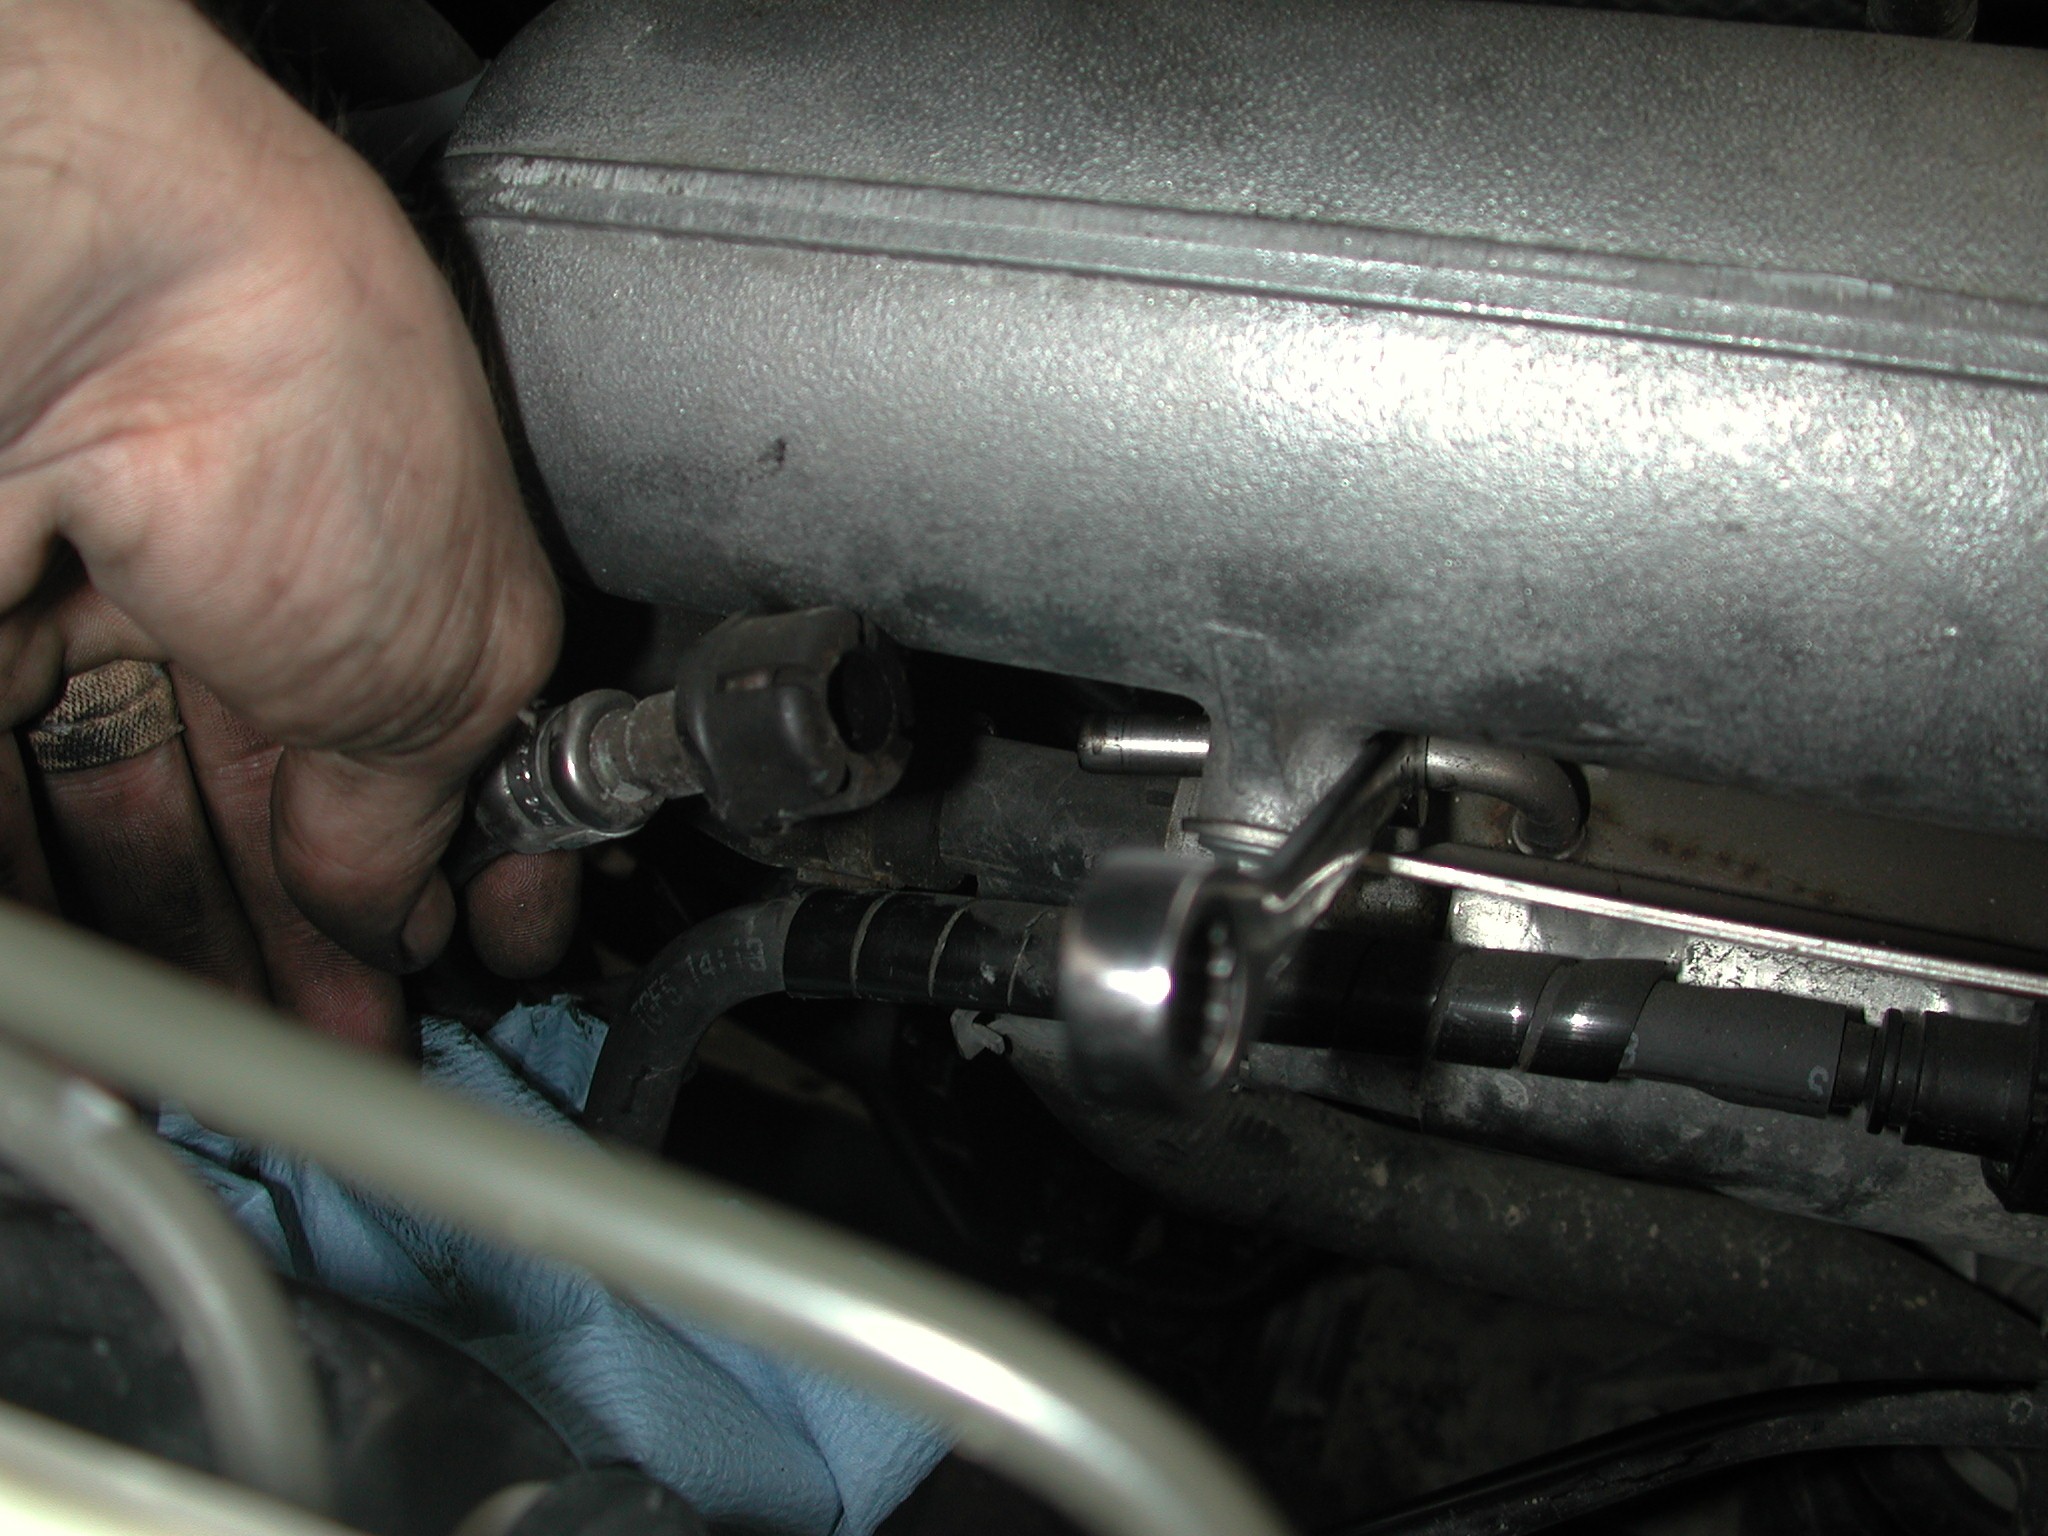
Now you can see what's in there and what needs to be removed. There is 2 pipes, 3 x 10mm bolts and the plug on the switch. Loosen of the top 2 bolts, this is where the ratchet spanners come into their own, although a socket and extension would also work well.
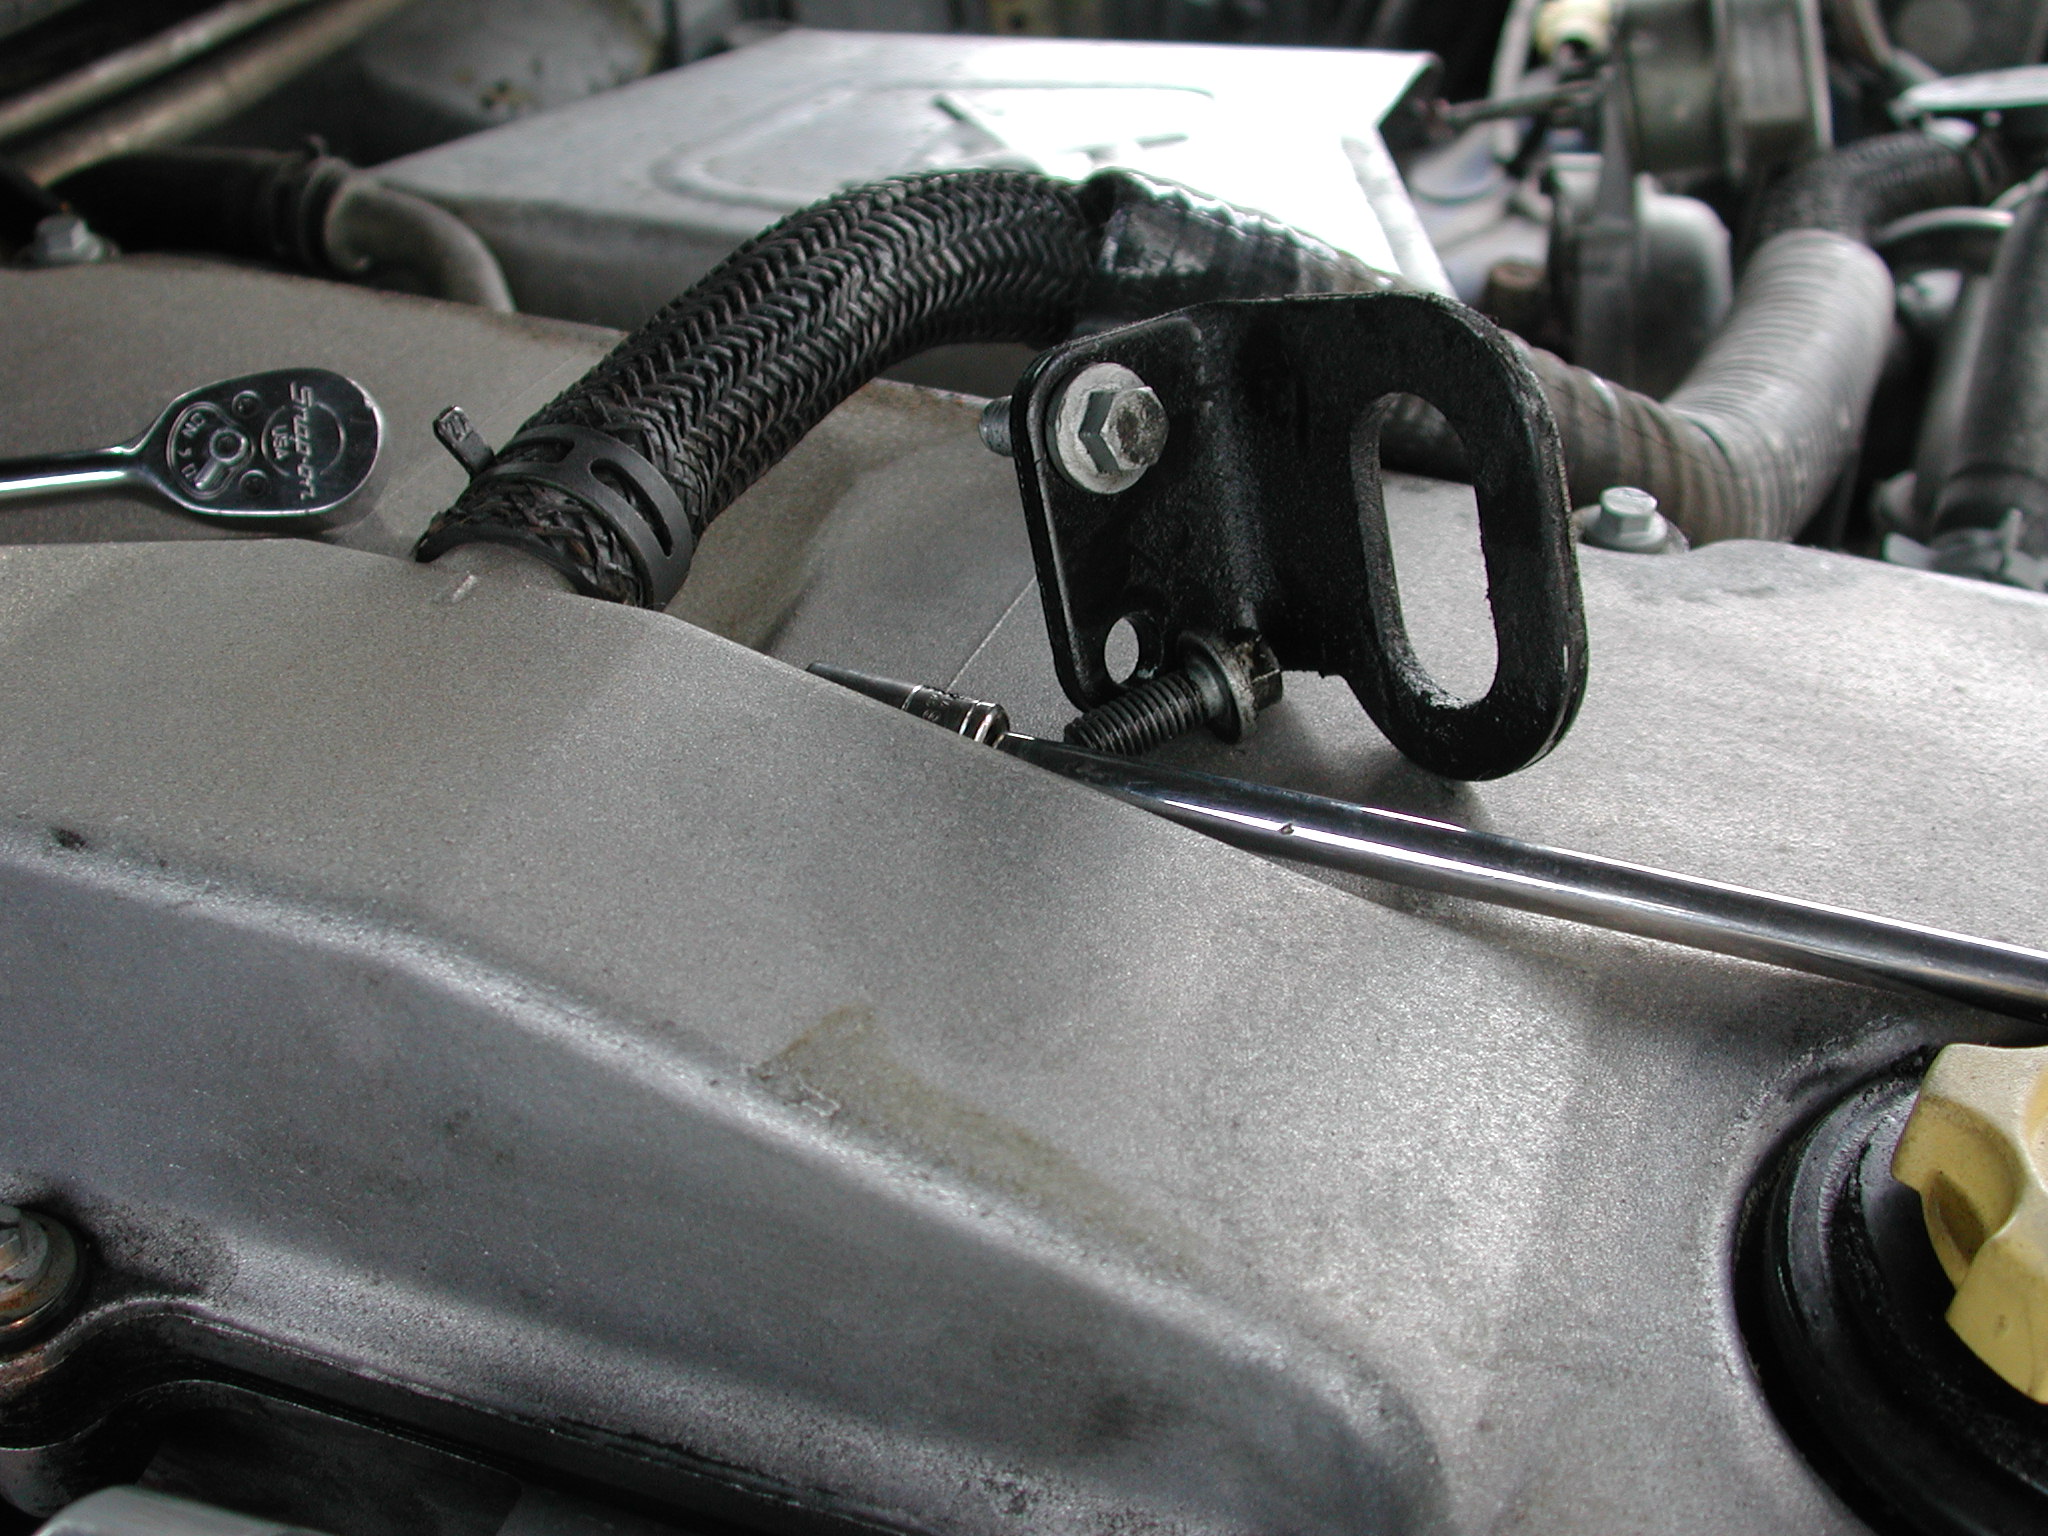
Once the top 2 bolts are loose, remove 1 of them completely, does not matter which, we need to leave one in to stop the FPR rotating when we undo the last bolt. Remove the electrical plug from the sensor and move it out of the way. It is a "typical" plug that is held by a spring clip, it was difficult to push it in the middle on mine as it was underneath and there was just not enough room to get my hand in, so I CAREFULLY levered out the clip completely from above and then re-fitted it to the plug once it was disconnected. You will now need a 10mm socket and at least a 6" extension and ratchet to get access to the bottom bolt. You can feed the extension etc underneath the fuel cooler and onto the bolt. If you shine a torch from above, you can see it on the bottom right corner of the FPR. You can get at it from underneath, the choice is yours, but I did it all from the top. Remove that bolt completely. Next is the fuel pipes, The main feed from the backend is the upper of the 2 pipes, you do not need to disconnect the pipes at the FPR as the new one is supplied with one, and the other (main feed) is quick release. You just squeeze the main feed pipe and pull it off to release it. Once its off cover the end to stop any dirt etc getting into it. The pipe that comes with the new FPR is the lower one and runs up to to the fuel cooler. This to is quick release, you literally push the plastic collar down the pipe and it will disconnect, you can try this on your new one.
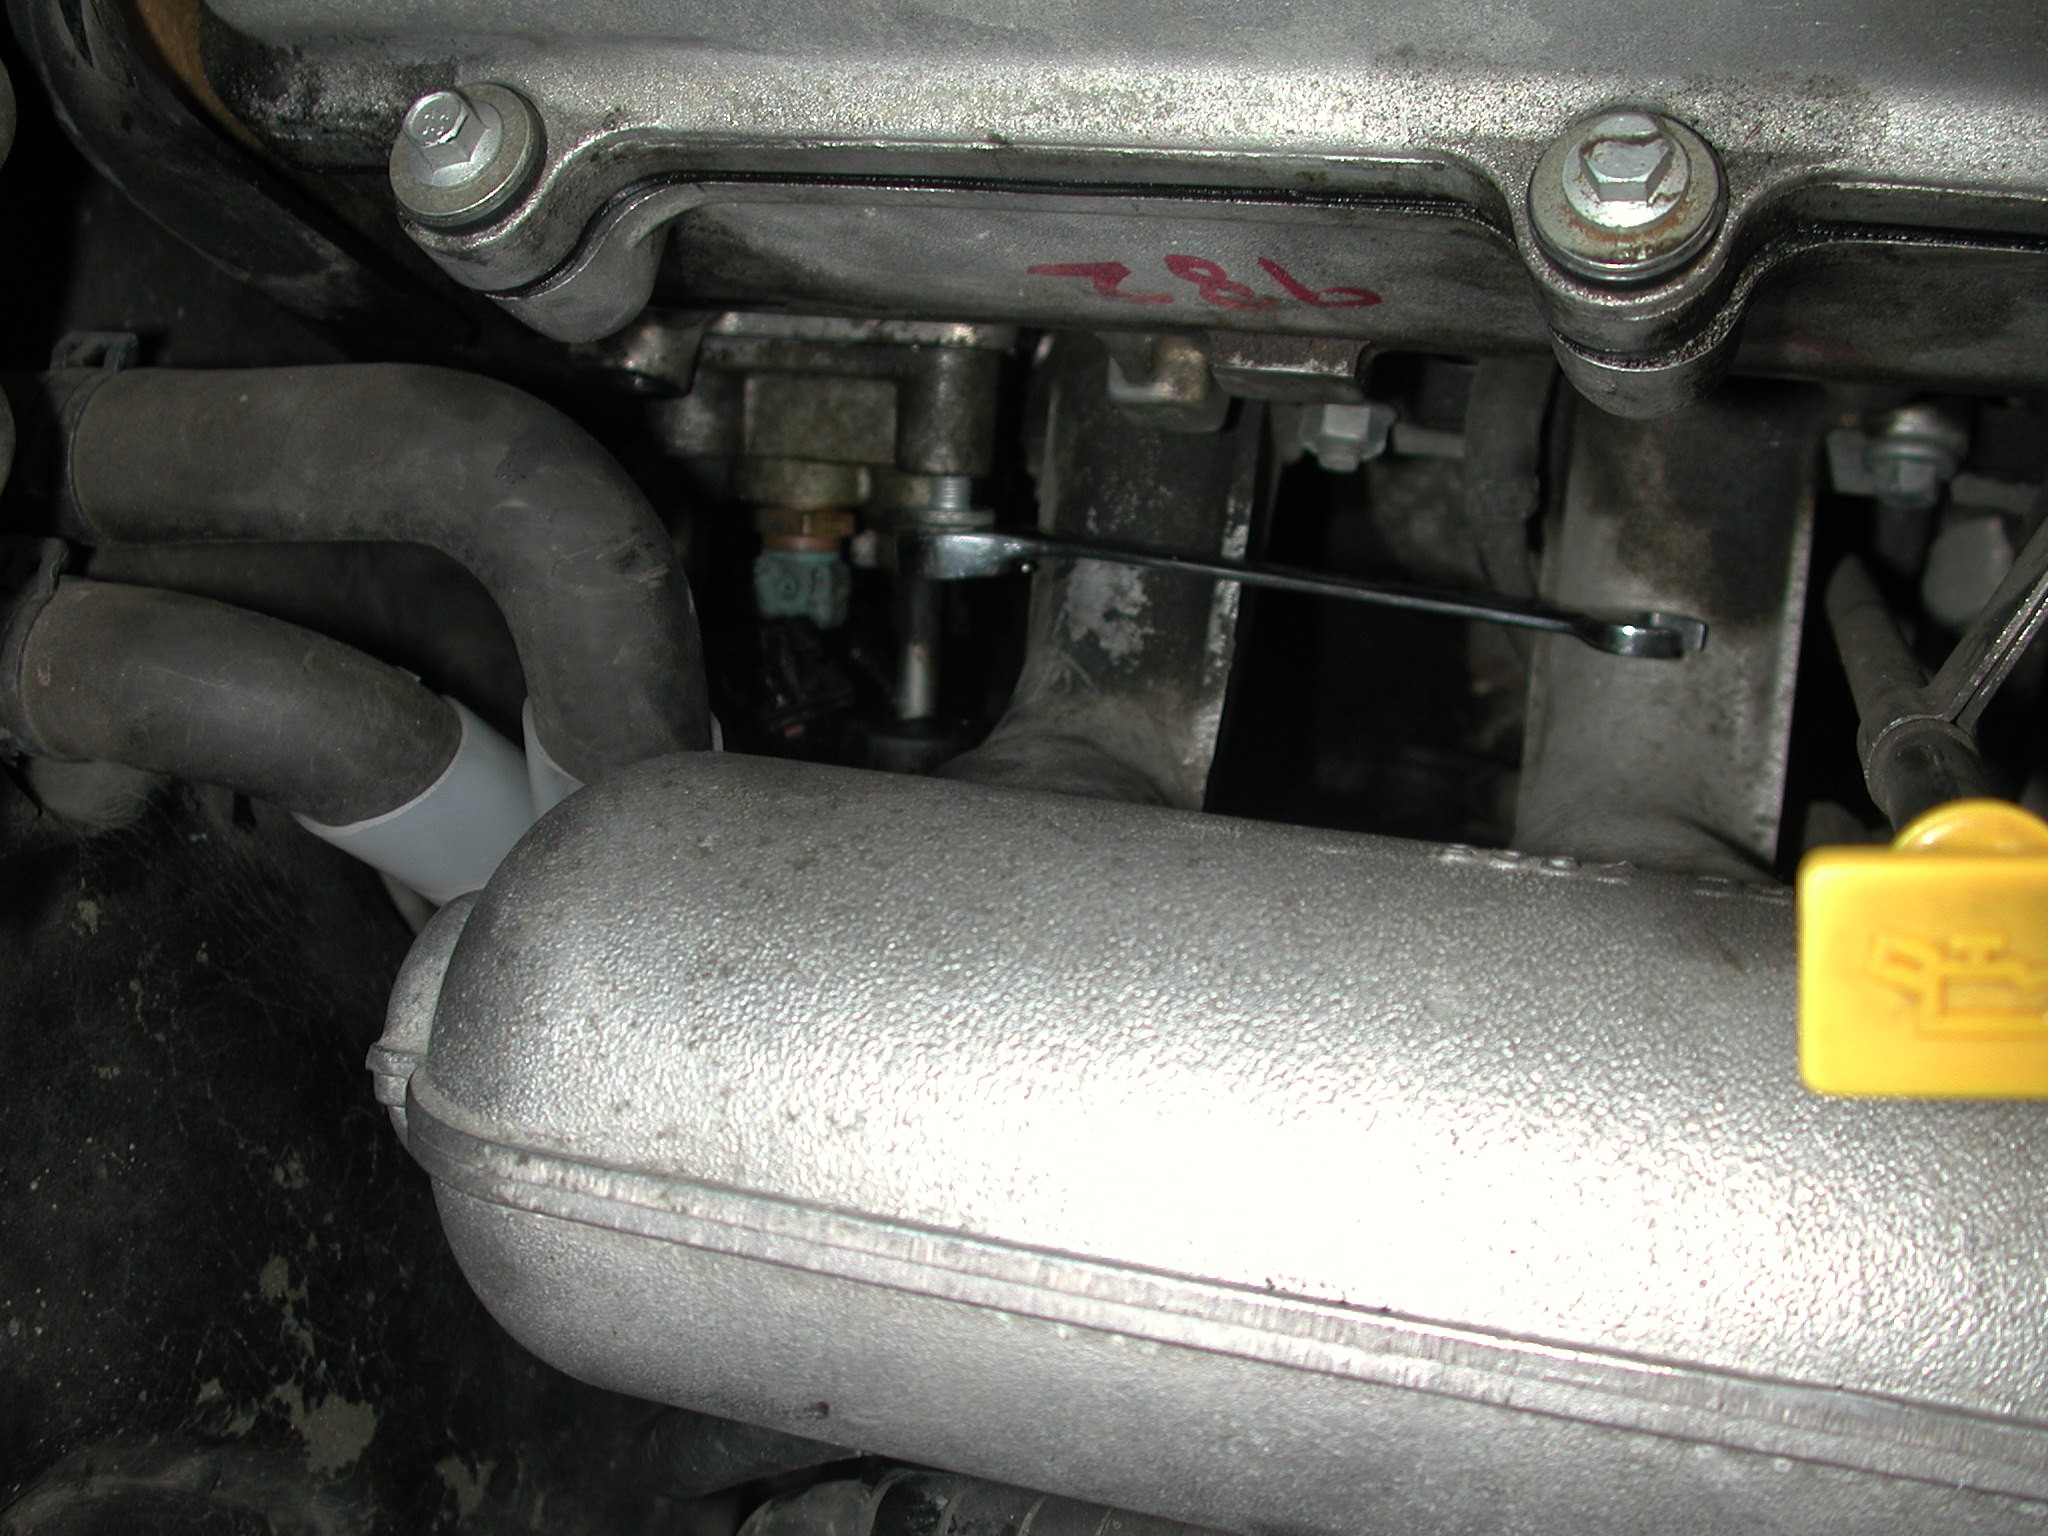
Above is the fuel cooler connection, because of where it is, you cannot get 2 fingers on it to push the collar back, so what I did was use a 10mm open ended spanner, and put it through the gap between the cooler and its mounting bracket, put it over the pipe and use that to push the collar backwards, give the pipe a constant tug while you do it, it will come pretty easily. Now remove the last top bolt and the FPR will come away. NOTE behind the FPR is a tiny gauze filter between the gasket and the block held by an "o" ring , don't loose it !! Be prepared for a little diesel spillage, I did not get much at all, but have a rag or some paper towel handy just in case.
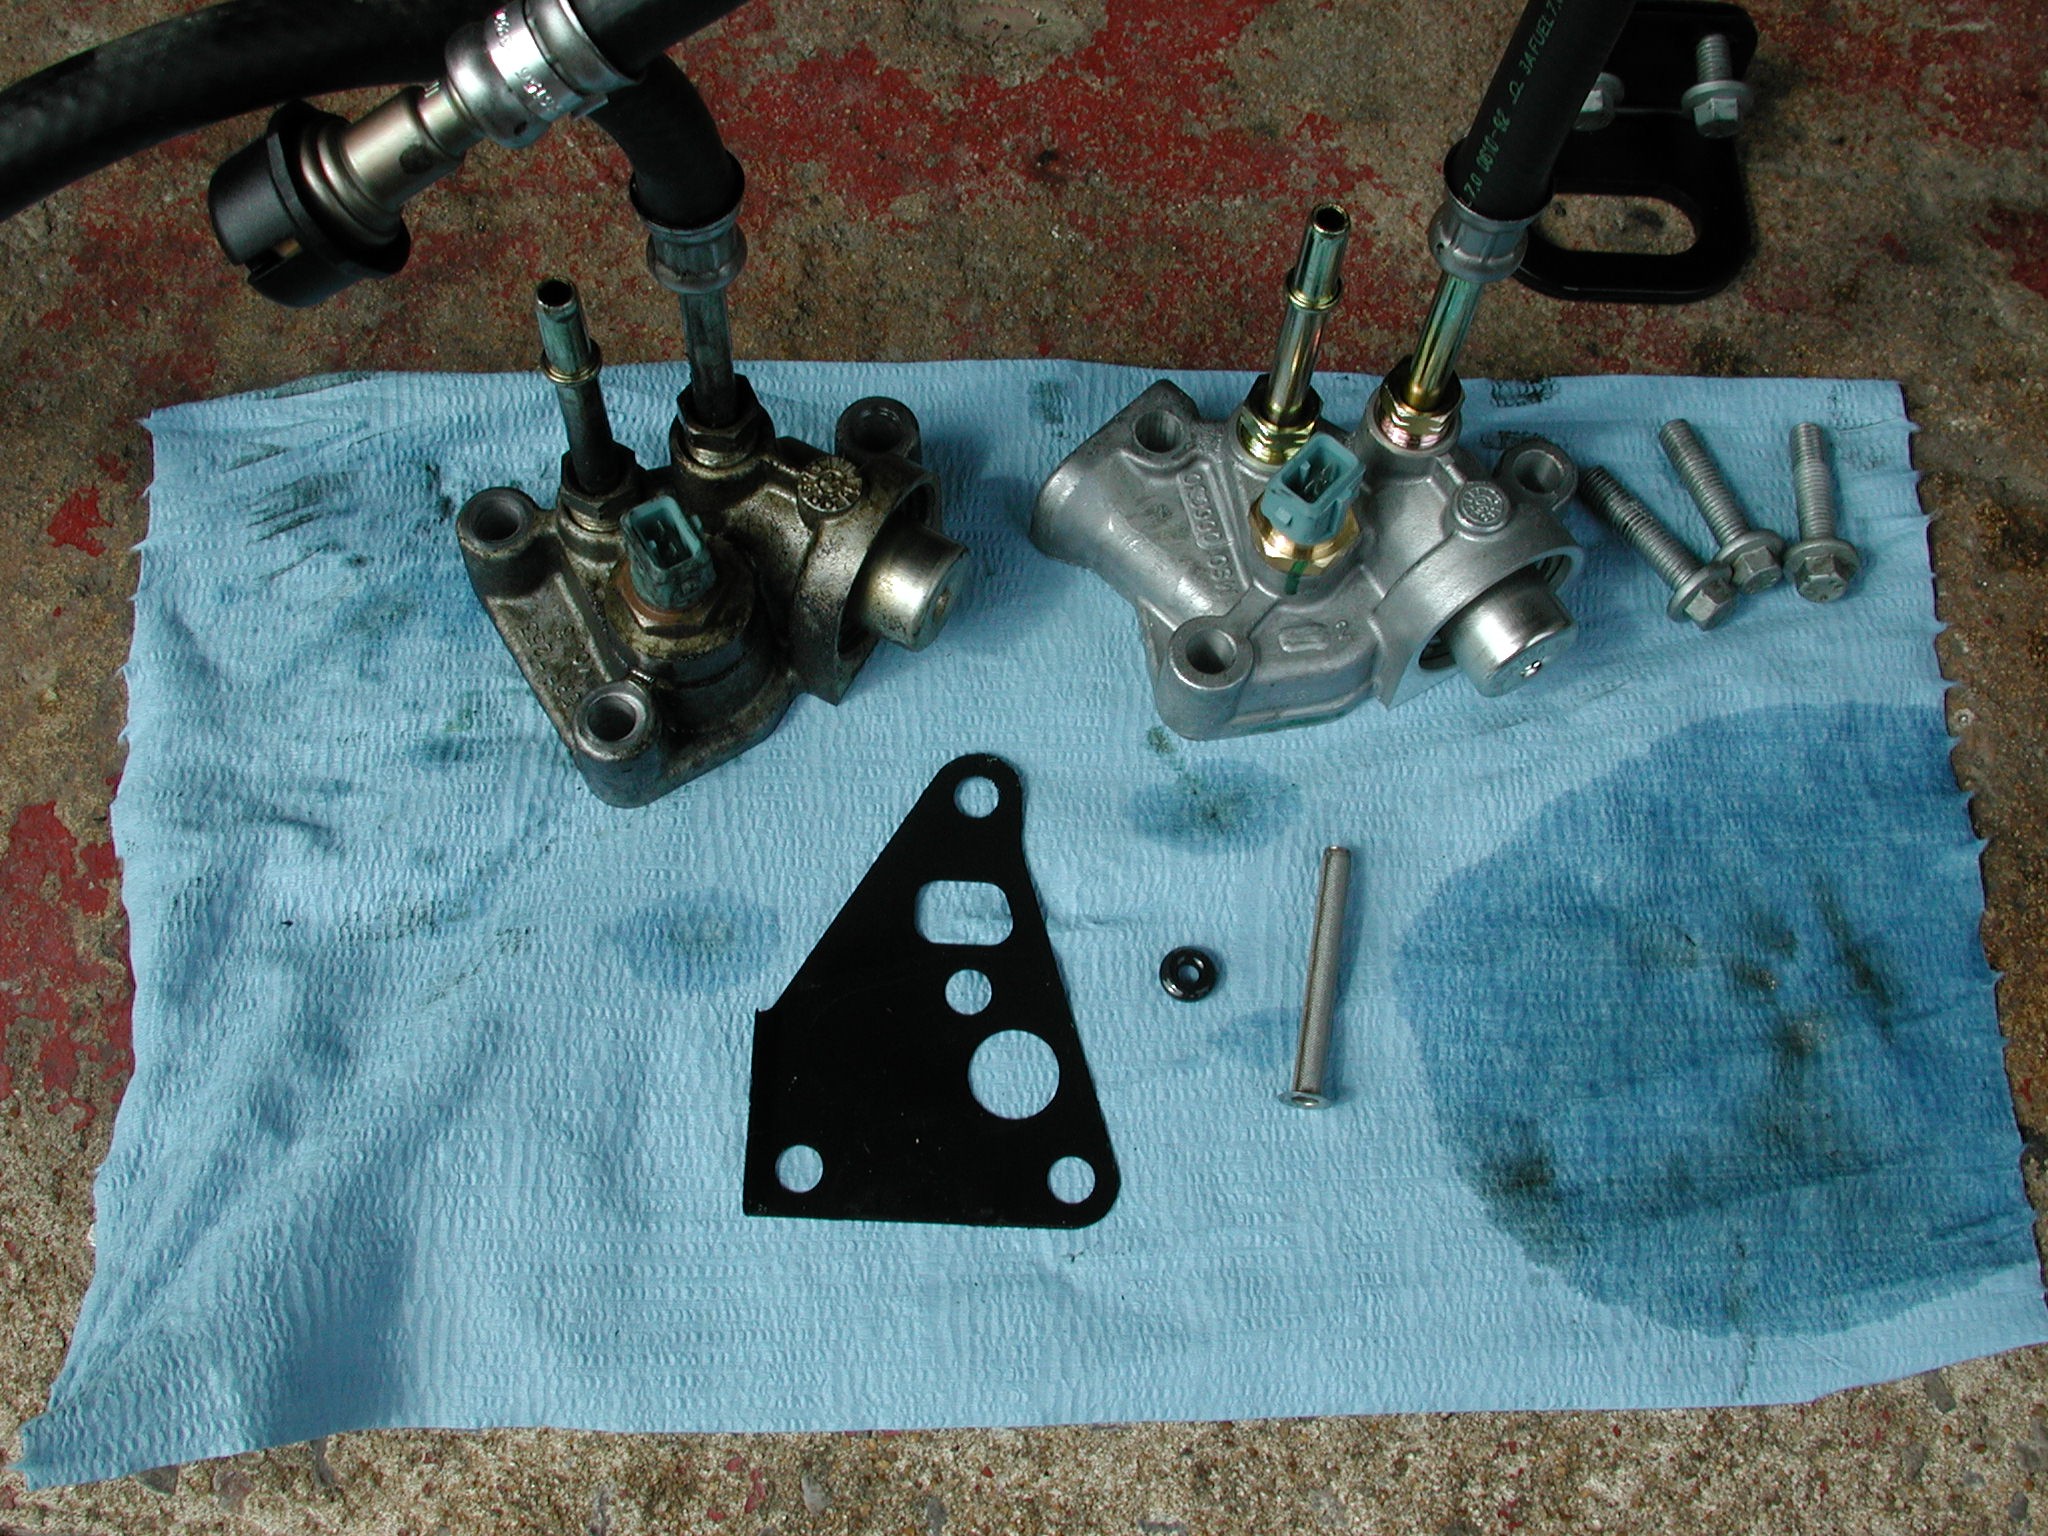
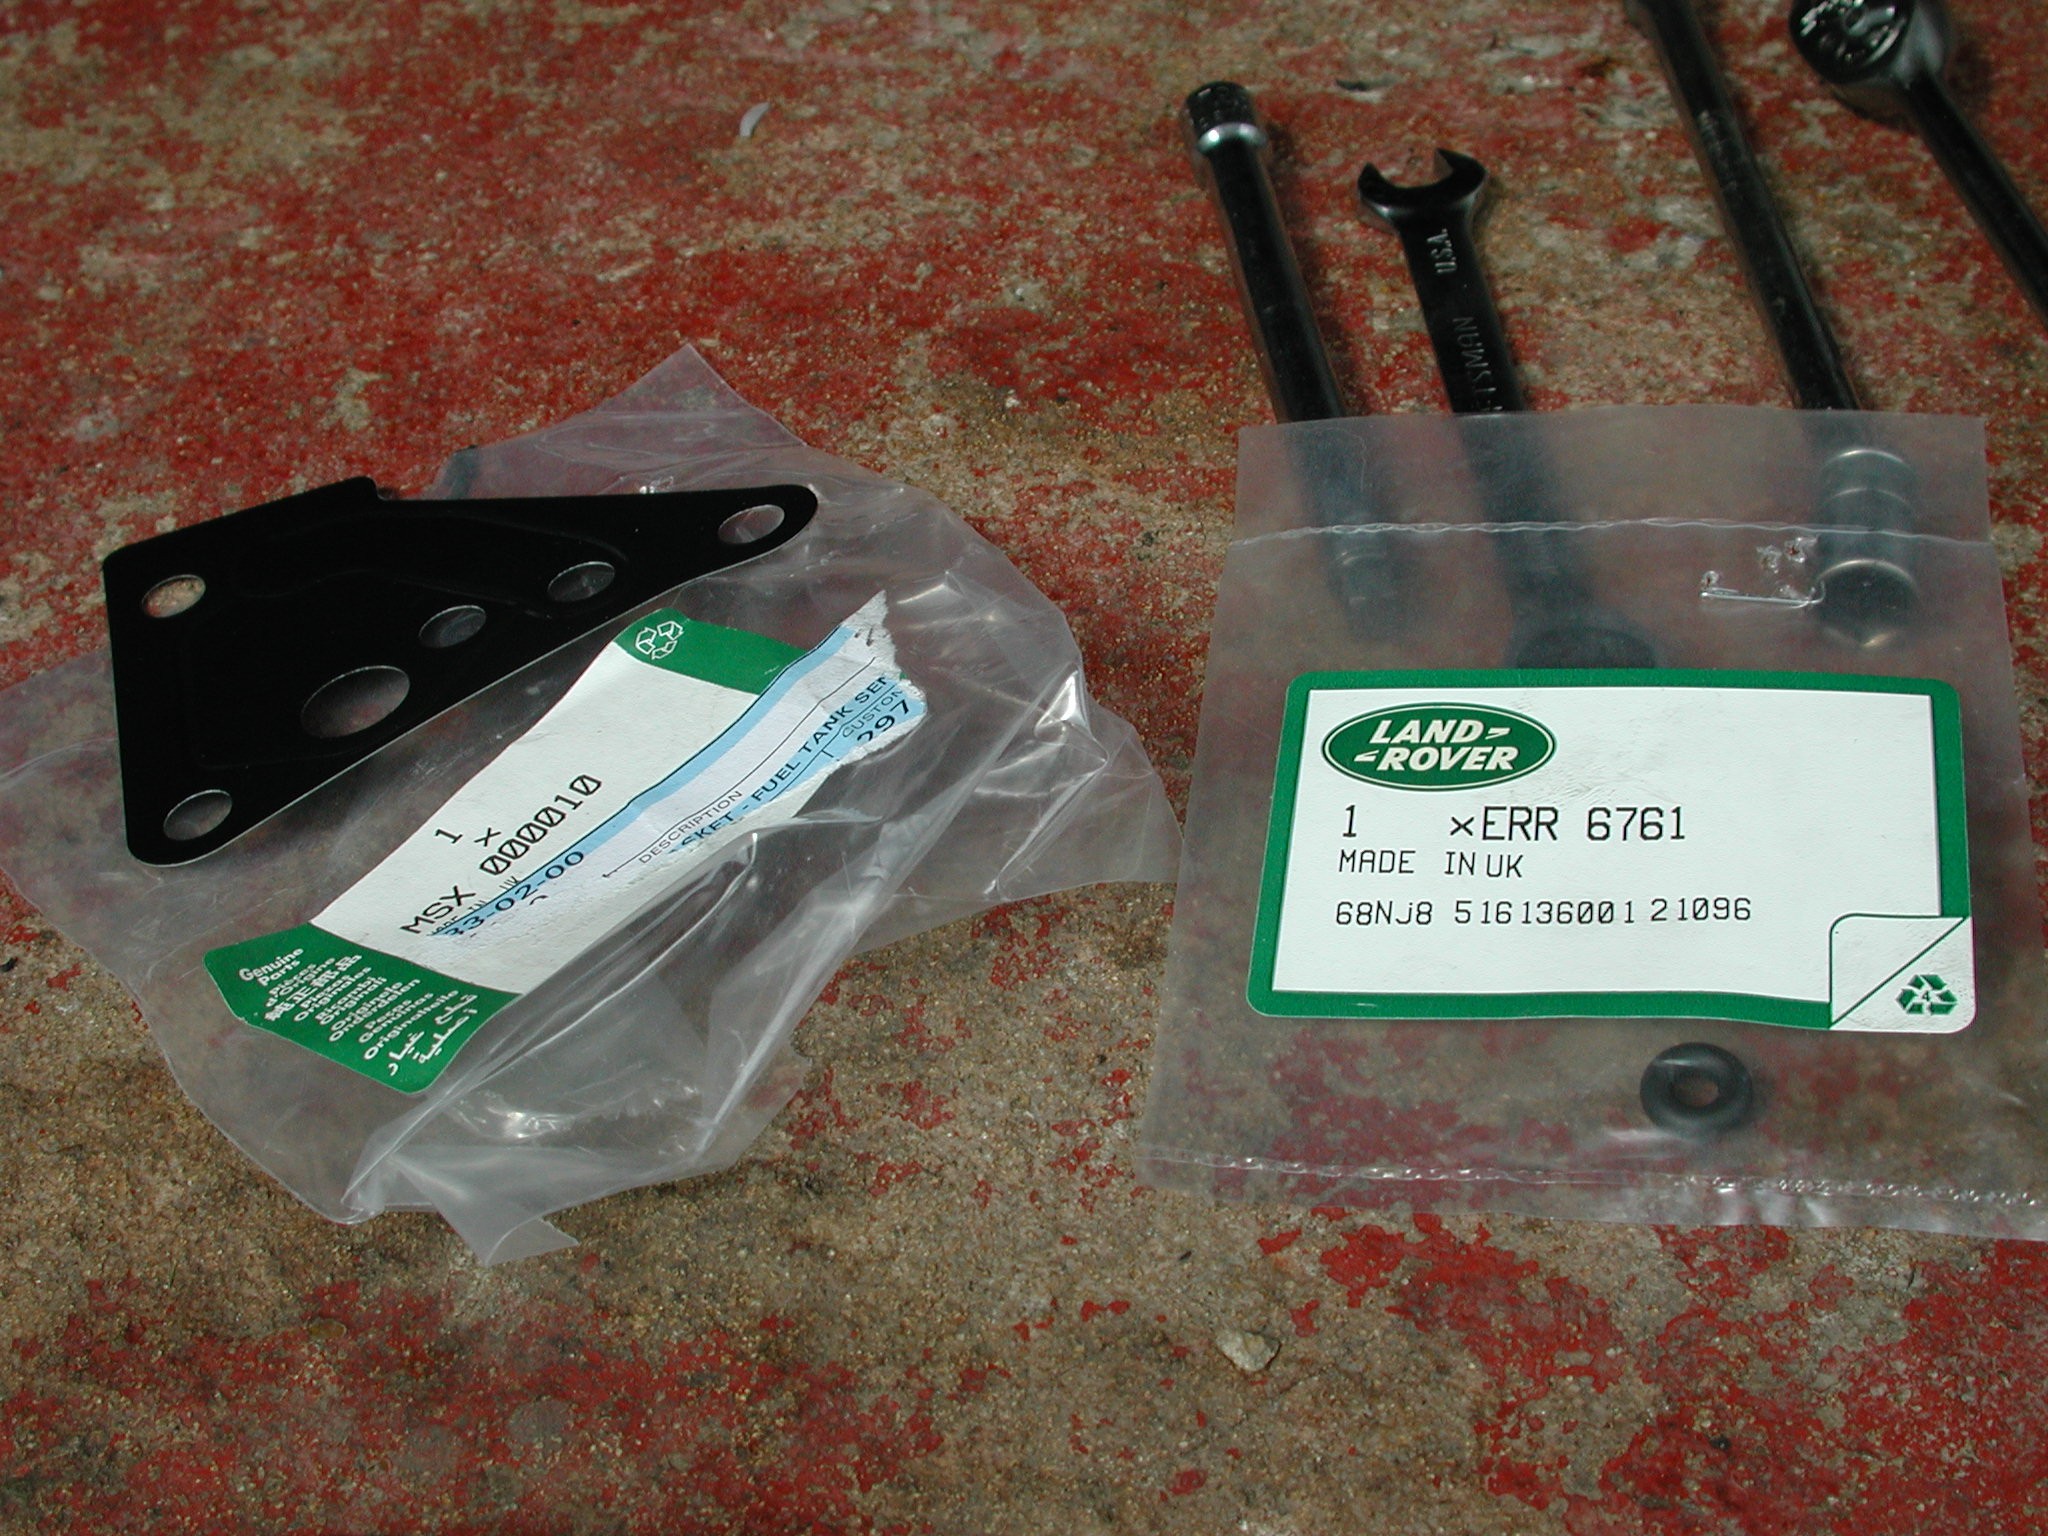
Here you can see the 2 FPR's next to each other, The bolt pattern obviously is the same, but the new modified one has an additional part of the cast where the extra pipe for the external fuel return goes on the later models with 15P engines. You can also see the gasket, "o" ring and the tiny gauze fuel filter. You will need a new "o" ring and gasket. The workshop manual states to renew the filter as well, but to be honest mine was very very clean and was perfect for re-use. Even if the filter is dirty, it would be easy to clean with some paraffin or even WD-40
The new gasket is a "crushable" type, and because of the bolt pattern, if its lined up with the bolt holes, then it can only be correct way round Here is the new "o" ring and gasket, and you can see the numbers on the packets. Next make sure the mating face on the block is clean and free from dirt. You have to put the small filter into the block first, and the "o" ring to hold it there before you refit the new gasket and FPR Its a fiddly task, but put the filter back in the block, and carefully press the "o" ring into its hole to hold it in.
"o" ring marked with the yellow circle above. The rest of the Re-fit is a reversal of removal, but remember the "o" ring is there and try not to knock it out when fitting the new gasket and FPR. Loosely fit all 3 bolts to the FPR before tightening them up, and ensure they go through the gasket as well. Once they are in, torque the bolts to 25NM or 18 lbs ft or 220 lbs inches depending on your torque wrench. Re-connect the electrical plug and the main fuel feed pipe and your almost there. Now because you have let air into the system, on the first turn of the ignition, the fuel pump will run and be a bit noisy, don't start the car leave it for 5 secs or so then switch of again, wait for 2 or 3 secs, then switch on the ignition again and it should now sound normal as it has "bled" the fuel line. Start the truck and check for any leaks, let the engine get to operating temperature and have a good look above and below at the FPR and pipes you have disturbed at different rev ranges. Once your happy, re -fit the engine acoustic cover and your done!!!! |