![]()
| Workshop - Injector Removal / Seal and Washer Replacement. |
|
|
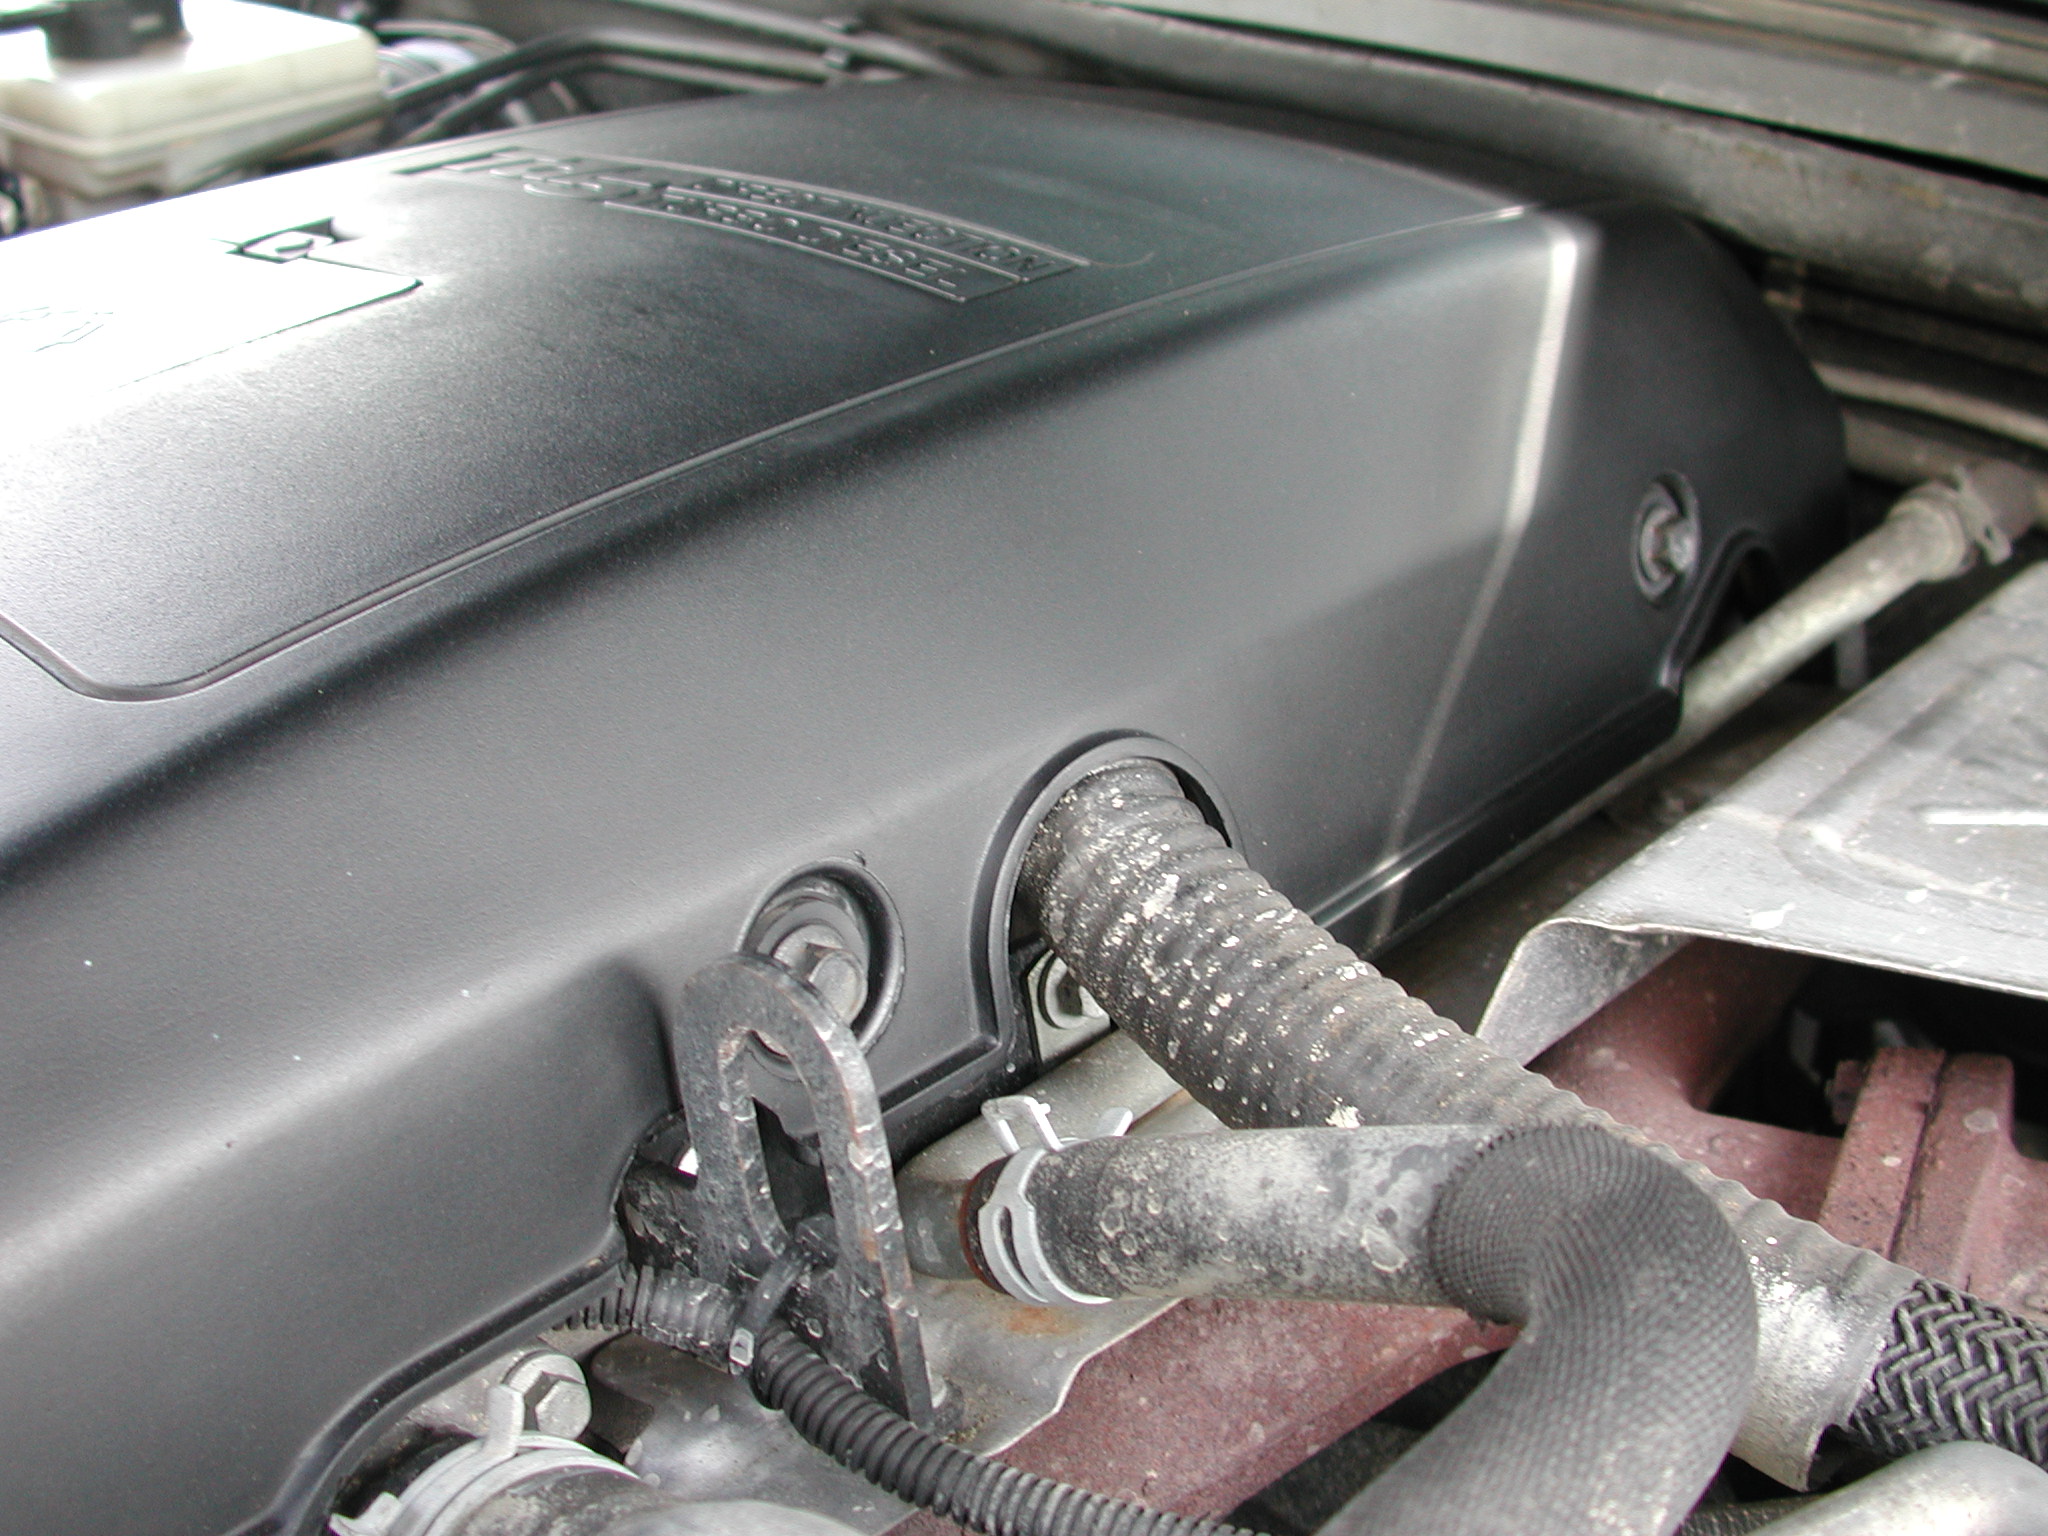
The TD5 engine has for its time a modern electronic injector system where the injectors are fitted "inside" the engine and the fuel supply to them comes through drillings inside the aluminium head. The injectors themselves have "o" rings and sealing copper washers that are fitted to them to seal them from other parts of the engine, these are known as the "injector seals" and its not uncommon for them to leak / perish with age. This can show itself in a few ways, such as poor running, difficult to start and the worst case scenario of an increasing oil level in the sump. This can usually be determined by the smell of diesel in the oil when "sniffing" the dipstick. This "failure" is probably the worst scenario of all because the oil is "thinned" by the diesel fuel in it, and can if ignored significantly reduce the lubrication capacity of the oil and promote serious engine wear. The following write up shows the replacement of the washers and "O" rings on a TD5 with a 15P EU3 engine found primarily in facelift (2002) on Discovery 2's, although late pre-facelift may have a 15P engine as well. The procedure is the same on 10P engines which are fitted to 98-2002 vehicles as well. First off remove the engine acoustic cover with the 3 bolts Then the camshaft or rocker cover needs to be removed. (note library picture)
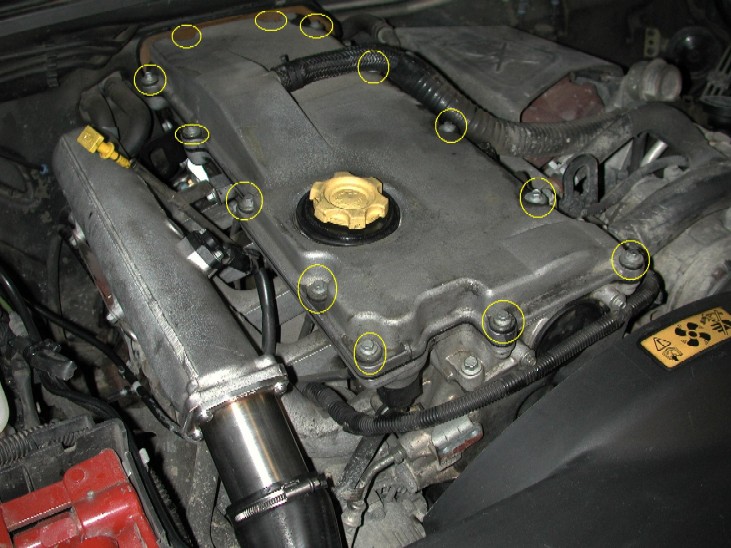
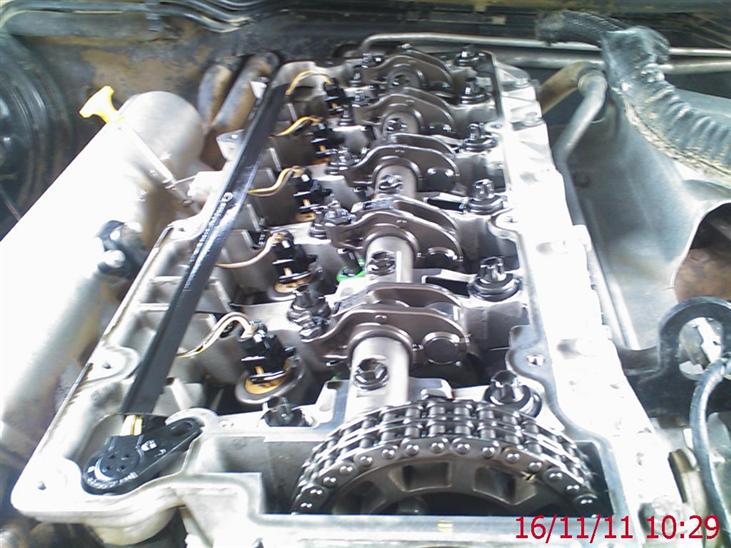
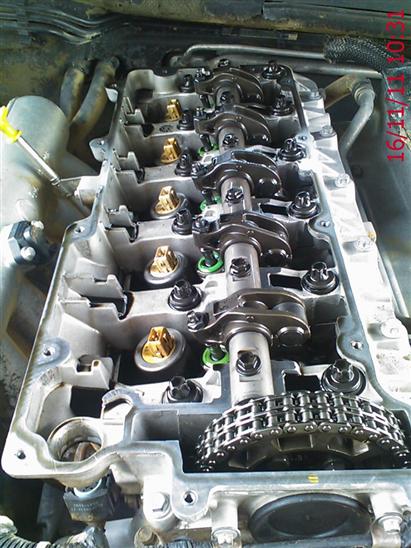
Picture above shows the bolt locations, remove all the bolts and then remove all the sealing washers / spacers BEFORE lifting the cover off. The engine breather hose needs to be removed at the quick release clamp as well. Once that's off, below is what you will see. If you have ever done an injector harness replacement, then it will look familiar to you.
Next unplug the injector harness from each injector,
and then from the front of the loom under the rocker box as well....
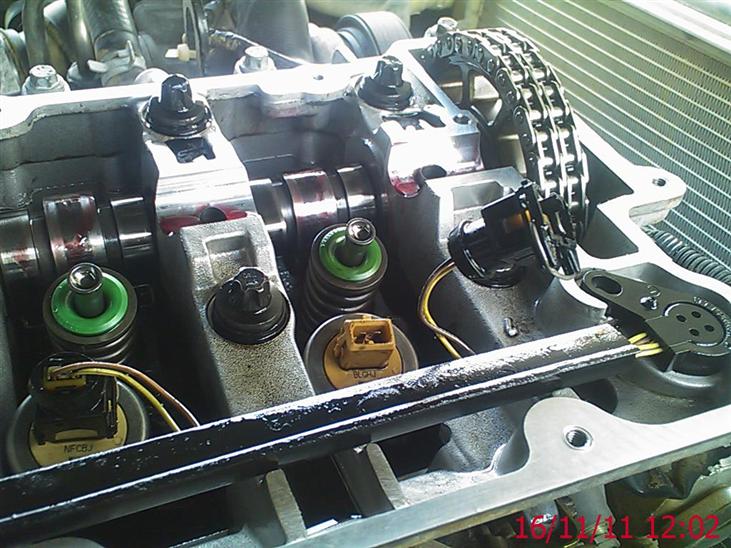
"If" your engine has never had a new harness, then now would be a good time to replace that as well. Below is a picture with the harness removed. NOTE on vehicles with 15P prefix engine they are fitted with "green top" injectors, earlier engines have "black" top injectors. The 2 are NOT interchangeable.
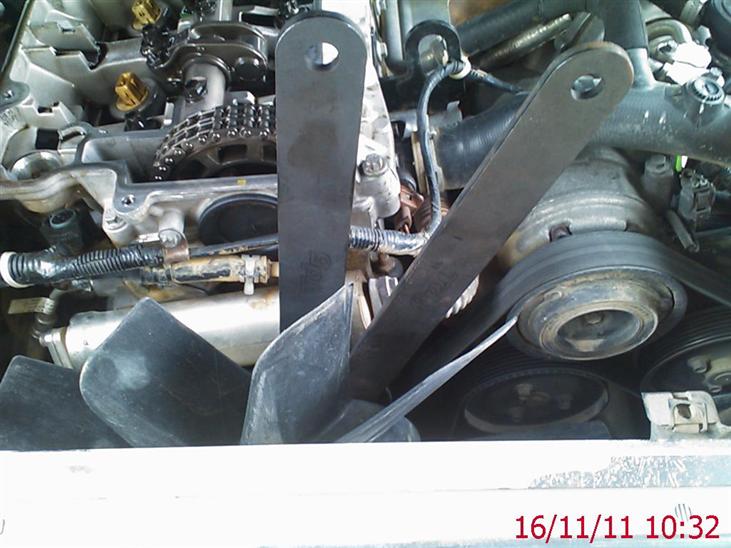
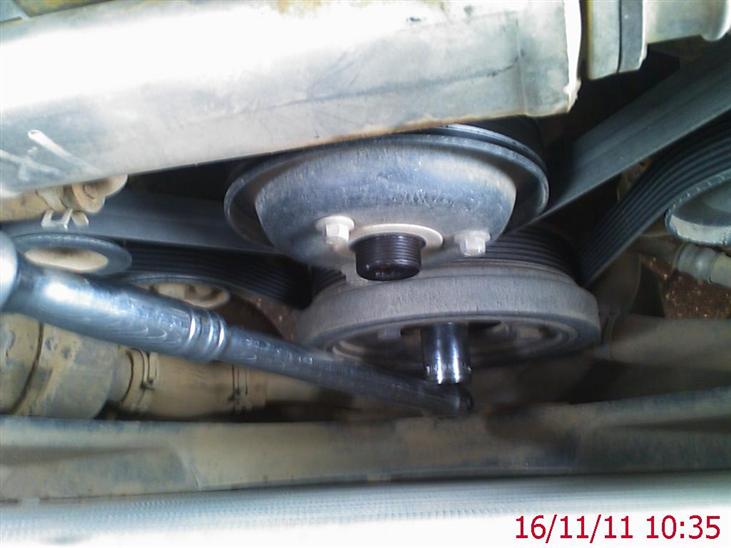
Now, to give you more room and to be able to rotate the engine, remove the viscous fan....
I use 2 fan spanners specifically made for the TD5 engine, they are available on Ebay and worth their weight in gold!!!! NOTE :- the Viscous fan on a TD5 engine is a NORMAL right hand thread..........
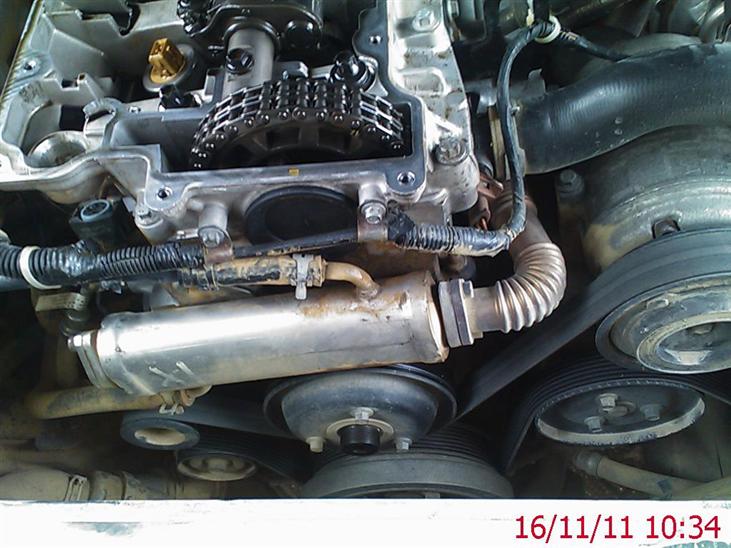
Take note of the EGR cooler fitted across the front of the engine, that's the "easy" way to tell you have a 15P or later engine (EU3 spec) fitted to your car, that will also mean it has "green top" injectors fitted. Once the fan is off, this will enable you to put a breaker bar and 24mm socket onto the crank pulley bolt as we need to be able to rotate the engine....
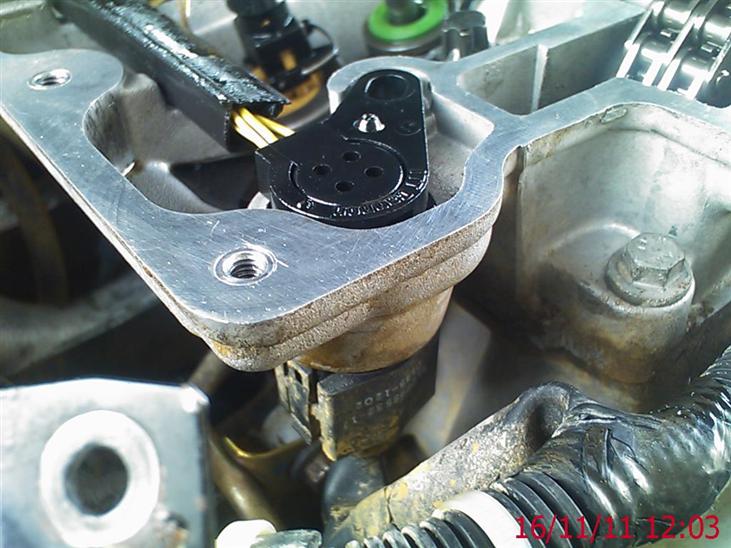
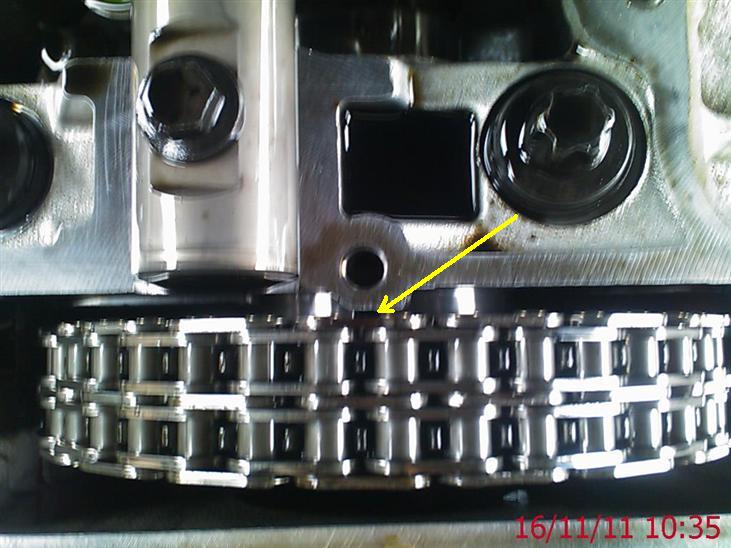
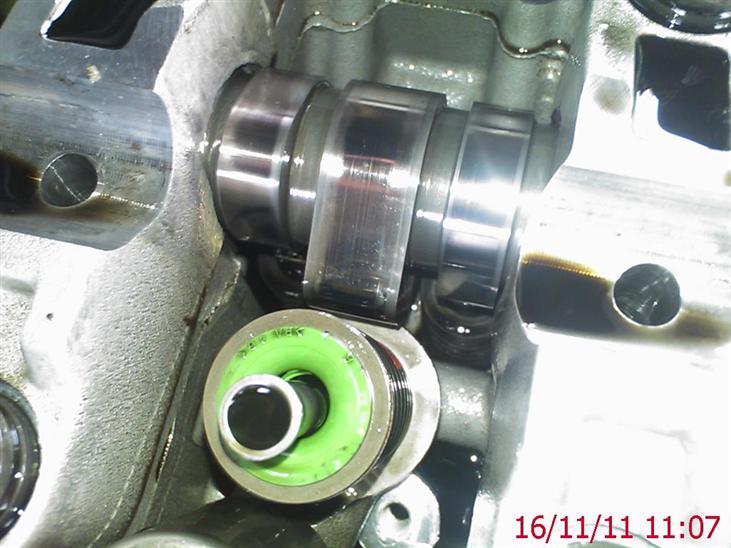
Rotate the engine until No1 Cylinder is at TDC (top dead centre). No1 is the pulley end of the engine. There is a couple of ways to know when No 1 is at TDC, you can either watch the rocker shaft lobes and continue to rotate until No 1 stops "lifting" or if you look at the back of the camshaft pulley (where the timing chain is) you will see a slot or key way cut out of the back.......picture arrowed below....
The slot in the pulley is there to line up with the hole above it drilled into the rocker box, this is where you fit a "timing pin" through the hole to lock the camshaft in this position....
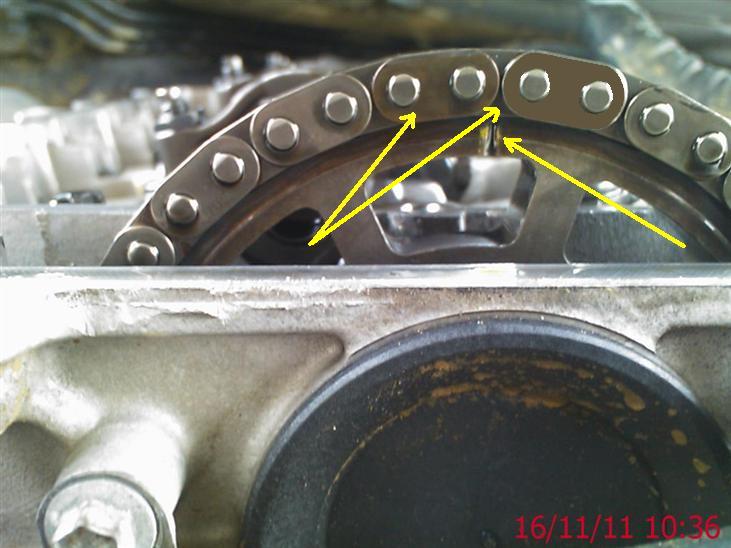
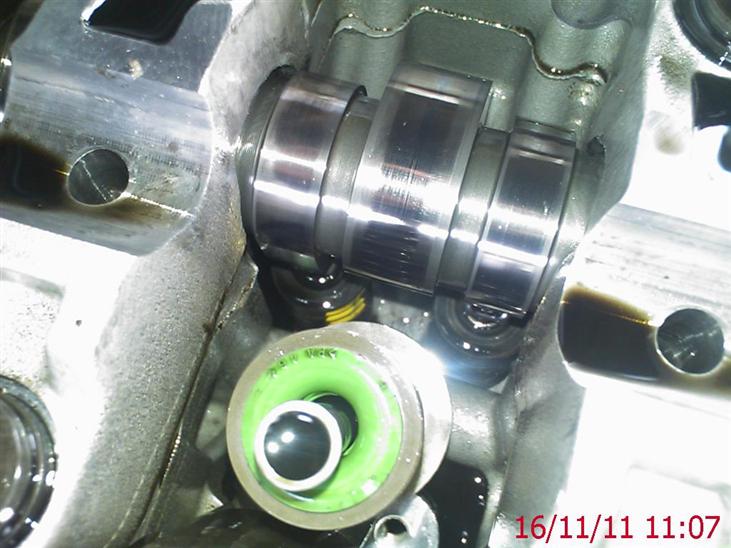
To confirm 100%, you should now also see a "timing mark" on the front face of the pulley, it can be either a small slot cut into it, or stamped "dots".......this will also coincide with 2 different coloured links on the timing chain itself.
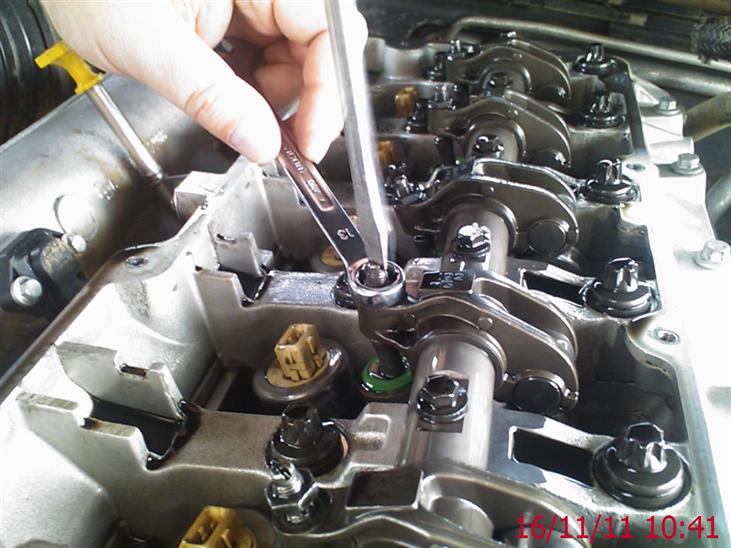
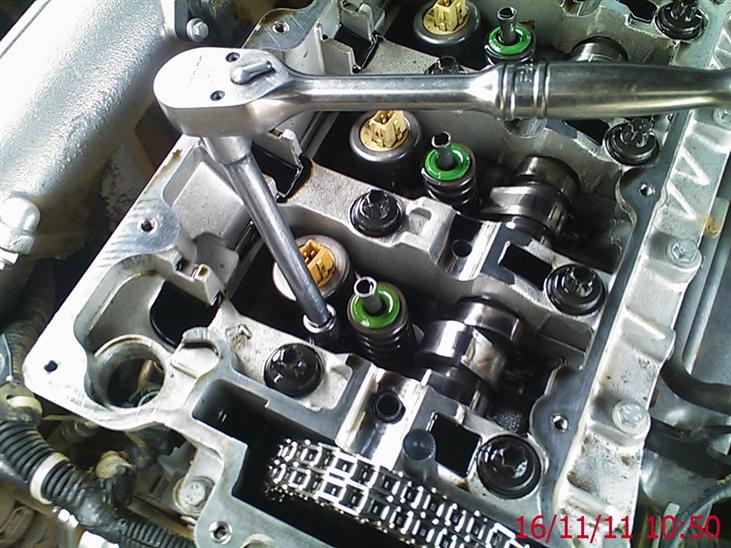
Both the timing mark on the camshaft sprocket and coloured links arrowed above. Now that the engine is locked into this position, we have to undo and loosen the lock nuts and rocker adjusting screws so that they are clear of the injectors to prevent damage on re-assembly.
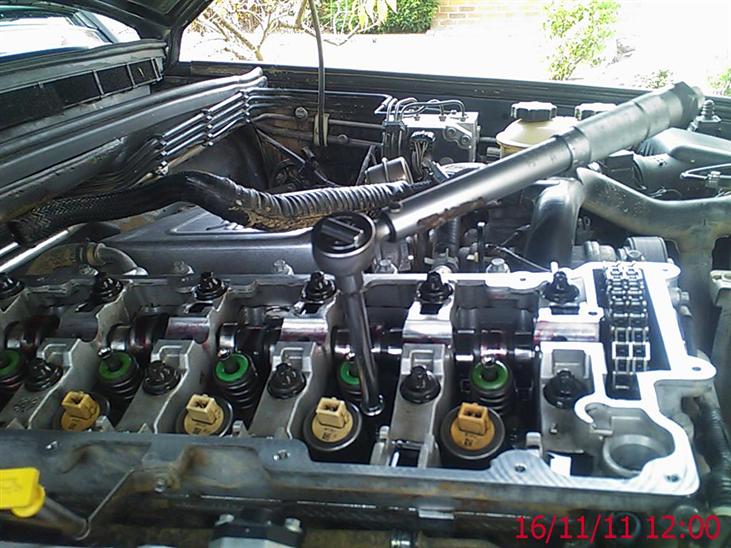
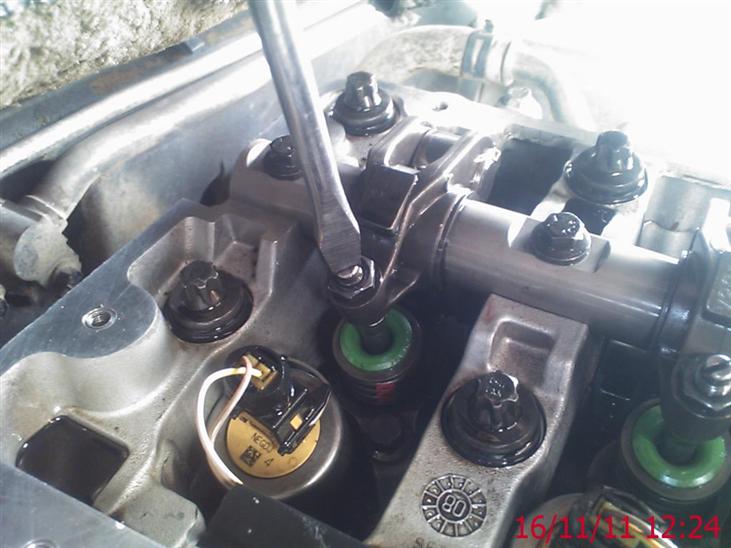
Simply undo the 13mm locknut being careful not to slip off, then with a large flat bladed screw driver wind the adjusting screws back until they are loose. NOTE :- the workshop manual states these nuts and adjusters should be discarded and new ones fitted, but from talking to garages etc, it seems they are often re-used with no problem.......you will have to make your own choice. They were re-used during this "fix". We now have to remove the rocker shaft assembly itself. It is held down by 6 bolts. These bolts need to be undone (cracked off) progressively and evenly to allow the shaft to "come up" evenly. DO NOT undo them all from one end to the other as the shaft will be allowed to flex, so start in the middle and bit by bit work outwards and round in a circle....
Again the bolts retaining the rocker shaft should be discarded and replaced..........you decide.....
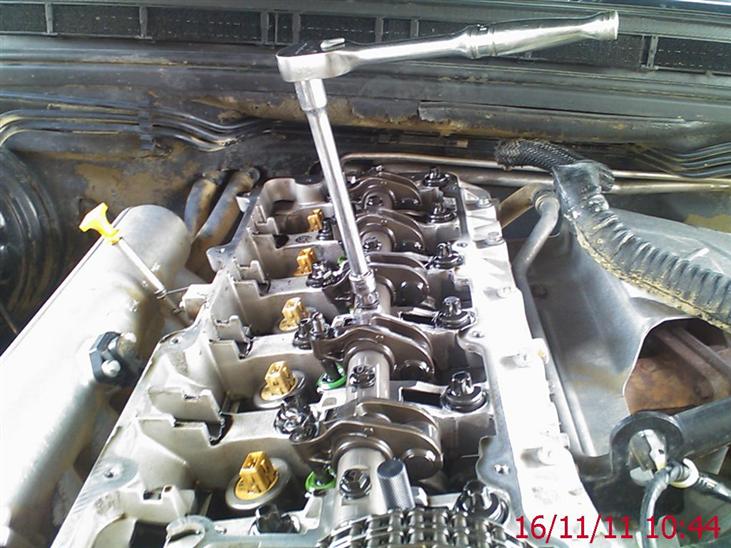
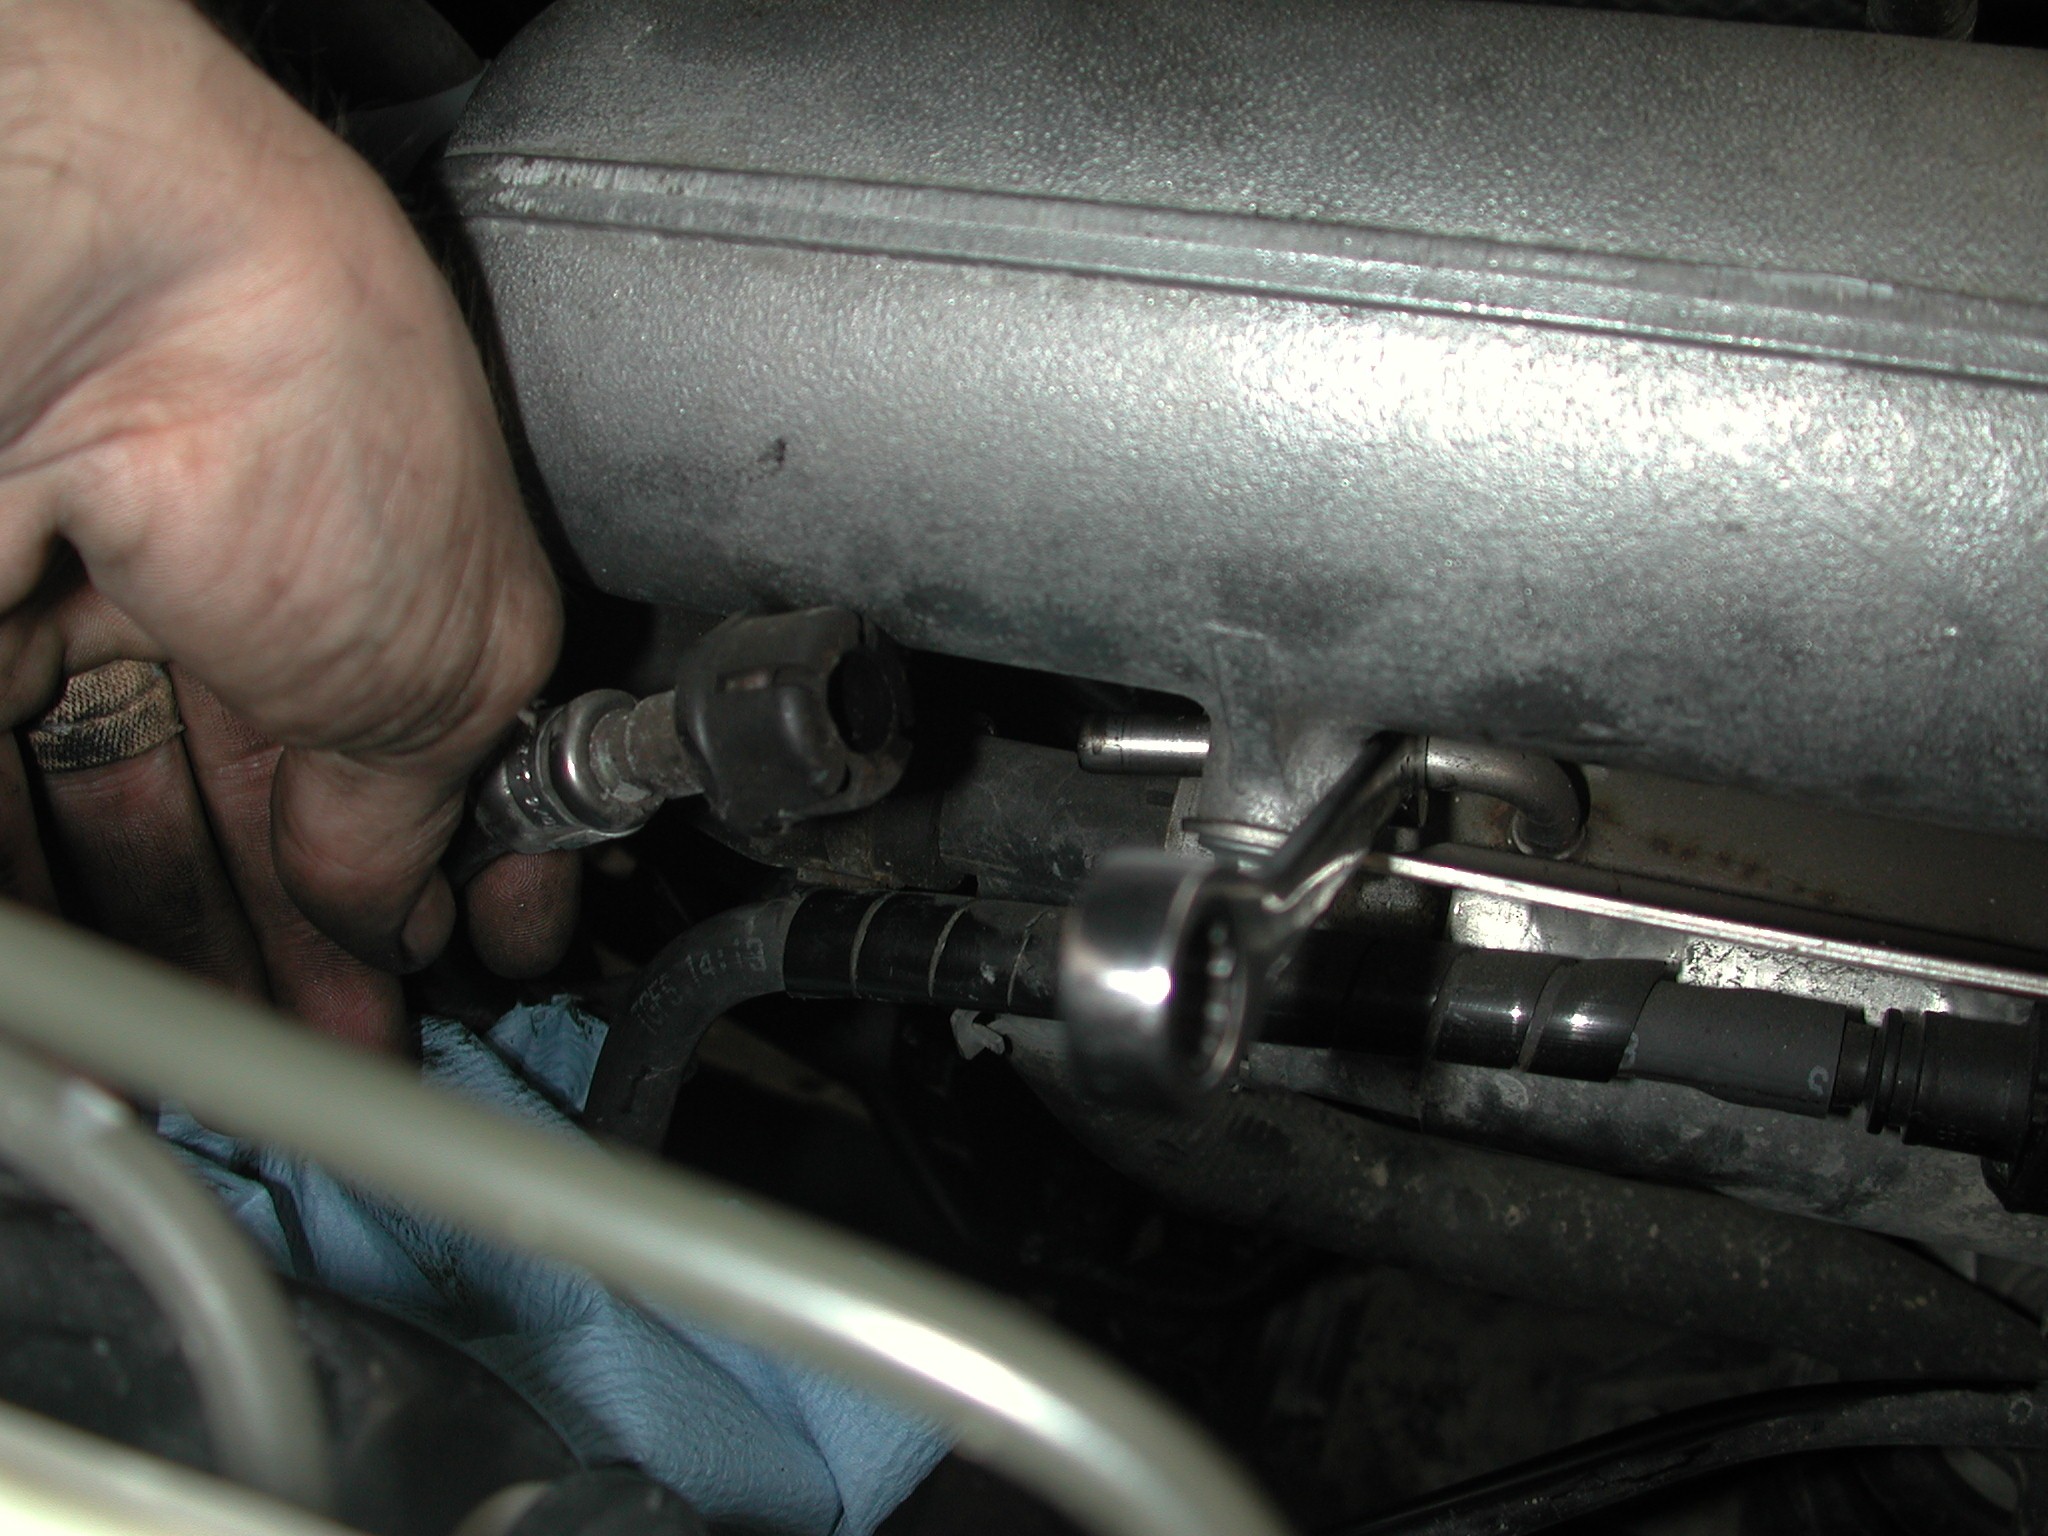
When all the bolts are undone completely, simply lift the rocker shaft off and put it somewhere clean and dry. Next place a container below the vehicle by the fuel pressure regulator and disconnect the quick release connectors on the Fuel cooler and fuel pressure regulator to drain the cylinder head of diesel....
Now we are finally at the injectors, they are held down by a horseshoe shaped clamp bolted into the cylinder head. Undo and remove the bolts (1 per injector)
Now there is "just" enough room to get smallish fingers in there, but it is very easy to drop the clamp and then it somehow wedges itself down in there lol...........so to avoid that issue, I simply use a magnet on a stick to lift each one out.
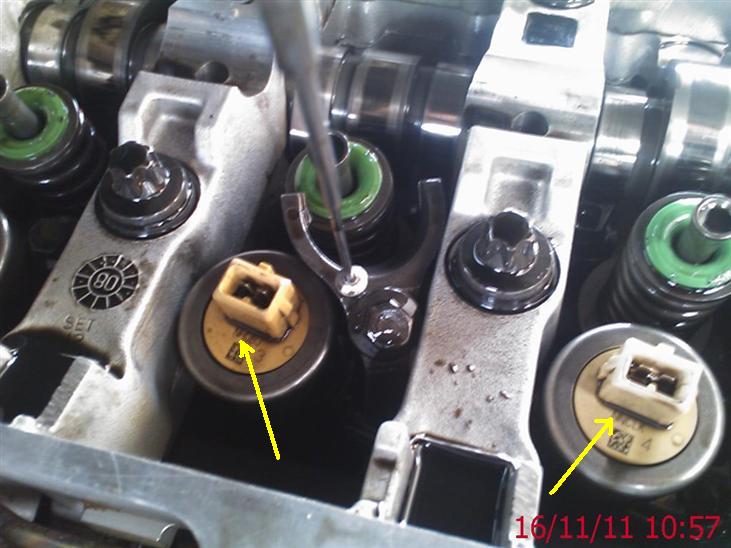
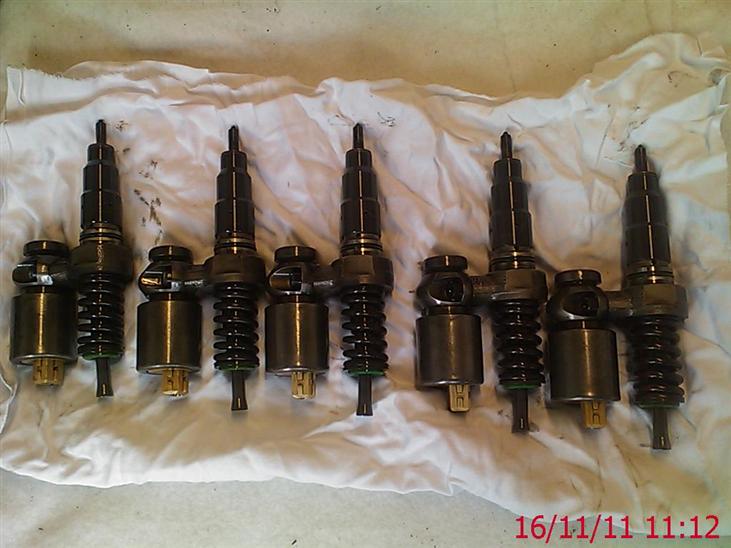
It is VERY good practice to keep each clamp "labelled" or placed so you know which is which and it goes back into the same position on re-assembly. Now just BEFORE we remove the injectors, we need to make sure which one is in which location as it is VITAL they go back in EXACTLY the same cylinder because the Engine ECU is coded to know which one is in which position. So grab a pen and bit of paper and write down the injector codes, No 1 injector is at the front of the engine and so on. "Ahh codes" you say, I "hear" about them......well, these codes are assigned to the injector during manufacture, although each one is pretty much identical, there are slight differences in each one and how it performs when tested when its made. The tests results in each one being given a "code" which the engine ECU is aware off and can adjust each one accordingly to give smooth engine running and better performance, this is why it is very important you know which one goes where. If you get it wrong, then apart from you undoing all your good work and removing them again, you would need a diagnostic tool to reprogram the engine ECU to tell it which position has which injector in it. The codes are a series of letters and are printed on the top of each injector........
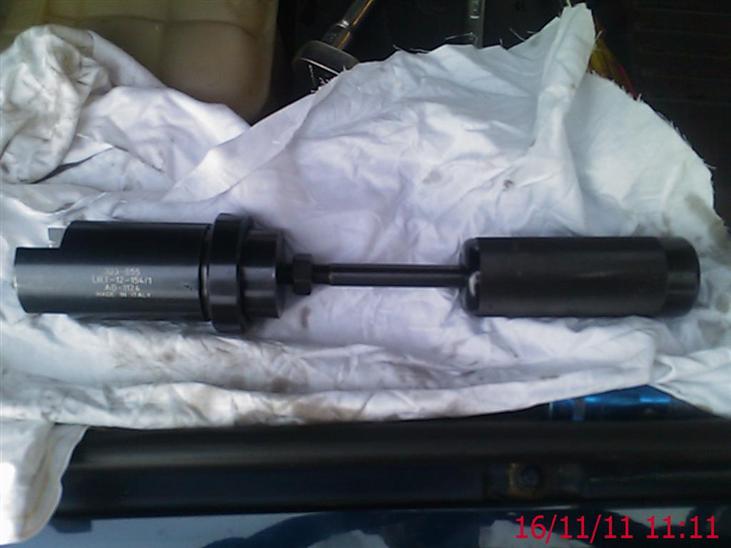
Codes arrowed above..................SO WRITE THEM DOWN!!!!! Right, removal of the injectors is not really difficult, BUT there is a specific land rover tool to do it, its a small slide hammer assembly which clamps around the injector and with a couple of small knocks out they come.
Now I'm aware not everyone will buy the tool to do it as its not cheap, there are other ways, some use a "hooked" tool like a screw driver with a bent u shape on the end to hook under the injector and pull it up, the choice is yours what you use, BUT it is VERY important that the injector is pulled from the cylinder head directly upwards in the same angle it is fitted, if not and they are "levered" about, damage can occur to the "seats" where the injectors are fitted. YOU HAVE BEEN WARNED!!! It is for this reason, buying the proper tool is a not a difficult choice for me and it makes removal EASY.....
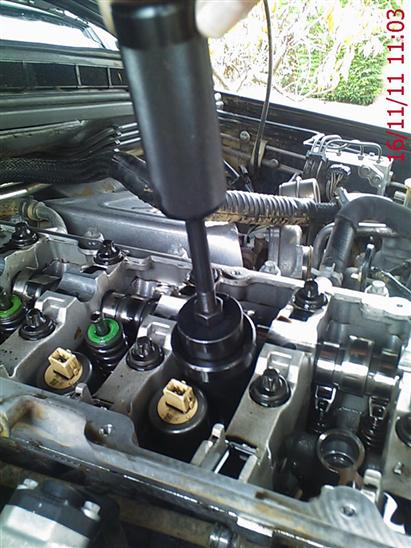
Now because there is not much room around the injectors as it is, and because of the position of the camshaft, you cannot fit the tool onto all injectors without rotating the engine to move the camshaft lobes away from each one.....
Above you can see the camshaft lobe will "snag" and stop the injector coming out, so remove the camshaft locking pin and rotate the engine until the camshaft lobe is clear from the injector......
Use the tool or whatever you are using and remove all 5 injectors......
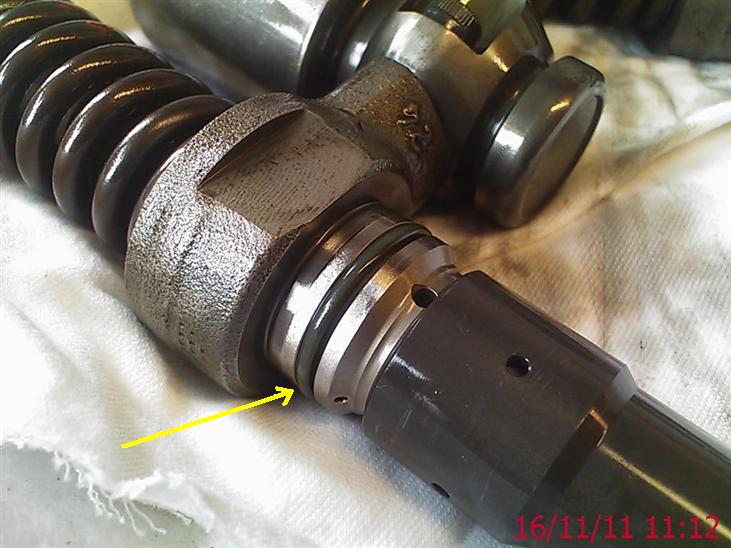
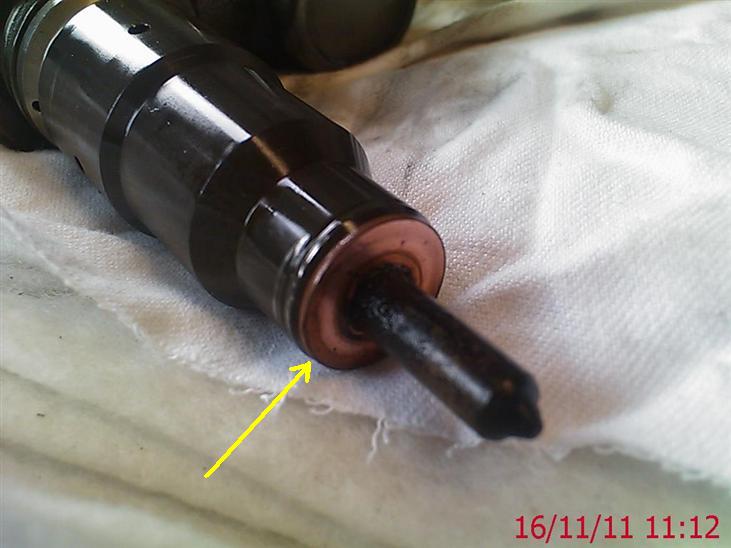
Below is the "o" ring arrowed.......
And the cooper sealing washer......
Removing the "o" ring is simple enough, but the copper washer needs a little more care to make sure you don't damage the end of the injector. I used needle nose pliers and carefully rotated the washer as I pulled them off, some of the injectors may have more "build up" on the ends than others, slowly rotating the washer as you pull it off will help remove most of that carbon build up.
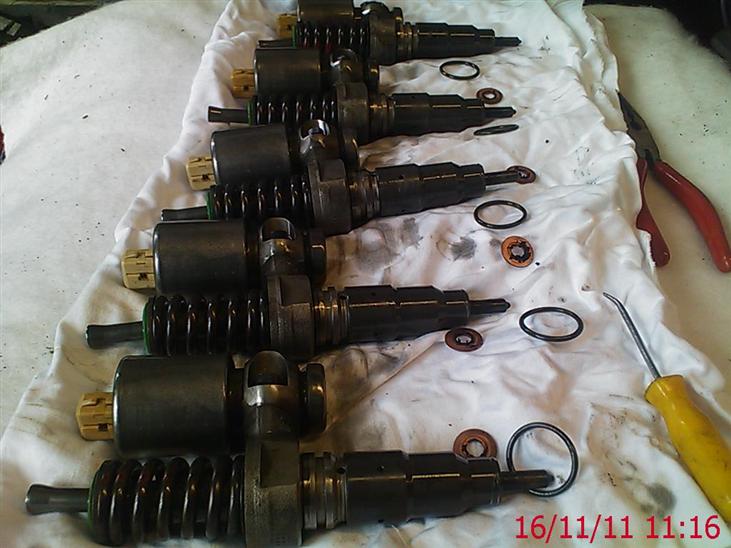
All the "o" rings and copper washers removed, so we have finally got to the bit we want to replace.......
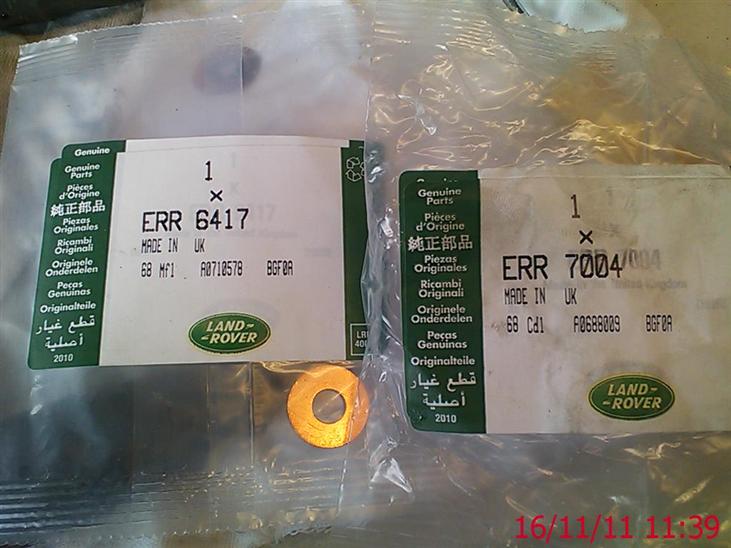
Washers and "o" ring part numbers above, you can get a genuine "kit" of seals etc on eBay for around £25. Carefully with a small bit of "used" scotchbrite give the injector ends a little clean. Lubricate the new injector "o" rings with some "O" ring grease, to aid fitting, if you don't have that a small smear of new engine oil will suffice. Fit the new copper washers to the injector ends ensuring the will go all the way down. If they don't clean the carbon build up to make sure they do, but be gentle with them because they are only copper and will EASILY be deformed..... Now the refit, CAREFULLY select each injector making sure you have picked up the correct one, IF IN DOUBT CHECK YOUR LIST OF CODES!!!....lower it slowly into the cylinder head and then give it a little "Push" with finger pressure and you should feel it pop in around the "O" ring seal, always make sure the copper washer has not dropped of the end as well!!..... Refit all five in the same way.....NOTE :- you may have to rotate the engine as in the removal to ensure each is clear of the camshaft lobe. Next using your magnet if you used one like me, lower each injector retainer back in.....ensure the rear of the retainer is sat on its "peg / dowel" correctly...
LOWER..do not drop the retainer bolts into each one, and start them off by hand first, then tighten and torque each one to 32NM or 24LBSft.
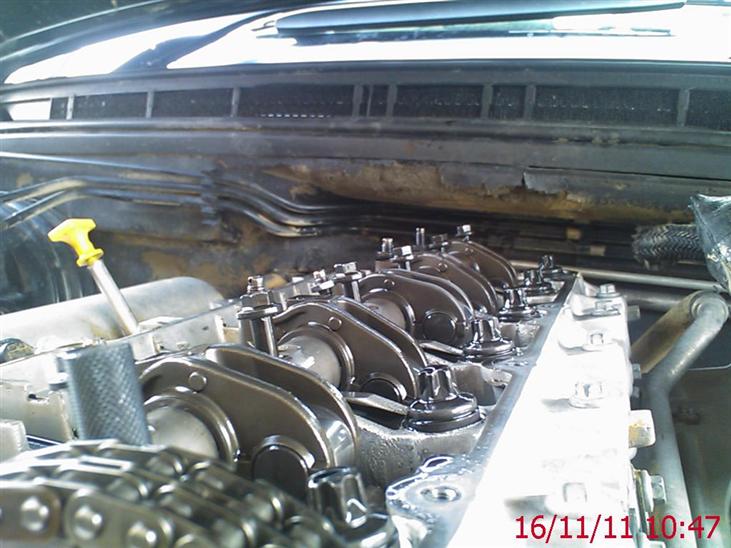
Do the same for all 5 injectors, then refit the injector harness and plug in all the injectors. Now it's time to refit the rocker shaft.....makes sure it is the correct way around and ensure the locating dowel at the camshaft sprocket end is located properly and the rocker shaft lobes are up above the camshaft. Lower the rocker shaft retaining bolts in, start them by hand and progressively (as in removal) tighten the rocker shaft down evenly and torque the bolts to 33NM OR 24lbs FT. Now we have to adjust the injectors......Rotate the engine until No 1 injector lobe on the rocker shaft is at full lift, if not sure go back and forth until your sure it's a max height, then tighten down the adjusting screw until you feel the injector plunger "bottom out". Then BACK it off 1 complete turn and whilst holding it in this position tighten the lock nut to 16NM or 12LBs ft.
Repeat that process for all 5 injectors......ensuring the adjuster does NOT turn while doing up the lock nuts. Re-connect the fuel lines at the quick release connectors on the FPR and fuel cooler. Refit the camshaft cover fitting a NEW seal "if" it's old and fit the washers and spacers and tighten the bolts to 9NM or 7LBS ft. Refit the engine viscous fan. Then switch on the ignition and PUMP the accelerator pedal quickly between 5 and 10 times and that will illuminate the engine check light and put the fuel pump / system into self "purge" mode. This will last up to 5 mins (good time for a cuppa). When that has finished, ensure all tooling is remove / clear of the engine bay and start the car. Allow it to idle for a few minutes and all should be good. Refit the engine acoustic and fan covers and job jobbed. NOTE :- if you have performed this job because of suspect leaking seals, or more importantly a rising engine oil level, I would highly advise you then replace both the engine oil filters and engine oil as per this page..... http://www.discovery2.co.uk/oil_change.html
|