![]()
| Faults and Fixes - "Air Suspension Drops" SLS Air Spring Replacement |
|
|
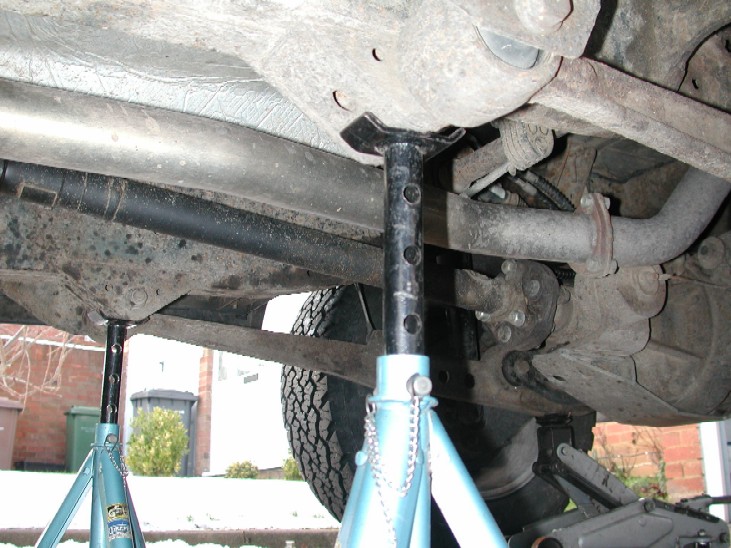
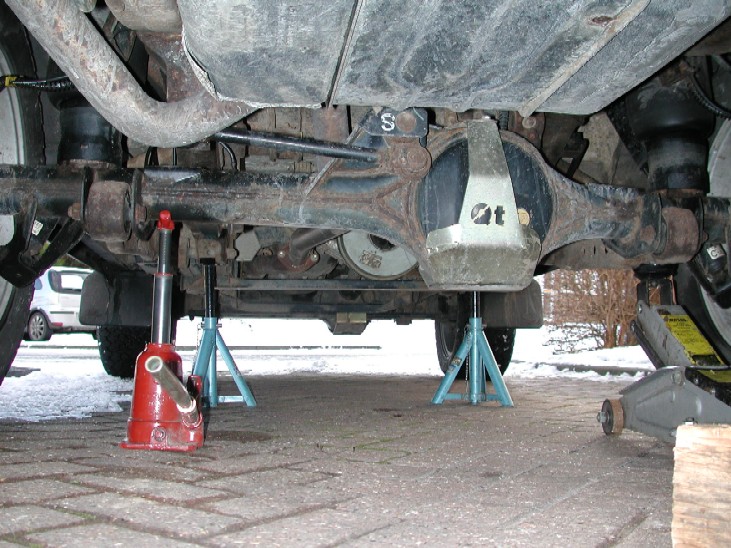
One of the more common "issues" with the Discovery 2 is the SLS - "Self Leveling suspension". Probably the most common failure is that of leaking Air springs that are in place on the rear axle where traditional coils are fitted. Quite often what happens is the car will "drop" at the back overnight or when parked for long periods of time. This is 99% of the time due to leaking air springs. They generally leak where the spring "rolls over" itself at the lower piston, or after a few years the rubber can crack at the same point and leak as well. Normally even if the car does drop, when the vehicle is restarted the rear suspension will pump back up to normal ride height again, this is off course assuming the compressor assy itself has not failed. The compressors are generally reliable units, but what can "kill" them early is leaking air springs that are ignored, so the compressor has to work for a lot longer periods than its designed to do to keep the vehicle level due to the leak, so this can burn them out prematurely. It was for this reason, that upon noticing my car had sagged at the back one or 2 times over a couple of weeks, I wasted no time and got on with replacing the Air springs. I could def see that it was the rear left spring that was leaking, but both sides tend to drop as it tries to sit level. You can replace just the spring that is faulty, but I would HIGHLY RECOMMEND you replace them BOTH at the same time so you know where you are. What can be done to investigate the problem, is raise the vehicle with the offroad height switch and give the bags a soaking with a soapy water spray solution, this will find any leaks if they are obvious, but the bags can sometimes self seal as they roll over the lower piston, this is why the car may drop randomly and with no pattern to it. If it drops every / other day, then honestly don't bother looking for leaks, just replace them. Replacing the air springs is really quite a simple task to do as long as you have some axle stands, a trolley jack and can use a spanner. First of all just "loosen" the rear wheel nuts on both rear wheels, then you need to get the car up and supported on the chassis, the best place to do this is next to where the rear radius arms connect to the chassis rails either side. Before jacking and "if" you have one, engage the CDL and chock BOTH front wheels with either bricks or blocks of wood. Lift the car so it just starts to take the weight of the rear axle, then put the axle stands in each side and lower it slowly onto them.
Then get 2 jacks, either trolley or bottle, I used my trolley jack and the vehicle bottle jack, lift and support the rear axle so the rear wheels are just of the floor, and then remove both rear wheels,
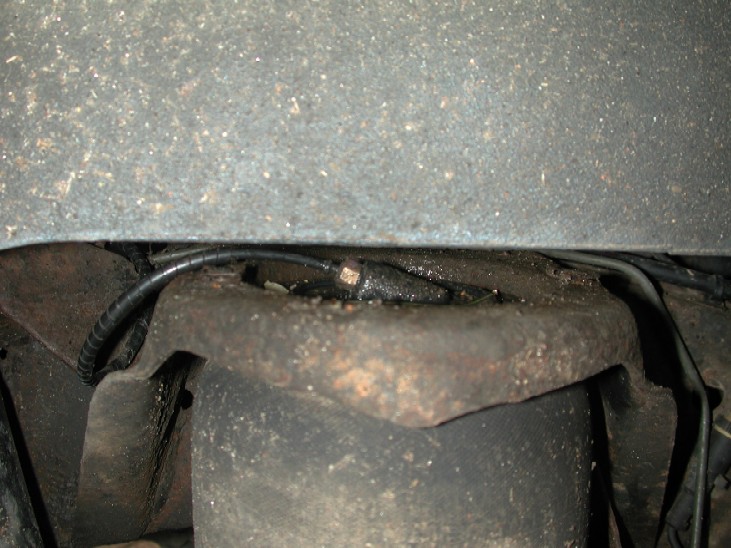
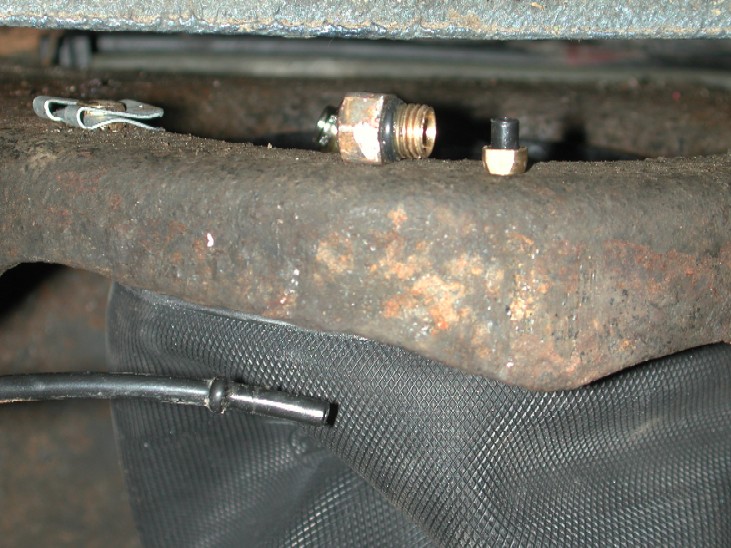
Next we have to somehow de-pressurize the Air springs, below you can see there is a 10mm connection union on top of each air spring, but because of where it is, its difficult to get a spanner in there to undo them, so its easier to let the air pressure out at the compressor end.
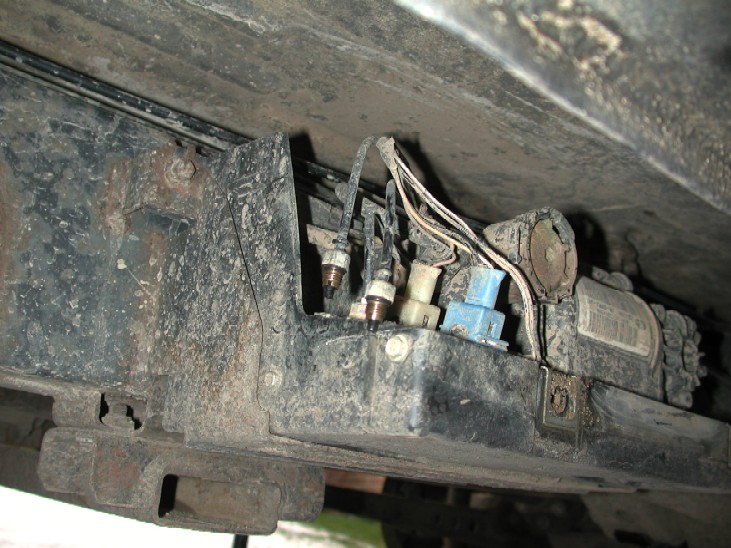
Under the vehicle level with the front passenger seat (UK car) the suspension compressor assy is housed in a small plastic box bolted to the outside of the left hand chassis rail. It has 2 "Zeus" quick release fasteners that once undone allow you to lift of the cover. Once the cover is off, a the front of the compressor assy you will see 3 unions / air pipes. We are ONLY interested in the outside 2 pipes NOT the middle one
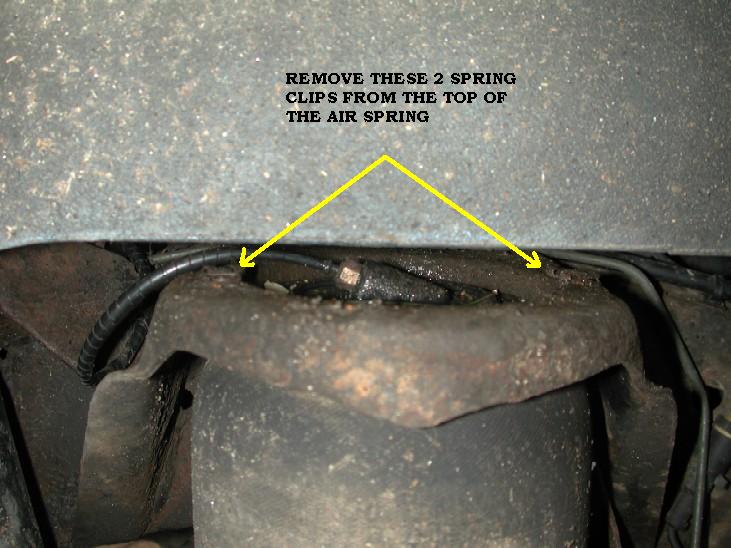
They are also 10mm in size, one at a time, undo them slowly and allow the air pressure to escape, once the "hissing" stops, you can simply check by squeezing each air spring, if its fully depressurized it will squash easily. Take care not to get any dirt on the pipe unions and into the compressor assy itself Now we need to remove the air spring itself, the tope is held by 2 spring retaining clips, and depending on how old your vehicle is or if they have been replaced before will depend on the condition of the spring clips. I had bought new ones just incase, but to be honest my originals were "ok" to re-use. You can see them before you start the job anyway, so worth checking to see if you need to order some new ones.
I found its easiest to just remove them carefully with a flat bladed screwdriver, try not to loose them if you don't have new ones ready !! Picture below for ref the spring clips (air spring out)
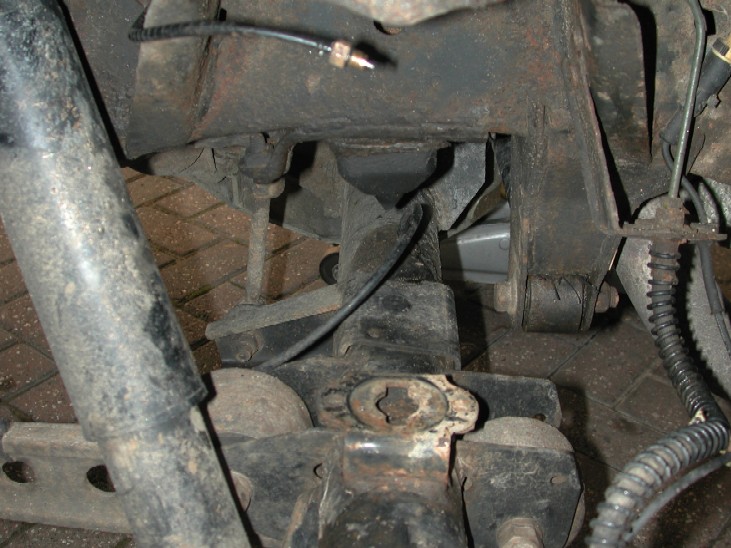
Once they are off, you can then partially collapse the air spring down from the top, this will make it easier to get a spanner on to undo the top air pipe connection, be careful not to "stretch" the air pipe whilst doing this as there is not a lot of slack in it. Once the pipe is off, collapse the air spring fully down so it clears the top seat. The bottom is simply hooked in place. If you look at your new springs, this will be easy to see. So rotate the whole thing from the bottom 90* and it will simply lift out.
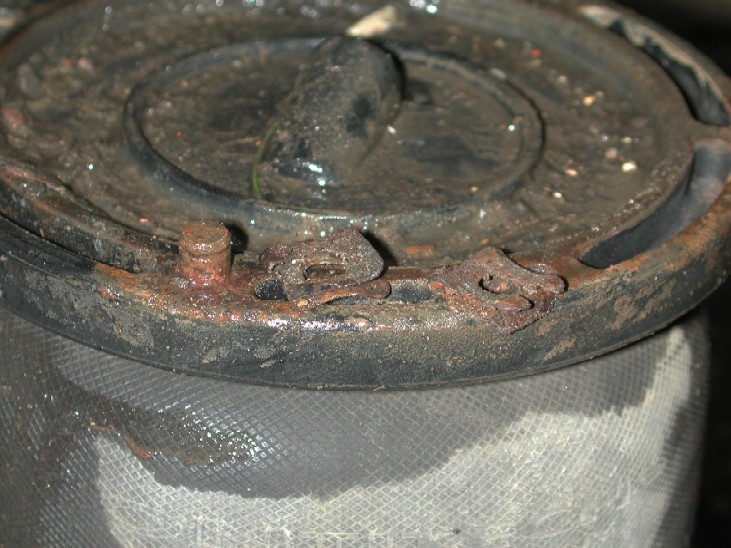
Below you can see the bottom fixing on the axle. Once the air spring is out, give the top and bottom seats a good clean / brush down of any dirt and rust etc
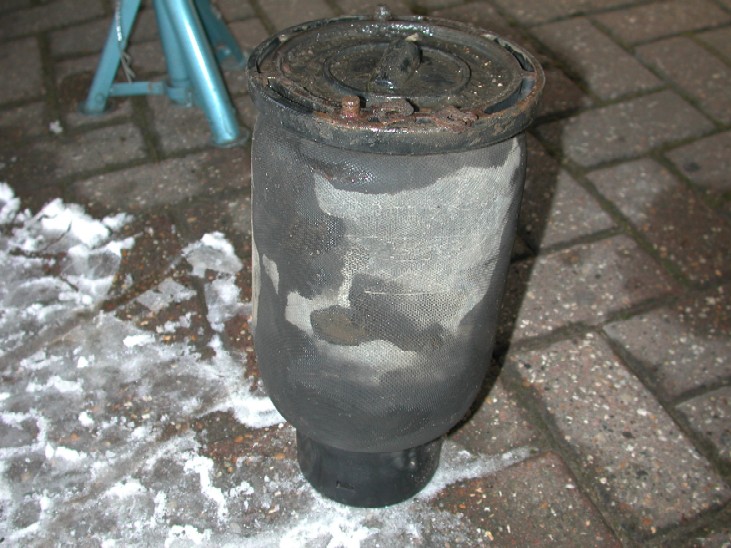
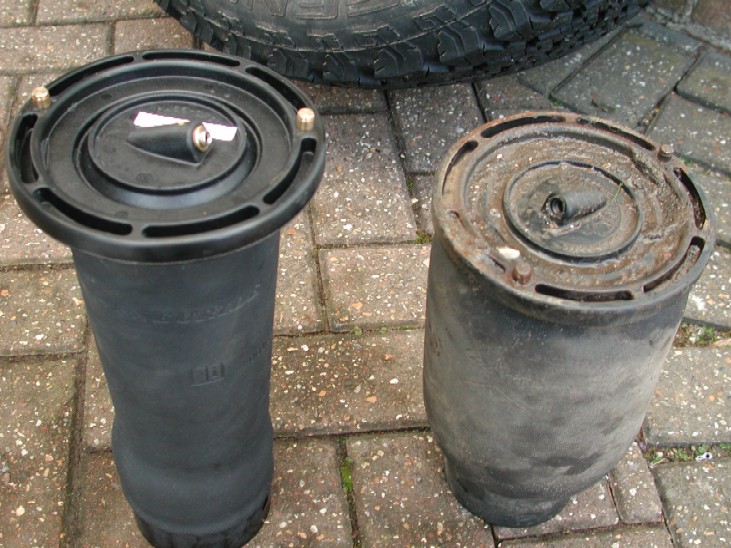
Here is a comparison of a new one to the old one. Now, depending on where you buy your new air springs from, will depend on how they connect back to the vehicle system. Land Rover charge TWICE as much for new air springs than any other spare parts retailers, Land Rover specialists and even Ebay is cheaper as well. My new springs have a "push" fit connector as opposed to the brass union "o" ring type found on the original springs. I'm not sure what type you would get even if you bought them from Land Rover, it maybe just a more modern way of connecting them up, who knows ?? My replacement springs were genuine Dunlop items, you can see the top connection difference in the picture below
Now because of the push fit connector, you have to remove the brass fitting from the vehicle pipe work. Get a NEW sharp stanley knife, slide the brass union back up the pipe to reveal the olive on the pipe, then cut the pipe squarely, directly behind the olive to keep as much length as possible. You can cut the pipe either before or after re-fitting the new spring.
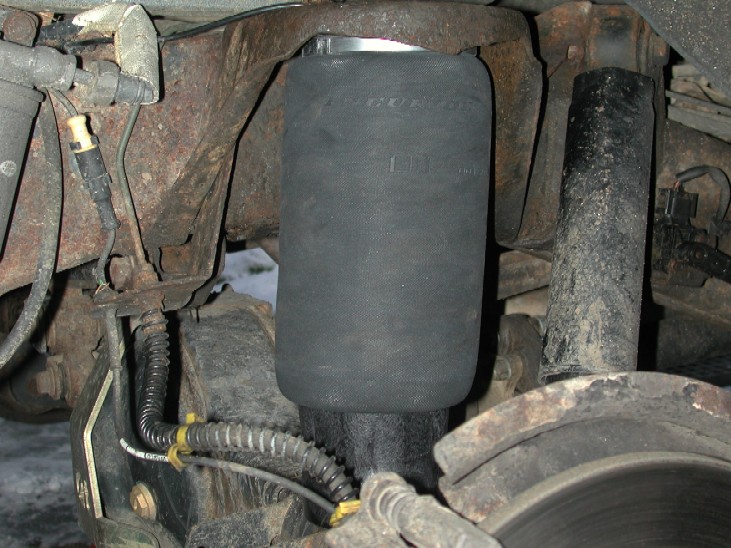
Now its time to refit the new spring, simply collapse the new spring down, and without "twisting" it, refit the bottom of the spring to the axle by rotating it 90*. Make sure you fit the new spring so the pipe outlet is on the correct side. If the spring wont reach the top fitting, or is to long, you can simply move the axle up or down using the 2 jacks so you can engage it and refit the locking spring clips on the top 2 studs. Once its in place, push the air pipes FULLY home into the new push fit connectors, the pipes should go almost in as far as the swage on the plastic pipe. Give them a small tug to ensure they don't just pull out and are fully locked home. Go back to the compressor assy and reconnect the 2 pipes you disconnected earlier, but leave the cover off for now so you can test for leaks. NOTE!!.. TAKE EXTREME CARE TO NOT CROSS THREAD THE PIPES IN THE VALVE ASSY AND DO NOT OVER TIGHTEN THEM!!! Now, open the drivers door window, shut the door and make sure ALL other doors are closed, start the vehicle and the compressor should start to run straight away, allow it to run for about 15 secs, by this time the bags should have started to take "normal" shape. STOP the engine and check to see there is no twists or creases in the bags and they are inflating "neatly".
If all is good, restart the car and allow the compressor to run its full cycle to inflate the bags up to working pressure. Once it has stopped, refit the road wheels, you may have to adjust the axle height by using the 2 jacks to allow the wheels to be refitted. Once you have put the wheels back on, release the load on the 2 axles jacks so the rear axle is on the wheels again, you may hear the system release air etc, this is due to the fact your moving the height sensors up or down whilst lowering the jacks. Once the wheels are on the floor, remove the 2 jacks from under the car completely and restart the car and leave it idling. Whilst the vehicle is idling away, jack it up and remove the axle stands from under the chassis, each time you remove one, CAREFULLY lower it down on to its own weight as the air springs may still NOT be at full working pressure. Do the same both sides. Once its fully down and off the axle stands, it may still be sitting lower than normal, but this will soon sort itself out once the car has got is bearings ref the pressure / height sensor settings. Once the vehicle is back to "normal" height, press the offroad switch and check to see the rear raises up the extra 2 inches. Once its up, have a good look / listen / feel for leaks at the new pipe fittings and at the 2 pipes on the compressor assy that you removed earlier. If all is good, refit the compressor assy cover, remove the wheel chocks, and take the vehicle for a test drive. It should lower itself back to normal height once you go over 20 mph. That's it Job done!!! NOTES. Up until the cold weather, I never had a single issue, I can only put this down to coincidence, or the fact that the cold weather means the rubber on the air springs is less flexible at lower temperatures, therefore its ability to "self seal" is reduced significantly and they leak easier My car DEF feels better on new springs as the new rubber is most likely not as "worn" as the old tired air springs. The Vehicle now raises and lowers a LOT quicker when using the offroad switch, this maybe due to the leak that was present, but also maybe due to the fact the new spring rubber is not as stretched / flexible / old as the old units, so it takes less air to inflate them to the required height. When washing the car, I periodically raise the rear on the offroad switch, and then wash / clean around the lower parts of the air bags where they "roll over" themselves. This I hope will help keep them clean and longer lasting. This I would suggest is more important if you use the vehicle offroad in mud etc. |