![]()
| Rear Passenger Door lock Assy / Motor | ||||
|
|
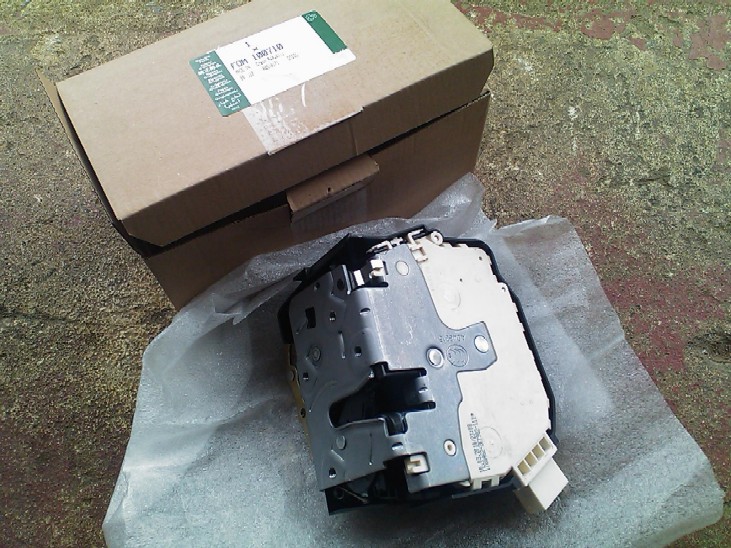
Here's another of the "common" faults or failures on the Disco 2, the door locks. These can be slow to operate, operate intermittently, or pack up all together.......it also seems to be worse when the outside temperature is colder, and that's usually when they finally give up. There is no "quick" fix to be honest, if your door locks are playing up, its time for a new one. They retail around £60 a door and are all handed due to the fact the motor / lock assy is all contained in one unit.
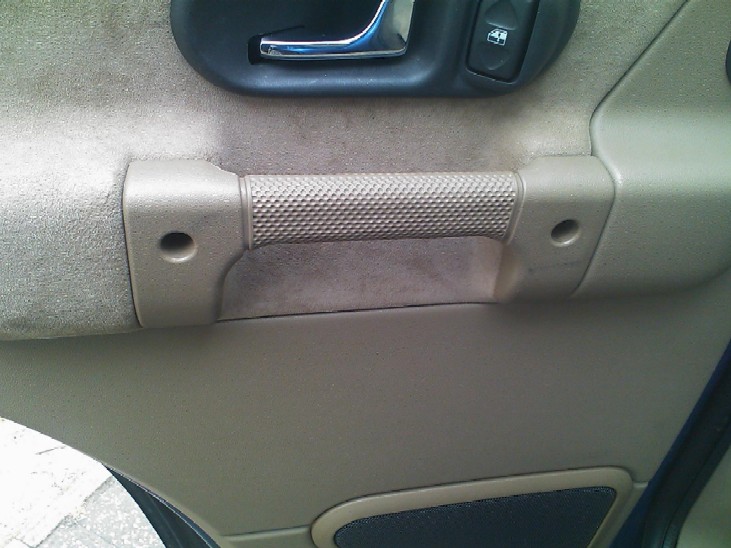
Above is what they look like, all 4 doors have similar assy's, but the drivers is slightly more complex as it has the key / switch assy on it as well. NOTE:- 2 different vehicles were used in this write up, but the pictures are from both rear doors. To start with you have to remove the door card / interior trim, to do this start with the 2 screws located in the door handle.
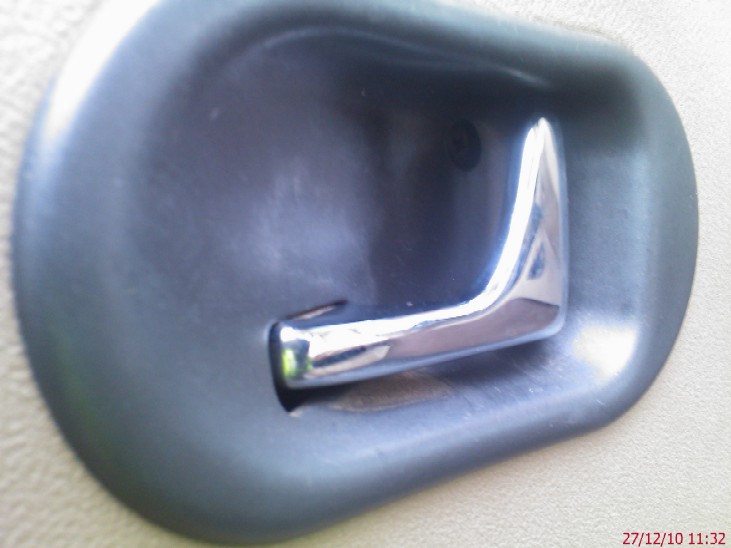
Next you need to remove the screw that holds the inner handle finisher on.
NOTE:- Front door shown, ALL doors similar. Once the screw is out, carefully lever out the trim and then disconnect the electrical plug to the window switch.
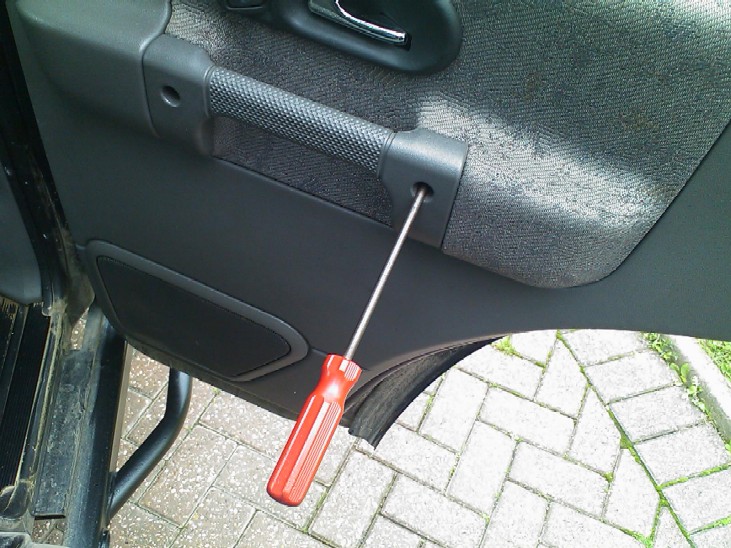
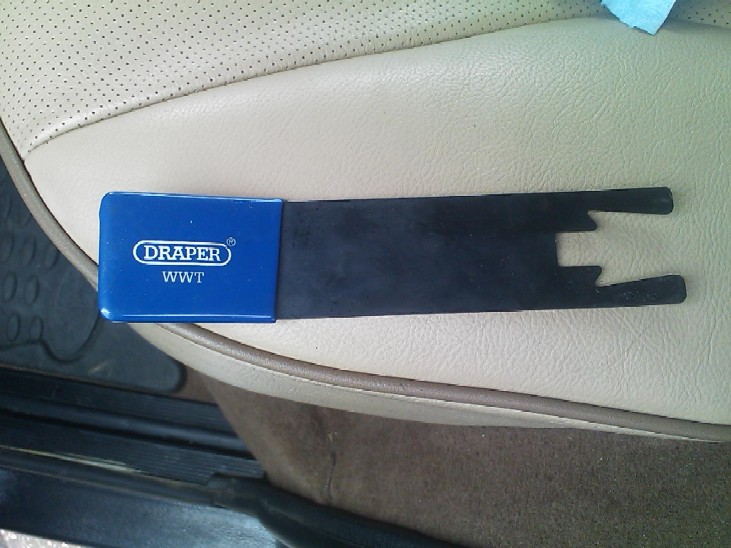
Next using a trim removal tool, or wide bladed screw driver, "carefully" lever the door trim away so you can get your trim tool etc underneath by about an inch or so. (typical tool below)
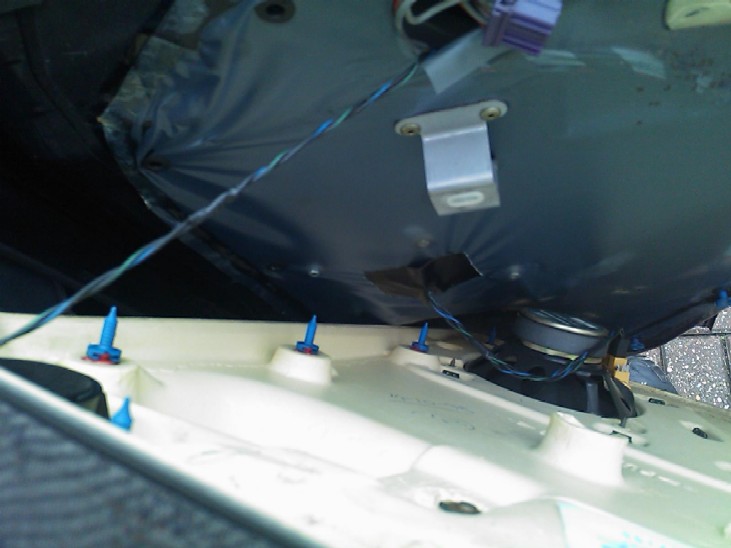
The ideal place to start on the rear doors is where it goes around the wheel arch, once your tool is in, lever away so you can get your finger tips in there and then carefully unclip the door trim all the way around the 2 sides and the bottom edge. the trim plugs / retainers are space a few inches apart and it is much better to pull on the trim as near as possible to where the plugs are, that way there is less chance of breaking them. Use the picture below to see where they are located, Trim plugs are the blue plastic things.
It is highly likely you "may" break one or two, or even more, depending if the door trim has been removed in the past and how carefully it was done. The trim plugs are only cheap and can be bought in packs of 10 from Ebay and all land rover parts places. Good idea to have some new ones before you do this job. Link below as an example http://www.island-4x4.co.uk/door-trim-panel-clips-mwc9134-p-1549.html Some of the trim plugs may pull out of the door retainers and remain on the door, these are the ones that will need replacing, simply remove them from the door and clip the new ones back onto the trim panel. Its pretty self explanatory when you see them. Right, once you have freed off the trim around the 2 sides and the bottom edge, you have to free the plugs along the top edge / face, so putting your fingers in from either end, carefully pull the trim away from the door, you will "hear" them when they unclip. Once they are all free, lift the trim up and off the door lock button....... DO NOT pull it away to far as you still have to disconnect the 2 sets of wires running to the door speakers (shown below)
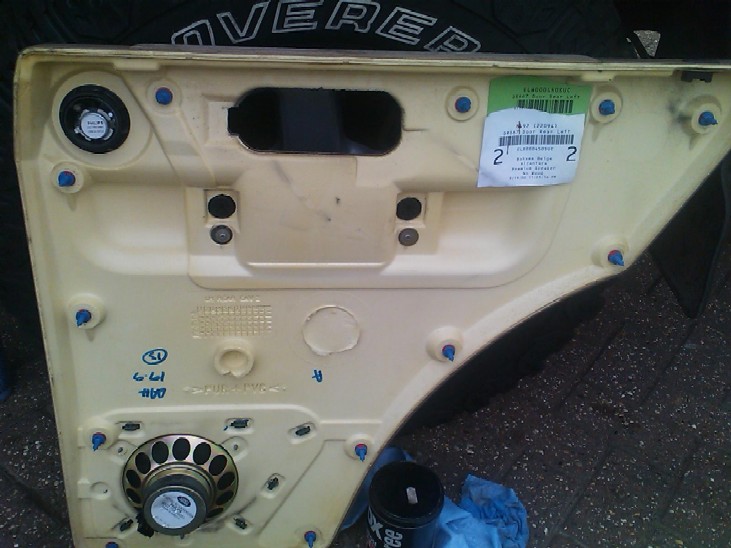
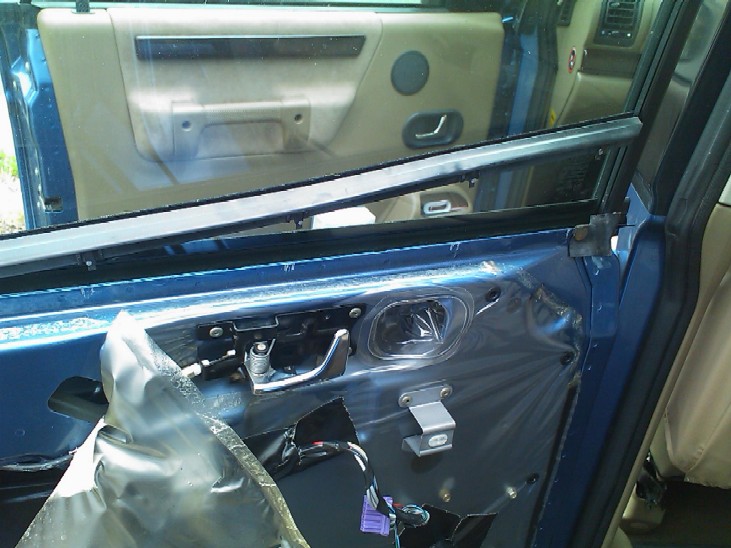
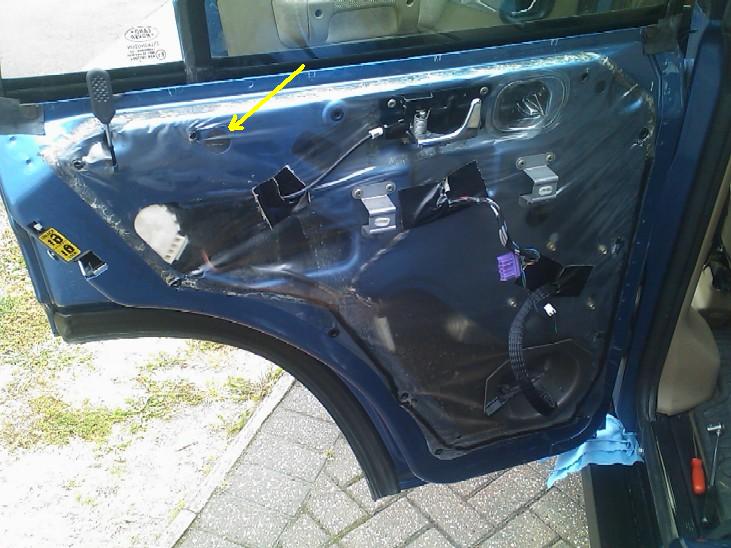
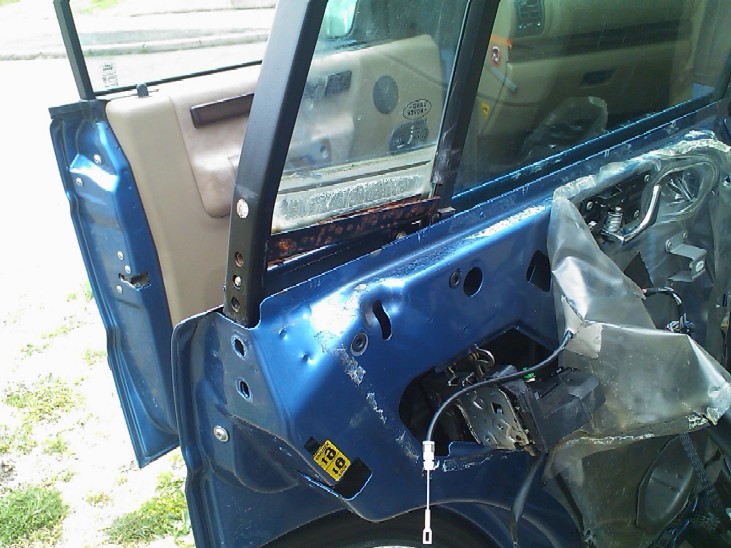
Once they are disconnected the trim is free to come away and this is what it looks like....
The door lock assy / motor can be seen in the top left of the door (white plastic item). The door is covered internally by the dust sheet / splash guard and as with all cars I have messed with over the years it is very difficult to remove / peel away this plastic liner without it tearing!!!......take your time and slowly peel it back, if it tears don't worry to much as it can be re-taped together when the job is complete. You need to peel it back enough so the liner is back to where you see the steel bracket in the picture above that mounts the interior handle, it will most likely tear as it comes around where the trim plugs go. Next is the interior weather strip, that is simply a "push fit" and is clipped to the metal on the top of the door, it contain a metal "inner" which will bend out of shape if you are to aggressive with it, simply pull it directly up the door to remove it....
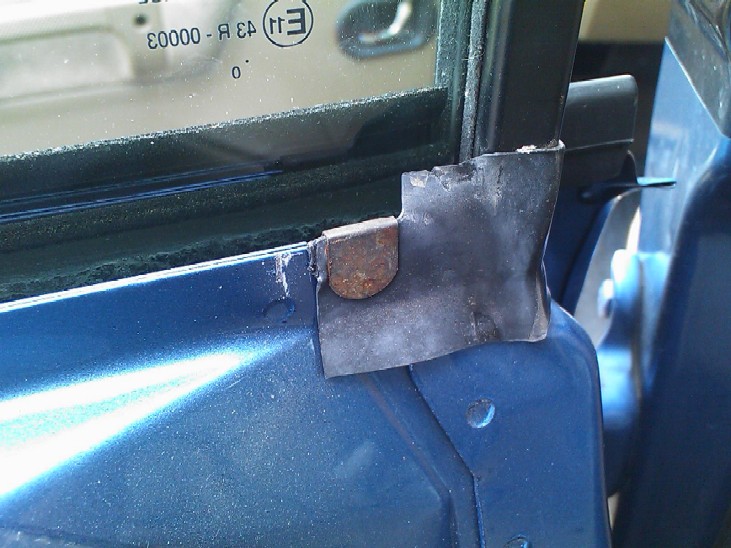
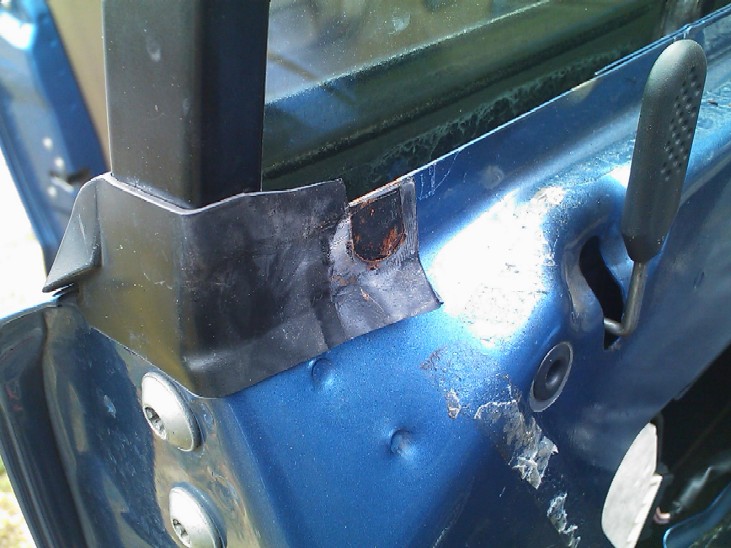
The next part is to remove the outer weather strip, that is held on the inside by 2 spring clips just exposed be removing the interior weather strip............. one at either end.....fwd one here..........
Aft one here...........
Carefully prize them up with a small screw driver to release the trim, then once they are both off, you can CAREFULLY remove the weather seal by lifting it directly up the window glass, DO NOT use to much force as the strips contain a metal insert that will bend and go out of shape if you are to forceful with it.
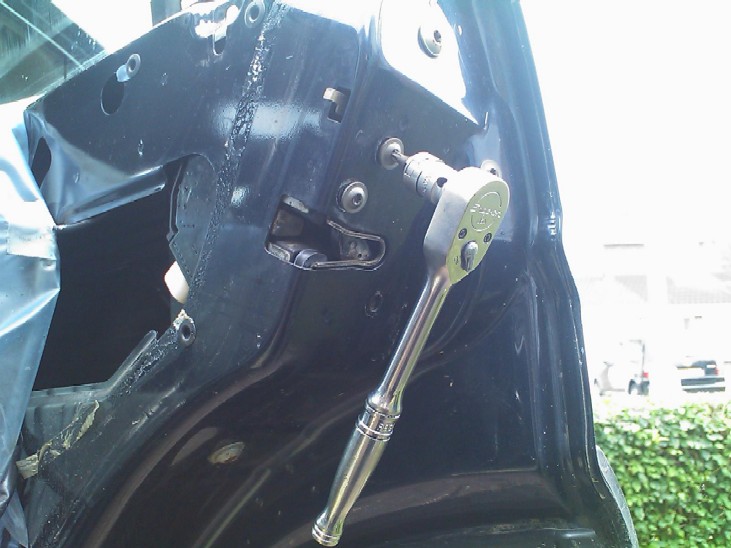
Once that is removed we now need to start releasing the door window frame (black part). That is held by 5 Torx bolts (silver) on the outer edges and 1 bolt between the quarter window and main window....... 2 Torx here....
2 more on the front face by the hinges here .....
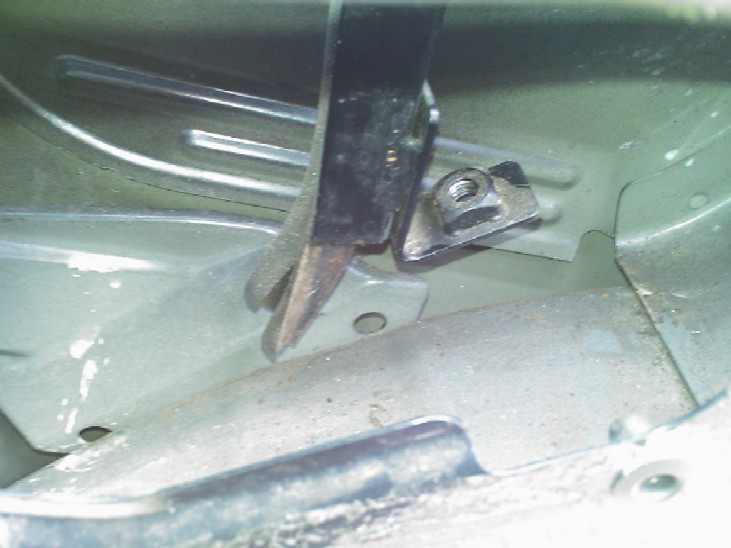
And the central "pillar" under the wheel arch section..........here...
and the inside view of the above bolt....
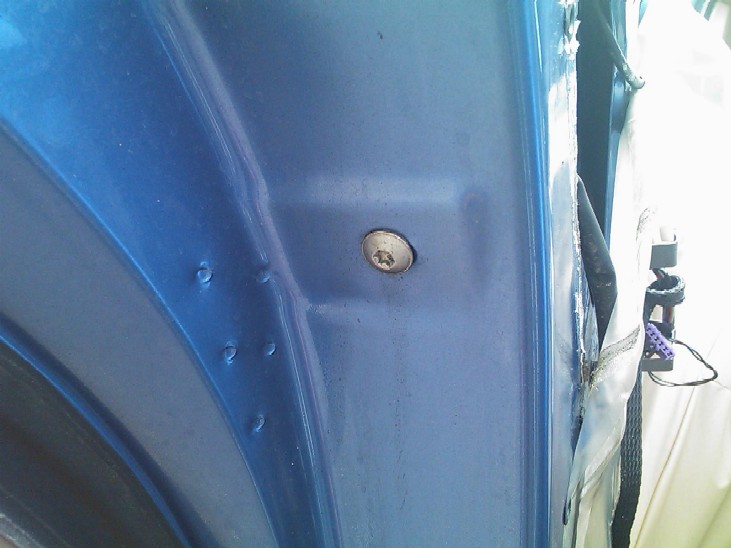
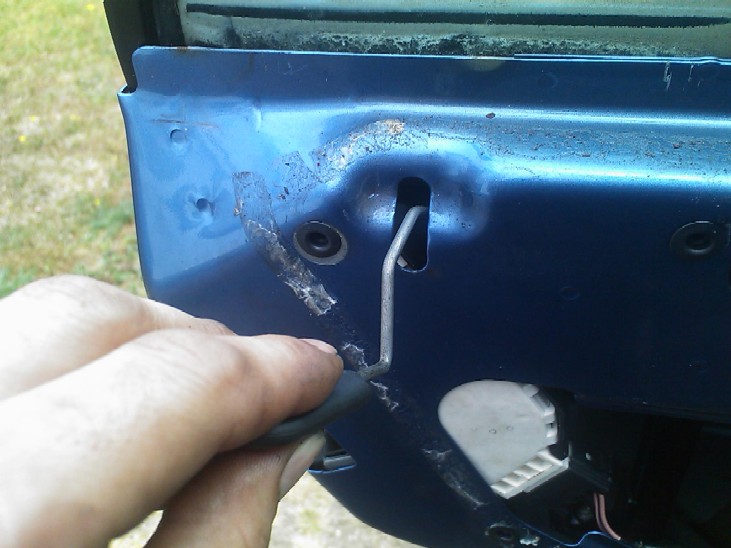
And finally the single bolt here (arrowed below) Pierce the water shield carefully to access the bolt....
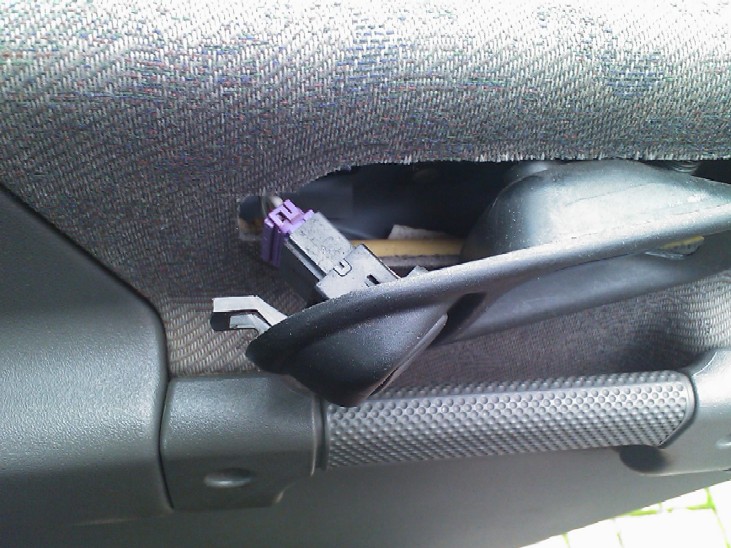
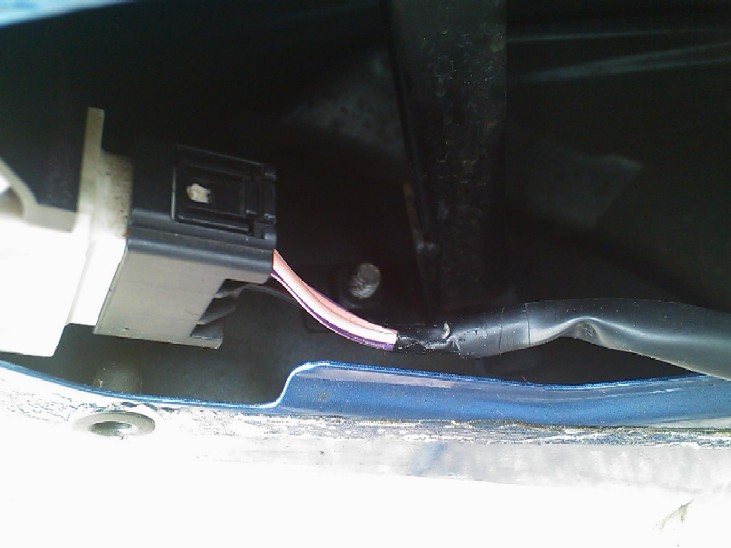
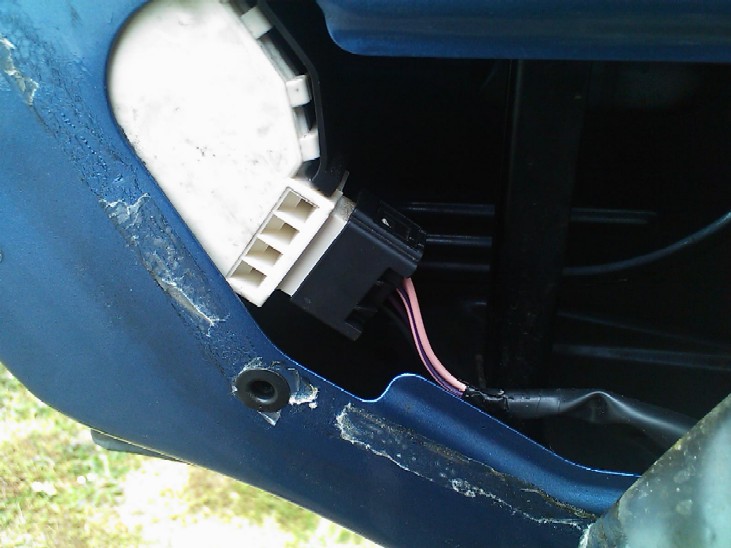
Now the door frame is "released" we can when needed lift it up to gain enough clearance to remove the door lock motor assy. So now disconnect the door lock electrical plug (below)
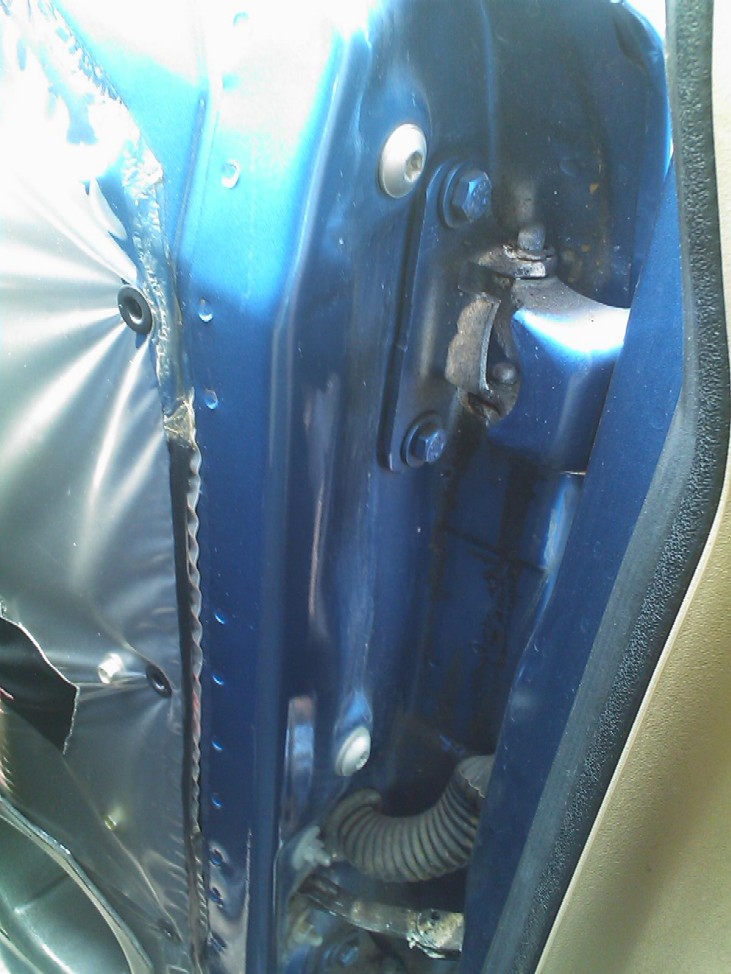
You could do that after the motor is out, but for me its better to do it whilst the motor is still held to the door assy. Now we need to undo the retaining bolts for the motor itself, these 3 are in the wheel arch face of the door.
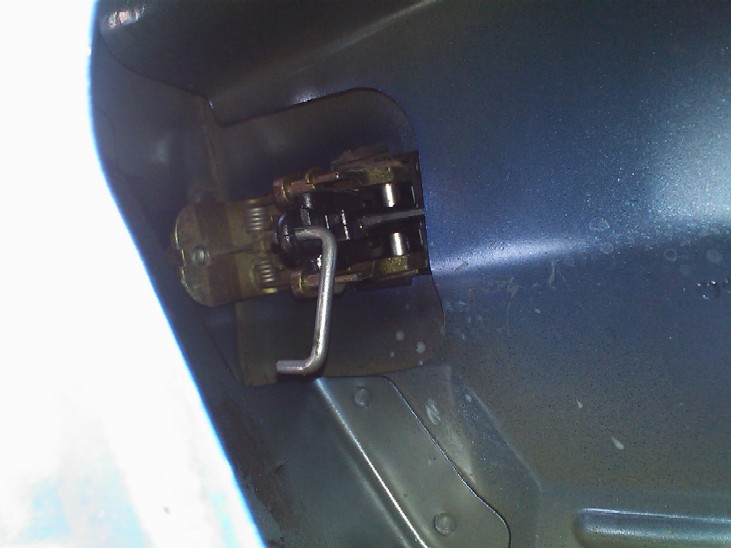
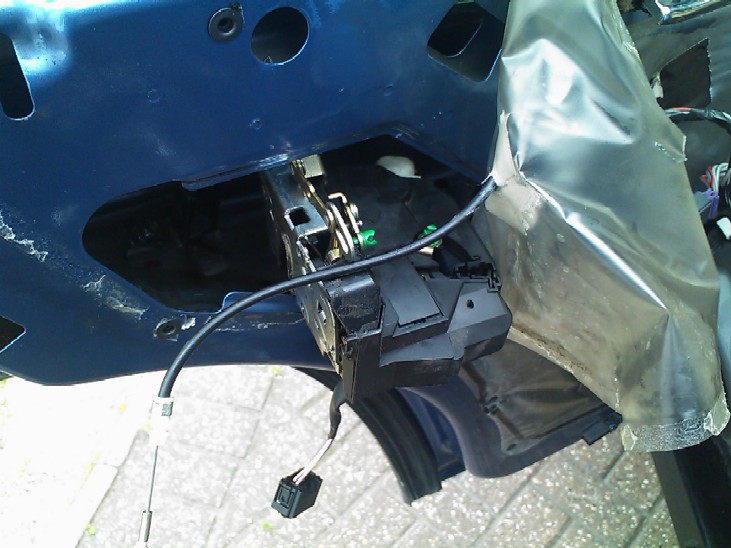
Remove 2 completely and leave one finger tight to stop the motor dropping into the door. Now the fiddly bit, you have to disconnect the rod from the lock assy that connects it to the outer door handle, its VERY difficult to even get your hand in there let alone a camera, but I tried to show it below.....
You can see its "clipped" into the green retainer, does not take much to unclip it and leave it connected to the outer handle. It pulls "out" of the retainer towards the door hinges..... Picture below with motor removed........
Once that's done, you also need to unclip the door lock button, that is held in exactly the same way and if you put your hand in and unclip it towards the outer door handle, you can then completely remove that out the way.....
Now we are pretty much ready to get the motor out, it is still connected to the interior handle release cable, but that can be disconnected once the motor is out, once you have done 1 door you would be able to disconnect that from memory before removing the motor assy. So carefully lift the door frame assy up about 3- 4 inches at the back end, having a second person here to help support it would be advisable.......
The amount you lift it is up to you, but you only need to give your self enough clearance to get the motor past the middle part of the frame that is bolted to the wheel arch section of the door.......so remove the last finger tight bolt in the motor, and with assistance ideally, lift the frame and tilt the top of it towards the back of the car, this will move the lower part of the frame towards the outer skin of the door.....
This now gives you enough room to squeeze the lock assy past the frame and out of the hole in the door...(picture shows interior handle cable disconnected)
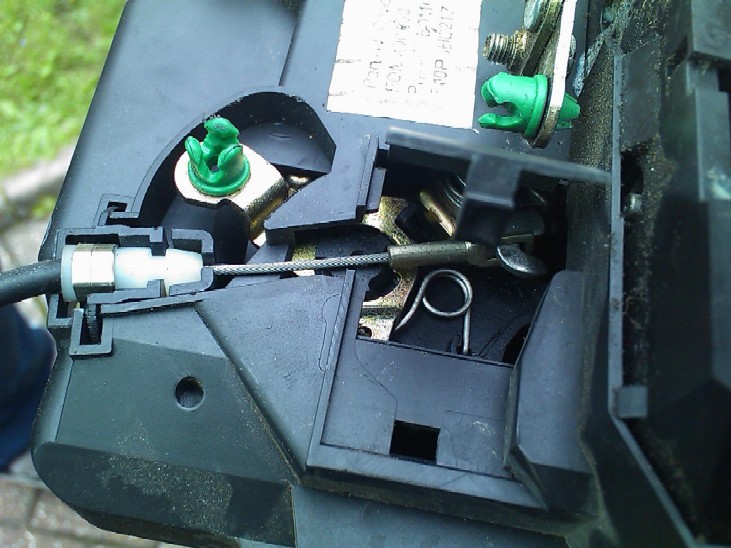
Below shows how the interior handle cable is connected to the lock assy, you lift / unclip the little flap, and remove the cable and un-hook it from the latch assy......
By all means do this with the motor still in the door (as I did), but if you have not seen or done it before then looking at the picture above will hopefully show you how its connected, there is enough slack to remove the motor and unclip it when its outside the door assy. Well that's about it really, its not a bad job if you follow the guidance I have provided here, hopefully you will find it useful. The refit is the exact reverse of the removal, don't forget to connect the interior handle cable, and both the lock button and outer handle levers when the lock assy is refitted to the door. If your splash guard was torn when removing it, then use a good quality duct tape or similar (not insulation or masking tape) to repair it. Where the splash guard is on the outer edges, it will still be able to be stuck back down with the factory "putty" used. The 2 rear doors are identical, and the front doors are similar, Passenger front door replacement will be added to the site very soon. Happy Rovering!!! :o) |
|||