![]()
|
Bush Cables - Limb Risers |
||||
|
|
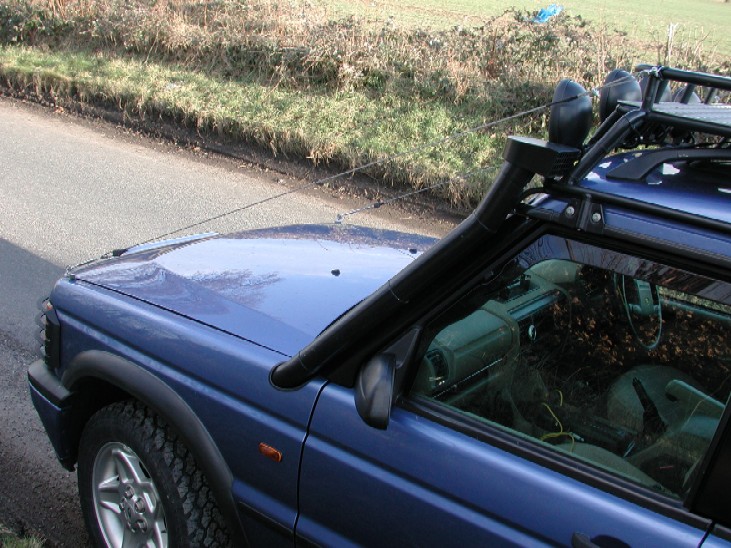
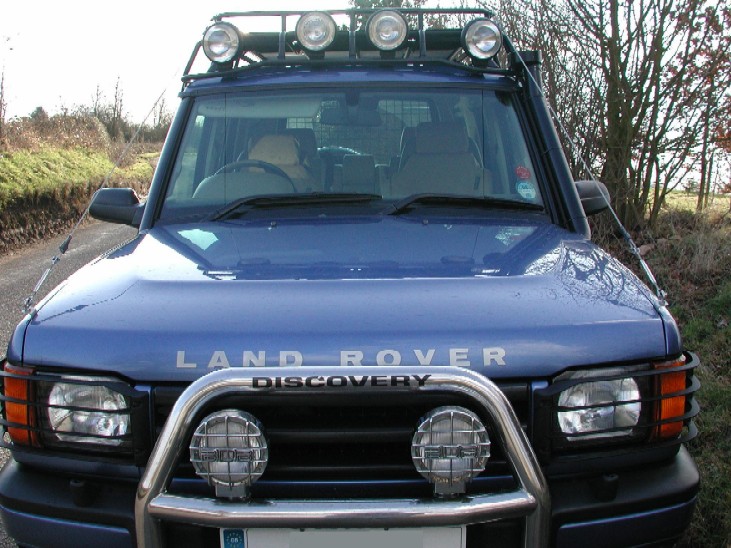
These have been around since the very first days of the camel trophy vehicles. Specifically designed to reduce the possibility of tree branches / foliage hitting the front windscreen. They have acquired several names over the years, but the all mean the same thing, they are known as Bush cables, Limb Risers, Tree Cables etc etc etc. I don't think I'll find myself in the "bush" as much as the camel trophy vehicles were as I quite like my shiny paint finish, but anything that can possibly reduce damage when off road and green laning is a good thing in my opinion. The most popular way to fit these cables is between the roof rack and the Bull bar / brush bar. This is all well and good if you have a full wraparound type bull bar, if you don't then your a bit more limited to the options you have. Fortunately, Kurt at www.bushcables.com has come up with a good idea for vehicles like mine which don't have the front bull bar fitted, and that is to use a bracket fitted in between the front wing and the bonnet.
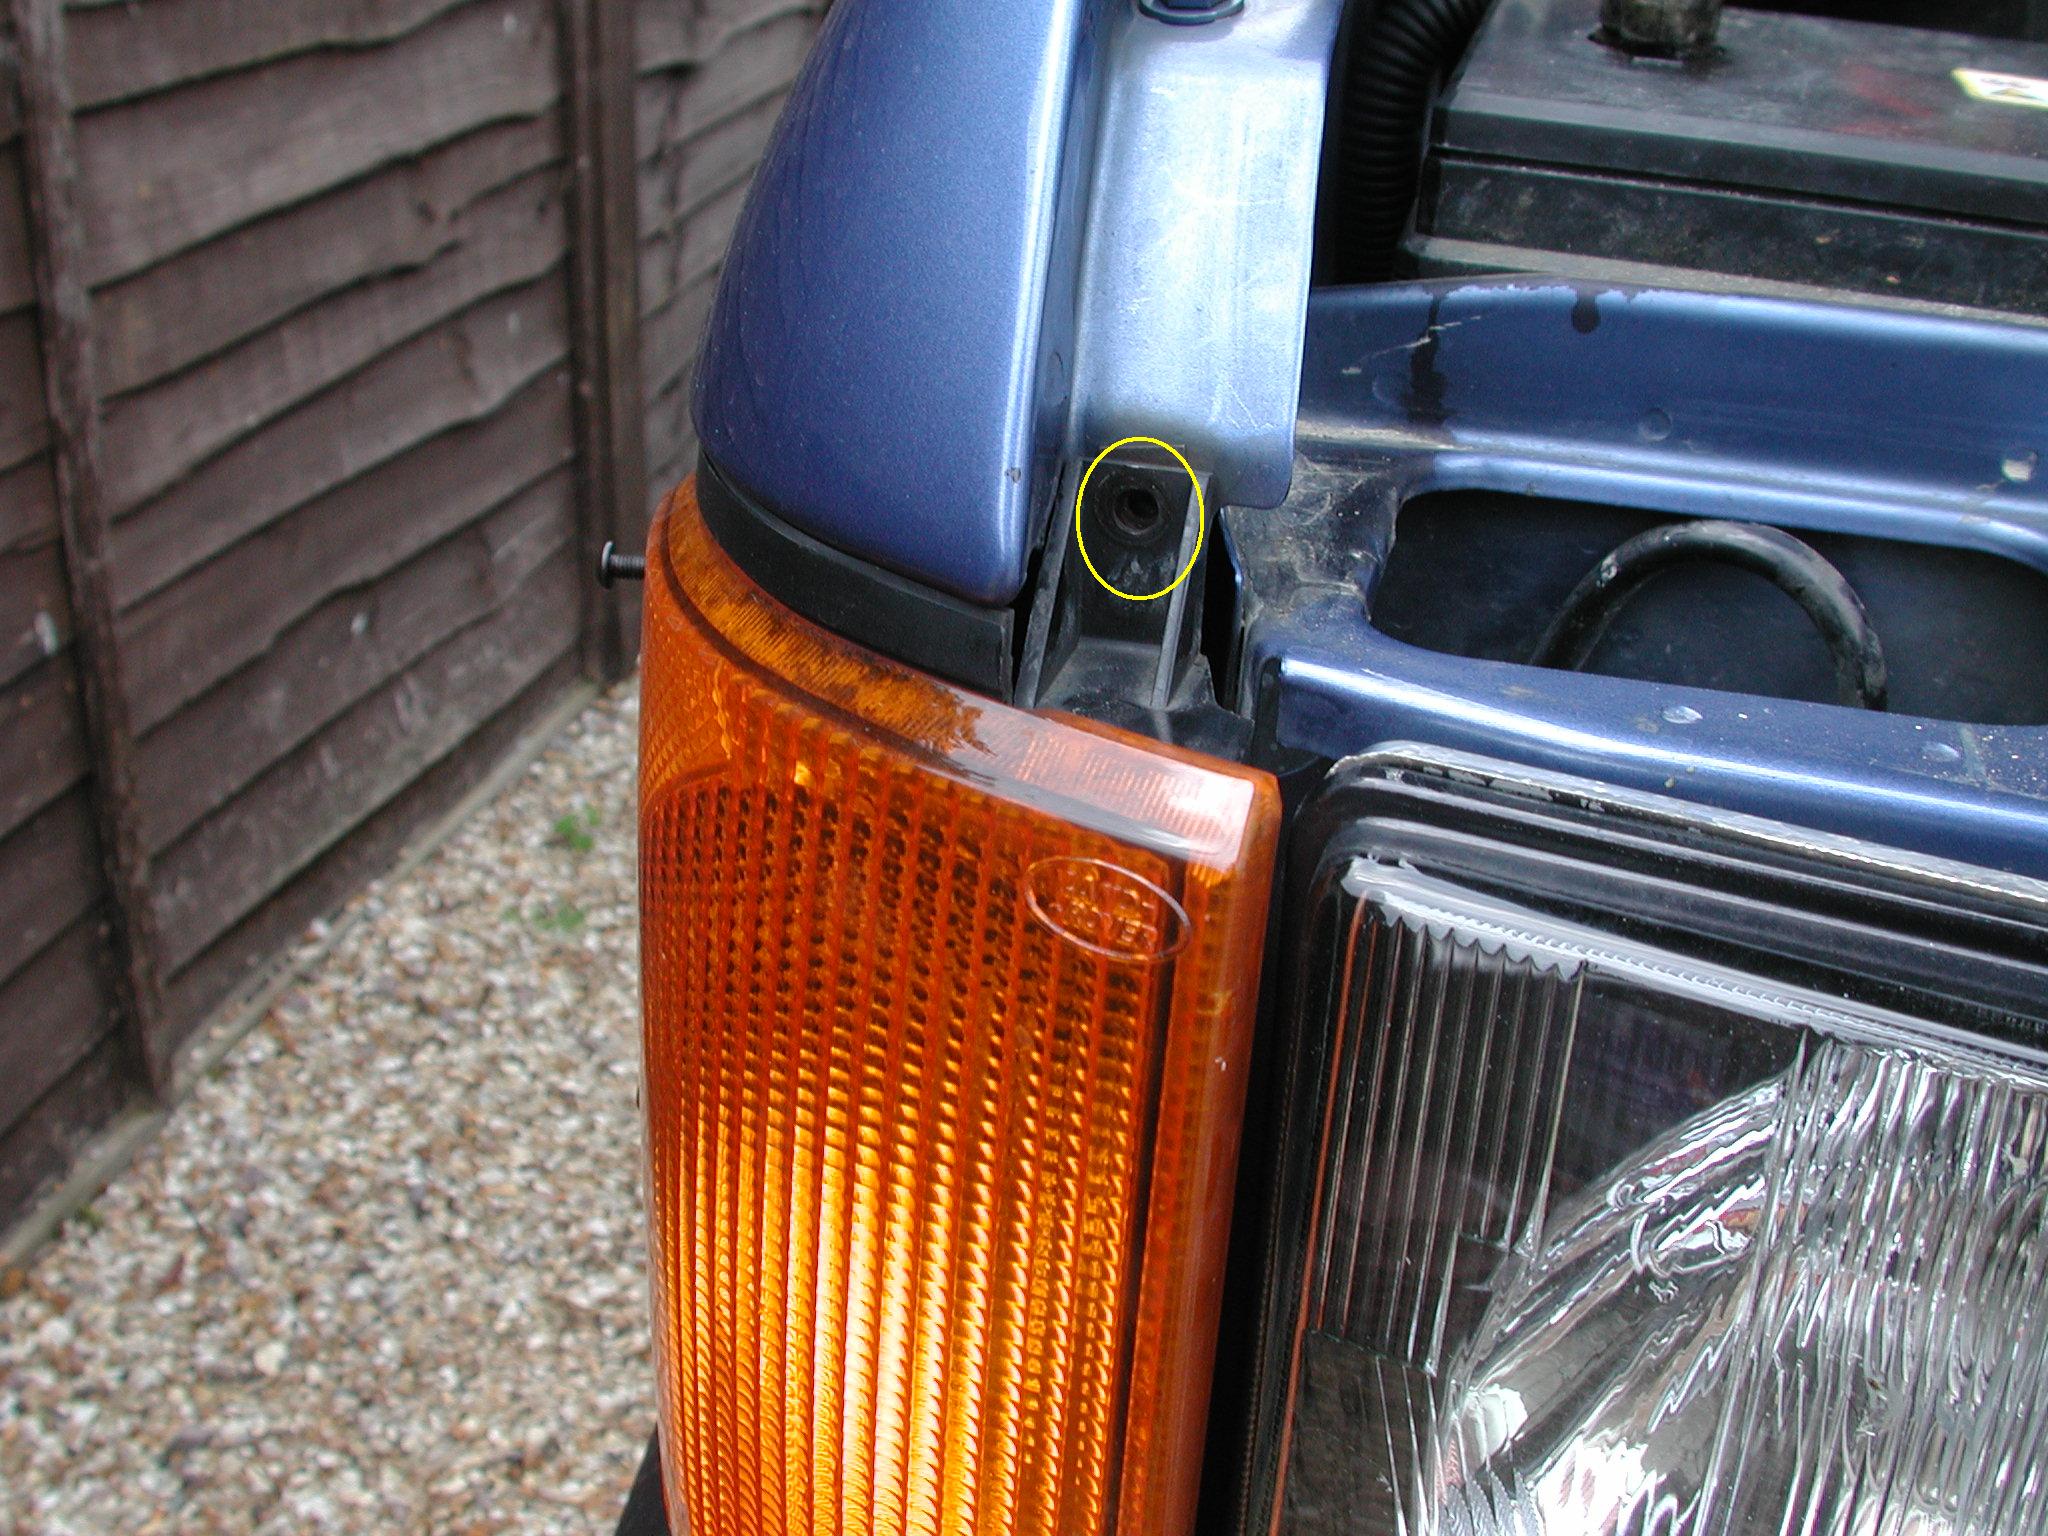
This now gives the option to have the cables fitted, obviously having a roof rack is pretty much a necessity unless your going to bolt something directly through your roof. I light bar would also provide a good mounting point if you have no roof rack. The bracket is designed to be fitted with one of the wing attachment bolts and then another bolt added as a further fixing, I chose to move the bracket a bit further back where it seemed to sit nice and snug and drill / fit 2 completely new stainless bolts and nuts to hold it in position. You will need to remove the front indicator assy to do this to allow access to behind for fitting the nuts. To remove the indicator assy, simply open the bonnet and remove the plastic cover over the headlamps, on the battery side you will need to remove the battery cover as well. Once they are off then simply undo the one self tapping screw that is at the top, and then firmly, but squarely tug the indicator forwards to remove it from the plastic spring retainers, then simply let it hang out the way as no further dis-mantling is necessary.
Once the indicator is out the way, place the brackets where you want them fitted and drill your holes and bolt it down. You can use the very front wing bolt as one of the fixings, however because of the "Indentation" in the wing in that area , I chose to move it further back where it sat really well, so 2 new holes were drilled and then the bracket was nut and bolted into position.
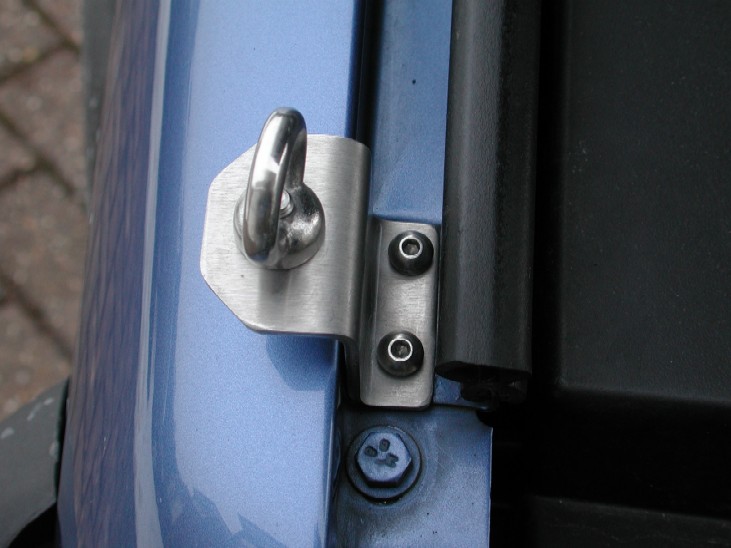
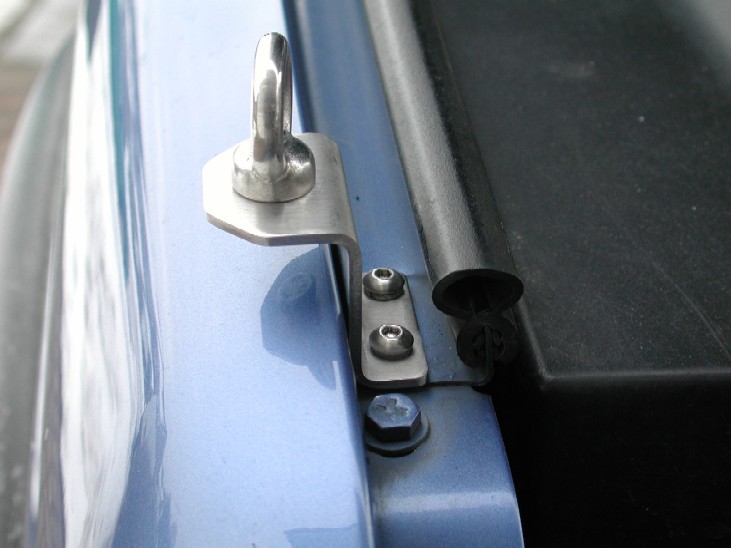
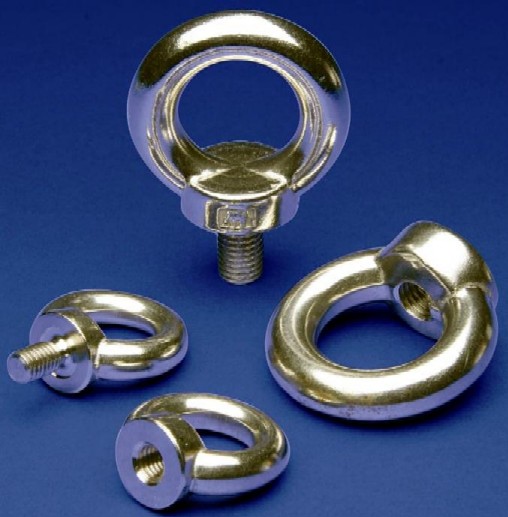
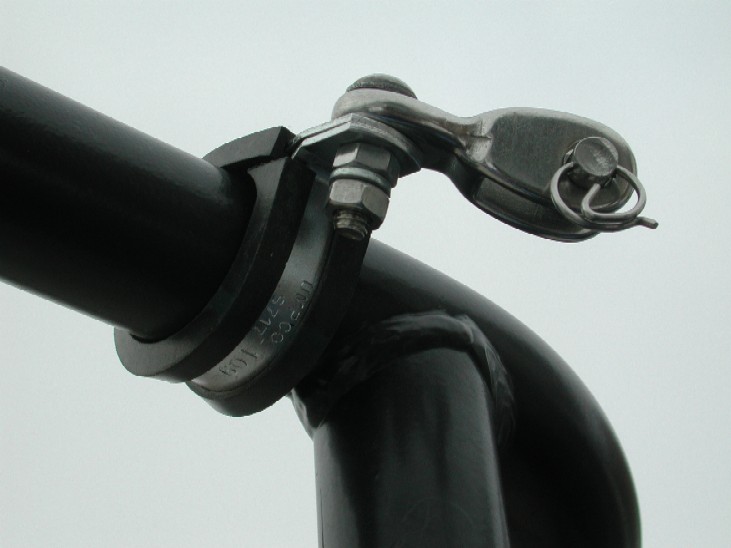
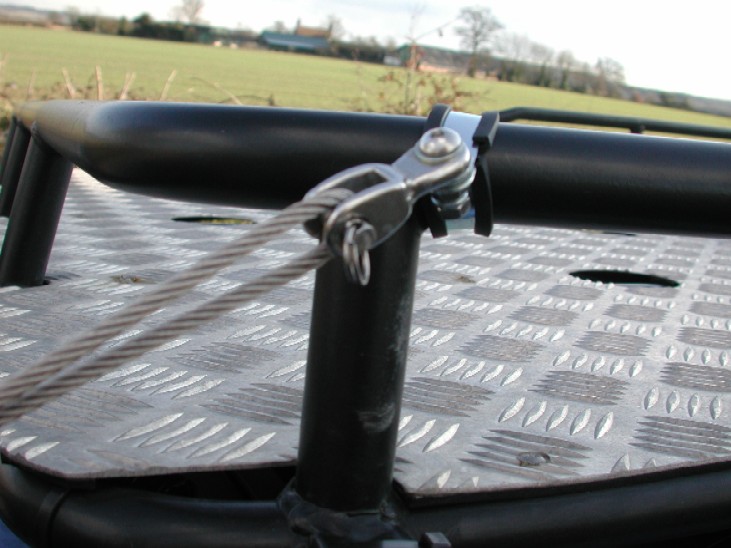
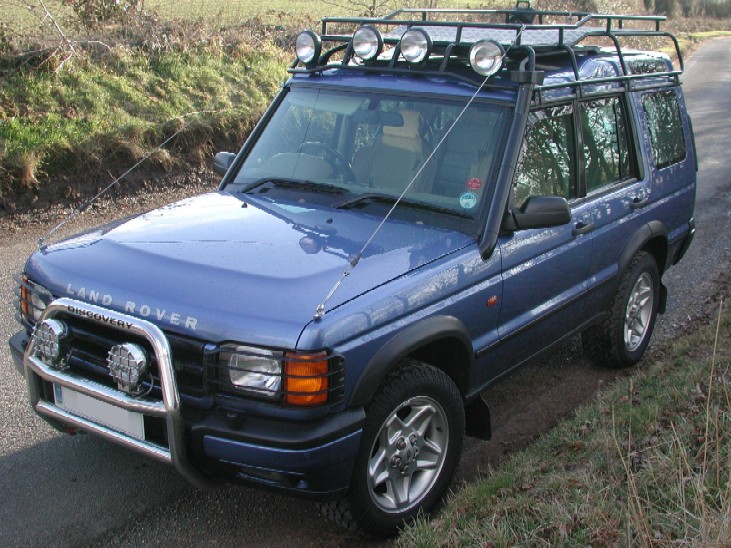
Once the brackets are done then its onto the top fixing. The easiest way is to drill a hole in the roof rack and fit an eye bolt and connect to that,
How ever I did not want to drill a hole in the rack if I did not have to, so I got some large stainless "P" clips to fit around the top tube / rail of the roof rack and used one of those on each side to connect the cables to.
What you use between the "P" clip and the cable is up to you, you could use a small shackle, a carbine hook, make a bracket or what ever you find best for your needs. I used a small fitting (toggle) that I got from a marine supply place on eBay, I found it was ideal as it had a bolt hole to connect to the "P" clip and then a quick release pin to connect to the cable Below you can see the top connection on the roof rack rail / tube.
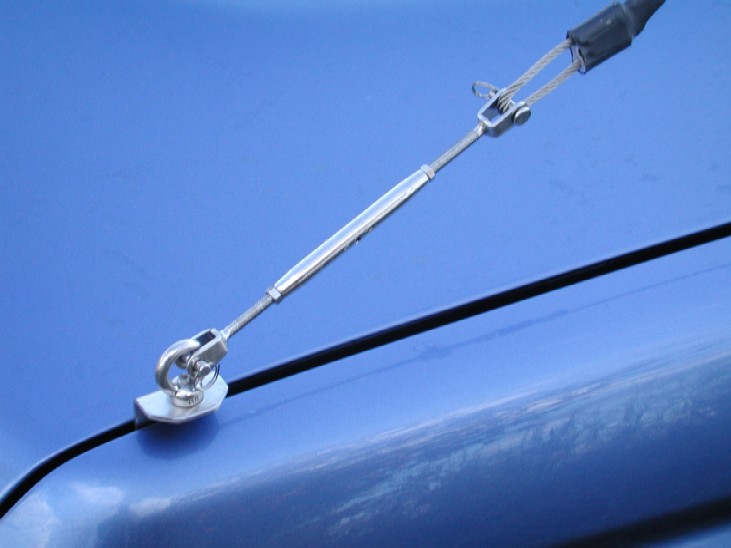
Once you have a top and bottom fixing, its a case of fitting the turnbuckles and then cutting the cable to the required length. To do this extend your turnbuckles almost fully and pull the cable towards your top fitting. The kit comes with the lower end of the 2 cables already pre - crimped / terminated and covered in heat shrink as well.
leave about 4 inches extra to allow the cable clamps to be fitted and then cut the cable. I used a hacksaw to cut the cables but wrapped the end near the cut in tape to stop it fraying. Once that was done I added some heat shrink to the cable to keep it neat and tidy Once that's done, tighten / tension the cables to the required amount and lock off the turnbuckles, and that's it, job done.
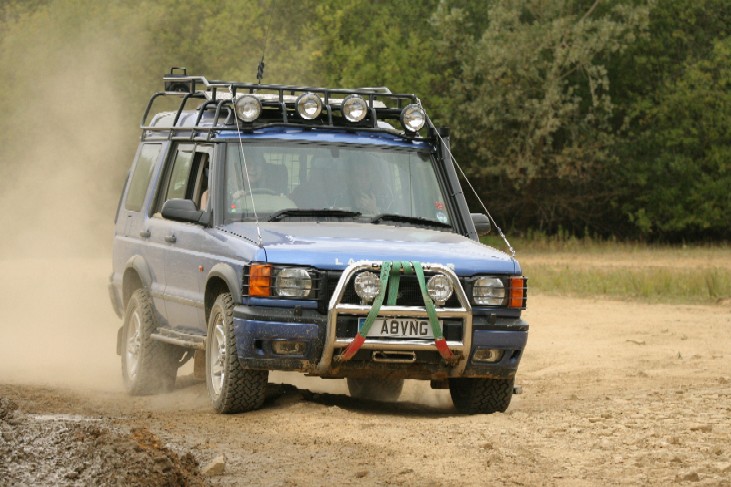
Well, hopefully they will add some more protection when off roading and in particular when laning in overgrown green lanes, they look good anyway!!! ;o) NOTES :- If you have an SD rack like mine and intend to do the same install, make sure your outer spot lights are no bigger than 188mm wide as this would interfere with the cable run up to the roof rack. The cable passes my outer roof lights with about 10mm to spare |
|||