![]()
| Workshop :- Front Shock Lower Bushes | ||||
|
|
The Discovery 2 is a heavy old beast and this
contributes to suspension components wearing out quite quickly. During the
replacement of the
front springs I had already re-fitted new anti roll bar links, but
upon disconnecting the front dampers to get the springs out, I had noticed
that the lower bushes were pretty much pooped and would need replacement
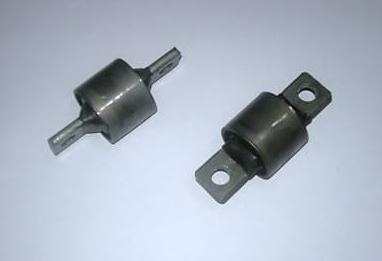
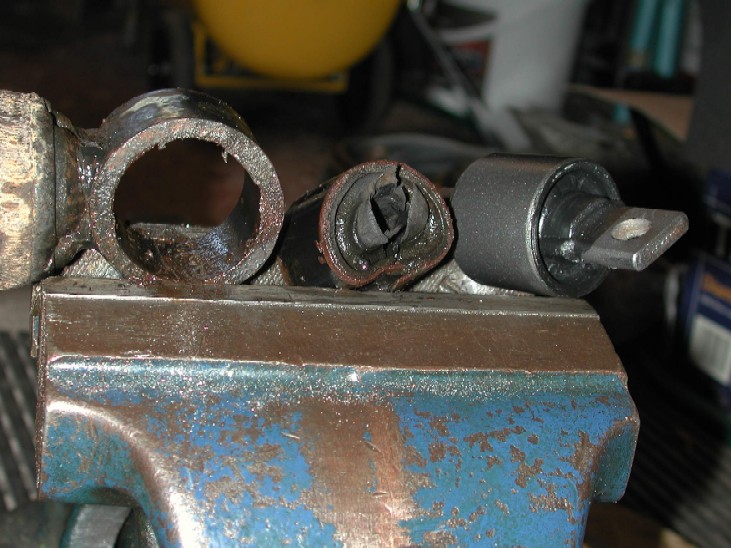
very soon. This is what they look like, available readily on Ebay, any Land Rover specialist and off course Land Rover dealers as well
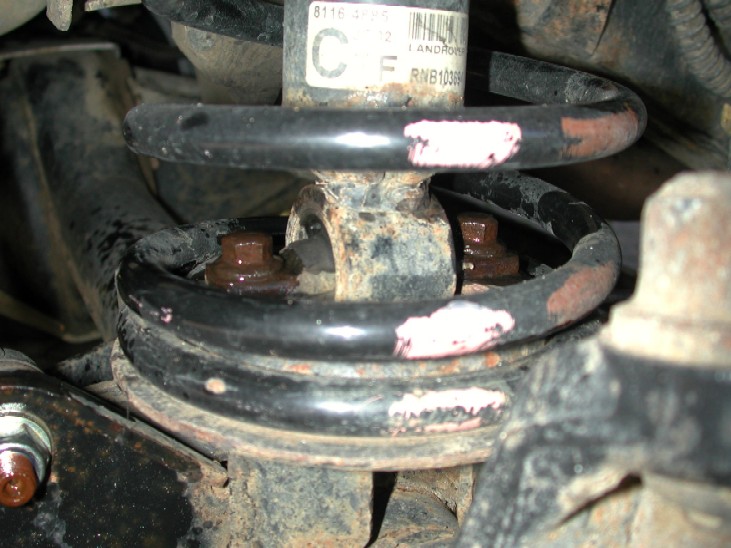
And this is where they go
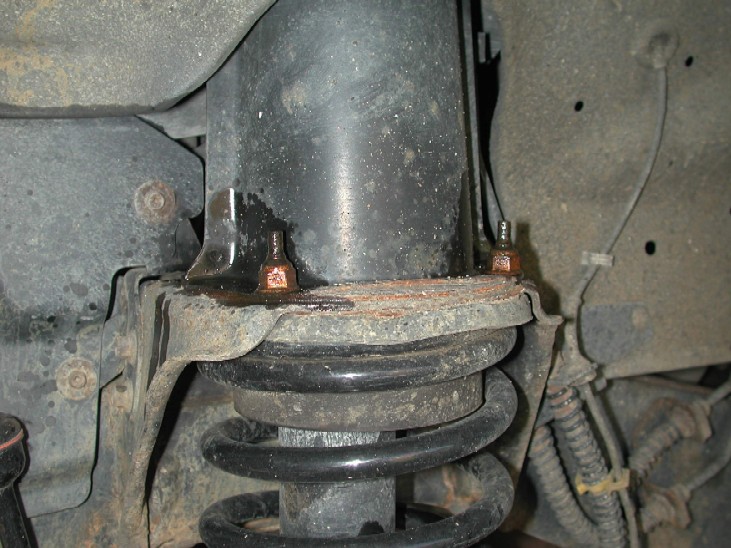
To replace the bushes is a relatively straightforward task, How ever I would recommend that before you tackle it, you either have access to a hydraulic press, or a good large vice and a good selection of sockets up to 32mm in size. To start off, you need to jack up and support the vehicle using a trolley jack and axle stands, I do not advise using the cars bottle jack for ANY maintenance tasks. Remove the wheel assy from the car, then you will see the lower bush etc at the bottom of the damper. Give the 2 lower bolts a good spray with some penetrating fluid, or WD 40 or similar. I knew mine would come undone as they had been out recently, but even so some spray lubricant etc always helps diss-assembly. The shock and turret assy is held by these 2 bolts at the bottom and 4 nuts / studs at the top, so give the top ones a good soaking as well while your there
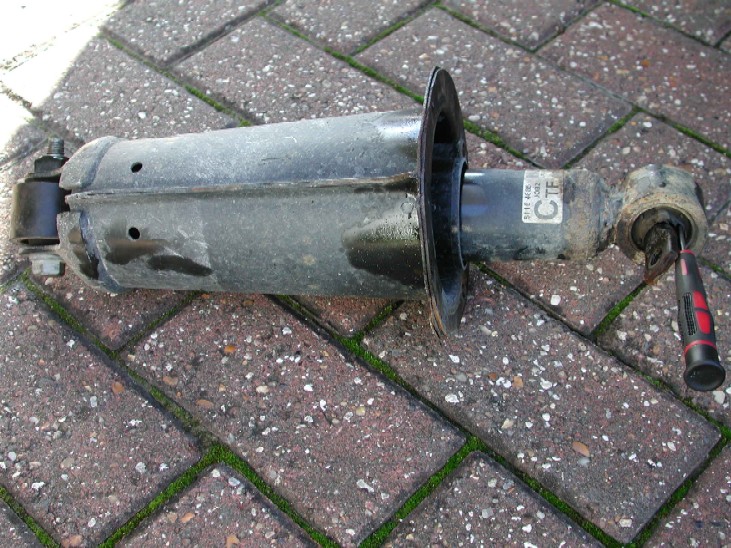
NOTE !! you will be disconnecting the damper assy from the car and axle, this is the ONLY thing that limits the travel of the axle, so ensure the axle is supported to stop it dropping away !! Remove all 4 nuts at the the top, and the 2 bolts at the bottom (all 13 MM) . On vehicles fitted with ACE, the drivers side shock turret (UK CAR) also has a bracket supporting the ACE pipes fitted to the inner 2 nuts / studs. This will simply lift of the studs and can be maneuvered out the way, it's a little stiff and fiddly, but it does go. TAKE NOTE OF WHICH WAY ROUND THE TOP DAMPER BOLT IS FACING WHEN THE TURRET IS STILL FITTED IN THE CAR Once all the bolts / nuts are off, you need to "collapse" the shock, use a firm hand pressures and push the damper up into the shock turret. Then its simply a case of CAREFULLY lifting the whole shock mount / damper out from the top of the car in the engine bay. Take your time and with a wiggle here and there it will come out. On TD5 engine vehicles, it helps to unclip the coolant expansion tank from its mountings, and carefully move it out the way to aid clearance in removing the shock tower etc out. This is what it looks like when its out,
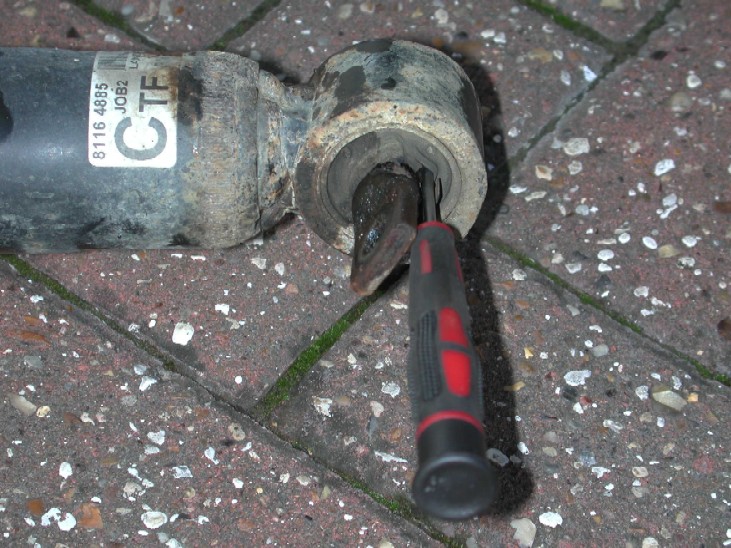
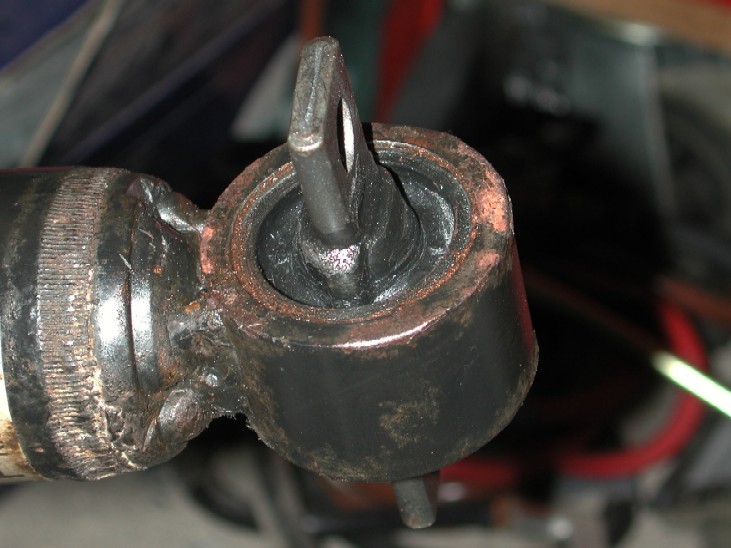
Below is an example of how worn the bush is, you can see I can easily slide a screw driver down the side of the bush, there should be no gap here at all !!!. This amount of wear allows the shock to move in all directions and is not good!!. The passenger side was even worse !!!
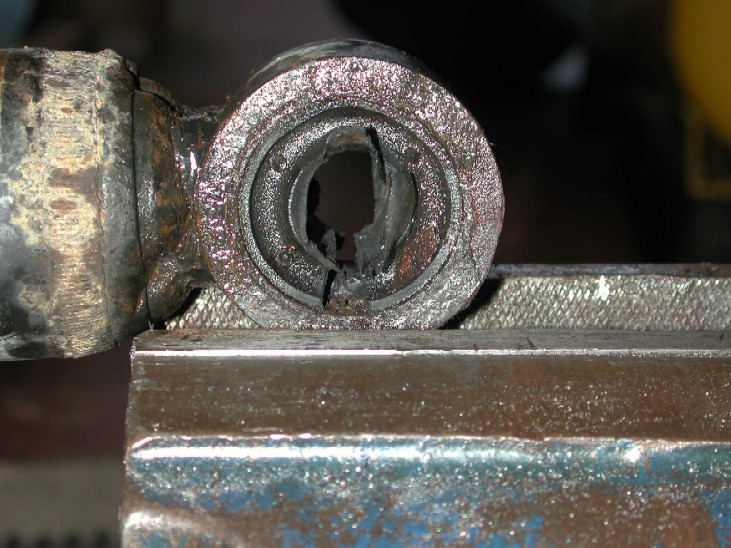
NOTE!!!. "if" your front dampers are worn and you intend to replace them, they "usually" come already fitted with new lower bushes anyway. The procedure is the same, you would now just remove the top damper bolt and refit the new damper back to the turret and refit back to the car. Now its time to remove the bush from the damper. If you have access to a hydraulic press then great, go ahead and use that to push the bush out and refit the new one, take note of which way round the bush is fitted, the "flats" should be facing vertically up the damper. I do have access to a press at my place of work, how ever it can also be done as below. In and "ideal" world, we could use a socket of the same size as the outer of the bush, support the shock and give it a good belt with a hammer to knock the bush out, how ever these have been in here a long time and it was never going to be that easy !! This is how I did it, support the damper in a vice so the edge of the bush is level or just above the top of the vice jaws like below, this will enable you to cut all the way down through the bush until you hit the hard jaws of the vice.
You can see from the picture above, I managed to push out the fixing straight through the bush to get it out the way, I did this with firm hand pressure !!, its another indication of how worn the bushes were. I then CAREFULLY fed a hacksaw through the hole, and cut down into the bush till it was all the way to the edge.
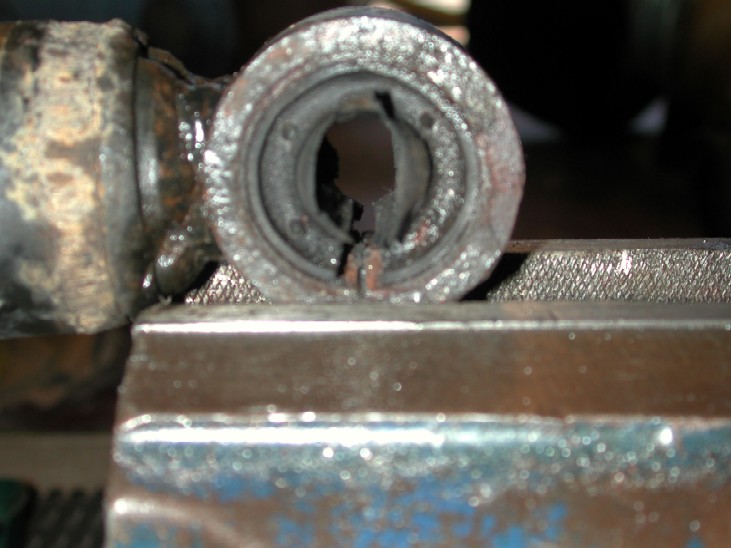
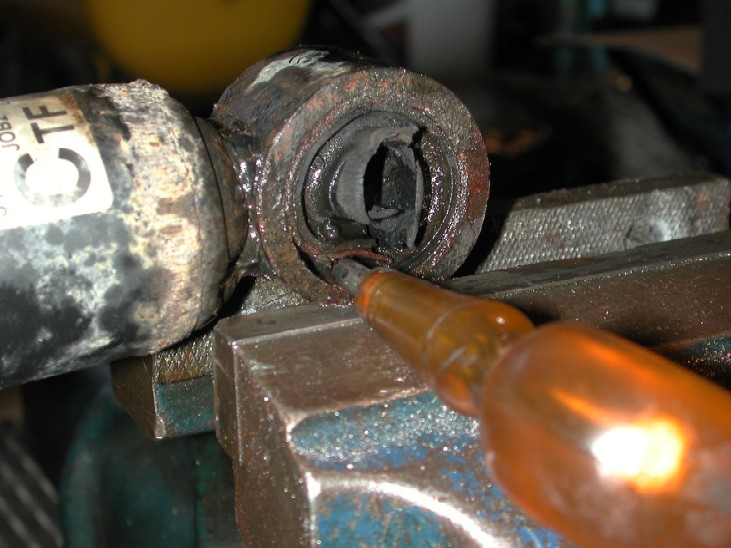
This creates a "split" in the bush and will relieve all the "pressure" in there. I then simply got an old flat bladed screw driver and hammered it down in between the bush and the shock taking care not to damage the inner damper surface.
Work your way around a little at a time from the split you cut, until the bush simply falls out. Below is the old removed bush and the new one to.
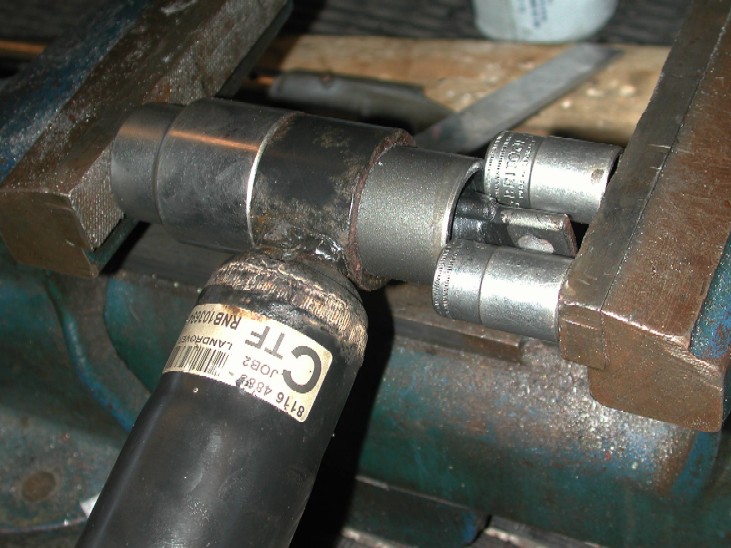
Now give the end of the shock a good clean out inside and "if" there is any burrs or marks, lightly sand them or file them of so they don't snag the new bush going in. The bushes "should" probably go in dry, how ever I put a very "light" smear of copper slip to help the new bush slide in. This is where the fun begins, and having a very good selection of sockets will help a LOT. I used a 36mm socket on one side as it has to be big enough to allow the bush fixing to move inside it as you push it through the shock, then 2 smaller sockets to push evenly on each side of the bush. You will need to use sockets "taller" than the bush fitting, having a large vice to fit this all in width ways is definitely needed !!
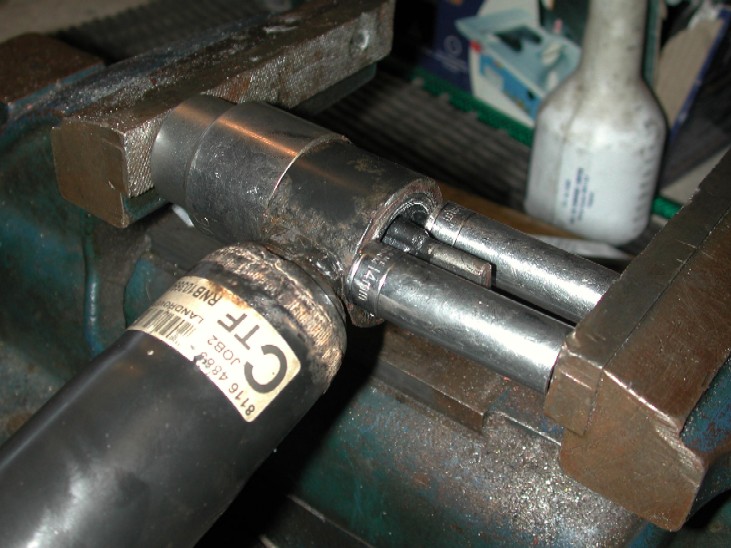
It's a little fiddly lining it all up, Make sure the bush is "square" in the hole and make sure the bush is correctly positioned with the flats facing up the shock before you start to push it in !! Its then simply a case of winding in the vice slowly, it needs a good bit of force but it will go quite easily once its started in the hole. Depending on what sockets you have / use, when the bush gets nearly flush with the shock, the outer socket will hit the bottom of the damper and stop you going any further, this is where I changed the sockets for "deep" thinner ones to allow them to go past the shock and push the bush flush into the hole
New bush fitted and flush with the shock.
That's about it, repeat the task for the other side of the car, refitting the shock tower etc is a reverse of the removal, take your time fiddling the turret down onto the struts, DON'T FORGET the ACE pipe bracket on the drivers side and torque all the bolts up to the figures below and your done!!! TORQUE FIGURES :- Damper lower 2 bolts 55NM or 40Lbs ft Turret to chassis nuts 23NM or 17Lbs ft Wheel Nuts 140NM or 103Lbs ft |
|||