![]()
| Faults and Fixes - Wheel Hub / Front Bearing |
|
|
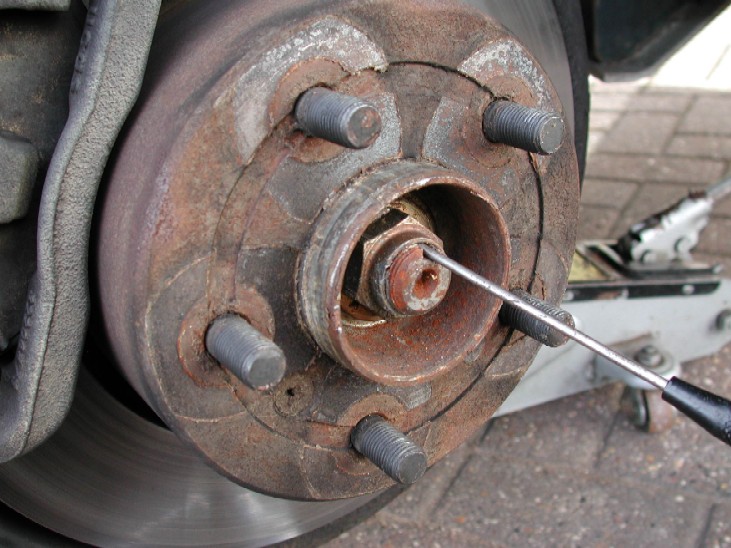
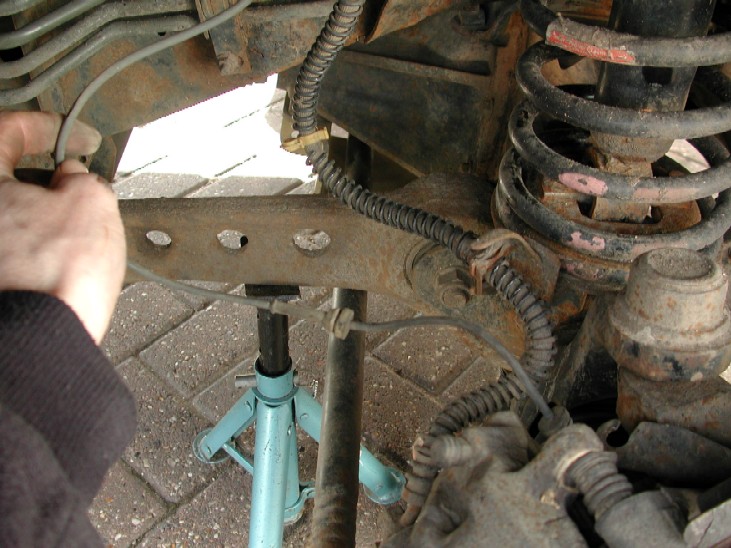
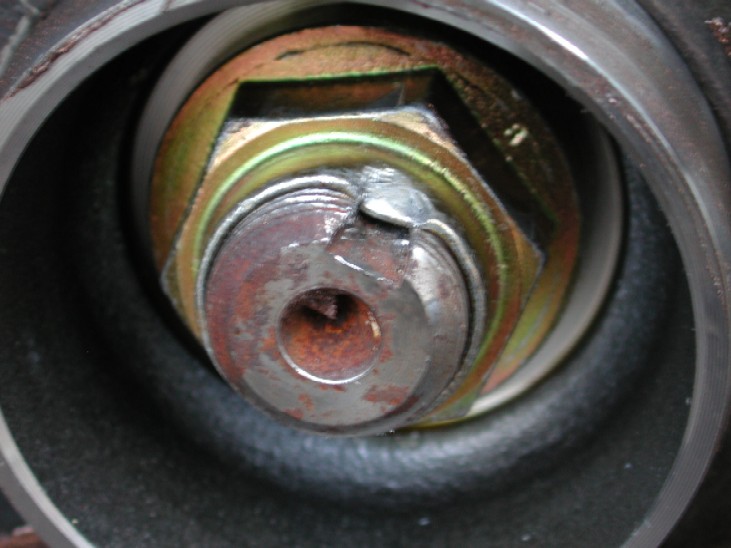
During this years MOT, it was picked up that the front offside wheel bearing had excessive play in it. Now when I was told this, if I'm honest I thought they were being a bit "picky" as its very common for the Discovery 2 to throw up the "3 amigos" ( ABS / TC / HDC) lights if there is a lot of play in a bearing as the ABS sensor picks up the fluctuations and goes mad. Well I had no lights at all, so all I could do was take it home and investigate. Well upon jacking up the truck and having a "wiggle", to my surprise they were not being picky, it def had a lot of play in both directions........dam, not a good thing as the front bearings on the Disovery2's are none serviceable and come as part of the Hub assy. These consequently are not cheap, the price's range from about £160 for replacement items, up to about £260 for the genuine Land Rover ones. Now if I'm honest, with such an important item and the "common" issues / faults that can occur with the ABS sensors etc, I bit the bullet and went for a Genuine item after a little haggling with my local dealer. Changing the front hub assy is not really a difficult job, but the issue is the final torque of the Hub nut on re-assembly, it is 360 Lbs ft or 490 NM, so do this you will need to have access to a pretty big torque wrench, fortunately I use them at work and it was easy enough to "borrow" one for the weekend. So first off, crack the wheel nuts loose then jack up and support the side your doing on an axle stand. Remove the road wheel and that will show you the Hub stake nut. Its called a stake nut as once its finally fitted, a punch or similar is used to "stake" a section of the nut into the slot in the drive shaft as a way of "locking" the nut on. A NEW nut must be used on reinstallation. So to remove the stake, simply use a small punch or old screwdriver and hammer / knock the stake out so you can undo the nut.
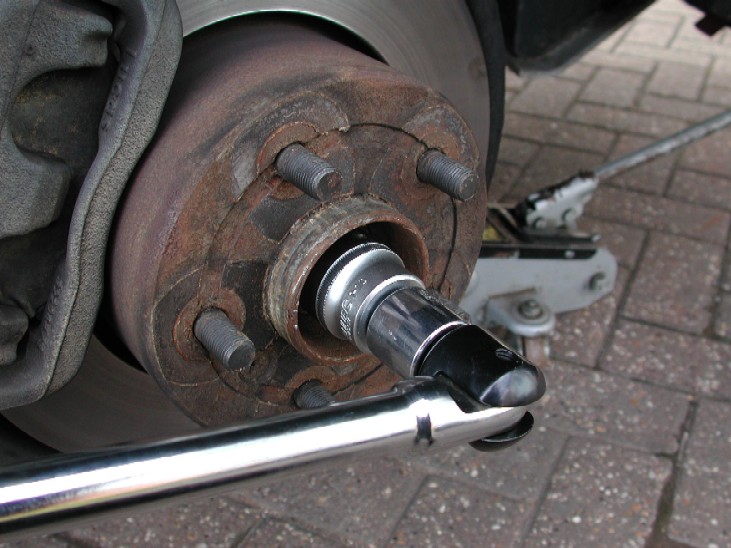
Here lies the first issue, you need to "break" the torque on the nut. I m pretty sure its supposed to be 32mm, how ever I found that size just a little to "sloppy" for my liking with such a high torque, so I used an 1-1/4" AF 6 point socket as it just fitted better. Its about 0.025" smaller than 32mm and that seems to make all the difference. I would HIGHLY recommend you use a 6 point socket as to avoid the possibility of "rounding" the nut off.
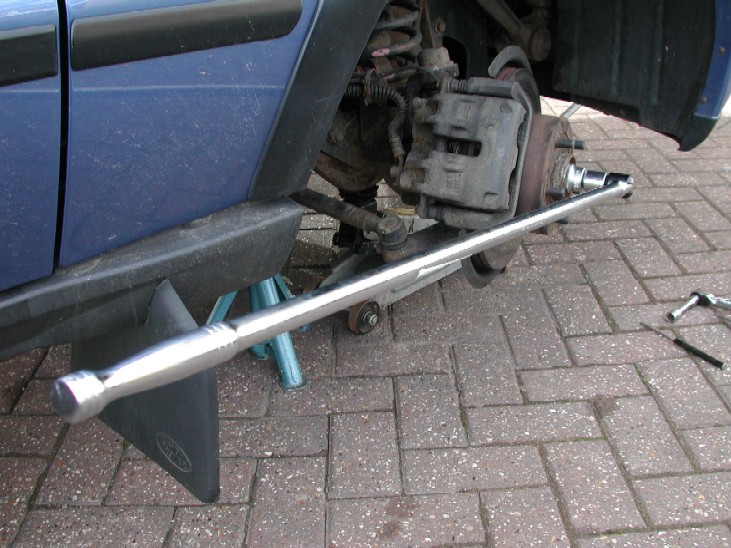
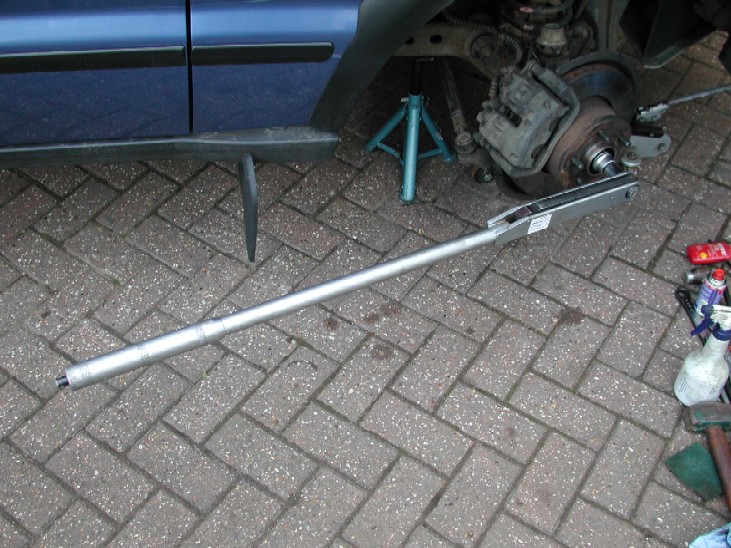
As well as a big torque wrench for refit, you really need a good breaker bar to undo it in the first place. I used a 3/4 drive 1.2m bar and even then it had some force applied before the nut come undone. Turn the wheel so it brings you away from the car when undoing the nut. I engaged my CDL and left the auto box in park and transfer box in LOW range to assist in holding the hub still and that was enough, you could also start the car and have a second person apply the brakes to also help hold it if need be.
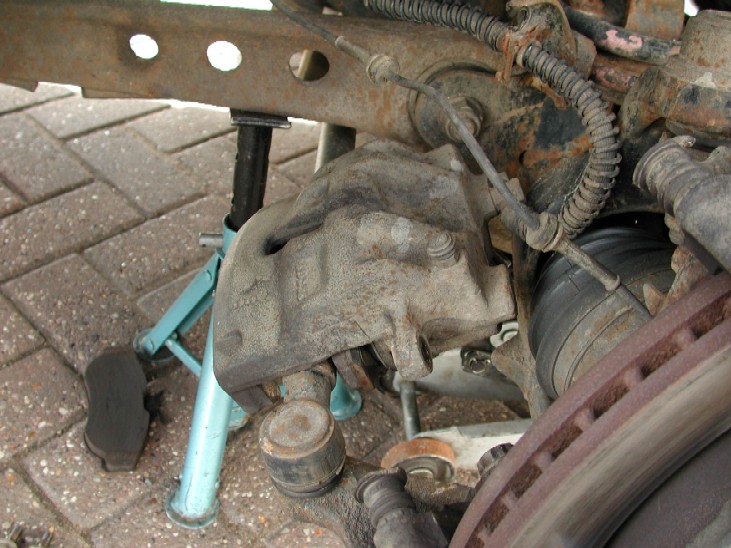
You just need to "break" the torque for now and undo 1 or 2 turns. Now you need to remove the brake calipers and brake disc as well. For "full" info on that check front disc / pad replacement article. For a quick guide, you need to first remove the pad carrying part of the caliper, undo the 2 bolts at the caliper sliders.
Then before you lift the caliper away, unclip the ABS sensor loom from all the points up to the inner wheel arch. Then go into the engine bay and follow the loom to the connector on the inner wheel arch. It is just below the brake master cylinder on my TD5 (UK car). Feed the loom back out under the wheel arch and leave it there for now.
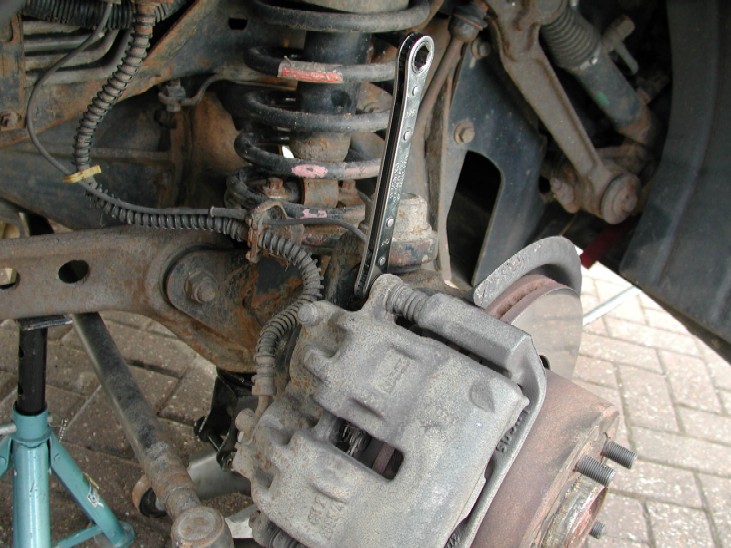
Then lift the caliper away and rest it on the radius arm, take care not to kink or damage the brake pipe. You may need to remove the brake pads and store them safely out the way.
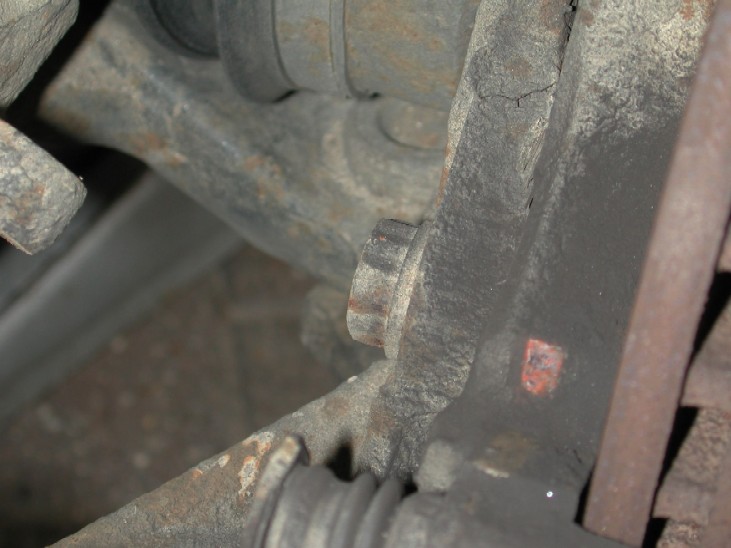
Next you have to remove the inner part of the caliper, that's held on by the 2 12 point bolts that you can now see at the back of the hub.
Now you can remove the brake disc by undoing the brake securing screw and then lifting of the disc. If your discs have been of recently then they should come off pretty easily, if not, then spray some penetrating oil around he centre part of the disc / hub and let it soak for a bit. Then if need use a block of wood and give the disc a little help with a hammer to remove it. Once the disc is off, you can then start on the Hub removal. The Hub is held on by 4 15mm bolts from the back, they should not be that tight. Applying a little penetrating / dis-assembly oil is always a good idea. Whilst your undoing those bolts, apply some oil to where the hub meets the steering knuckle as its been in there a long time!!.
You will need to turn the wheel each way to get access to either the front or rear bolts, be careful of the brake caliper resting on the steering arm when doing this. As with the Hub nut, 6 pointed sockets are always advisable on items like brakes as they get treated to all the elements and are usually rather tight / corroded to come undone. NOTE the top rear bolt also holds on the bracket for the ABS sensor loom closest to the Hub.
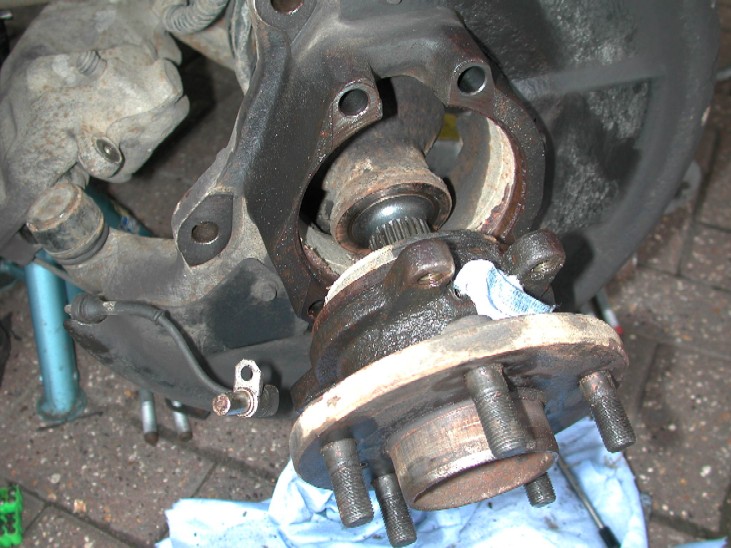
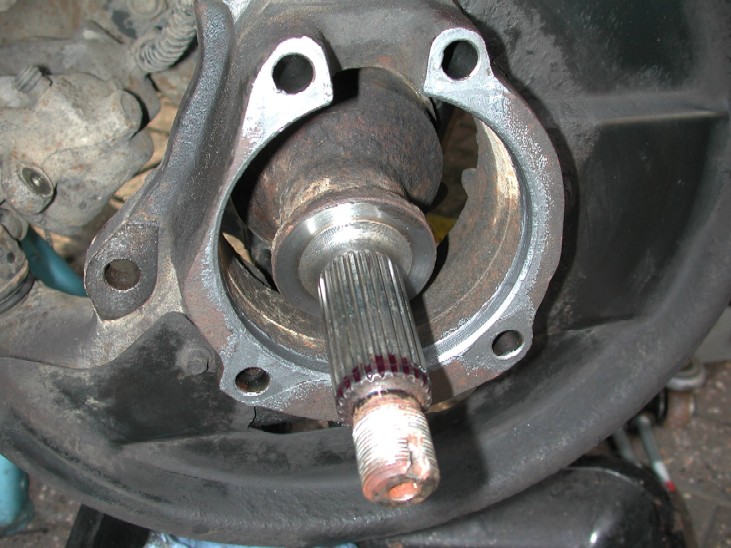
Now you cab remove the Hub Stake nut completely. Then using a hammer I gave the back of the hub a little "tinkering" all the way round to help free it from the steering knuckle. Its pretty easy to see if its started to come away. For the next part, the "official" way is to remove the Hub / drive shaft as one assy and then split the 2 when off the vehicle using a press if need be, this would also mean you would have to replace the drive shaft oil seal as well.. Well this would be a pain in the bum to me, so I tried it a different way I loosely re-fitted 2 bolts back into the Hub and then used a standard 3 legged puller on the Hub itself and after a few turns it simply began to come free from the driveshaft
So with a combination of the hammer on the rear of the hub, and the puller, the hub assy came away nicely both from the steering knuckle and the drive shaft and there is no need to replace / disturb any oil seals etc ;o)
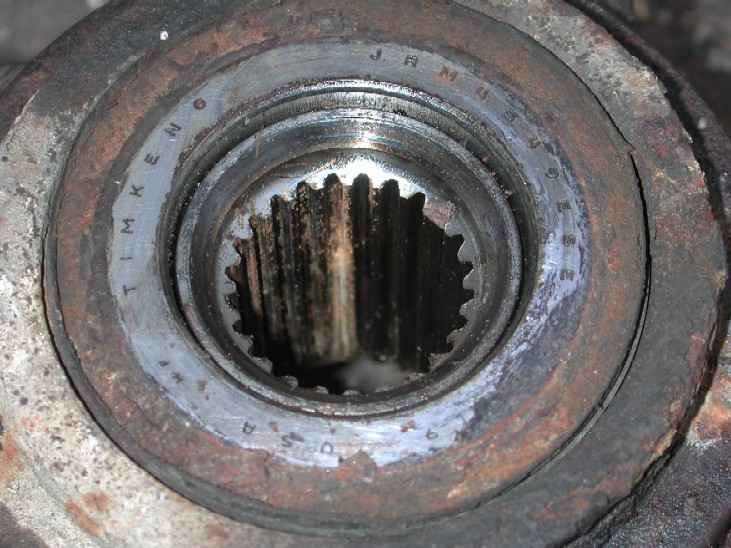
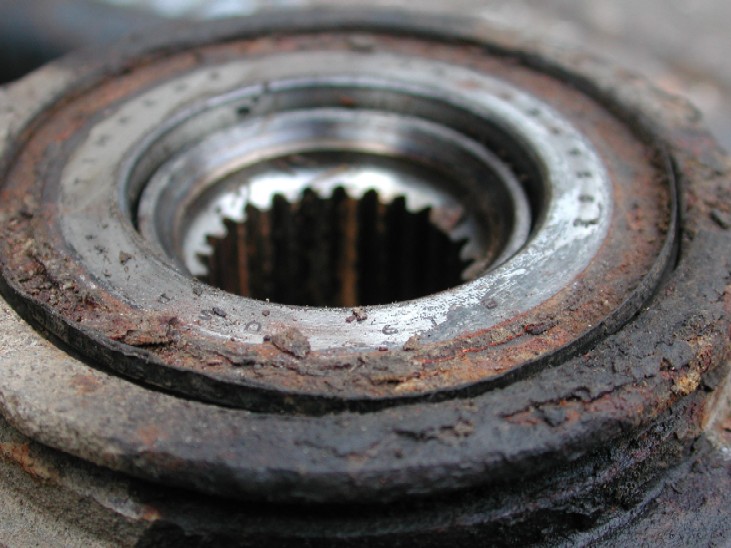
Feed the hub of the drive shaft and also feed out the ABS wiring loom. Heres the back of the hub showing the bearing etc, looks a little worse for wear!!.
The movement in the bearing was very minimal when off the car, but obviously when you hang a large wheel off it, the movement is "magnified" and it feels a lot worse.
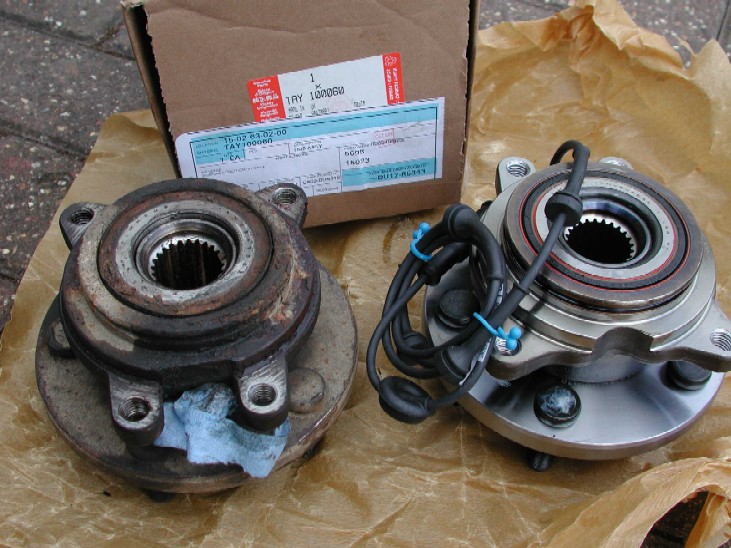
Old v New, I know which one I prefer!!.
As you can see the new Hub assy comes complete with a new ABS sensor and wiring loom already installed. DO NOT disturb / remove the sensor!!! You will probably have noticed that my old hub has no ABS sensor installed. There is a reason for this and I will explain why at the end of the article. Now its time to get it all cleaned up and ready for the shiny new one!!. First of clean the drive shaft splines carefully of any dust / dirt / oil and old loctite etc. Then clean mating face of the steering knuckle where the hub sits and apply a smear of anti-seize compound to it.
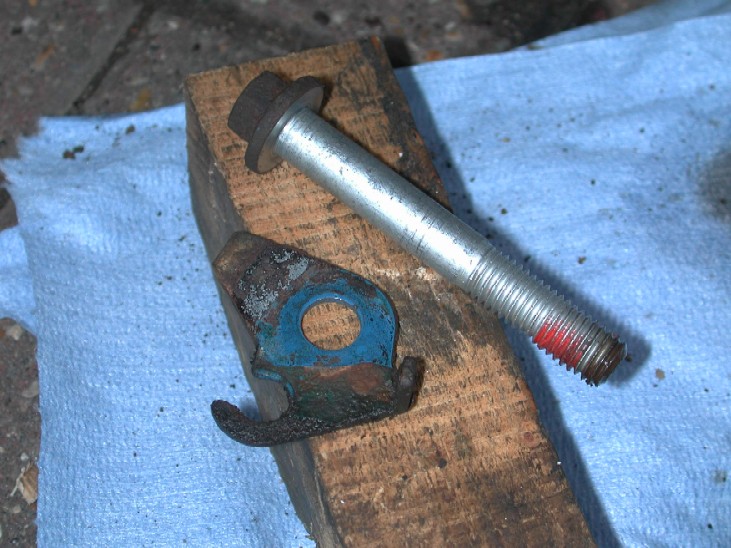
When your ready to start the re-assembly, you need to apply a 3mm wide bead of loctite 640 (or threadlock) as above to the very end of the driveshaft. This will then be smeared down to the splines as you push the new hub assy on. Make sure your have all your tools and bits ready at hand as the Hub assy must be refitted and finally torqued up BEFORE the Loctite goes off!! Don't panic its not a 30 second race, but once you start the refit process carry on completely at least till you get the Hub / Disc / Caliper back on ready for the final torque to be done to the NEW stake nut. The refit is a reverse of the removal, but MAKE SURE you "feed" the new Hub / ABS loom into the steering knuckle as you refit it. Don't forget the bracket that fits the top rear bolt for the ABS loom. Once the Hub / Brake Disc / Pads / Caliper is all back on, its time for the Big torque wrench to earn its money. Torque the drive shaft nut up to 360Lbs Ft or 490 NM
Then, using a punch or similar, re-do the stake on the NEW drive shaft nut to lock it on.
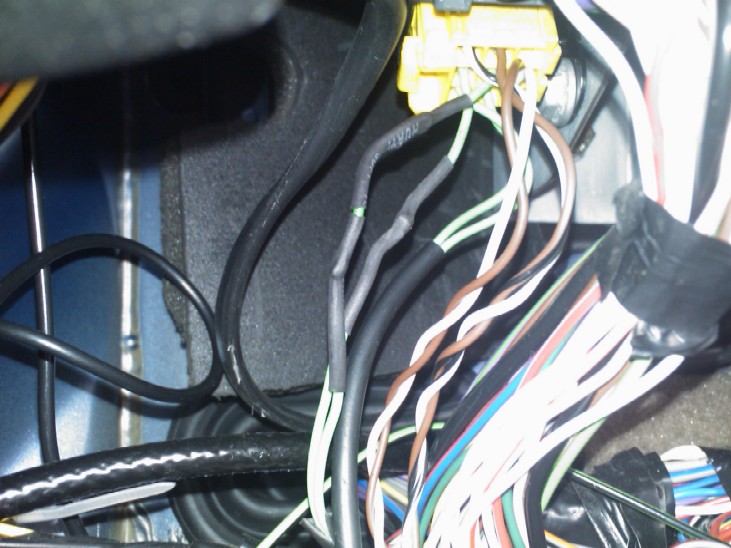
NOTES. Now I mentioned earlier that my old hub had the ABS sensor removed, the reason for this was at "some" point in the cars history a new sensor was fitted to the offside Hub. I'm led to believe that they "could" come with a full length loom that was wired directly back into the car and into the SLABS ECU. Well this is what I had on the drivers side. So I had to trace that loom back, and reconnect the "original" car loom back to the SLABS ecu and into the factory wiring / plug on the inner wing. This then allowed me to use the new sensor / loom assy in the new hub. The reason for removing it from the hub is that the ABS bracket on the sensor would not fit through the hole on the inner wing, so the loom had to come out the other way from inside to out. I will keep this as a spare just incase. I did intend to take some photos of it, but it was getting dark by then. What I will say is this, that the wiring was a complete mess / abortion at the SLABS Ecu and I hope it was not a dealer who did it !!, its a good thing that its now tidied up and back to how its supposed to be from the factory ;o) UPDATE here's a picture of the loom / plug at the SLABS ECU, you can see where I had to re-solder the loom back together and then I covered them in heat shrink to protect them.
|