![]()
| WORKSHOP :- TD5 Fuel Injector Harness Replacement |
|
|
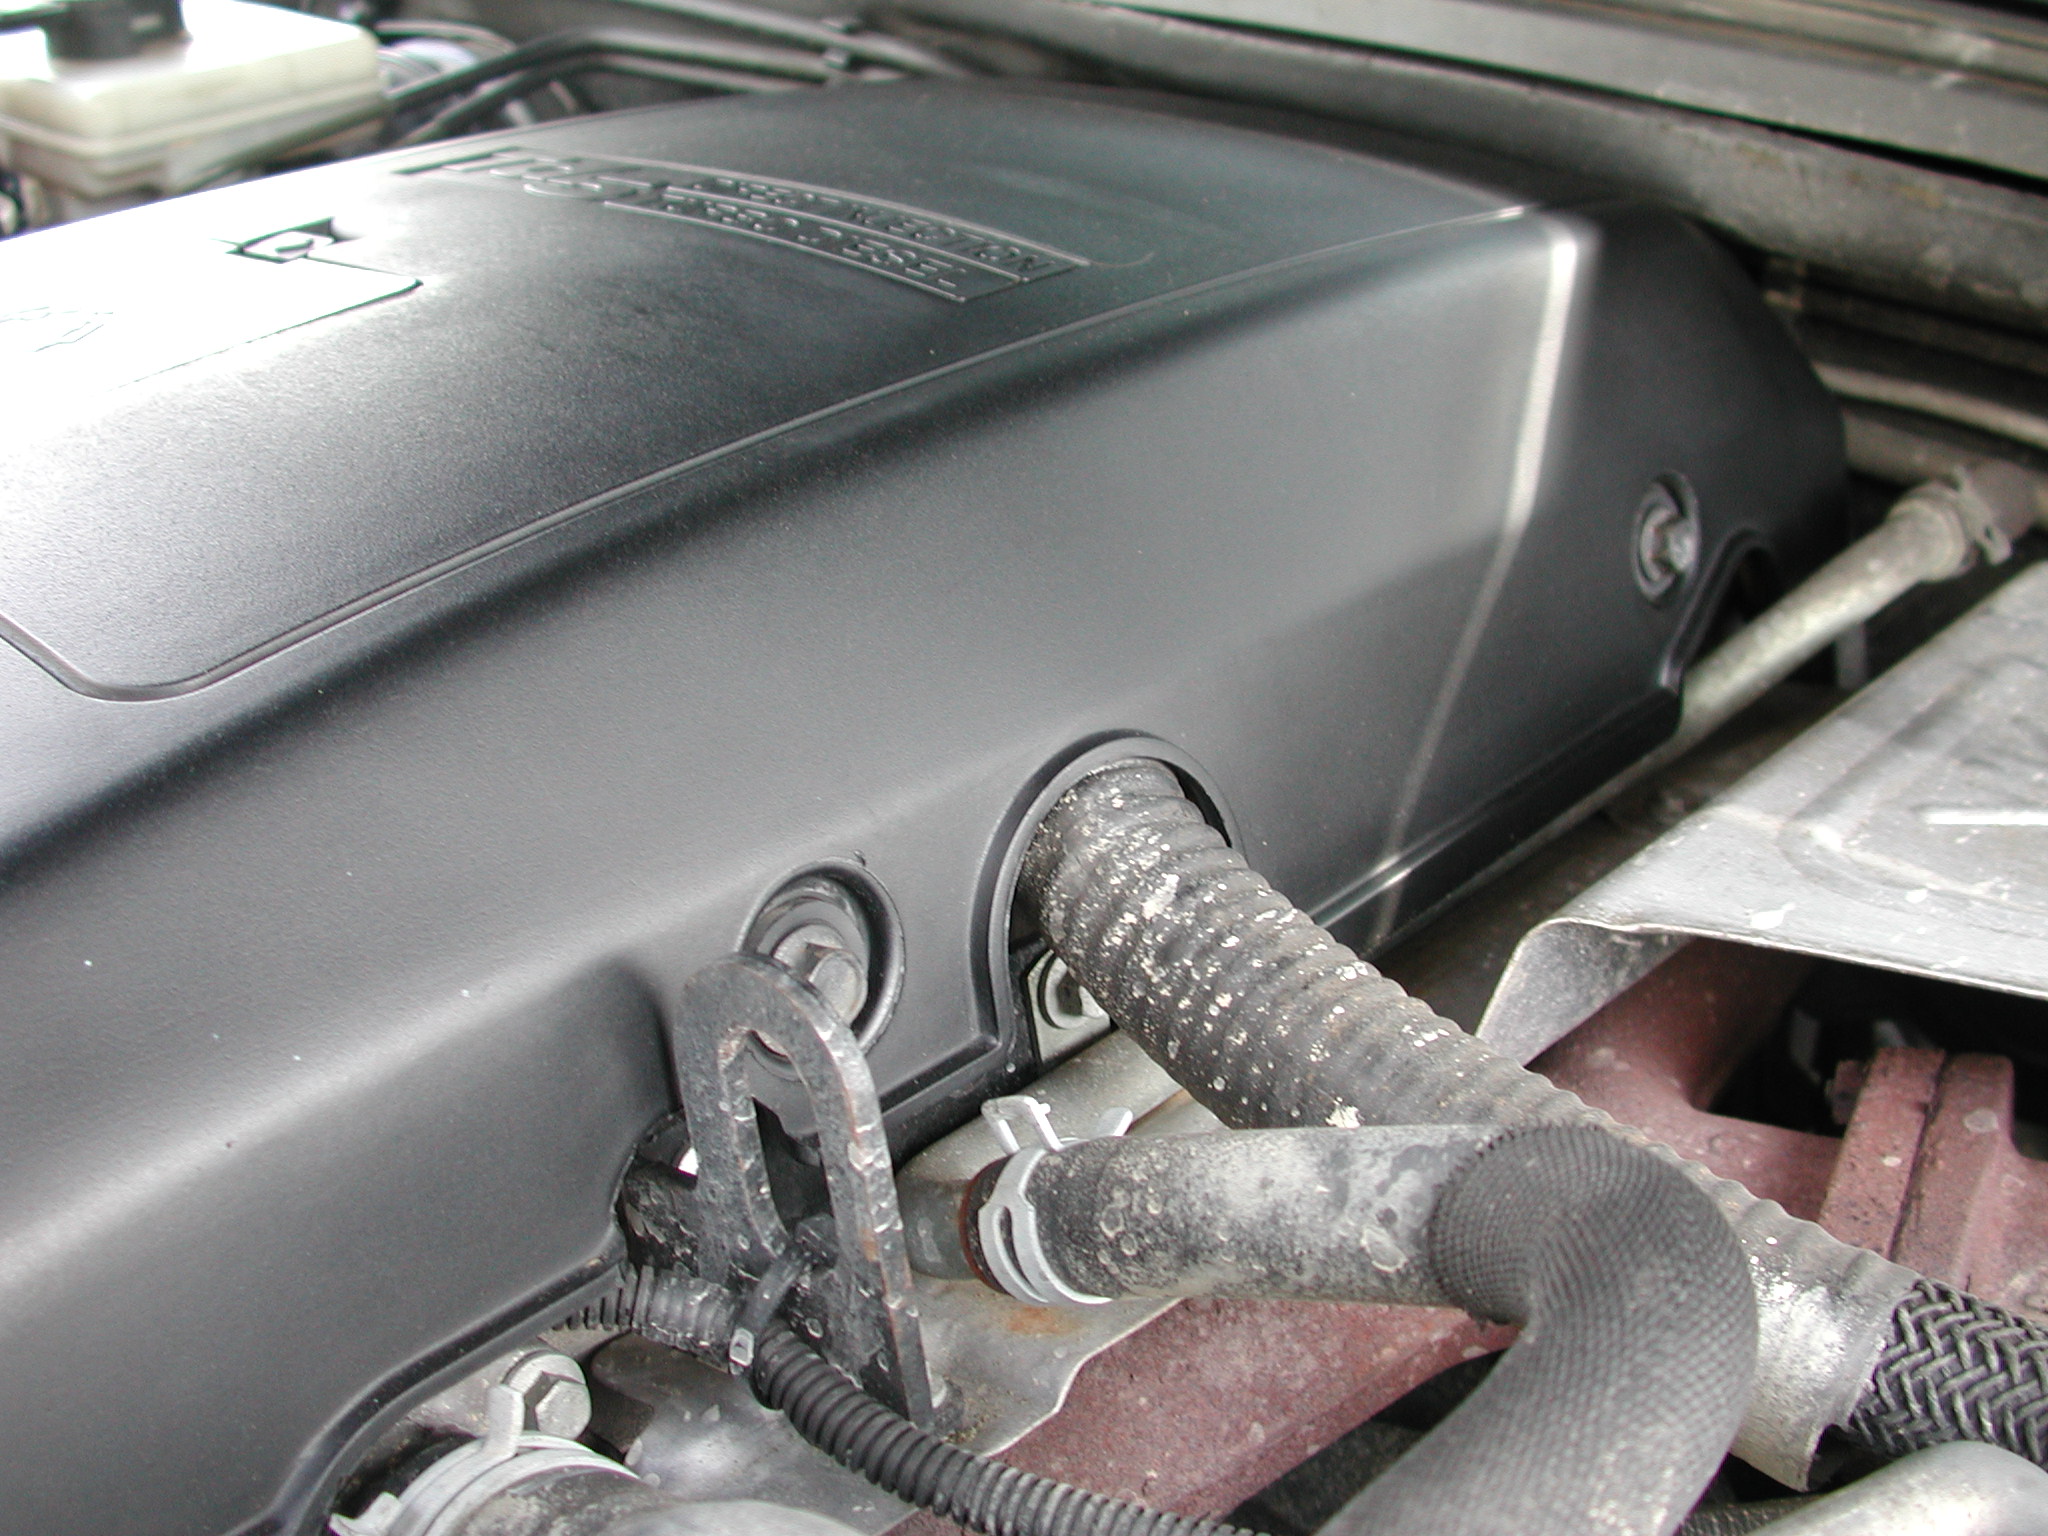
Yet another "common" issue with the Disco 2 TD5 is the Fuel injector harness leaking and allowing oil to pass down the loom and into the ECU. This "can" cause several symptoms including bad starting, misfiring, rough running or a combination of all 3. If you have a TD5, it is "highly" likely you WILL need to do this one day, I had bought the loom several months ago to have it ready "if" I had a problem. How ever, looking at my car months ago there was no sign of oil at the ECU, but this week I checked again and found a small amount around the wires going into the RED plug on the ECU. So before it could get any worse and start to cause running problem, which incidentally I never had, I thought I would go ahead and get it changed. Its not a difficult job and only a few tools are needed to complete the job. Overall it probably took me 2 hours or so, but I did do "extra" stuff while I was replacing the harness. New harnesses are available obviously from the dealer, and also the many Land Rover outlets around the country and on Ebay off course. it not expensive at around £30, Just make sure when you do order one that it is the later modified harness. NOTE:- You will be disconnecting your battery, so ensure you have the Radio code !!!! TOOLS I USED / NEEDED:- 1/4" Drive Ratchets , Torque wrench up to 250lbs in, 8mm socket, 8mm spanner, 8mm ,10mm & 13mm Ratcheting spanner, Philips screw driver Paper towel / clean rags, solvent cleaner, RTV sealant. So, first of all as with "most" jobs, remove the acoustic engine cover by removing the 3 x 13mm bolts, 1 on the drivers side and 2 on the passenger side
Next remove the battery cover, and disconnect the
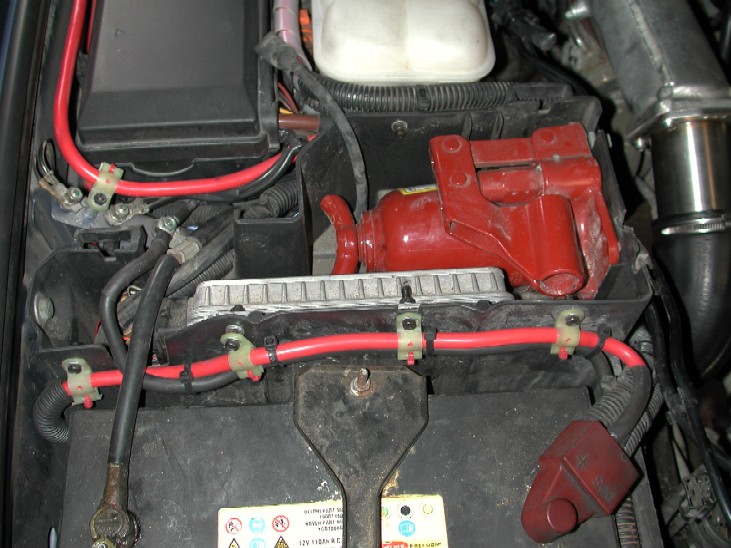
battery earth lead as this will be needed to be moved out the way to allow
you to remove the ECU. Here because of my winch install, I had to remove the "p" clips holding the power cables going to the winch as they also hold the ECU. Your ECU "should" be held by just 1 self tapping screw, which you can remove, also lift out the bottle jack and put aside to give you more room as well.
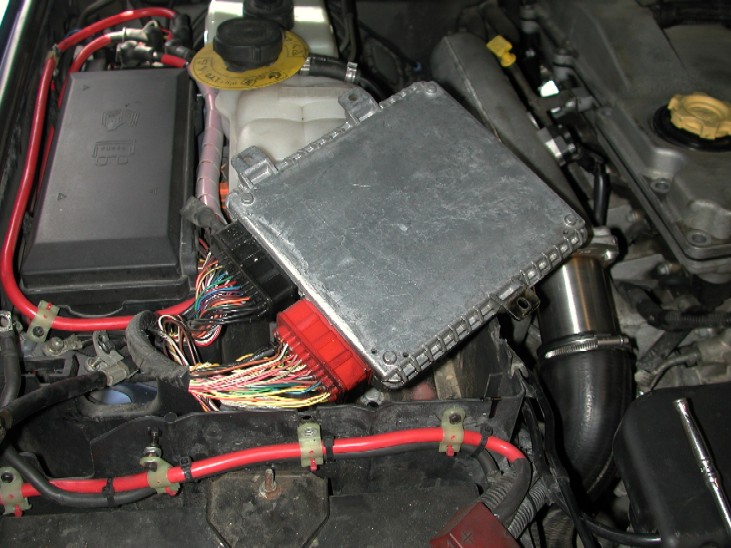
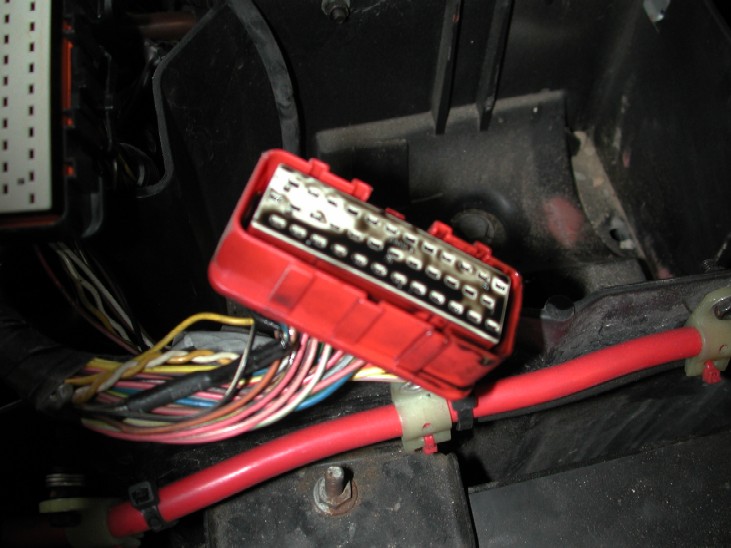
Now you can lift out the ECU, Here in the pictures you
can see the "small" amount of oil I had noticed on the bottom of the RED
plug, from looking at it when the ECU is installed.
Does not look a lot does it ?. well you can then
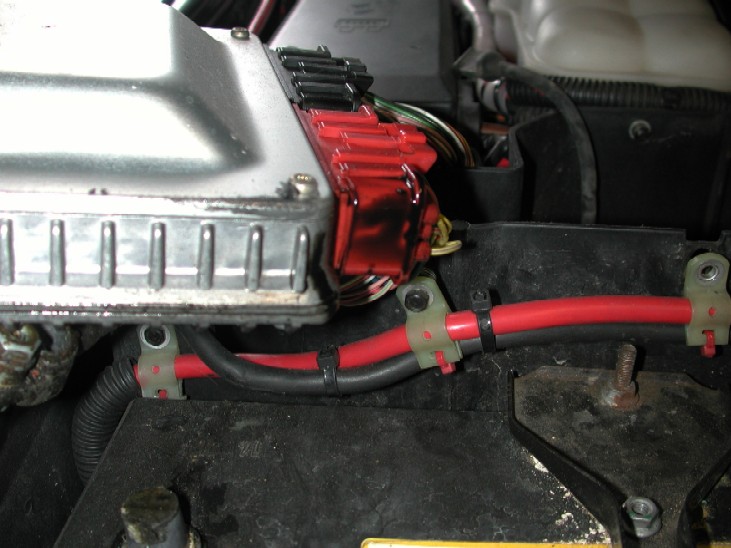
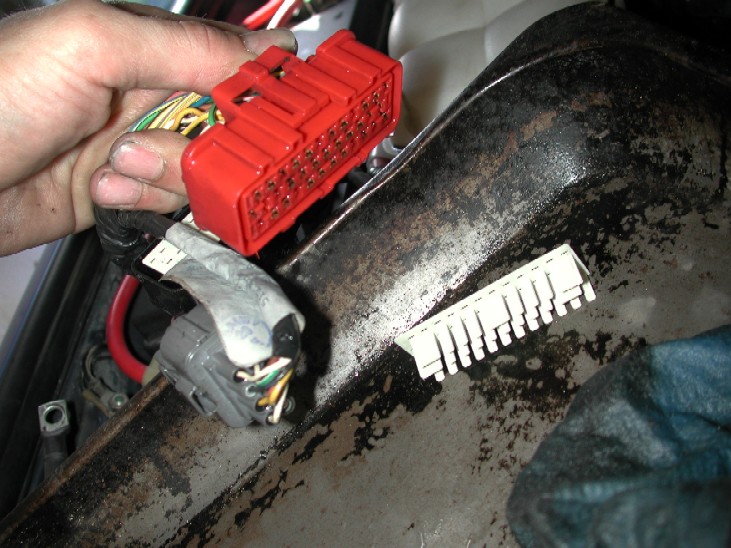
disconnect the 2 plugs from the ECU, and then I found this below :- As you can see, the RED plug socket is full of oil, It was probably only a matter of time before it may have began to give me rough running issues. Below you can clearly see the oil has got to all parts of the plug as well....
You can remove the white locking plate to help get at
the connections to clean them.
I used a fast drying solvent spray to clean all the oil out of the plug, and left it to dry / drain whilst I went onto the next bit. You will also see an orange rubber seal inside the plug, you can carefully "hook" that out to clean that as well. With the amount of oil that was actually in the plug, I was unsure whether or not it had actually made its way into the ECU itself.
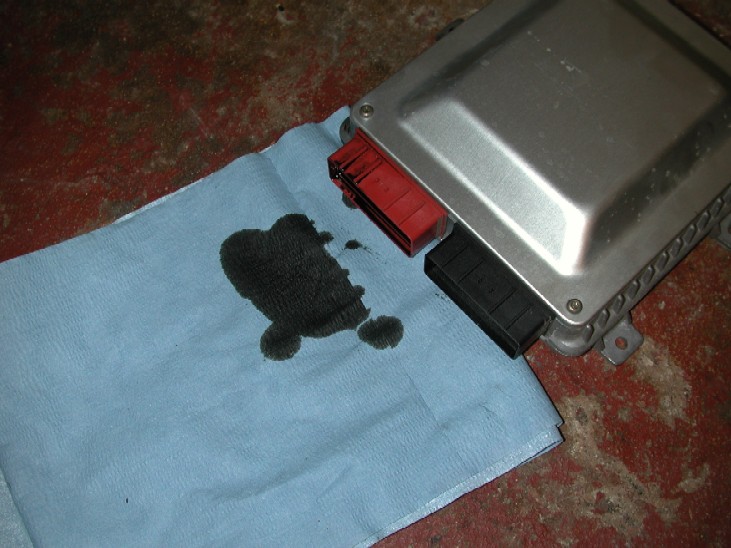
While I was cleaning the plug out, the ECU was stood up
on some paper, below you can see the amount that had drained out of it in
only a few minutes With this in mind, I decided to remove the top cover of the ECU to have a look inside to see if that was ok, The cover is held on with 4 tamper proof torx bolts, the top is also sealed / stuck down and needed to be levered free VERY carefully. The top is only thin aluminum, so if you go at it to hard you WILL damage / bend it out of shape. "If" you decide to take the ECU top of, do it entirely at YOUR OWN RISK.....
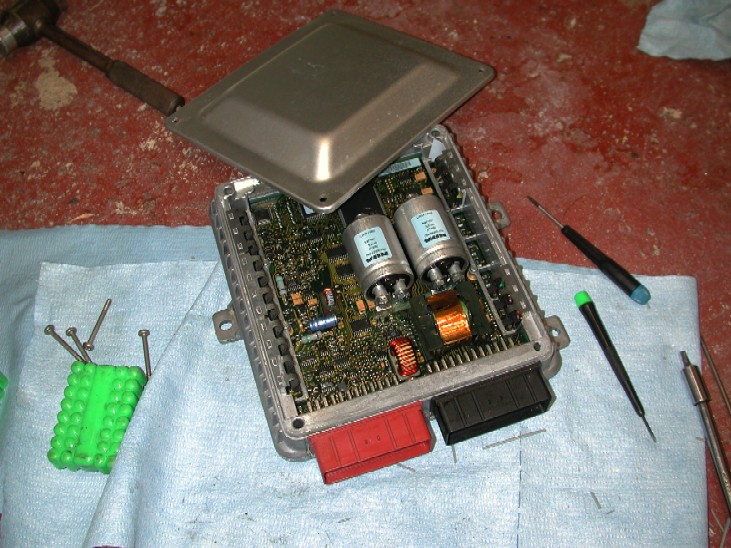
After actually getting the top off, there was only a very very small amount that had actually got inside the ECU, a small spray on the internal connector and it was clean. I cannot say whether or not yours would be any better or worse, the decision to open up the ECU is entirely up to you !! The ECU top is also sealed with a silicone like adhesive sealant to keep moisture etc out when its put together, I cleaned of all the old stuff being carefully not to get it inside, and then re-sealed the lid back on with some RTV sealant to keep it water / moisture proof. I then went onto the injector loom itself.
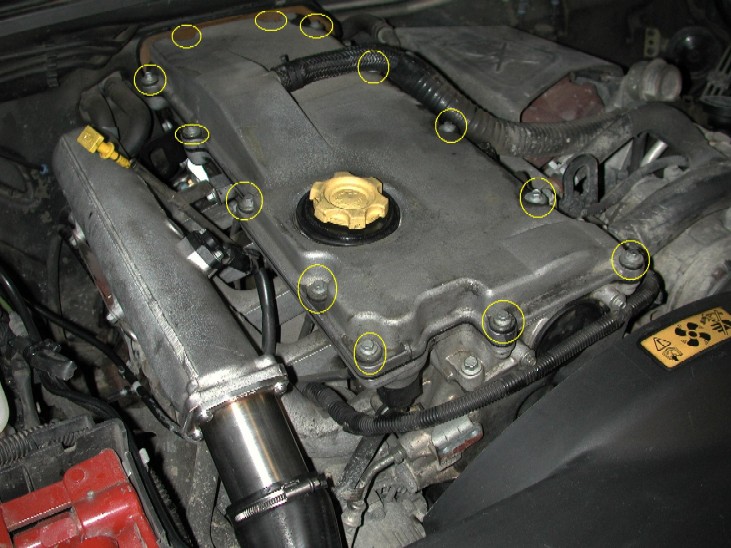
The loom is actually under the rocker cover, so to get
it out you have to remove the bolts holding the rocker cover on. The
picture below shows the bolts circled, you will also have to disconnect
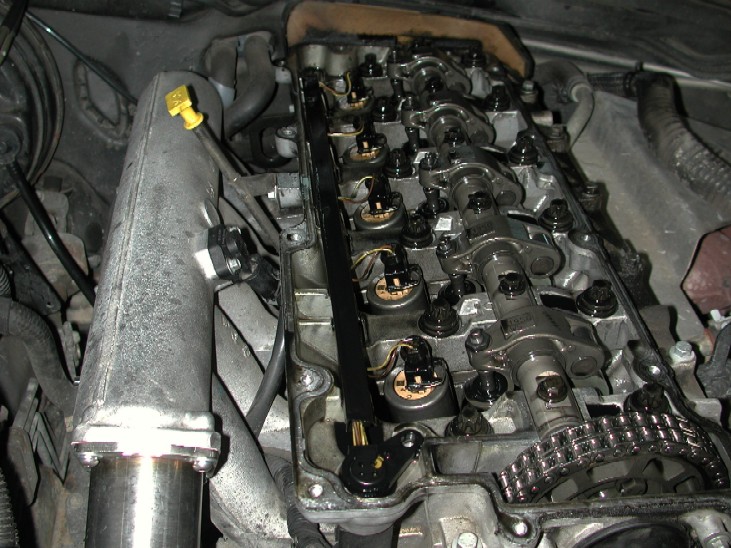
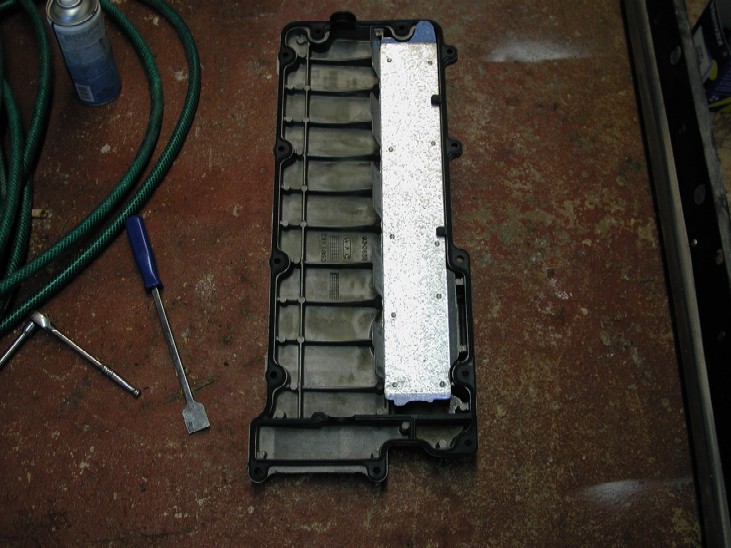
the quick clamp and take off the breather hose on the top The bolts have bushes and rubber washers on each one, so make sure you collect all of them before lifting the cover off. I was pleasantly surprised to see how good the condition of the engine was underneath, although it was not dirty at all, I removed the rocker seal and cleaned up the cover ready to refit later
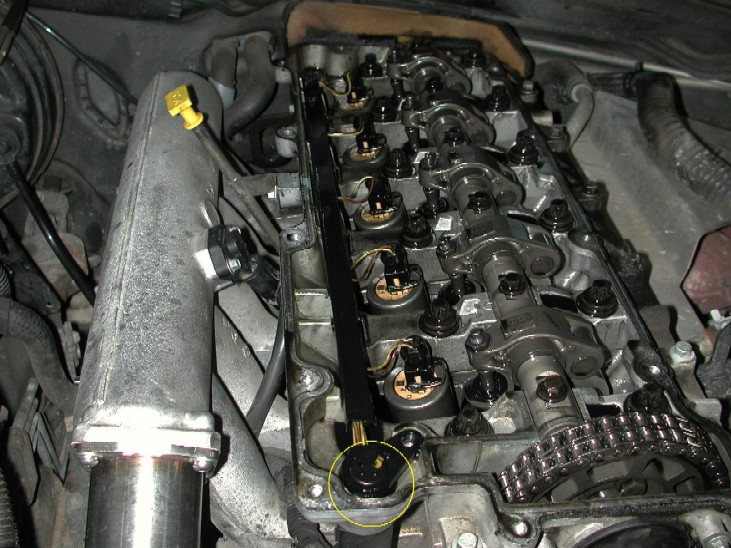
Above in the picture you can see the "splash guards" that protect the injector plugs Below is the injector harness in place, and circled in yellow is where the seals fail and allow oil to drain down into the ECU and loom.
You simply now have to disconnect each plug off the 5 injectors,
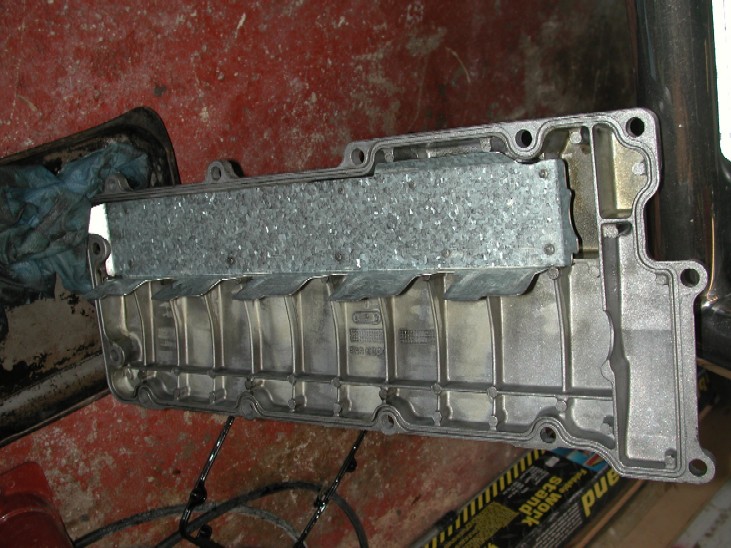
And the plug that is underneath where the main loom joins the injector harness. Once they are all disconnected, the harness simply lifts out. Below you can see the 2 guilty "o" rings that fail and allow the oil to pass into the loom.
You can also see above where the "o" rings have stuck themselves in the hole to the head, this ideally needs to be cleaned up before fitting the new one, use some scotch bright pads or "very" fine emery paper to carefully clean up the hole where the plug sits. Now its just a case of simply re-fitting the new harness into position, make sure all the injector plugs are properly clipped home, and also the plug that goes underneath at the front.
Now using some paper towel, or clean rags, clean around the edge of the head where the rocker cover seal sits making sure you don't push any dirt into the head. I already had a new rocker seal to re-fit once I had done this job, It is entirely your decision whether or not to replace the seal. It is good practice to do it and upon "feeling" the old seal, it had started to go hard with age etc, so I would recommend that you DO fit a new seal. The new seal should be fitted to the rocker cover first, as it will be almost impossible to lay it on the head and get it lined up correctly. The seal does fit nice and snug onto the rocker cover, and make sure its fitted correctly all the way around its edge, and in particular where it goes over the camshaft at the front, you can if you wish use a few "small" dabs of hylomar to help keep the seal in place on the rocker cover.
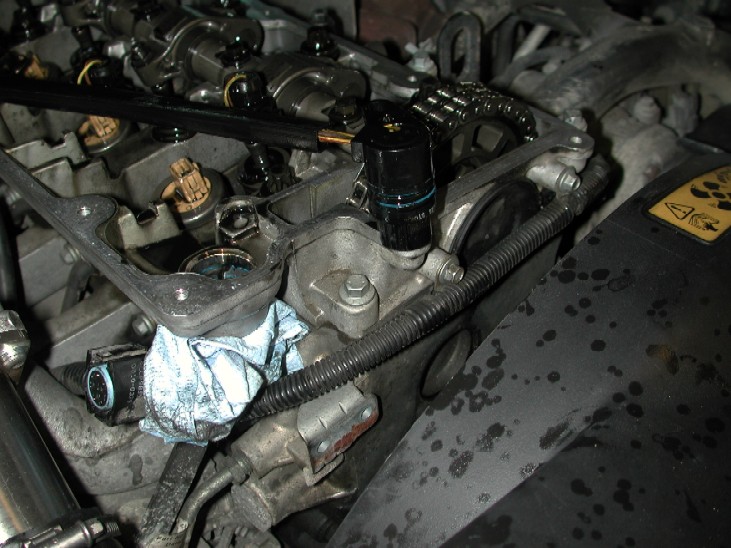
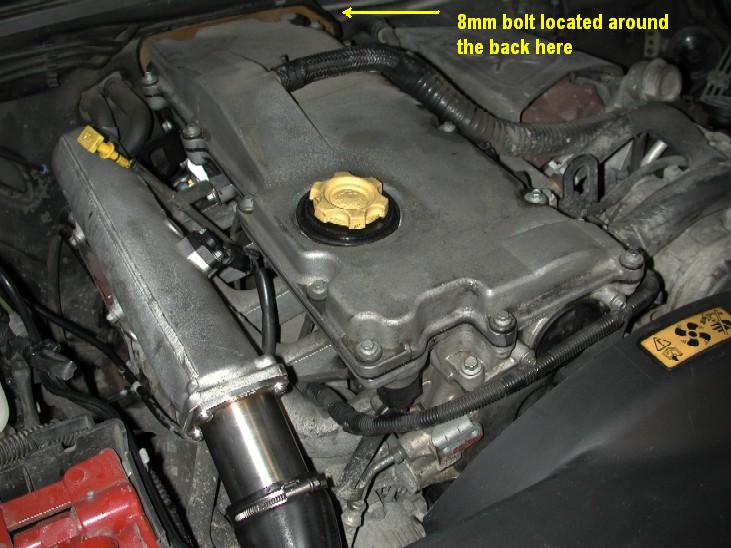
Now because of the rear acoustic engine cover, and the injector splash shields, its almost impossible to "feed" the rocker cover into place without knocking the seal of where it goes over the rear of the camshaft, so to help me get around this, at the back of the engine on the passenger side (uk car) there's is an 8mm bolt that holds the rear plastic engine cover to the block, remove that bolt and this will allow you to push the engine cover back towards the bulkhead and makes it far easier to get the rocker cover back into position without knocking the seal off each time. I wedged a hammer handle in between the cover and block to keep the cover pushed back against the bulkhead. below is a picture of the rough location of where the bolt is
Once your happy the cover is all back into position and the seal is all correct, refit the bushes and bolts with their rubber washers, start ALL the bolts in their holes by fingers before you tighten any up. The correct torque is 9NM or 7lbs ft or 84 lbs inches. Its good practice to tighten the bolts in an opposing manner to pull down the cover evenly onto its seal. Once they are all tight, torque them to the required torque and check the seal is still in its correct place all the way around the edge of the rocker cover. Now remove your hammer handle or what ever you used to "wedge" the rear cover out of the way, and re-fit the 8mm bolt at the rear of the engine. The rest of the re-fit is a reverse of the removal, but a small checklist :- Check you have torqued all the rocker cover bolts The bolt (if removed) at the rear engine cover is re-fitted Hopefully you plugged all the injectors back in, including the lower one at the front. If your happy that the ECU plug etc is all clean, reconnect BOTH plugs back to the ECU and refit it back into the jack box and secure with the 1 self tapping screw. Re-connect the battery negative lead, Now start the car and ensure it runs etc and all is well. Refit the engine acoustic cover and battery cover and your done!!!!
|