![]()
| Faults and Fixes - Rear Transfer Box Output Shaft Seal / Hand Brake Shoe Replacement |
|
|
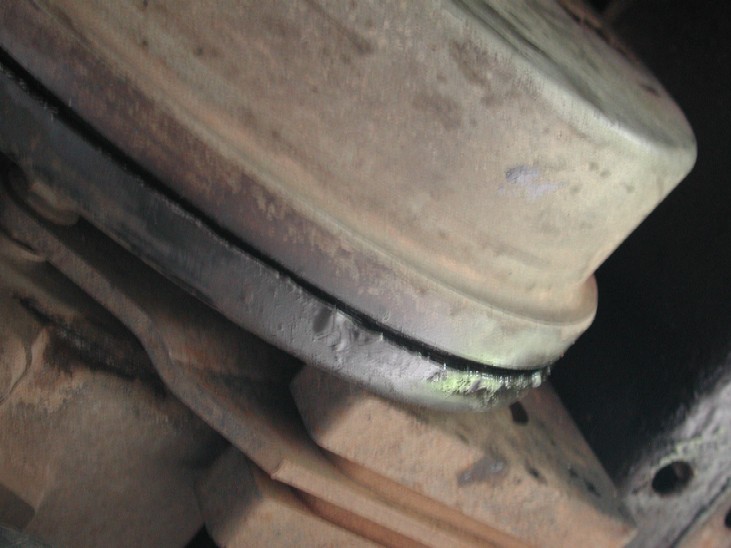
Over the past few weeks, my truck started to leave its little mark on the drive. I noticed a tiny patch of oil appearing so climbed underneath to see if I could locate it. Fortunately it was easy enough to spot where it was coming from, but was going to be a little more complex to fix it. Below you can see the evidence clearly on the bottom handbrake drum, and also on the adjacent chassis rail, so with oil leaking in this area it could only be one thing, and that's the Rear Output shaft oil seal on the transfer box.
This leak also seemed to coincide with poor handbrake operation that I was aware off, but it was also picked up on the MOT that the handbrake was not very "efficient" . Now because I like to go wading in my truck, its vitally important to be aware that if oil is leaking out from anywhere, then water can definitely get into that same area, so although the leak was not "that" bad, it was a very important fix for me to do. So to do this job, I drove the rear of the vehicle up onto to ramps to give me more room to work underneath, I also engaged the CDL and chocked the front wheels once it was on the ramps as you will removing the handbrake assy !!. Then mark the rear shaft somehow (I use a small file to mark both the rear prop front flange and brake drum in relation to each other) so it easy to re-assemble back in the same position Now you need to first remove the rear propshaft, to remove the shaft, simply undo the 4 nuts at the brake drum end, and the nuts and bolts x 3 at the rear Differential end, and it will simply come away once you compress it together. Once its off, that will reveal the brake drum securing screw
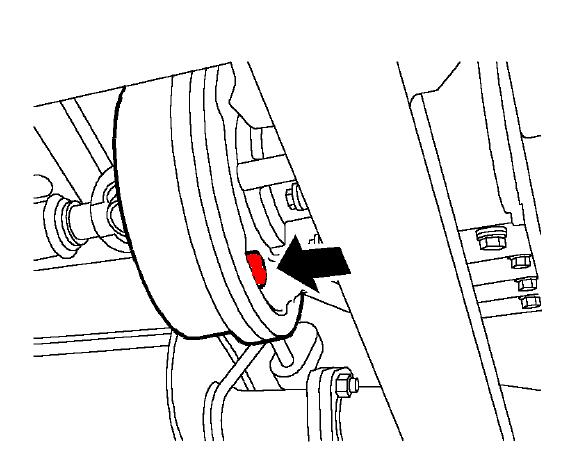
To make it easy to get the drum off, undo the handbrake adjuster bolt several turns to wind the internal shoes in together. Its located on the front face, at the bottom of the hand brake drum back plate and is 17 mm in size
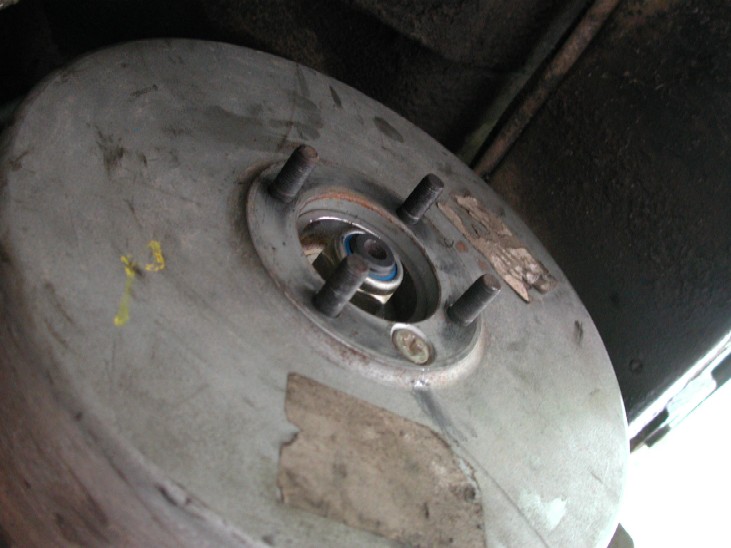
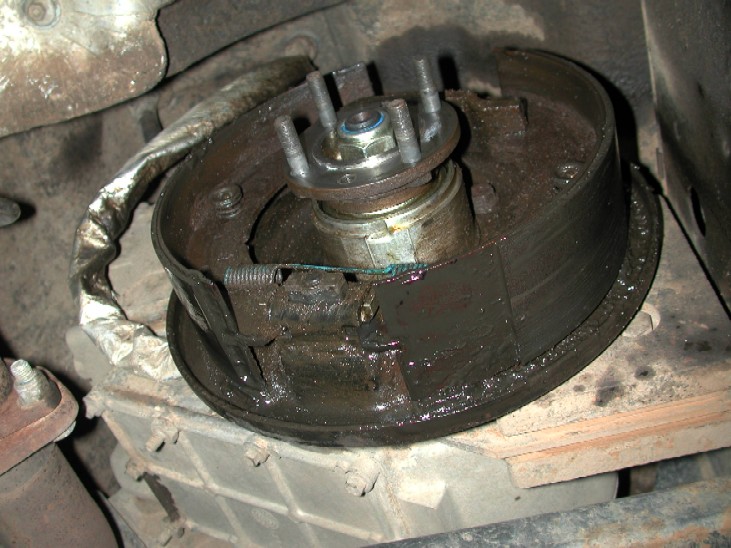
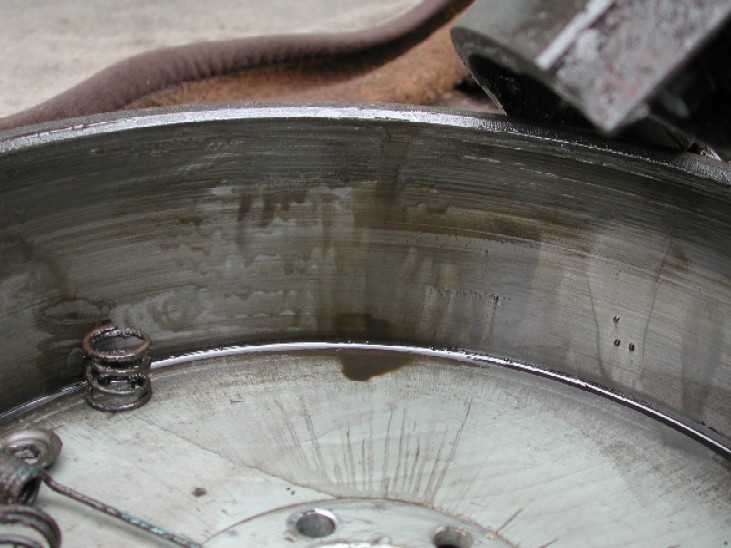
Once that's done, then remove the brake drum securing screw and lift the drum off, NOTE it is quite heavy !! Once my drum was off, I was confronted with this!!!...
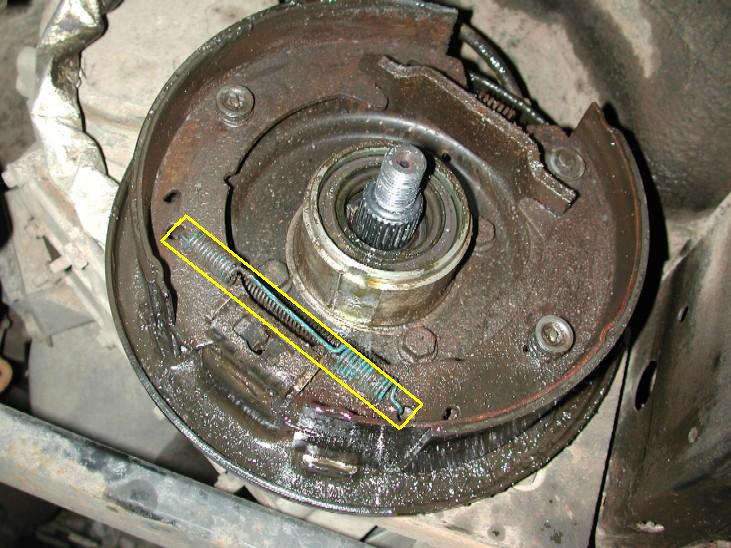
It seems it has been leaking for a "little" longer than originally thought, the brake pads etc were completely contaminated with transfer box oil (hence poor efficiency) , in "anticipation" of this and because the handbrake was becoming less efficient I had bought a new handbrake shoe kit ready to fit just incase... "If" you handbrake shoes are ok, then skip to the rear seal replacement section of this article, if you intend to replace the handbrake shoes then read on.... To get the shoes out, first off, remove / unclip the lower spring which holds the 2 shoes together.
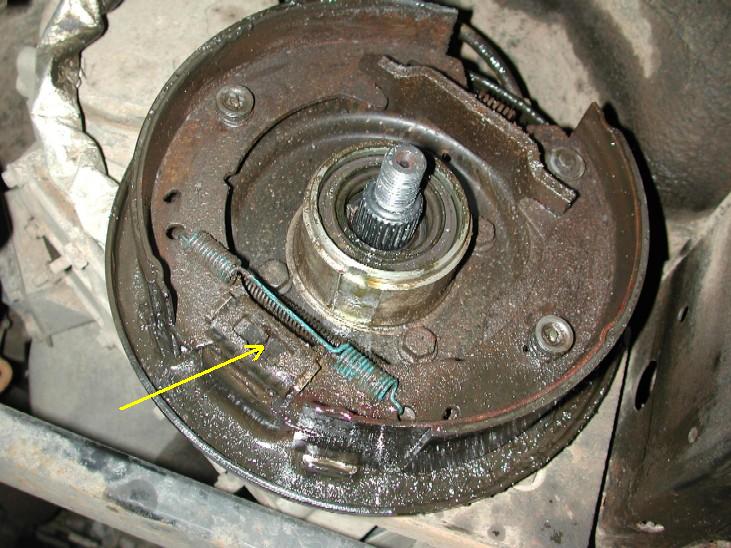
Then undo a fully remove the adjuster bolt from the show adjustment clams (arrowed below) and discard it, the new shoe kit comes with a new thread locked bolt and MUST used!! to avoid any rattle in the shoe adjustment assembly.
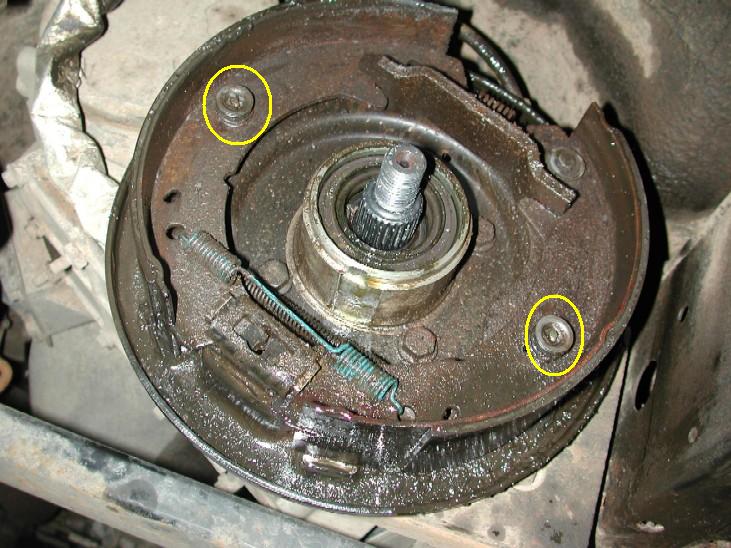
Once that's out, then the fun begins with the spring and washer retainers.... The washers are slotted over the pins and require you to push them to compress the springs, then turn 90* to release the washer and spring, they are fiddly and tight and its a good idea to wear some eye protection just incase the spring flies off!!
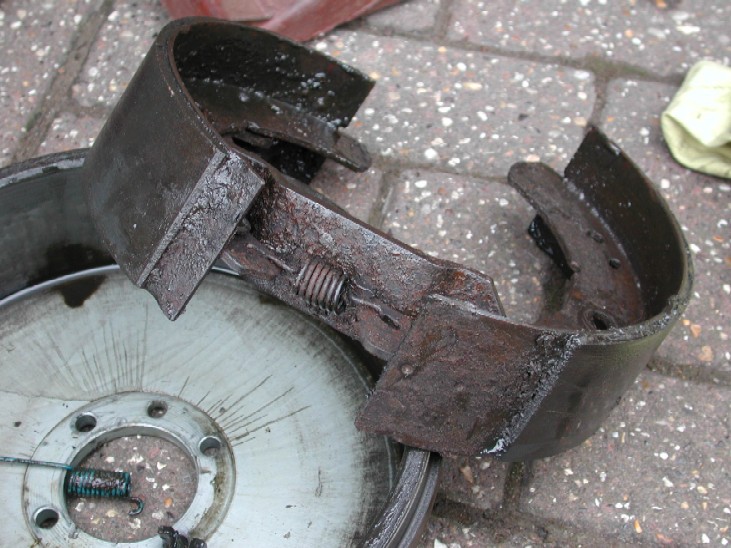
Once they are off, then both shoes which are still connected by the top spring will swing down, you can then get behind them to unclip the hand brake cable, this again is fiddly, but take your time and it will come away. You have to compress the outer spring on the cable and then unhook it through the retainer as the swaged end is to nig to fit through the gap. Here you can see the oil contamination on the shoes.........
And the oil in the brake drum itself...........
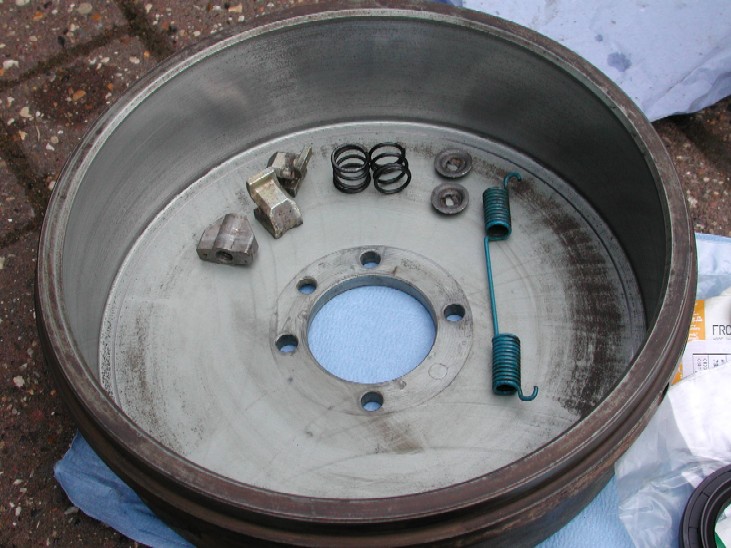
Now I cleaned up all the brake parts using some solvent cleaner ready for refit after the output seal is replaced. NOTE the only bit you need to discard is the adjuster bolt, everything else is re-used INCLUDING the top spring and plate, and hand brake lever, this has to be swapped over to the new shoes as it does not come with the kit. It is held on by the top spring and a circlip / pin.
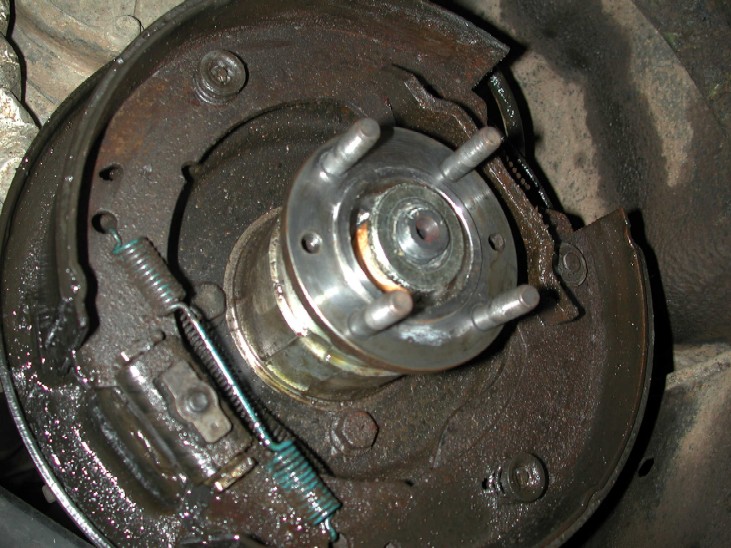
Now onto the seal itself, the rear flange is held on by the central nut, its 30mm in size and is quite tight at around 109 Lbs ft. NOTE, it is a lock nut and SHOULD be renewed!!. For info, its an M20 Nylock nut. I engaged the CDL to hold it in position, if you have a Discovery 2 without a CDL, then a tool can be bought to hold the flange whilst undoing the nut, its pricey at around £100, but you may have no choice, or possibly borrow / hire one from an independent or local dealer. or make something up to hold the flange from rotating while you undo the M20 nut. Under the lock nut is a large washer / spacer (note pictures still show handbrake shoes in place as they would be if you was only replacing the seal and not the handbrake shoes)
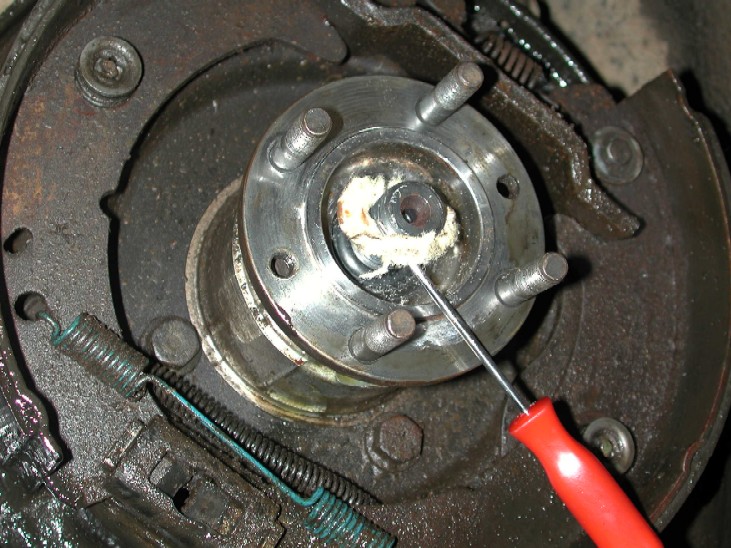
Under the washer / spacer is a fiber washer, use a small tool to dig this out.........again a new one will be required!!.
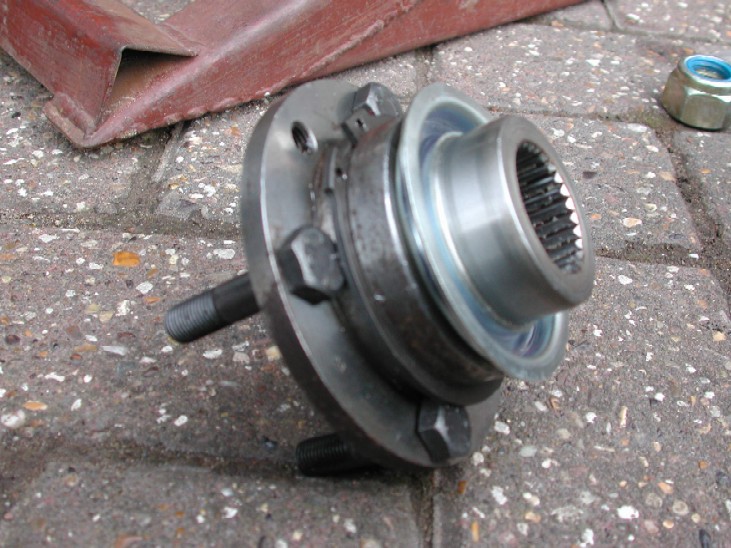
Once that was out, my flange simply came off no problem , if it proves to be tight to remove then a simple standard 3 legged puller could be used to remove it. Once the flange was out, a small amount of oil began to run out the transfer box, now because my vehicle is fitted with rear Air suspension, I started the car and raised the rear up a further 2" with the offroad switch and this was enough to stop the oil leak :o) If you don't have rear air, then don't panic, its not a lot of oil, but it would be advisable to then check the transfer box oil level after the seal replacement is done and the vehicle is back on level ground again
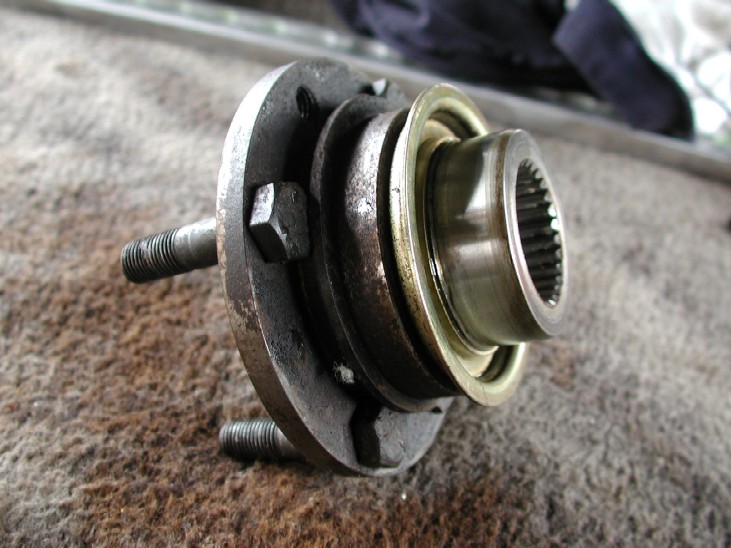
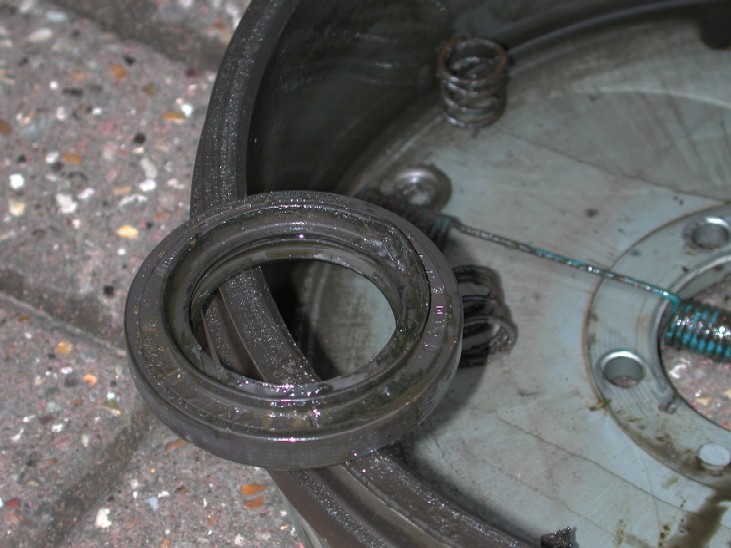
Above you can see the mud shield on the flange, and the circlip that retains the 4 prop bolts, I had bought all new ones to fit to the flange before re-fitting it. Now its time to remove the seal, I used a small 3 legged puller to go inside the seal and wiggle / lever it out. You can use anything you like but take care NOT to damage the seal face on the transfer box, use "blunt" instruments, my seal came out pretty easily. Once out, it was very hard to the touch, which probably relates to the fact it was leaking. here's the guilty item!!!!!
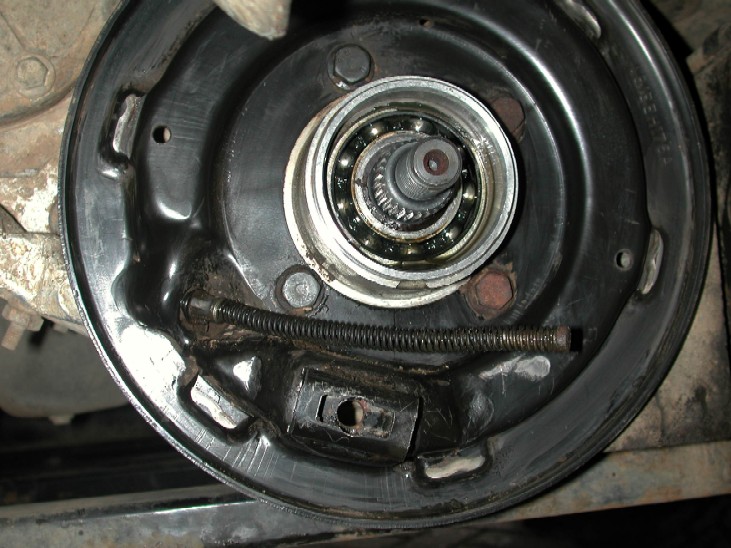
Here below is the seal removed and the handbrake cable is also visible (shoe replacement only), the back plate is all cleaned up of old oil and muck and care was taken to not get any dirt etc into the transfer box
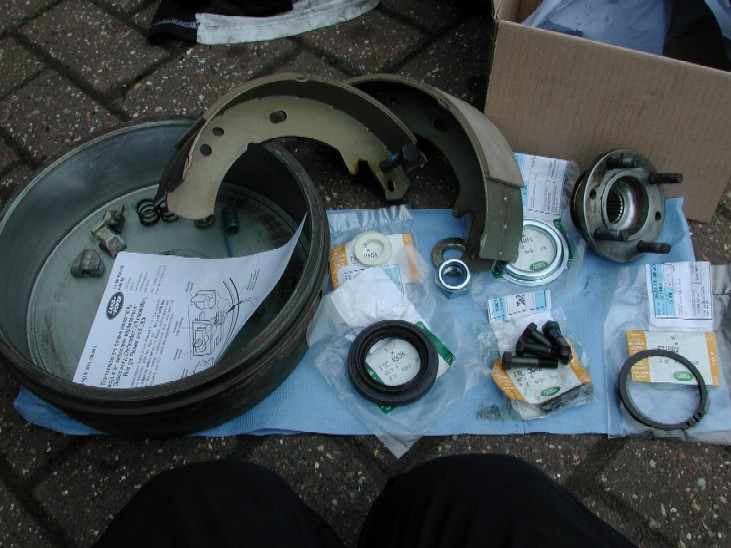
Here's a big pile of new bits!!! :o)
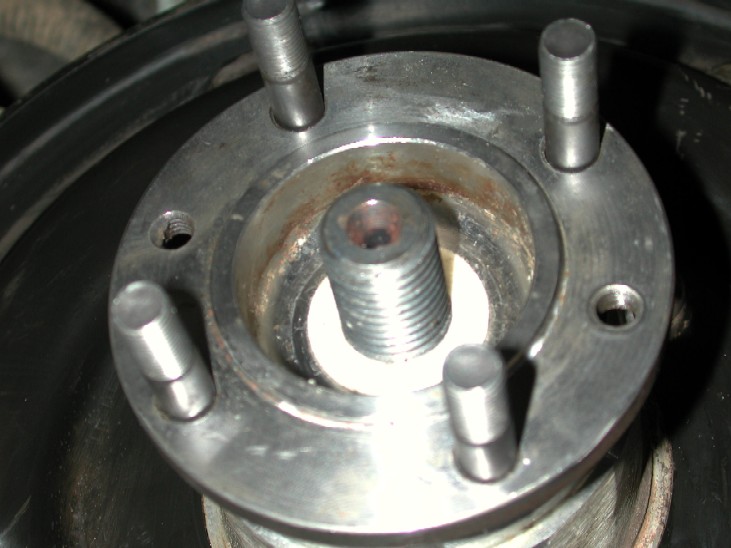
As I stated earlier, while it was off, I chose to renew the prop shaft bolts, circlip and output flange mud shield. The Big circlip def puts up a fight, and you will need big circlip pliers to remove / install it, wear EYE protection when doing this!!! The mud shield is simply a push fit, I used a hammer to remove it and a large socket to drive the new one back on squarely... Output flange all cleaned up and new bits fitted....
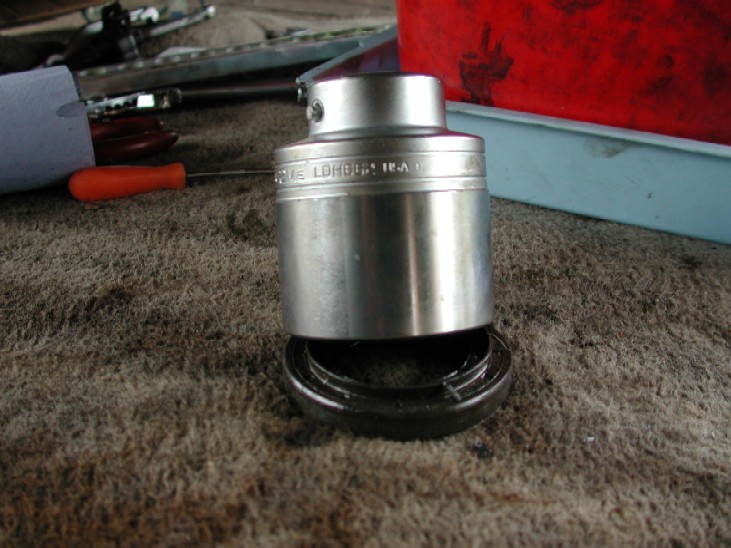
Now its time to refit it all back together, Make sure where the seal is fitted in the transfer box is clean and then smear some new oil on the new seal and push it into place. There is obviously a proper tool to drive the new seal in, but anything can be used as long as its BLUNT and will not damage the seal / seal seat. Fortunately I have a rather large socket that fitted it perfectly....2 1/16..
New seal driven into place CAREFULLY as not a lot of force is needed!!!!
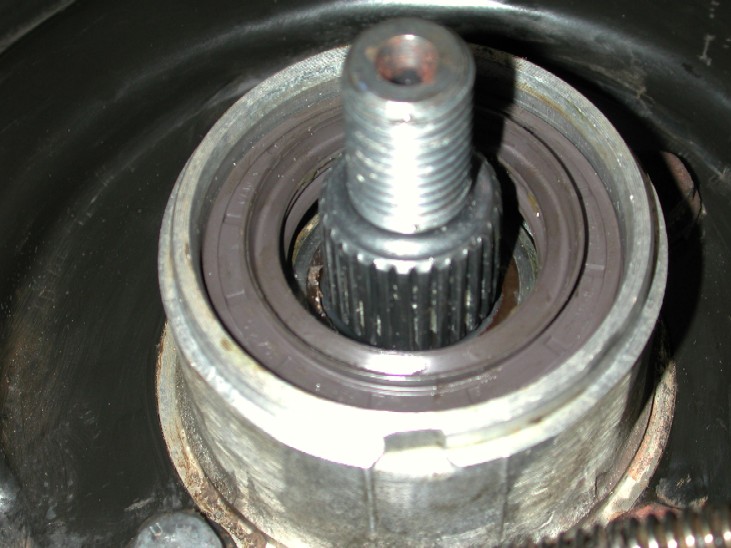
Now refit the output flange and ensure it goes fully home!! then pop in a new fibre washer and make sure that is fully pushed in so its flush with the inner surface.
Refit a new spacer / washer and NEW locknut and tighten to 109 Lbs ft
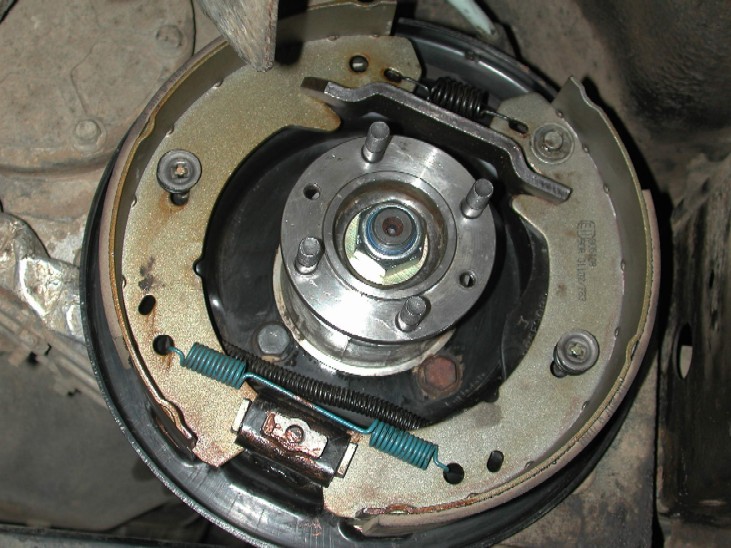
The rest of the refit is a reverse of the removal, if your only doing the seal then its relatively simple, if you need to replace the handbrake shoes, then take care when fitting all the springs etc back in, its fiddly and puts up a fight, but take your time, a second pair of hands may be of some help!!! below is all the new handbrake components installed
Put some copper grease onto the adjuster clams, where the shoes sit on the back plate and where the handbrake lever pivots on the outer shoe. Install the NEW adjuster bolt just a few turns to start with. Once the handbrake drum is refitted, tighten the adjuster bolt until the drum is locked and then back it off 1 and a1/2 turns. You may have to disengage the CDL and put the transfer box in neutral to allow you to spin the drum. After the car is all back together, the handbrake may require some more adjustment, but check this with the vehicle back on level ground. If you lost more oil when the seal is removed, then check the level in the transfer box as per transfer box oil replacement Hopefully no more leaks and a better working handbrake!! ;o) |