![]()
| Spare Wheel Carrier "flip" (Fitting Bigger Tyres) 05/02/2010 | ||||
|
|
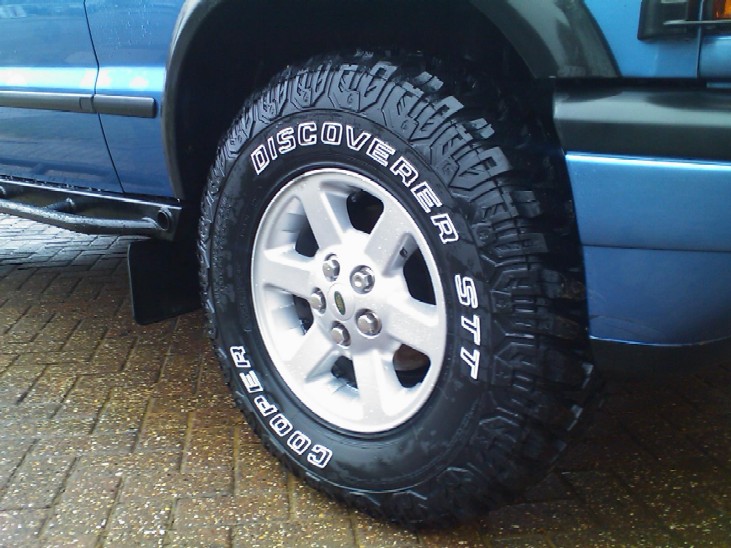
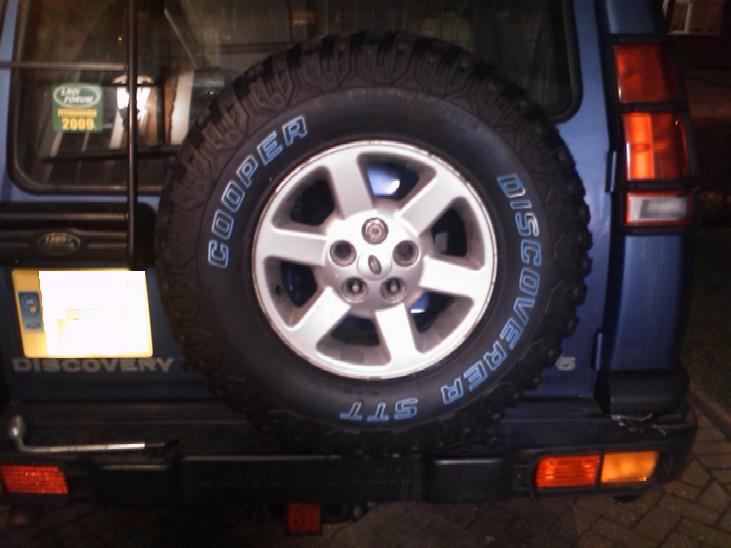
One of the mods you will most likely have to do "if" you lift your Discovery to fit bigger tyres is modify the spare wheel carrier to take a larger overall diameter tyre. This is usually needed when you go for a more aggressive mud tyre in a bigger size due to the much bigger tread they have. There's quite a lot of "info" out there, but I never found a definitive answer on the best way or easiest way to do it, I found lots of diff answers etc from lots of diff people, but never found any pictures etc of what they had done, so in keeping with discovery2.co.uk tradition I thought I would document this mod to. The way its achieved is to remove the spare wheel carrier and "flip" it over 180°, this will give you more room to clear the rear bumper. There is other options and that is to fit and adapter to the existing carrier to move the studs higher, or some companies make a complete replacement carrier assy to enable you to fit up to a 33" tyre on the back door, well with the current financial outlay with the lift and new wheels / tyres I decided to try the mod to the factory carrier first. My Disco is now lifted 2" and fitted with 265/75-16 Cooper STT's which are overall about 32" + in size, this is significantly bigger than the 255/55-18 all-terrain's I did originally have fitted which were around 29".
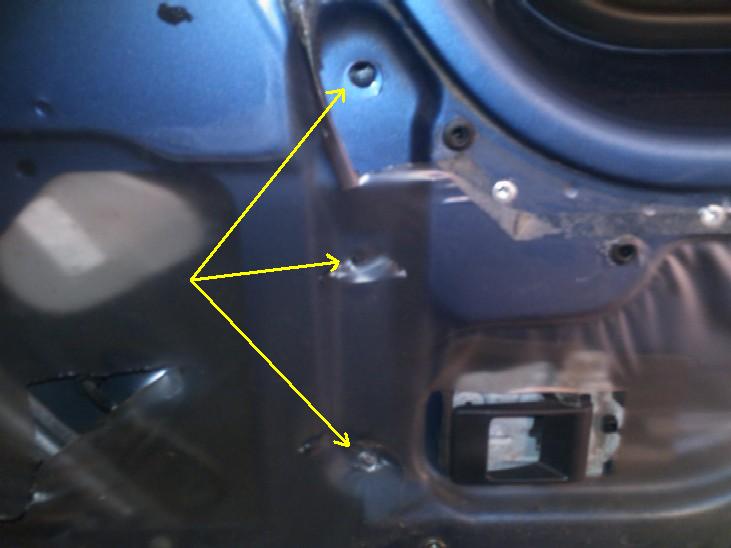
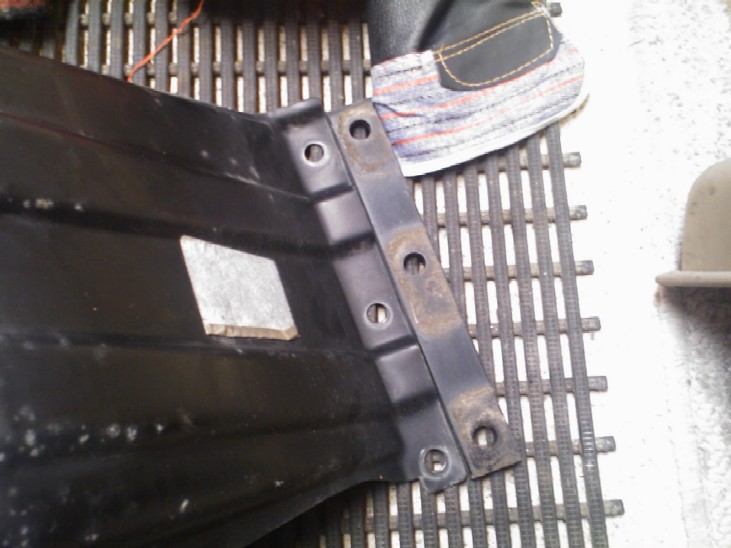
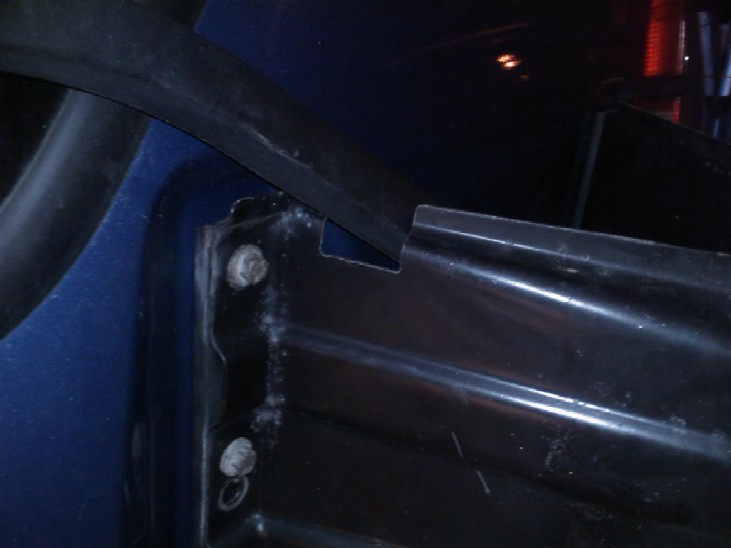
So there had to be something done to fit the spare onto the rear door !!! First of you have to remove the rear door trim panel, if your attempting this carrier mod, then I'm pretty sure you have already done on the past or are capable of removing the trim panel etc. Once that's off you can begin to remove the carrier assy. It's simply held on by six nuts an bolts that go through the structure of the door. Below is the bolt positions on the inside. (right hand side)
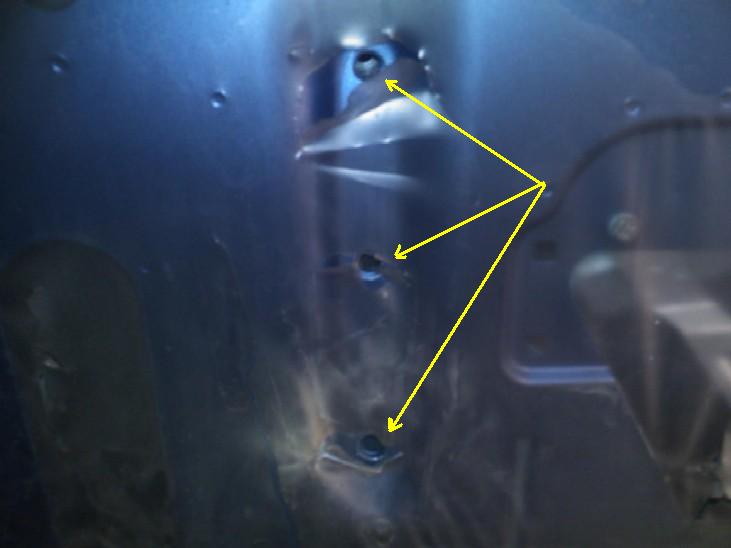
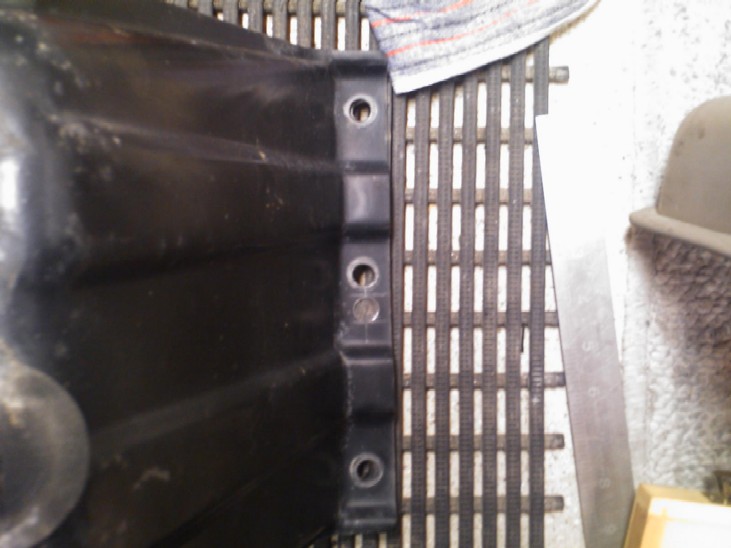
And left hand side
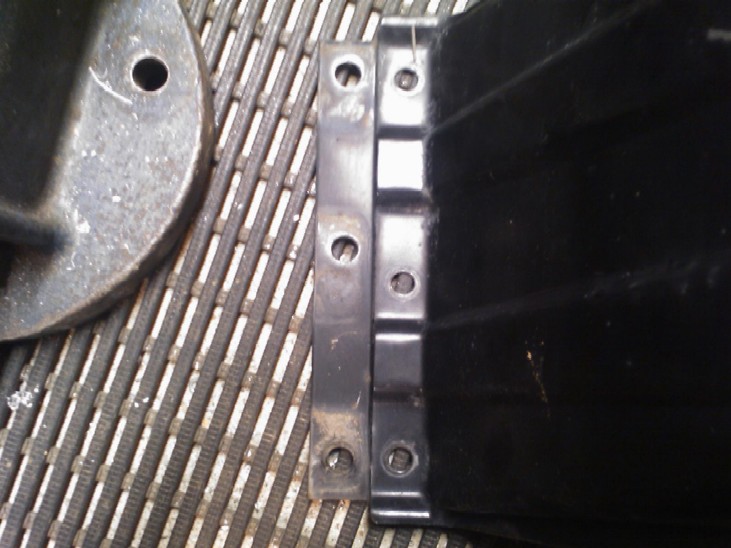
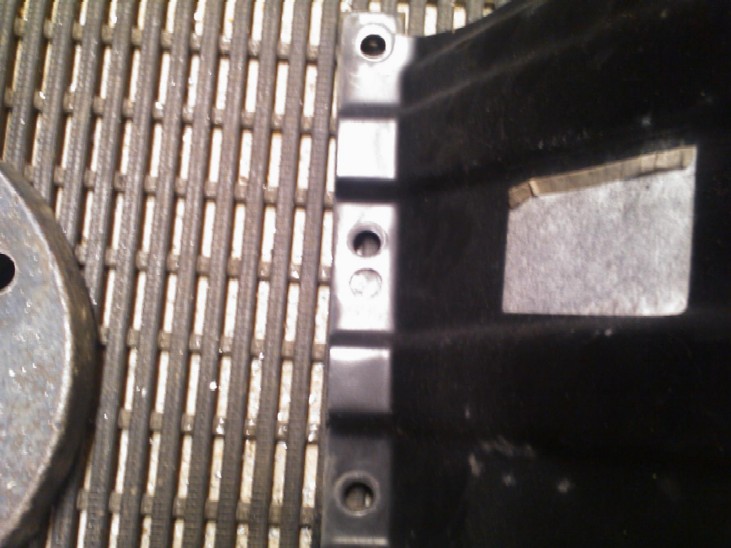
The carrier also has 2 steel spacing blocks on the outside between "it" and the rear door skin, be careful not to allow them to drop and damage the paint on your rear door. Once its off, keep the spacers relative to the side they came from and lay it down on the floor, then flip the carrier 180° and sit it next to the spacers, this will show you where the new holes need to be drilled as the holes in the carrier are not evenly spaced. Below is the left side spacer with the carrier flipped, you can see its the middle hole that will need to be re-positioned.
And the right side spacer with carrier flipped 180°
As you can see the top and bottom holes till line up and there's a lot of "play" in the hole size ref the bolt size that goes through the door structure. I had read that some people needed to "bash" the carrier flat, but I could not see why this would be needed as the new hole position will sit nicely just above the original hole on the flat section of the carrier. Now there's 2 ways to do it, either sit the spacers next to the carrier so the top and bottom holes line up, and simply draw / transfer the holes across "freehand" or hold the spacer onto the carrier with tie wraps in the top and bottom holes and turn it over to drill back through the other way, either method will work and will depend on your free hand skills with a pencil as to which way you do it. Once the holes are marked, drill them to the same size as the top and bottom holes, its about 10 mm. Here's the new holes drilled with the spacers lined up showing the "old" position.
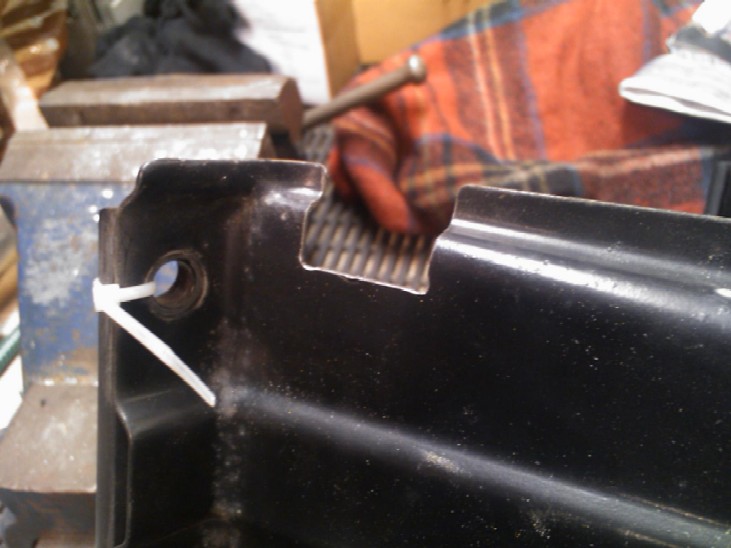
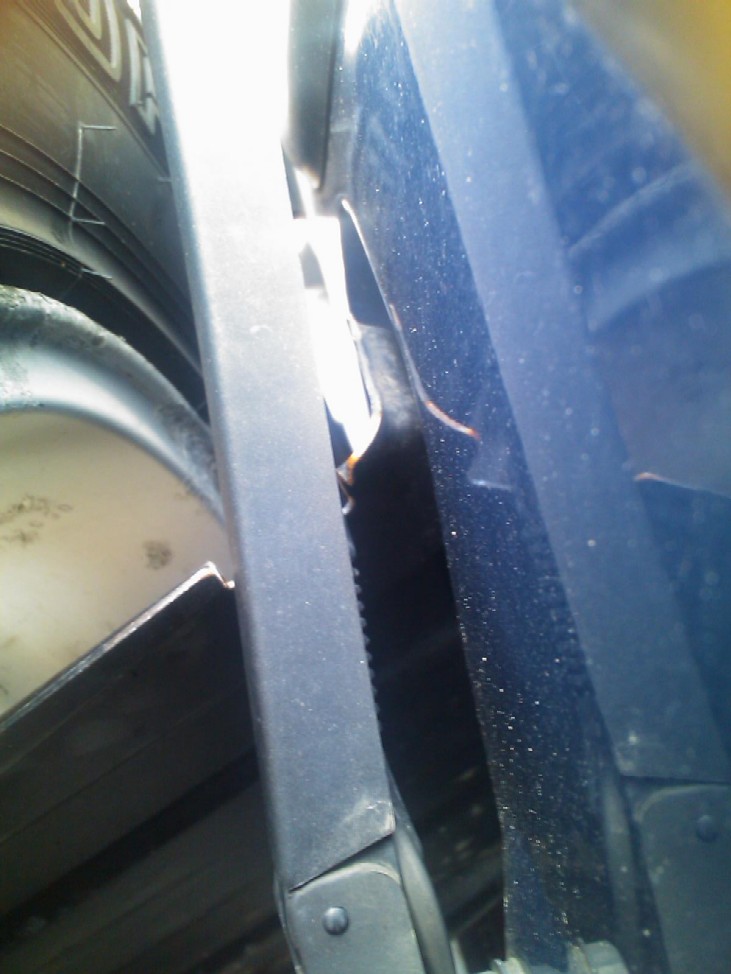
Now that's not quite the end of it, you will also have to mod the carrier so the rear window wiper does not hit it in the lower "parked" position as the carrier is angled on the original left side to miss the wiper arm. Now again there is 2 options here, some people simply remove the wiper of the splines and move it clockwise a few notches so it misses the carrier, this works fine, but for me it would annoy me with the wiper not sitting horizontal when its parked, so the other option is to cut a space / section out of the carrier so the wiper can stay in its original position and not hit the carrier. This is the method I preferred, what you do is up to you. To mark the area to cut out, I simply tie wrapped the spacers to the carrier assy, then held it against the door skin to see "roughly" where the wiper sits, marked it with a pencil, cut the vertical slots with a hacksaw as the carrier is very easy to cut, then chain drilled to meet the 2 cuts together and then filed it nice and neat keeping a small radius in each corner to "stress relieve" it.
This is how it sits on the door ref the wiper arm, I chose to cut a little "oversize" to allow all possible movement in the wiper when it sweeps down.
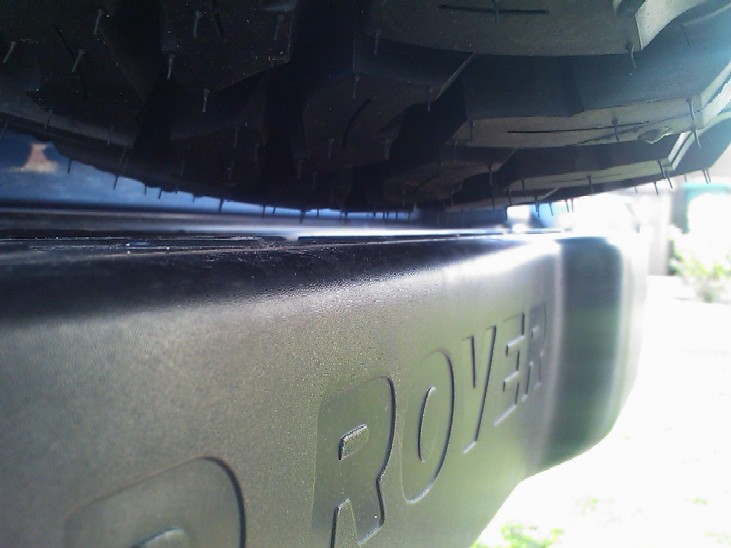
Now its a case of re-fitting the carrier back to the rear door, re-fitting the interior door trim panel, and then hanging your new spare / bigger tyre on the rear door. The first time you close the door, do it slowly incase the carrier mod is not enough to provide clearance (it should be for up to a 32" tyre) Here below is the amount of clearance with the new tyre on the door, its approx 10mm, not much, but its enough!! and does not cost a penny!! ;o)
The only downside is the carrier being "flipped" 180° is that it moves the spare towards the passenger side a little more, so the rear vision is a little more "blocked", but it's a small price to pay in my opinion as the vision was not great anyway!!
|
|||