![]()
|
Sunroof Switch Illumination. |
||||
|
|
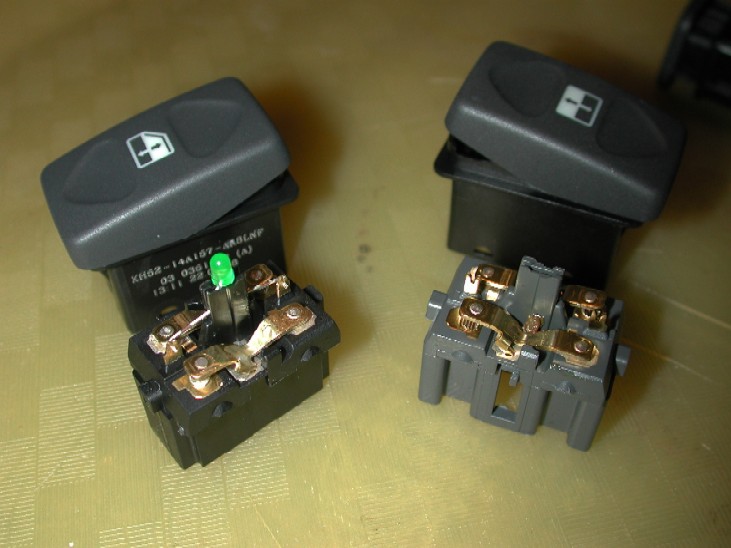
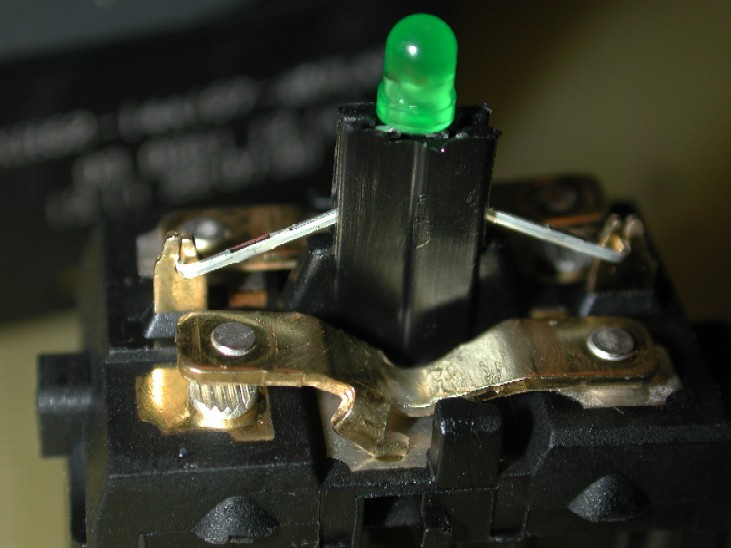
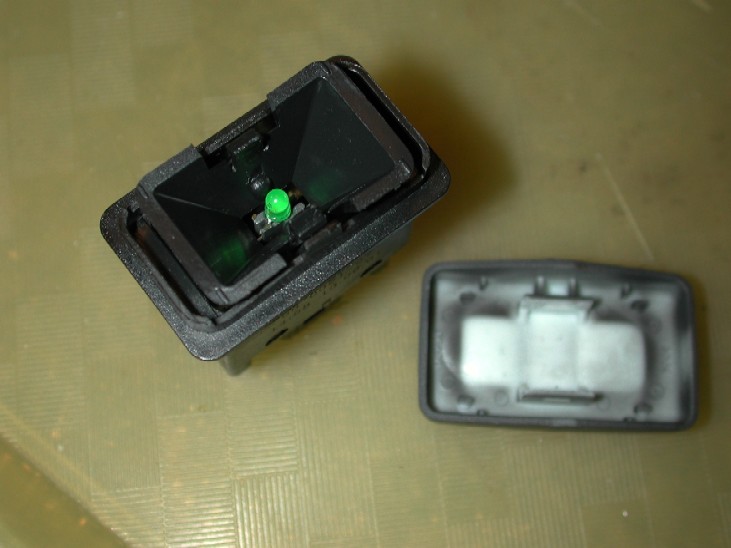
One of the small niggly things that annoyed me was the fact the sunroof switches on the Discovery 2 are not lit up when the vehicle lighting is switched on. Not a big deal really, but it would be better if they were illuminated like all the others. Why Land Rover could not be bothered to do this remains a mystery, but it was something I was going to sort out. After studying the wiring diagrams and the switches themselves, I determined that if I bought some front electric window switches like the ones in the centre console (which are lit) then I could maybe modify the plug on the sunroof harness and use them instead. There is no supply up to the roof from the interior illumination circuit, so that would have to be added, this is not a problem as it could be easily spliced of an existing switch anywhere in the dash, as I have already done with the other switches I have added for the roof lights, work lamp etc. The switches themselves are identical, its just the window switches have the LED in them, and obviously a different symbol on the rocker face. Below is the 2 switches, You can imply unclip the face plate, and also "carefully" split the body from the housing. You can see by looking at the picture the only difference is the LED. . After pulling them apart, I was pleased to find it would actually be even easier to accomplish this small mod and there would be no need to modify the sunroof harness plugs to make them fit. All I had to do was fit the LED into the sunroof switch, and add the new +12v supply to PIN 6. in the sunroof plugs. So, below is the LED fitted into the new window switches, you can see its just a push fit into the centre of the plastic molding and the legs are literally "clamped / crimped" into the 2 little forks on the end of the terminals
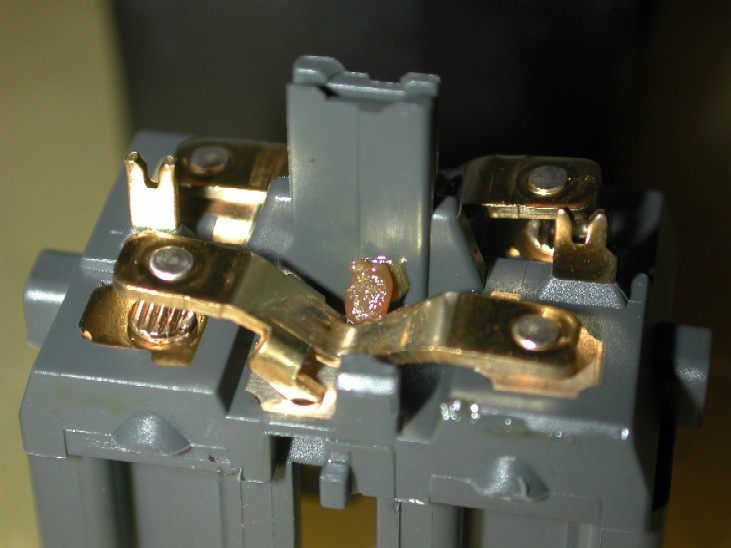
Here below is the sunroof switch, you can see the little "forks" still open....
So all you have to do is gently "open" the forks up a little with a very small flat screwdriver to allow the LED legs to be removed. You really don't need to open them much at all before they will slip out, and you can remove the LED. NOTE switch contacts removed for clarity and so you don't loose them, they just simply lift out.
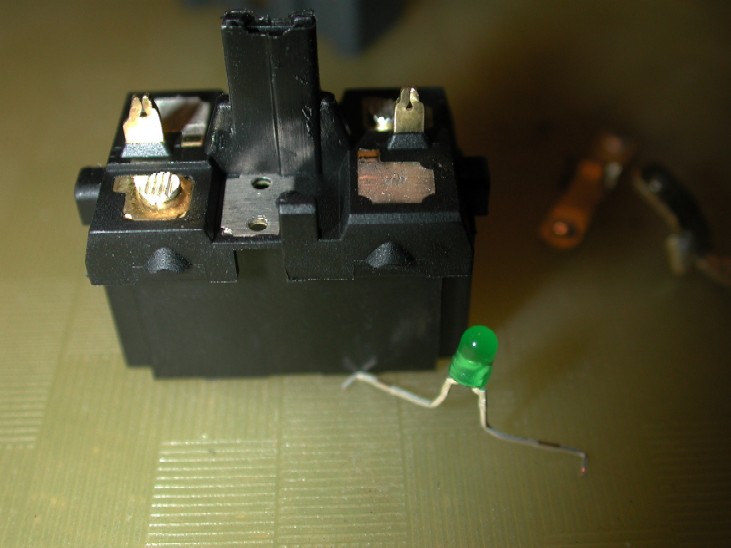
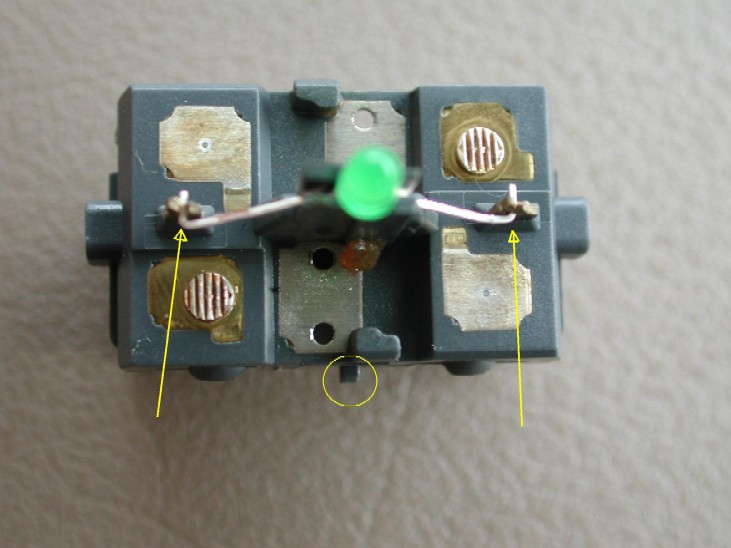
Now its simply a case of fitting the LED into the sunroof switch. Fit the LED so the right angles on the end of the legs face AWAY from the notch on the switch housing (circled below) This ensures the LED is the correct way round ref the current flow.
Then use some small needle nose pliers and carefully close up the forks to hold the legs of the LED still and in contact with the switch contacts
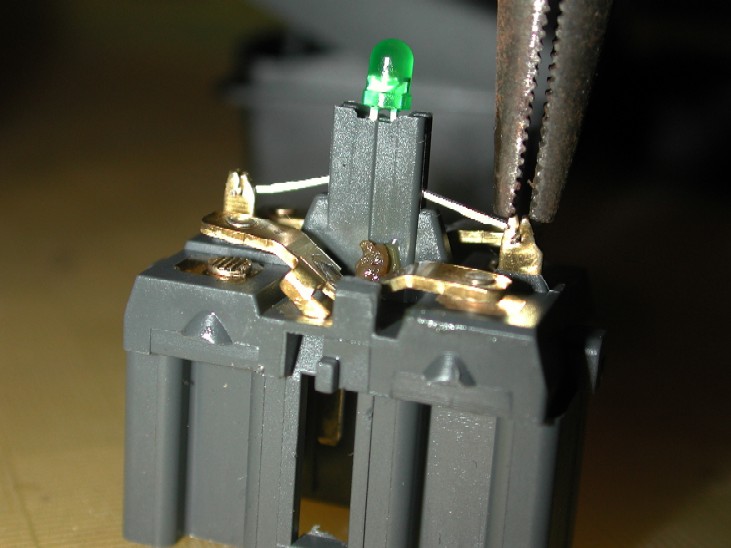
Now clip the housing back to the body, and the LED will sit neatly in the middle just like it "should" have from the factory!! Take care to ensure the rocker contacts are sitting in their little holes, and hold the rocker in the mid position whilst clipping it back together. Then clip the faceplate back on and that's the switch modding done!!
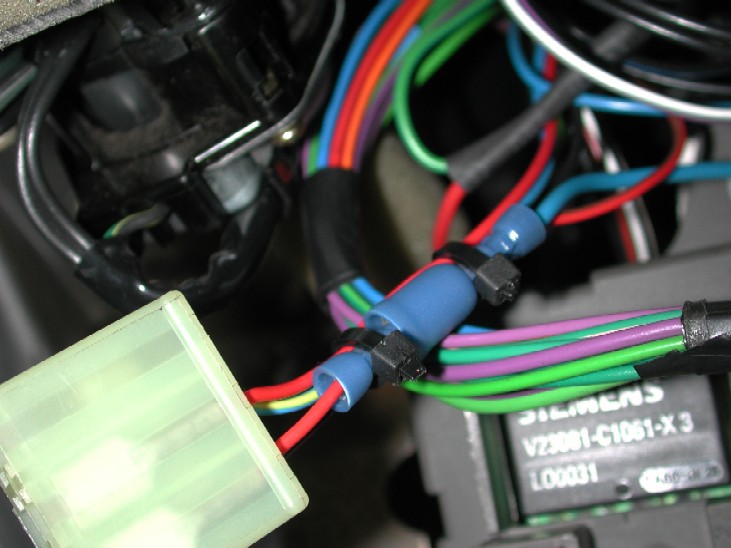
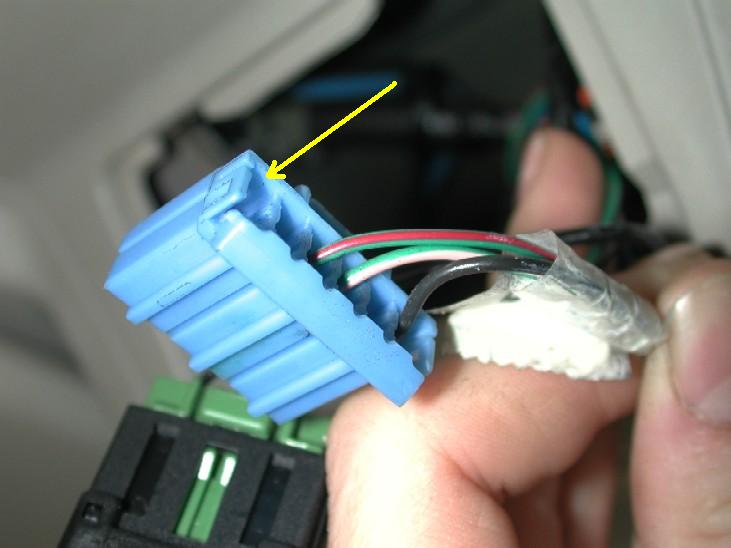
Now its onto the car side of the modifications. You basically need a +12v supply to come up to where the sunroof switches are located. I chose this time to splice off the back of the headlamp leveling switch. The BROWN / RED wire is the switch illumination supply. You could chose ANY switch you like, but as I stated earlier, I have already spliced off from several others so I chose one I had not used. You can disconnect the plug from the back of the headlamp leveling switch easily by opening the interior fuse box door.
Here I simply cut the BROWN and RED wire, added some bullet connectors and the new blue wire into the crimp. The wire runs up the "A" pillar behind the trim (simply unclips), then along under the front of the headlining (removing a few screws from the overhead map pocket will help you get the wire under the headlining) and up to the sunroof switch location. Leave the wire over long so you can splice of that into the other switch. The wire needs to go into slot 6, which is PIN 6 of the switch, they are numbered so it s easy to see. For ref, PIN 1 is the BLACK wire (ground)
Now, the only real way to do this neatly is to use the proper crimps / terminals and insert the new wire into the plug. You can see in the picture of the plug above, the back of the plug will unclip and hinge down and allow easier access to insert the new terminal. Below is the female terminals I used, I already had some of these spare, but they can be bought from places like Vehicle wiring products
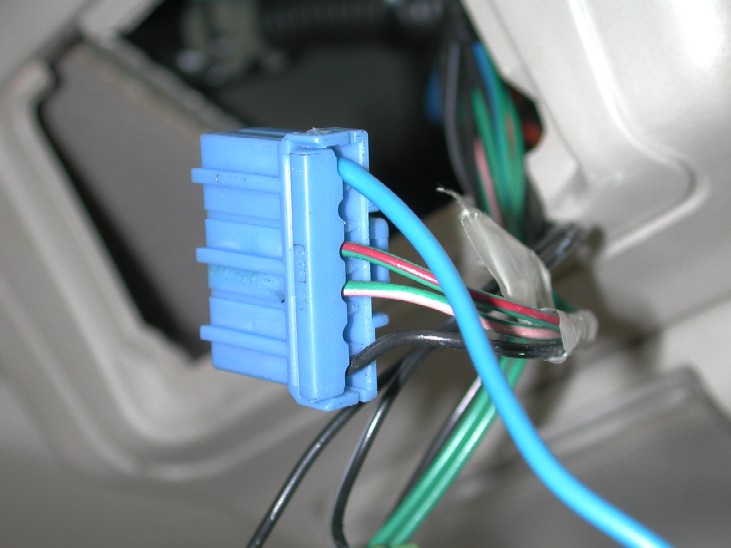
Once you have crimped on the new terminal to your wire, insert it into the plug and push it firmly home, then close the hinged part at the back of the plug to secure it. Give it a small tug to check its held in place ok. New blue wire fitted below.
Now as mentioned earlier you should have left sufficient length to be able to cut the wire, add some bullet connectors and another wire to splice of to the other sunroof switch, and then repeat the crimp / terminal fitment on that one as well.
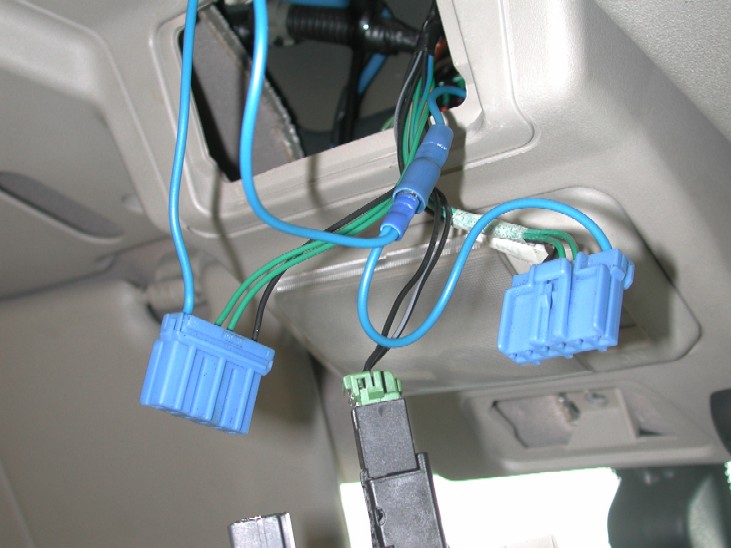
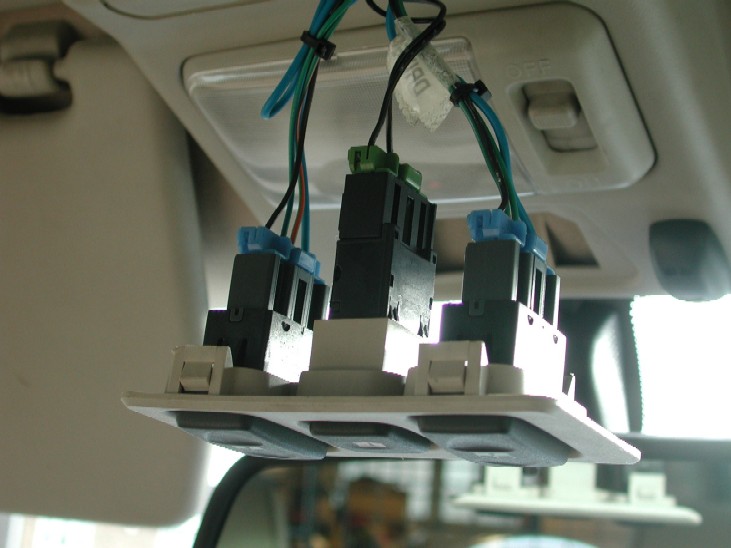
Now plug in your new modified switches, and tidy up the cables if need be with some small tie-wraps, be sure to leave enough "play" in the looms to allow the switch pack panel to be pushed back into the roof console.
Now switch the vehicle lighting on and they should now light up like all the others. I removed the faceplate to check the LED's were working as it was bright sunshine and was difficult to tell. I will add a picture when its dark to show the full effect.
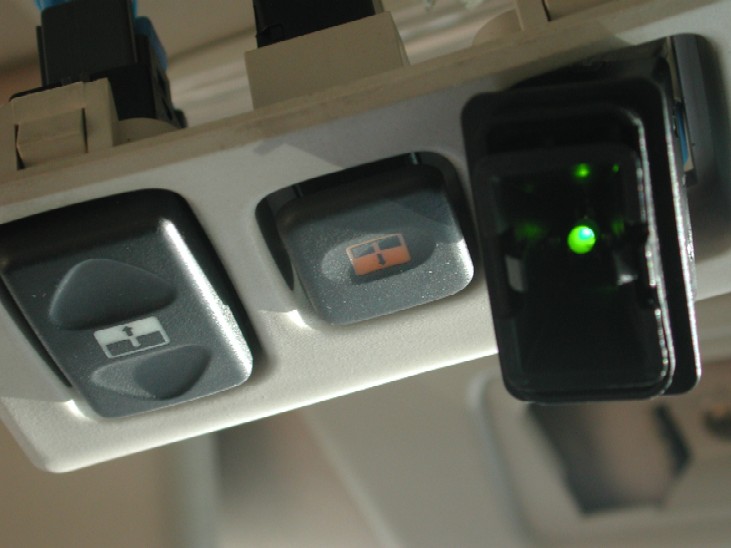
Well that's it, You may think why did I not do the other switch, well I looked into it, but the switch itself will need modifying a bit more and a LED soldered in. As I now have the supply in the roof, it will be added at a later date if I find an easy way to do it. I have heard discussions on this, but never seen it done.... A simple, but pleasing mod!!! Well not long after doing the 2 outer switches, I did add illumination to the centre "enable" switch as well, which lights up red, below is how it looks when the lights are on, quite difficult to get a good quality picture, but you get the idea
How it should have been from day 1!!!!
|
|||