![]()
| Southdown Raised Air Intake (snorkel) | ||||
|
|
Well, If you have visited the site before, you would have most likely seen I have a Mantec snorkel fitted to my Discovery TD5 . I did have a D1 for a while and on that, I had a Southdown Snorkel fitted (below)
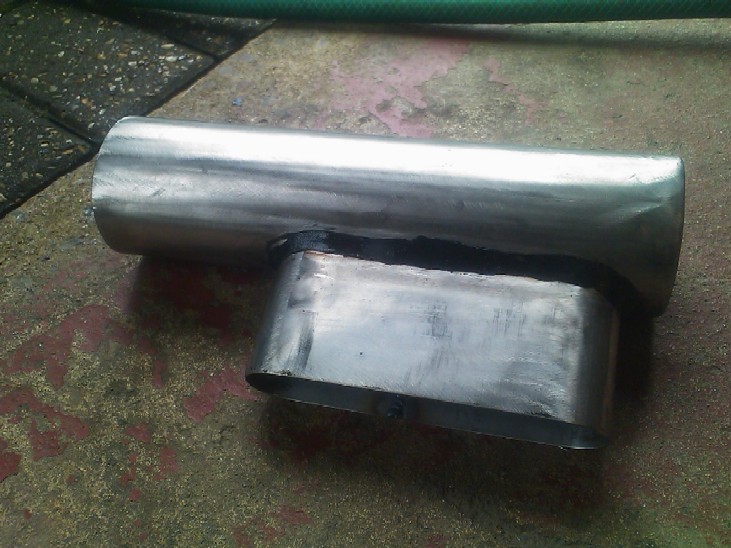
Well, my friend who also has a Discovery TD5 liked the Southdown snorkel design, but was not to sure about the stainless pipe "fitting" the look of the Disco 2, so we took the time to prep it and sprayed it black. Before we could fit it, we had to get the snorkel to mate properly with the D2 air intake scoop, as your probably aware the series 1 Discovery's have a round tube on the intake to the airbox, where as the series 2 has an extended oval shape, so to fit the round flexi tube for a Southdown there needs to be some kind of "adapter" to mate the 2 together. Well, if you check Souhthdown's website, and even their EBay shop, it lists the kit for a Discovery 2 but there seems to be no piccy of what connects it to the airbox. Fortunately we met them at their Billing stall and after discussing what we wanted they said they make a stainless steel adapter to fit the series 2. My friend promptly ordered one from them and whilst we was waiting we prepared the rest of the kit for fitting. Well, today the bit arrived and I must say it fits very well into the air scoop on the series 2.
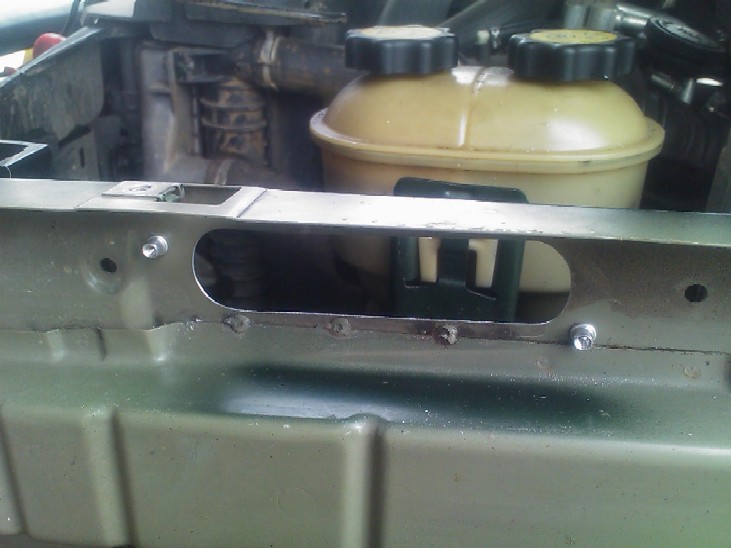
It seems very well made, but "just" incase, we added a bead of silicone sealant around the weld to cover any potential holes that "may" be there. We then went on to the rest of the "fit". This is not a "full" write up as we all may do things differently, but I will add the "basics". First off after removing the front wing (see Mantec snorkel install for details) and the whole airbox assembly we set about removing the studs where the crappy plastic nuts hold on the air scope. We first cut them flush and then drilled and added 2 M5 Rivnuts to the same positions.
The factory hole had to be made slightly larger in both directions to accommodate the new stainless adapter, this ensured it was a nice fit through the hole in the wing.
Adding the 2 rivnuts for the factory air scoop makes fitting the scoop tight to the inner wing possible, where as with the factory plastic nuts they just cannot be done up tight enough for a good seal Here's the new adapter sat in the hole with the flexi tube added on the end.
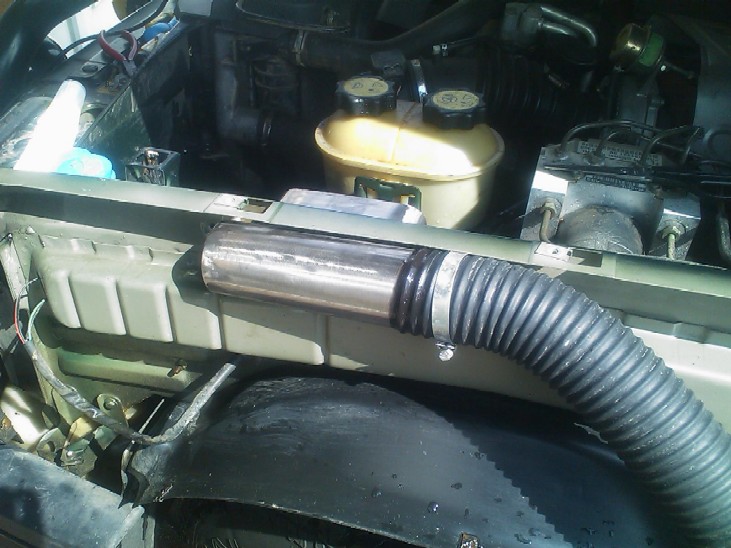
Another angle, the flexi tube is a real good fit, but it was slid on with silicone in place to provide an even better seal, and then the Jubilee clip added.
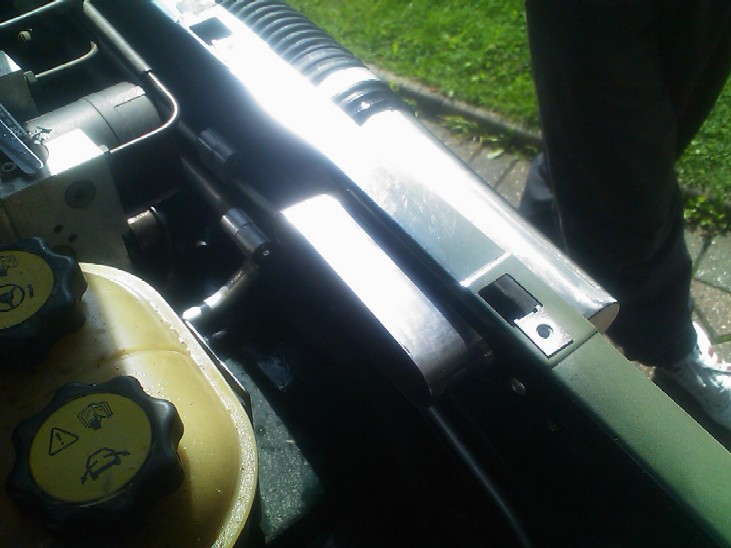
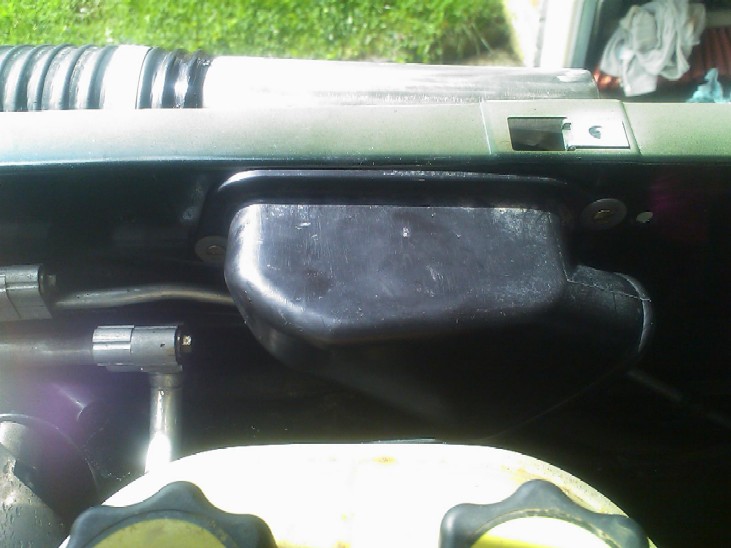
Here's the "factory" scoop fitted to the new stainless adapter, again silicone was added to both parts before pushing them together, it really is a snug fit!!!...
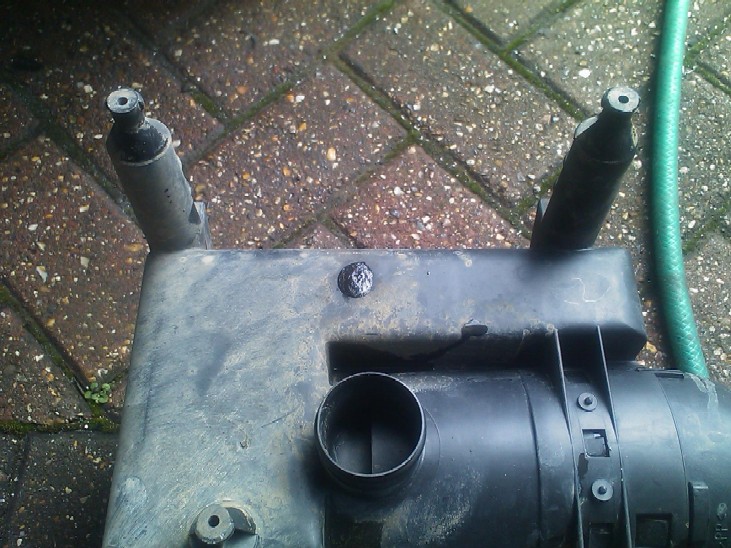
You can just see the 2 new screws and large countersunk penny washers now holding the factory scoop tight against the inner wing. Next on the list was the cutting of the hole in the wing, this is the bit "most" people don't like, but as it was a friends car I had no trouble cutting away!!! ;o) No pictures of this as I forgot!!.......but the snorkel comes with a template that you can and SHOULD follow, and remember measure twice cut once!!. I used the same process as I did for my own Mantec snorkel (see page) with a dremmel tool and small cutting discs. There is a lot less to cut off on the Southdown install as it sits further forward and does not require any of the strengthening webs to be cut off the back of the wing panel. Some "other" things you should definitely do on any snorkel is check the airbox for factory holes!!!, the D2 has one on the bottom, so that was quickly sealed up !!
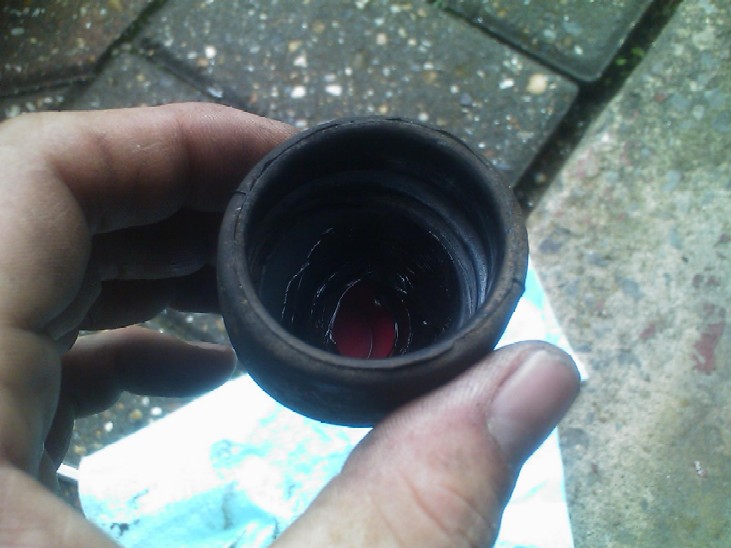
Also above you can see the "big" hole, this is where the D2 has a "dump" valve on the bottom that protrudes into the wheel arch. Its a simple rubber thing that over time looses its ability to stay closed and is a prime spot for water to still get up into the airbox. So, a plastic blank was pushed into the bottom and then again sealed in with the faithful silicone.
This can be fitted from underneath once the silicone is dry and airbox is all back in the vehicle. And last but not least, on all the snorkels I have done, I also add a new foam seal all the way around the lid of the airbox, this makes it a very tight fit against the air filter and should hopefully add to how well the whole install is sealed up.
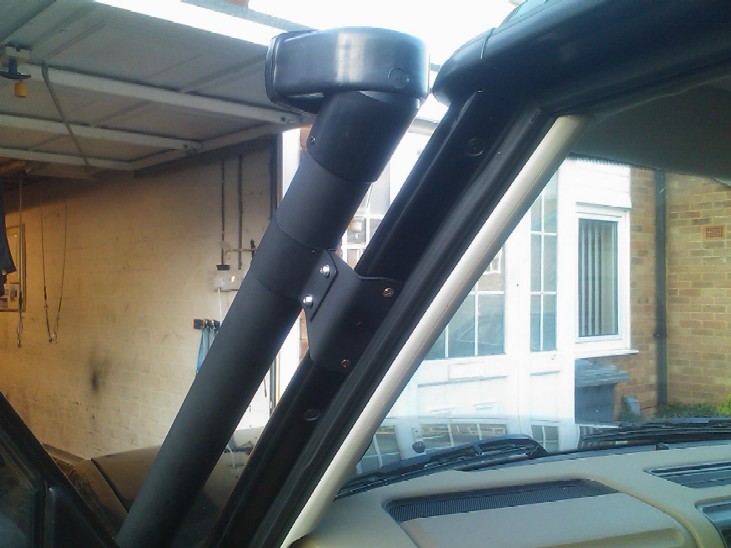
Once all that is all fitted back in, its the final part of the install, which is the upper tube and A pillar bracket. Again follow the install instructions you get with the snorkel. How ever again we modified the install a little. Because the of "A" pillar trims on the D2, there is less gap between the A pillar and the door frame when its shut than on a series 1 Disco, so to combat this we counter sunk the bracket for the A pillar which then gives plenty of clearance for the bolt heads, which leads nicely on to the next bit. The kit comes with self tappers to fit the bracket to the A pillar, but I personally do not consider self tapping screws a permanent fixing at all !!, so these were binned and we set about adding 2 more M5 rivnuts to the "A" pillar. Now because you "may" want to remove the trim in the future, and adding the thickness of the rivnuts under the bracket would most likely cause the door to fowl the bracket when closing, we decided to pilot drill the holes, then remove the A pillar trim, drill and fit the rivnuts to the body, then opened up the wholes in the trim panel to sit over / around the heads of the rivnuts, It makes a far neater install, is more permanent and will be easy to remove / refit at anytime.
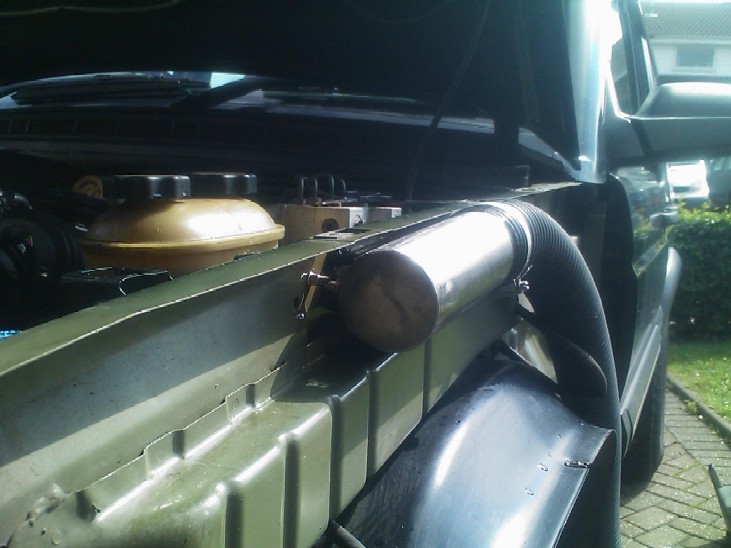
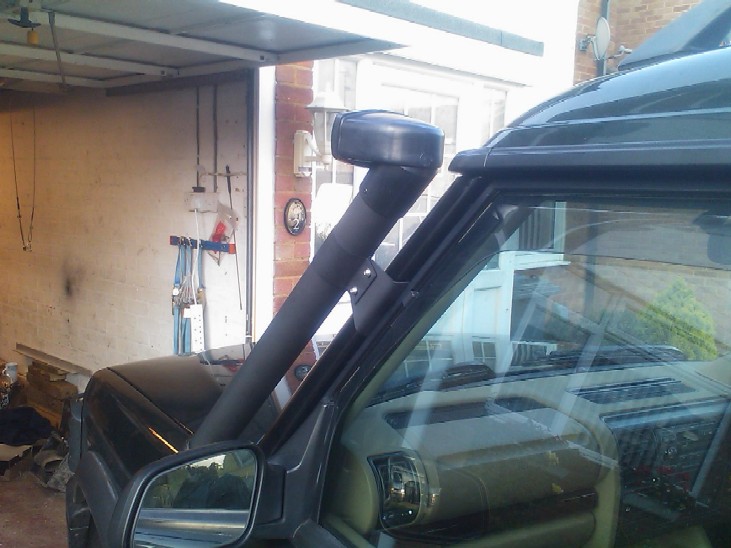
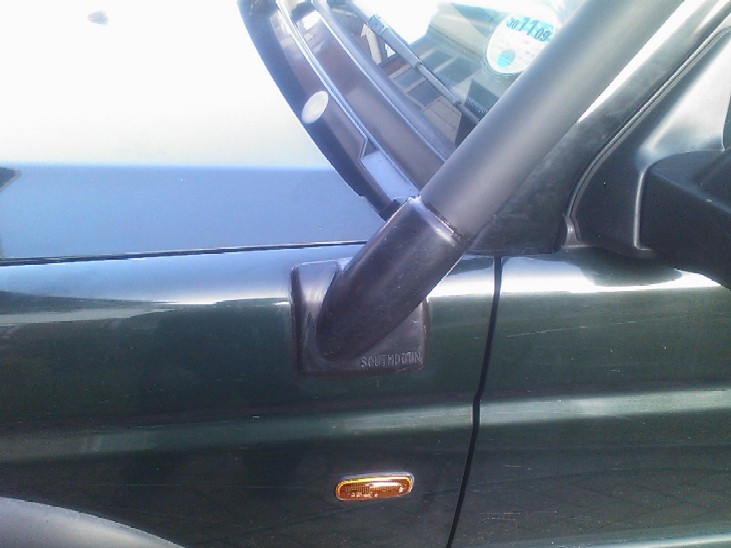
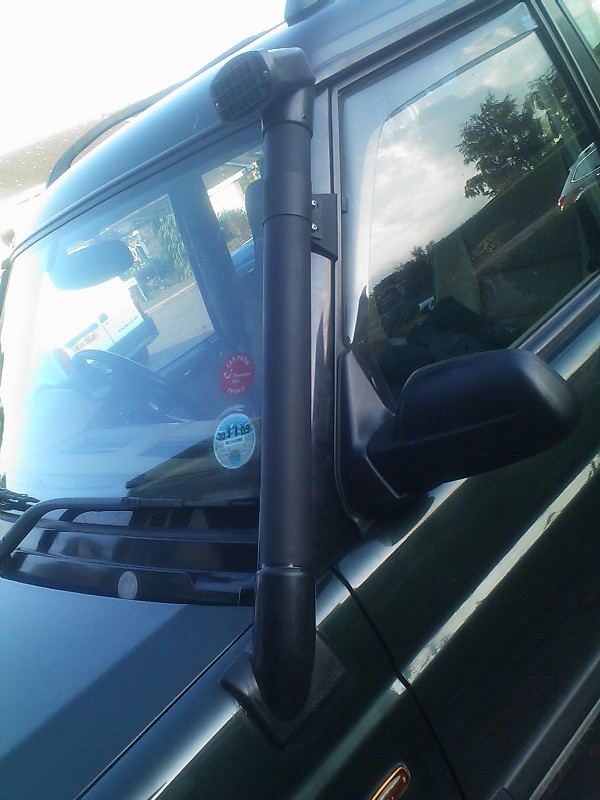
The rest of the install is connecting up the flexi hose to the bottom of the upper tube, make sure the tube sits parallel to the A pillar and the wing moulding is nice a snug against the wing. Do up all the bolts and clips etc, fit and secure the snorkel scoop, refit the wing and admire your new snorkel !! ;o) Heres a few of the finished article....
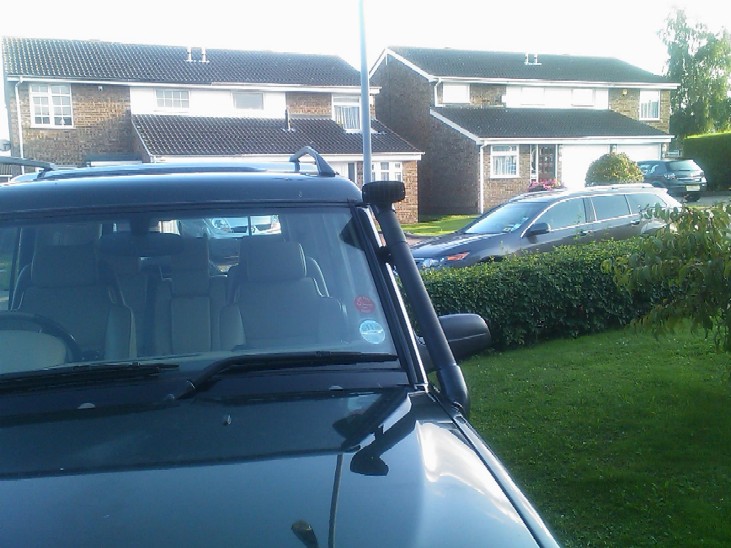
Bet you never seen a black one before!!!! ;o)
|
|||