![]()
|
|
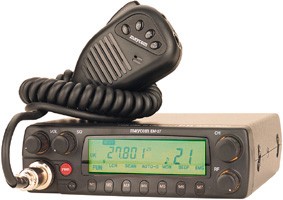
CB Radio For Off- Road Trips & Fun A CB Radio is a great addition when off - roading, when travelling on trips or just for fun to chat with your other 4x4 buddies. The world of CB's and which one to buy etc can be quite daunting for those that have never had one. The "tech lingo" can be difficult to grasp and choosing what to buy and where to put it can be a headache. I will be using one on the Morocco trip in OCT, but after having booked a "Wild Wales" weekend with the LROAC for June 08 recently, my purchase had to come forward a little. I looked at all the "modern" CB's out there today, and compared to the 1985 amstrad Hi-fi looking ones I have in the loft, a lot has changed. I have never been a lover of the the "traditional" needle type meter, and much prefer the "modern" digital look / design, so this was what I looked for. One Unit for me stood out from many others and that was the Maycom EM-27. It's an 80 channel (40 UK / 40 EU ) rig and is packed with features. It also has a large green LCD display that I feel will integrate best into the existing interior of the car.
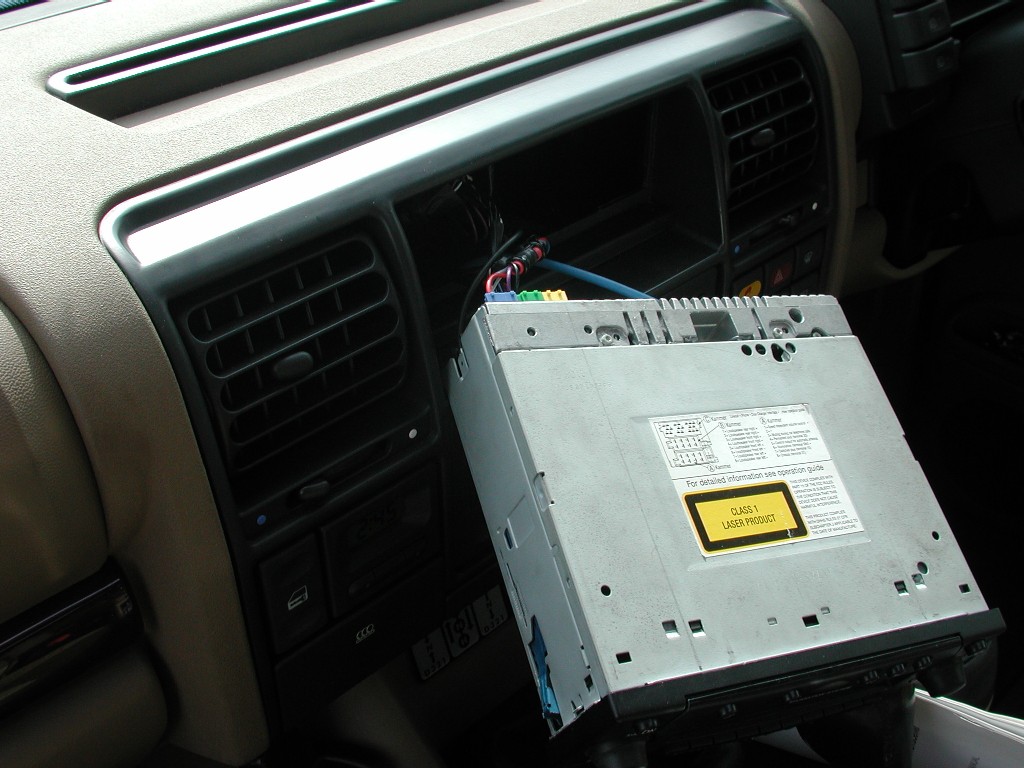
As with most of the "addons" I fit, they generally have to be installed "well", but also removable as they won't always be in the vehicle, but also be able to be fitted and removed "quickly". There is several places you could simply screw the unit to, and its all down to personal choice. I originally thought of "hanging" the unit from above near the front interior light, but viewing the display would not be that easy and the microphone wire would also be hanging down, so I dismissed that idea and looked for another place. Another common fitment place is on the side of the gearbox tunnel, however this was no good to me either as on the left side is my hands free phone kit cradle and both sides also have the US style cup holders which would get in the way. I think it would be difficult to read the display "down there" to. So in the end I was left with one option which worked out quite well in the end. I decided to fit it on the top of the dash in the centre, that way it would be easy to reach and use, easy to see the display, and also look good at night with the air con display, radio and CB all lit up together in green. You could simply use a power lead that plugs down into the cigarette socket, but I prefer a more "permanent" power supply. So I took out the radio and intended to bring the power supply through the radio "vent" grille.
There's plenty of space behind there, and after having it out hundreds of times to fit the Satellite navigation It was easy to route the wires etc. The centre of the grille above the radio is not actually "open", so because I wanted the wire to come out in the centre, I simply drilled a hole to feed it through
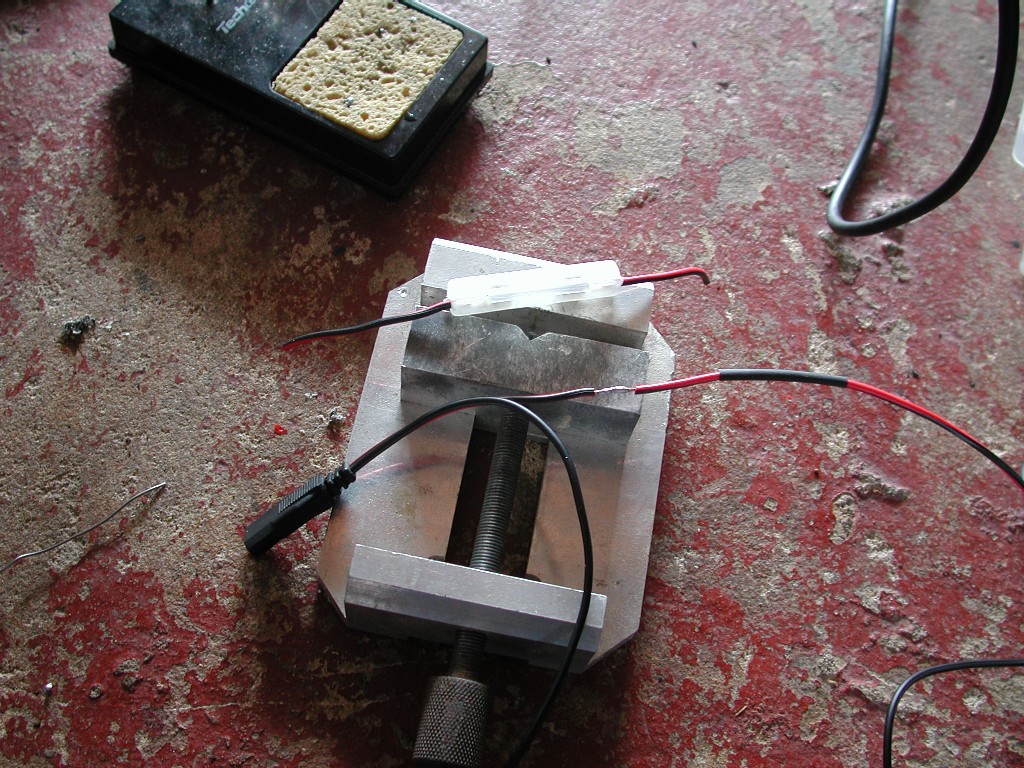
The power lead that is supplied with the unit comes with the round type glass fuse holder already fitted. I don't like these as they quite often fall apart and I much prefer the Blade type fuses already used in most cars. This holder and fuse was obviously to big to fit through the whole in the grill / vent, and was located very near the top of the power lead and I didn't want that on the top of the dash. So I cut it out of the loom and re-soldered the wires back together, covered them in heat shrink for protection and would re-fit a fuse holder else where.
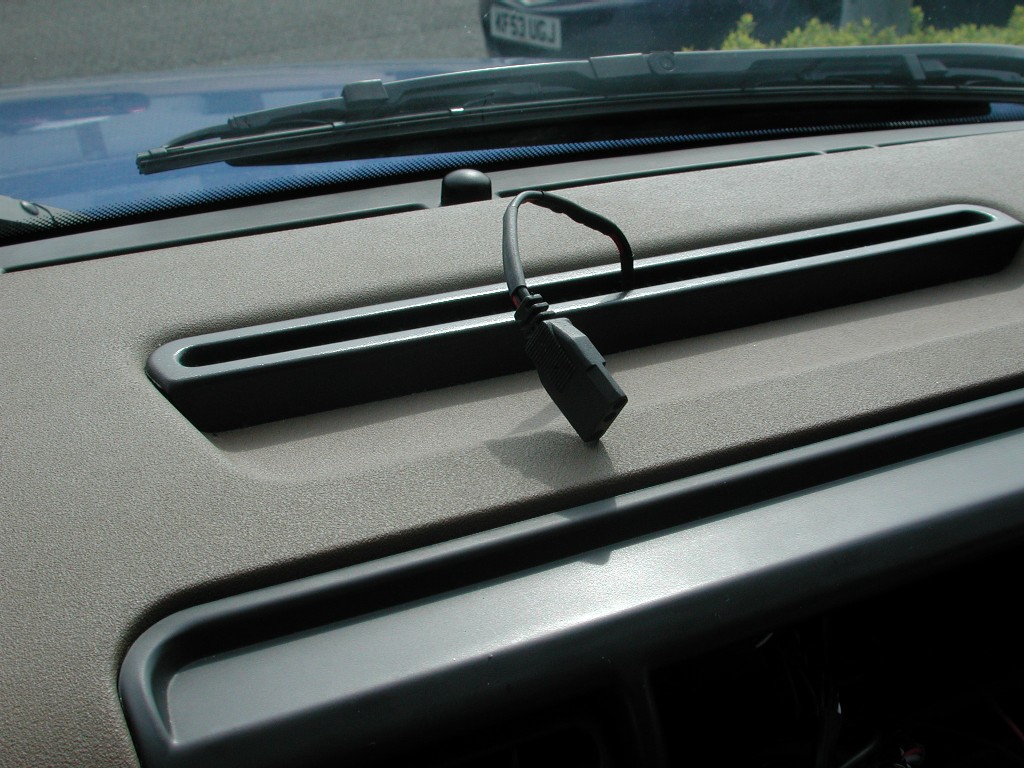
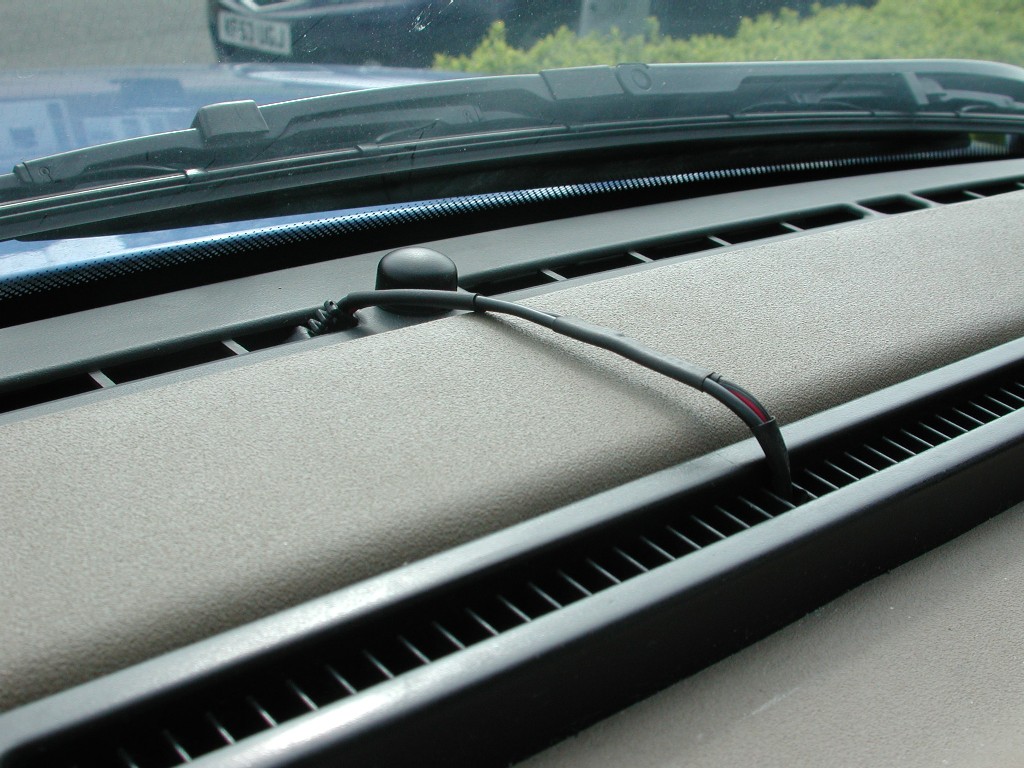
When the wire is not being used, I left it long enough, and buy good judgment or luck !! the plug fits nicely into the air grille further forward when not in use and holds it from flapping about.
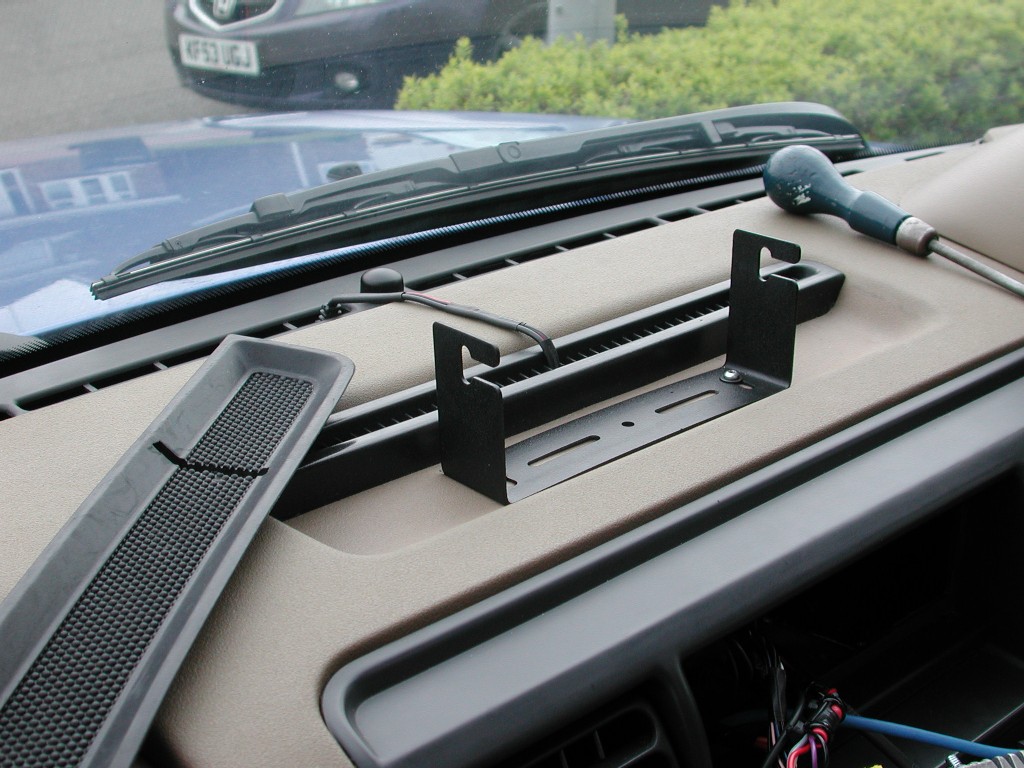
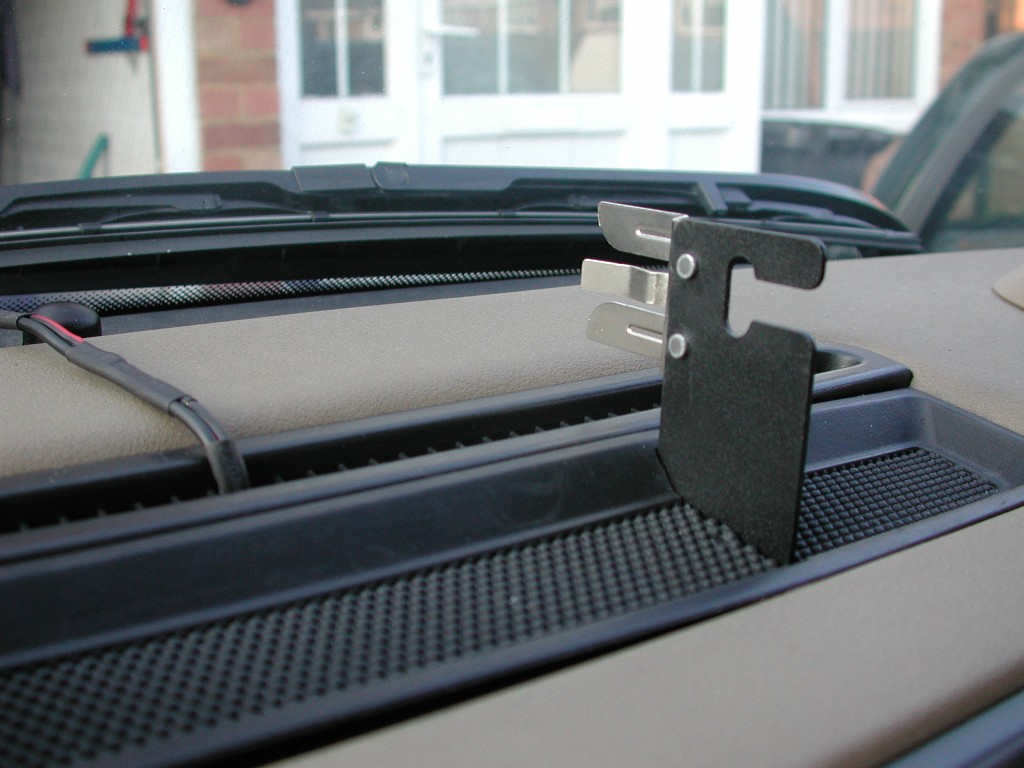
The unit also comes with a bracket and screws to fix it down. I simply drilled 2 holes through the dash into the space wear the radio goes and screwed it down. the original screws supplied were not long enough so I used my own. NOTE, you need to check the length carefully when installed, have a look underneath in the radio slot to make sure they wont interfere with the radio going back in. The good thing with this installation place is, even though you have drilled holes in your dash, if and when you remove the whole install to sell the vehicle maybe, the holes will be always out of sight under the rubber dash mat !!
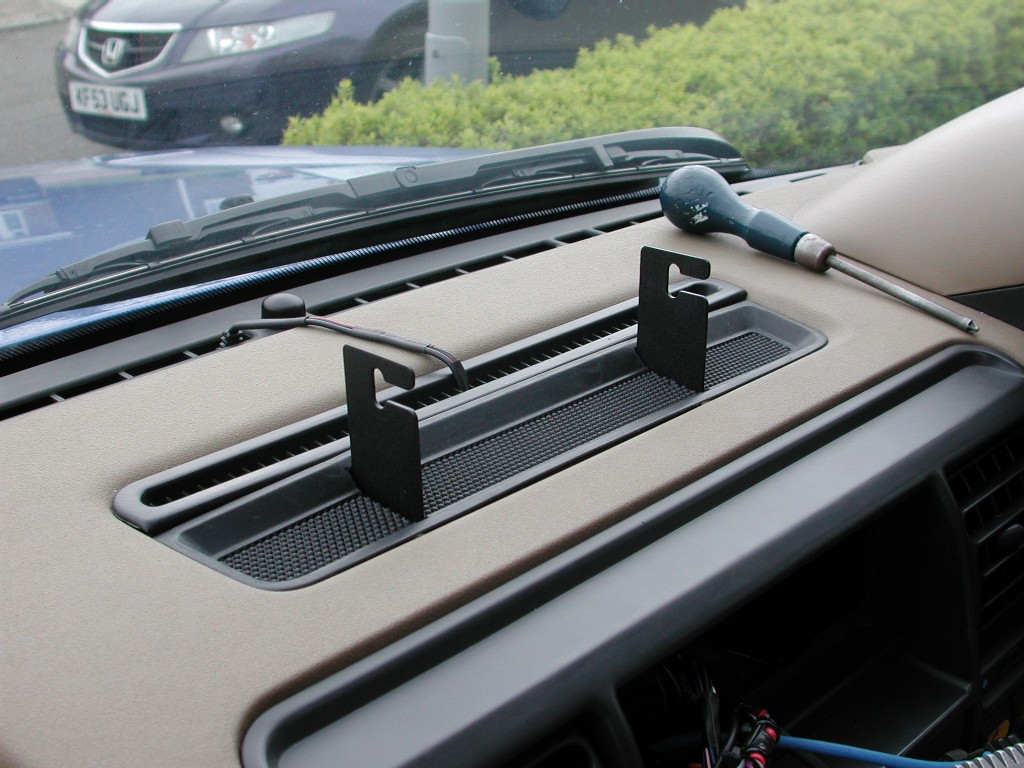
Once I had worked all the install out, I knew I was going to cut the dash mat, So I have already got a new spare mat ready to refit at a later date as they only cost a few pounds from the dealer. So, as you can see above I cut slots in the mat to allow it to be refitted over the bracket back in its original position
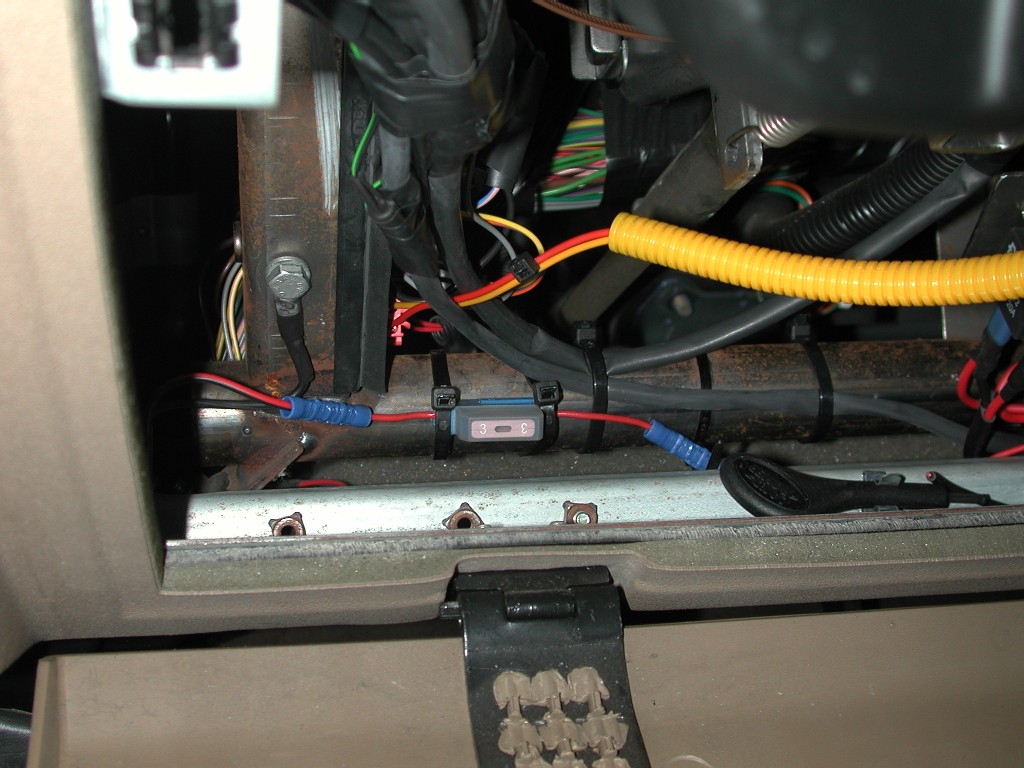
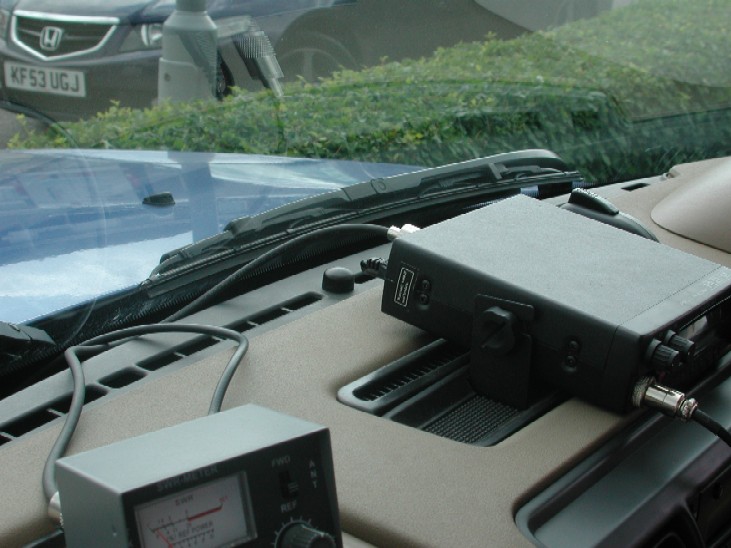
It sits a "little" proud because of the bracket and screws underneath, but looks good re-installed if you ask me!! and still enables you to use it when the CB is out of the car. Now I had fitted the mounting etc, I just had to connect up the wires. You need either a 12volt battery supply, or 12volt ignition supply, choice is yours. I had already fed an ignition supply fro my roof rack lights, so I simply run the loom into the car interior fuse box area, earthed it on the structure there, and connected into my ignition supply and fitted a 3amp "blade type" fuse holder inline as I had removed the original glass type earlier.
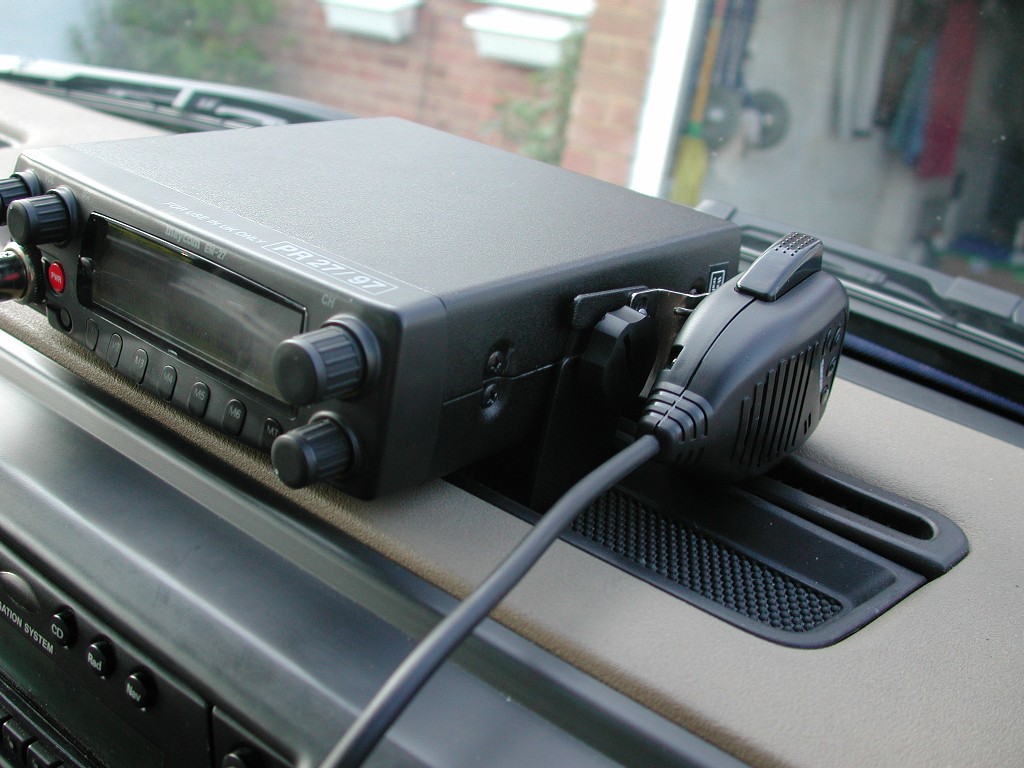
Next is the issue of where to mount the microphone holder. it simply has 2 holes and can be screwed or pop riveted anywhere you wish. I could not find a suitable place that would allow me to drill holes in the dash, but somehow cover them up at a later date. You could just use the factory "spring out" cup holder and lay the mic in there, but although it will probably get left there a lot when in use, I also wanted to use the mic clip as well. So, after looking at the set in the bracket etc, I decided to fit the mic clip onto the mounting bracket as well. I used just 2 1/8 pop rivets to secure it. NOTE because of the space between the side of the set and the bracket, I filed down the tails of the rivets to give it clearance and to stop it rubbing / scratching the set when its in the brakcet.
Fits nicely when clipped in, it's easy to reach and depending on how good the microphone actually is, you could key the mic and probably talk without removing it from the bracket....will see how this pans out.......
The unit simply clips into the slots in the mounting bracket, and is secured by 2 thumb wheels, takes literally 1 minute to fix the unit in, and plug in the power cord
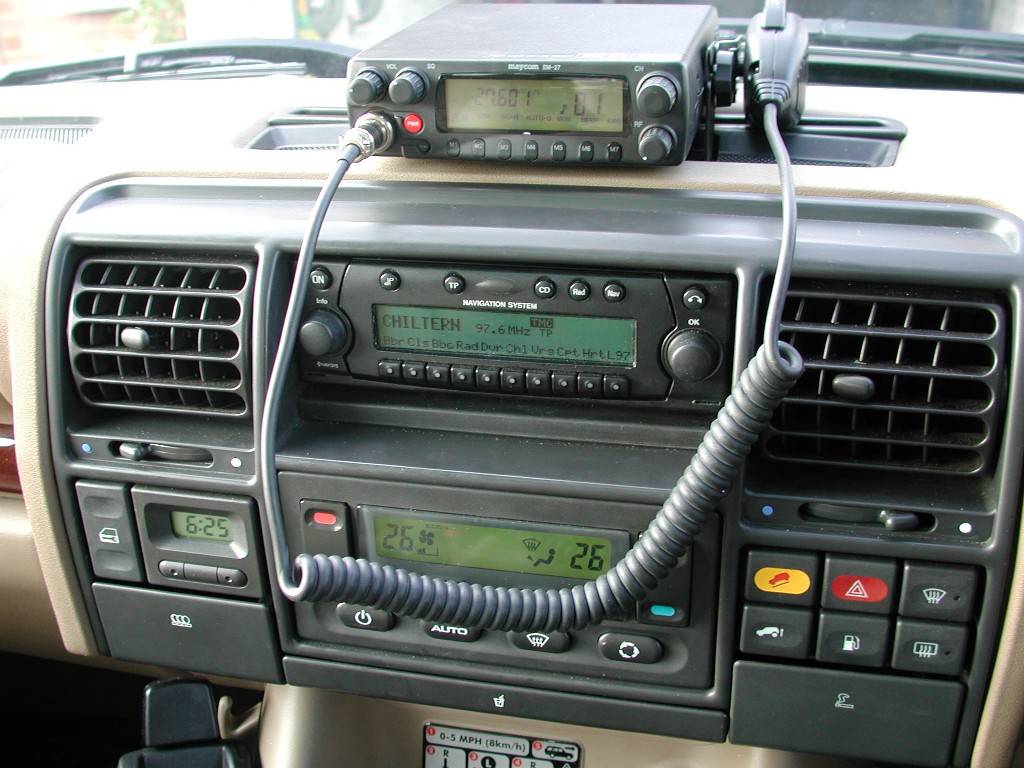
Hers a more complete look, the camera shows all the displays as different colours, but a night they all light up very similar. The mic wire does hang down, but its not really in the way, I'm quite happy how its turned out so far.
Ok, So the antenna install, well at first I did try a spare wheel mounted antenna, but after running all the cable in, 2 seperate earth wires, one to roof, and one to the chassis, I still could not get a good SWR reading at all. So after messing about I slapped my 10 year old mag mount on the roof and tried that, and to my amazement the SWR dropped to 1.4 which is pretty good. The mag mount offers ease of installation, and you can remove it in minutes when not in use, how ever I find it a pain to put the mount on the roof and then run the supplied cable with it into the car and up to the set each time you put it in. To combat this problem, I cut the loom on the mag mount so its just long enough to reach into the car (through the rear door rubber) and then connect to a permanent cable inside. The permanent cable runs from the dash, along the large gap in front of the dash, down the "A" pillar / kick panel behind the trim, along the sills under the retaining trim, and up behind the rear side trim panel to where it terminates with another plug and a cable coupler.
Above is the cable at the radio end
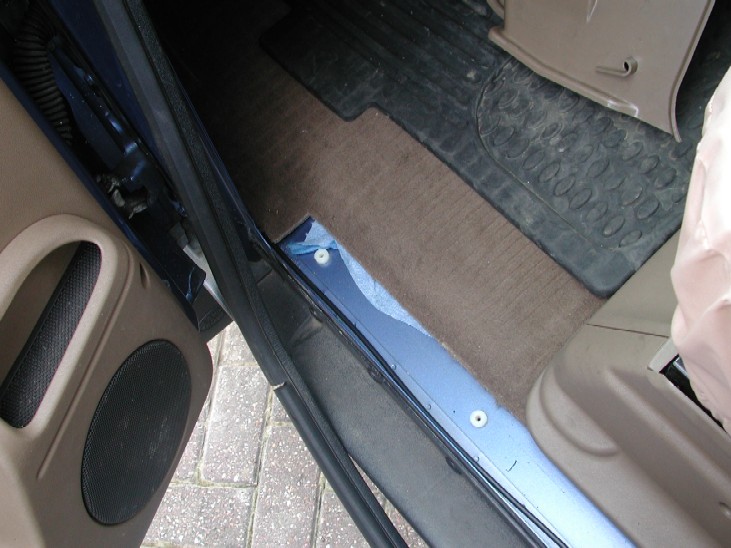
Here is the cable along under the sill trim, there is plenty of room under here !!
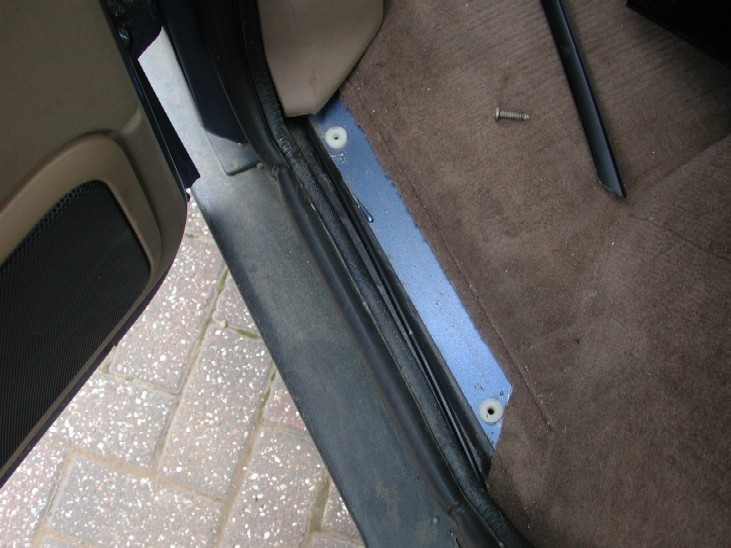
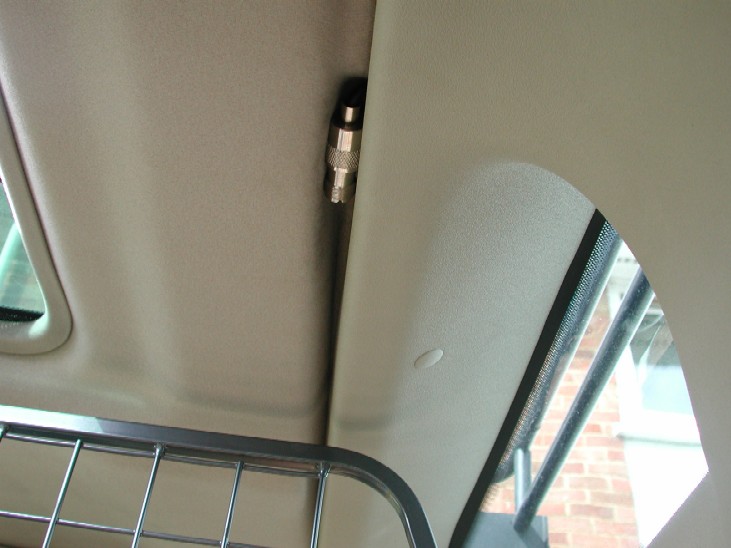
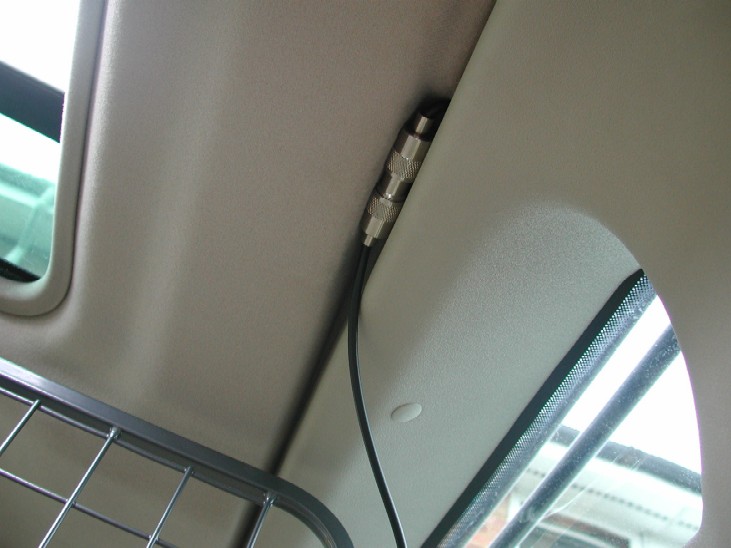
Cable again under the sill trim at the rear door It then is just laid underneath the carpet, goes up over the wheel arch and up behind the rear side trim panel. It's terminated with another standard plug, its also connected to an inline coupler, and it sits nicely in the gap between the rear side trim and roof panel.
So, when it comes to installing the radio, the mag mount is just simply put on the roof, the cable comes from that and goes between he rear door and rubber, then connects to the coupler in the roof.
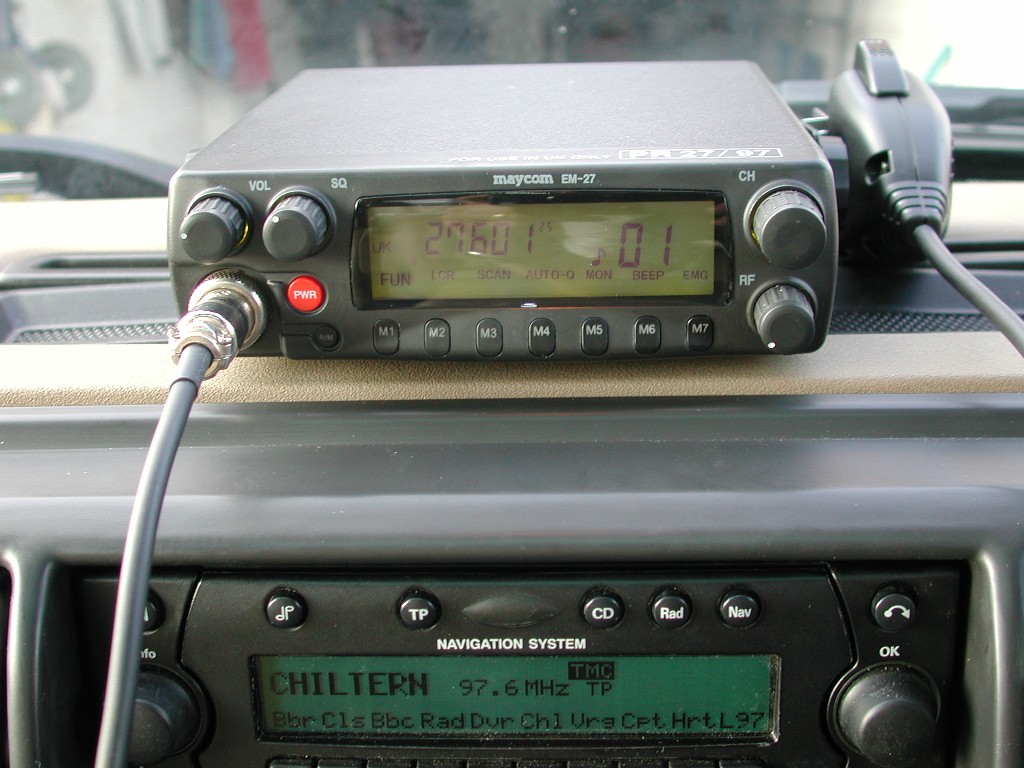
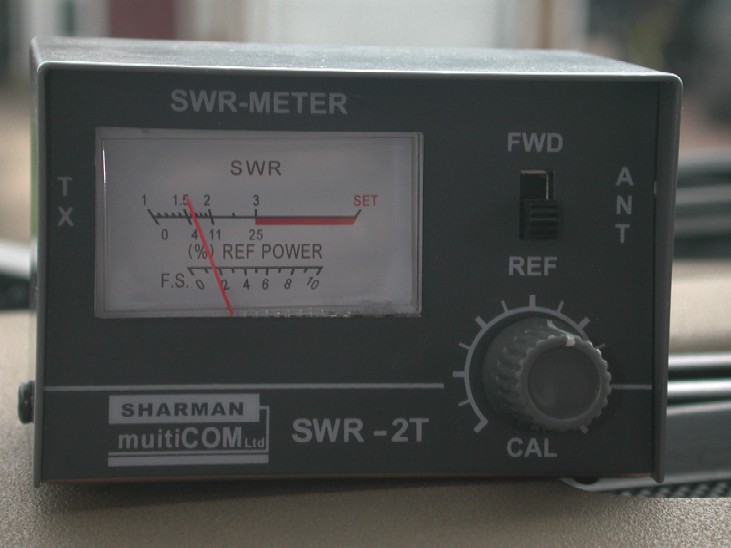
Once it was all in, and as with ANY install, you need to check the SWR. I made all the cables myself to get them just the right lengths, so checking the SWR was very important!! Here below you can see the SWR figure with the radio, mag mount and my coupling cable all connected. Time to enjoy the fun of the CB radio !!
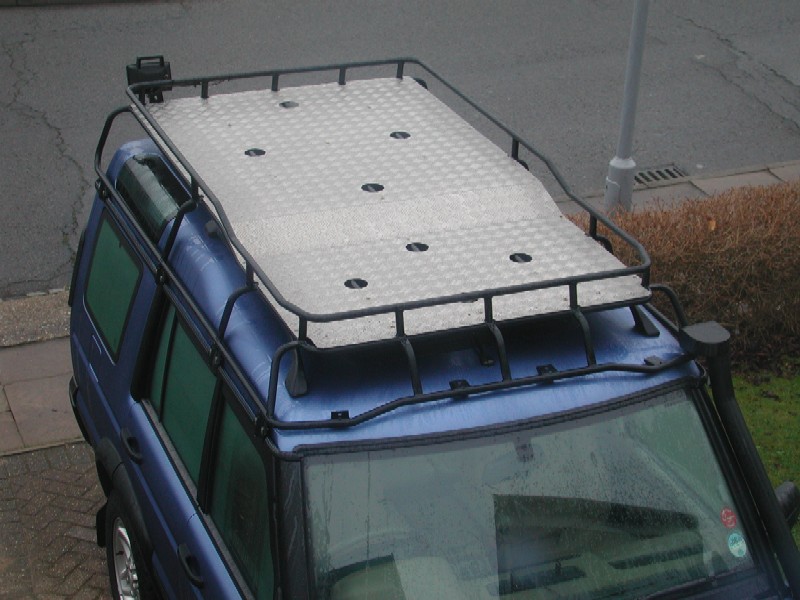
UPDATE BELOW Ok, so now the final antenna install, well maybe!! lol. Due to the fact I finally got an SD roof rack, I had to again find another antenna mount / location. On my previous roof rack I simply had a mirror mount on one of the tubes and the wire came along the rack ,in and down through the rear left door rubber and up to the coupler at the back. With the first roof rack install, the SWR was very high upon initial installation / test, so I had to run 2 additional grounds from the bracket to help combat this. One ran directly from the bracket down behind the rear light cluster and exited by the rear bumper, there I attached a ring terminal and grounded it to the chassis rail. I also spliced of this ground wire an run it behind the rear upper roof trim and grounded it to the roof panel. This proved to be about enough to get the SWR down to 1.8. Now on the SD rack, I wanted to avoid anything "to" permanent, so again I used a mirror mount to mount the antenna to the rack tubing. I could not decide whether to put the antenna on either side or even at the front centre of the roof rack. In the "middle" of the vehicle is the most popular place, and is thought to give the best all round performance. If I fitted it in the middle, it would most likely get in the way if and when the rack is loaded up, in particular with another spare wheel, so in the end I chose to mount it to the rear. Below you can see the rack is fully decked in Ali plate, but there is still a few holes in it to use for lashing stuff down to the tubes, the rear hole in the centre was a good spot to fit the new mount.
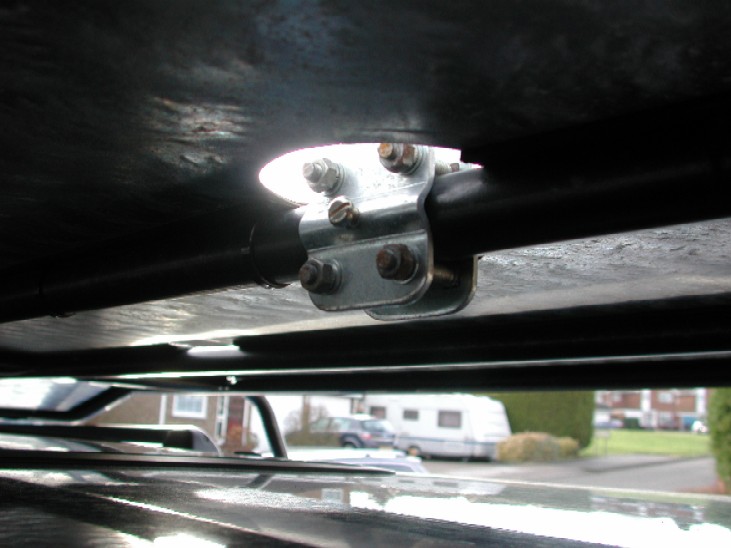
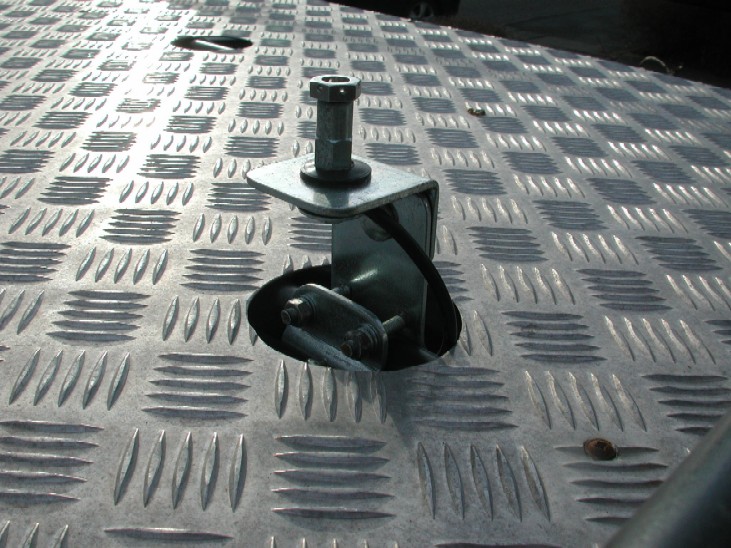
The new mount simply clamps to the roof rack tube.
The wire runs from the mount along under the rack decking and is simply tie-wrapped to the tubing as required, then comes down the roof rack leg by the "c" pillar, and goes over the gutter and through the door rubber and up to the coupler already in place at the rear upper trim panel. For some reason, and who knows the reason why!!, the SWR from the new mount is down to 1.1 and that is without any additional ground wires, so I'm very happy with that!!. When the antenna is removed and the CB not in use, I fit a blanking plug with "o" ring in the mount to keep moisture out of the threaded section and hopefully reduce the possibility of any corrosion building up and affecting the performance.
|
|||
|
|
||||