![]()
| Spring and SLS Suspension Lift 09/08/2010 | ||||
|
|
I had not originally planned to include a detailed page on my suspension lift as all vehicles are different, we all want different things from a suspension lift and off course there is hundreds of diff ways to do it as well. Recently though I have had quite a few e-mails ref my lift and what / how I had done it so I decided to add this page to give the basic details of the suspension lift. If I'm honest I never intended to lift my D2 at all.......but after taking it here and there and noticing that just a little extra ground clearance can make all the difference I decided to go ahead and raise her a little..........yes I know your probably reading this thinking a suspension lift won't aid ground clearance and you would be right, but its the first step in modifying the suspension to be able to fit larger tyres which will give you a little extra under the diffs.
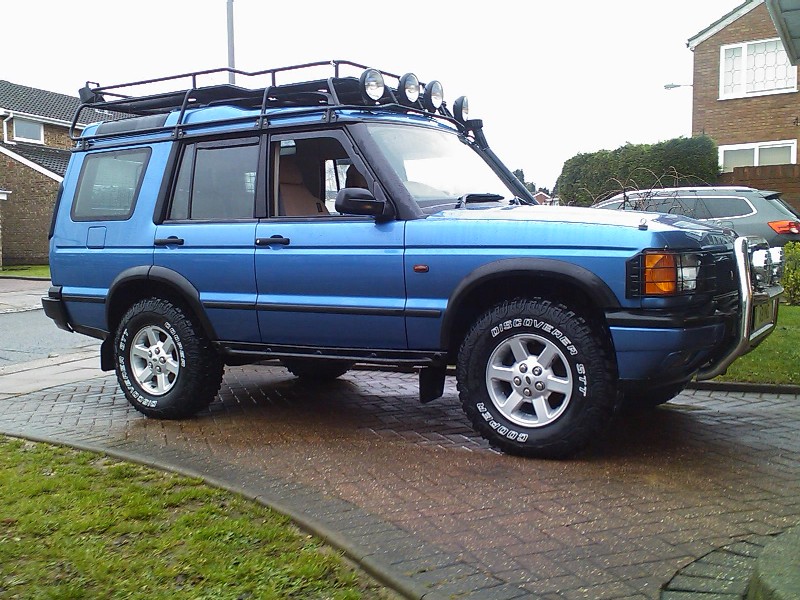
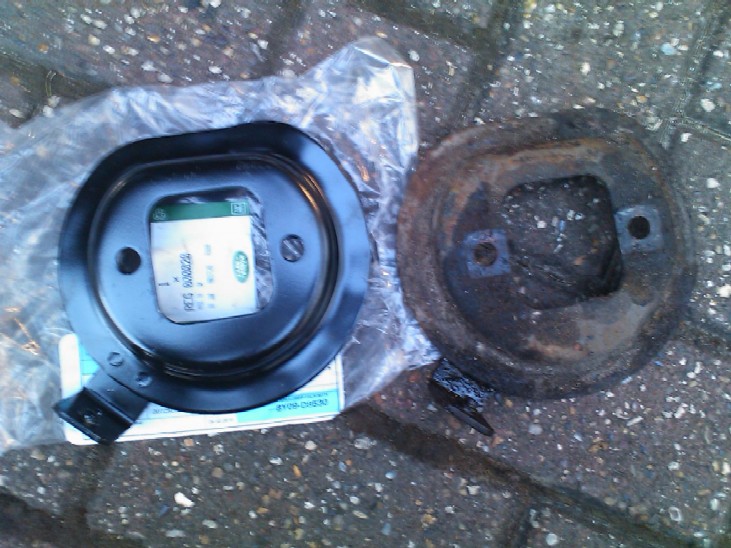
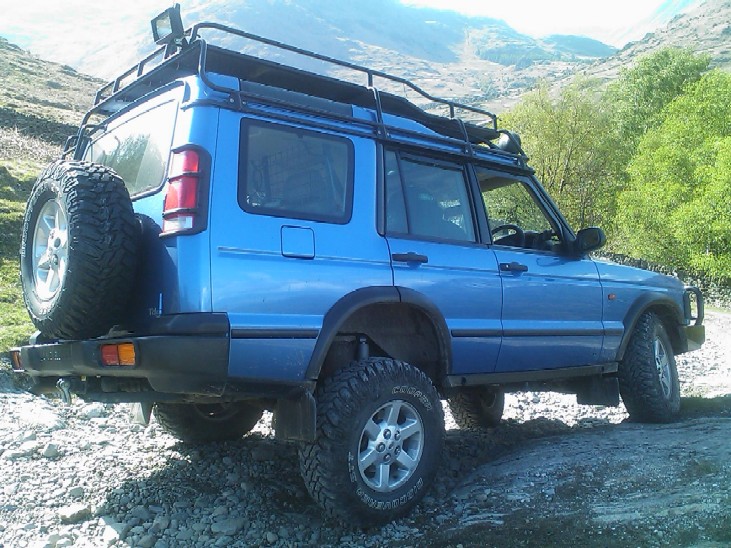
Above the lift is fitted, also with the new larger 265/75-16 tyres. As with ANY mods you fit, the biggest factor for most people is cost....but you also in my opinion have to consider that you generally get what you pay for. My D2 has rear air suspension and for me the system is far to useful and it was my full intention to keep that fitted. Many will say its a pain and unreliable etc etc and to fit coils instead, yes the SLS can be trouble some, but if you "look after" the system and treat it or its components as a serviceable "items" then I personally see it as a far superior setup to coils, but that's another argument for another day....retaining the SLS with spacers also still allows you to lift the rear a further 1.5 - 2" with the offroad mode switch which is a huge bonus on the D2 as we know it does have quite a low departure angle because of the longer rear end. So with the rear SLS being retained there is only one option really and that is to lift the mounting where the airbag sits, obviously your not going to move the original or weld a new one on (you could if your mad lol) so a spacer to fit under the bag is the best option. There's not many, if any companies that offer SLS spacers in the UK so again it was a shopping spree in the US. I chose to buy mine from Toddco suspensions the price was right and they were manufactured and shipped over pretty quick.
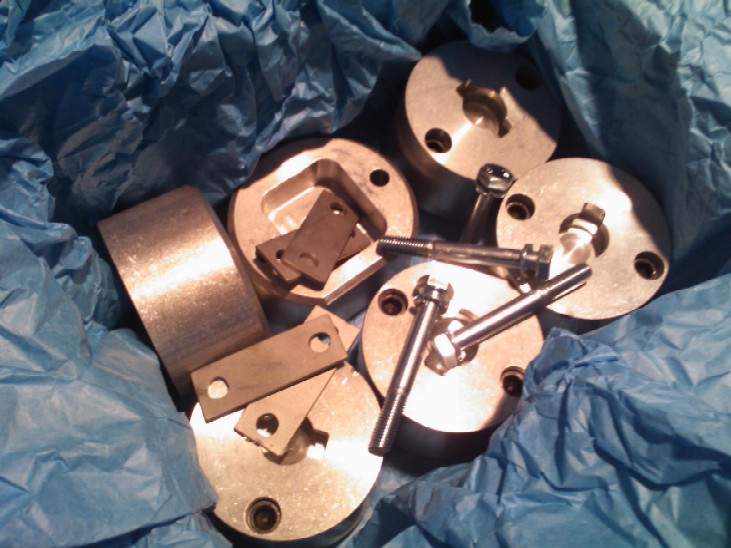
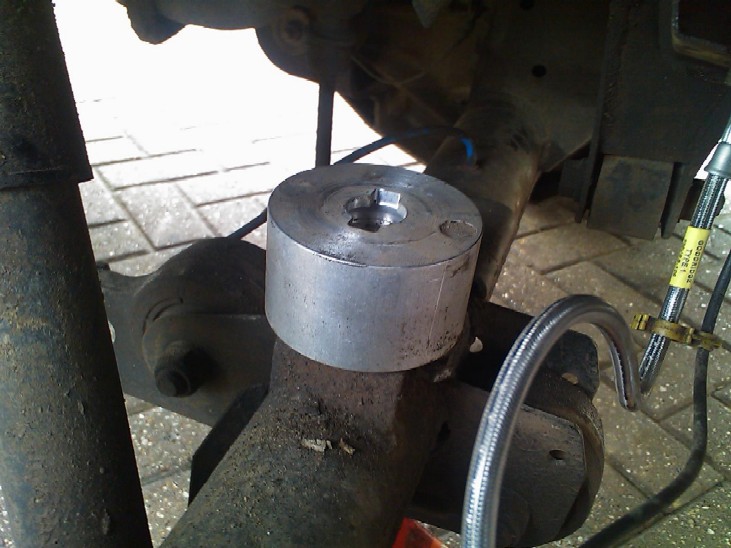
The Spacer has the same "key way" in it to accept the air bag exactly as the original axle mounting does and bolts to the same location as the rear coil spring seat would sit. The kit above was rear spacers for mine and front and rear for a friend, you can see the SLS height sensor brackets and hardware all come with it. Below is the spacer fitted, you can see the "keyway" where the airbag goes which is the same as the axle fitting. You may also notice that I "filled" the bolt hole / head with a silicone sealant to prevent water getting trapped in there and causing subsequent corrosion.
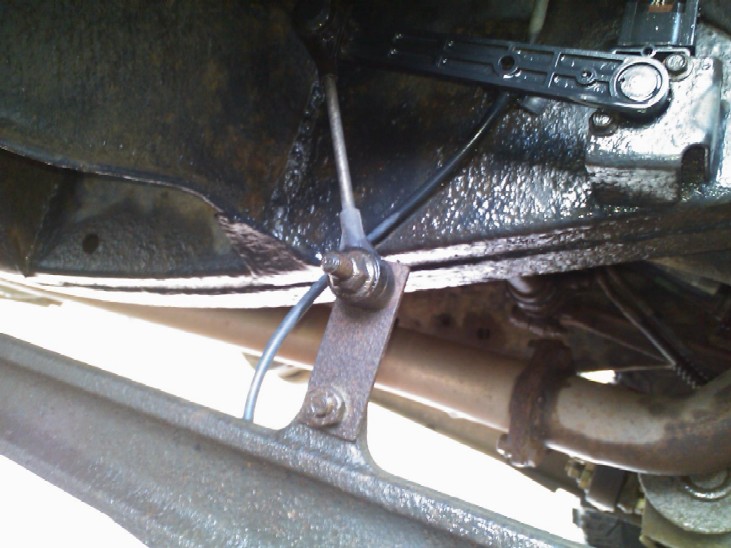
Now I believe some vehicles seem to have the holes where the spring seat goes already threaded from the factory, well on both mine and a friends D2 with SLS neither vehicle had threaded holes, so the holes were opened up to accept the bolts that come with the SLS spacers and they are simply bolted underneath with nuts. The other part of the SLS "Kit" is a bracket that repositions the height sensor that is bolted to the suspension arm.....this is fitted as you also need to move the "neutral" position of the sensor after lifting the bag.
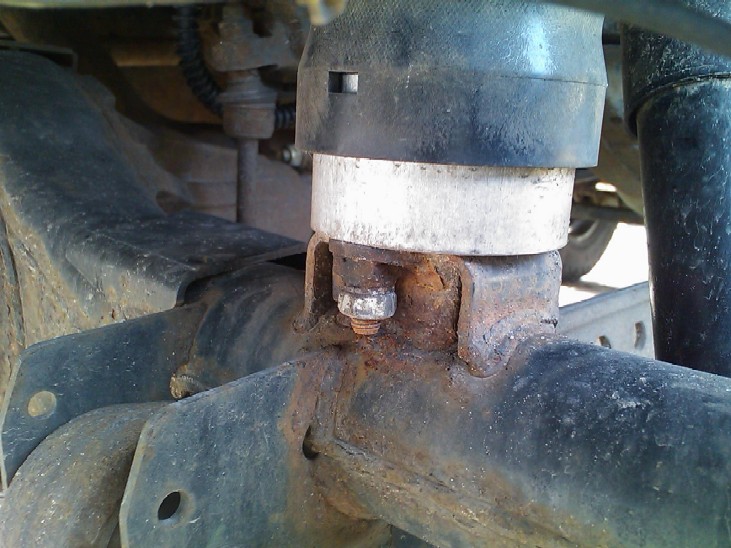
The bracket is very simple and simply re-positions the "normal" height setting of the sensor. I have read some people simply recalibrate the sensors to achieve up to a 3" lift on the rear, well for me this is a big no no for a couple of reasons, you will be naturally putting more air in the bags to "lift" the vehicle and this increase in pressure will make the ride more "harsh" on road, and secondly when offroad, if you select the offroad mode the bag will again be inflated further and increase in length by an additional 1.5-2" and this could be very detrimental to the bag when the axle fully articulates as it simply is not designed to stretch that much. This would be made even worse again if you fit longer travel shocks allowing the axle to droop further stretching the bag even more and "possibly" tearing it apart, it is for those reasons that I recommend you DON'T do it that way......
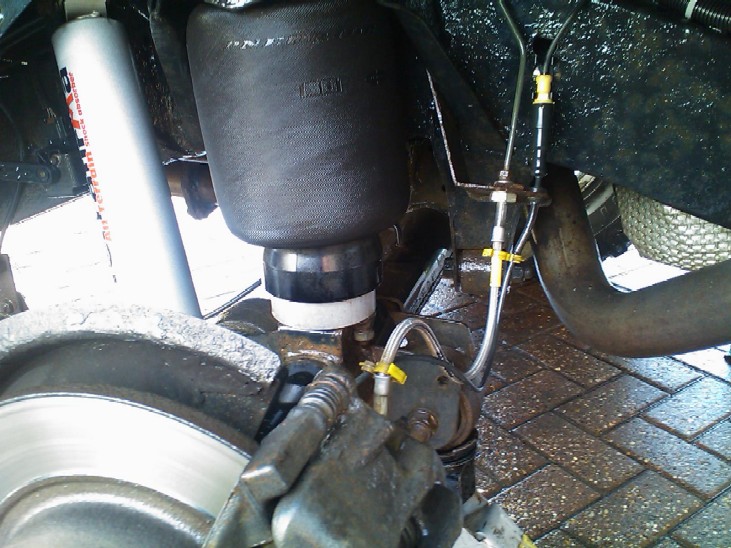
Above you can also see the +2" extended brake hoses and the new longer shocks (details below) So that's the rear sorted, what about the front ? well this one is not quite as simple as the rear because the choice of what to do is much more varied. If you looked at the Toddco link above you will have probably seen that front coil spacers are also available. Now these do work, are cheap and do provide a lift, BUT you have to consider the other factors before choosing the spacer option. These factors are what you really should think about, If you use spacers then your most likely going to continue using the standard springs, Are they old and saggy ? will you ever replace them with longer springs ? if so your spacers "may" become a waste of money as your VERY unlikely to use them with heavy duty lift springs. Using spacers on the front re-locates the spring seat +2" higher, so you MUST move the brake line fitting support back down again OR fit +2" longer brake hoses, if you dont the brake hose is VERY stretched when the vehicle is on full steering lock so check that out if you go for the spacer option. Lifting the vehicle with either different springs or spacers under the original seats does NOT provide you with any more axle articulation as the axle movement is governed by the length of the shock, so will you be fitting new shocks as well ? will these have a longer travel than the factory ones ? if so then ref the point above you WILL need +2" extended brake hoses. What springs do you get ? well how long is a piece of string!!......what you choose is purely down to your personal choice because what works for you may well be wrong for someone else. I will try to list all of what I did and you "should" consider... 1. What do you use the vehicle for, does it go offroad as much as on road ? 2. Is your vehicle often heavily loaded ? 3. Do you have a front mounted winch fitted ? 4. Do you OR will you fit a heavy duty bumper in the future ? 5. Is there any other additional weight over the front axle ? (ie Dual battery setups ) maybe not now but will you add one ? 6. Do you want it to be stiffer on road or offroad ? or a compromise ? remember adding heavy duty springs actually adversely affects axle flex as it requires more force to compress the upward going spring. No spring will ever be great in every situation. All of the factors above should be taken into account when you buy your replacement springs, factory springs are not even designed to cope with the additional weight of even just a front mounted winch, let alone anything else !! something to think about when deciding on springs or spacers. My vehicle is fitted with a front mounted winch and a twin battery but I also intended to fit a winch bumper as well so when choosing springs you really should look to the future when making your decision. It was for all those reasons that I chose to go with springs from OME (old man emu) which are made by the suspension division of ARB in Australia.
Now it won't take long on a Google search to see that OME springs are pretty expensive compared to others, but as I mentioned you would hope to get what you pay for, with this in mind and the fact I was going to add an ARB bumper, it seemed to make sense to choose OME as they are designed to cope with that additional weight and provide a true 40mm lift. OME do make several different types for the Disco 2 depending on your vehicle specs (weights etc). They also take into account that the D2 actually has different length springs on the driver and passenger sides of the vehicle, this is often not taken into account with the "cheaper" spring manufacturers.
In the end I chose OME 779's for the front of mine, these are the "highest" rate that OME do for the D2, but they cope fine with the additional weight at the front of my vehicle, in fact even after adding the ARB bumper the 40mm lift is still there so they are coping well so far. The springs are a direct replacement for the factory springs and require no additional mods for fitment, although I did buy some new spring seats to fit them on as the old ones were not looking that great.
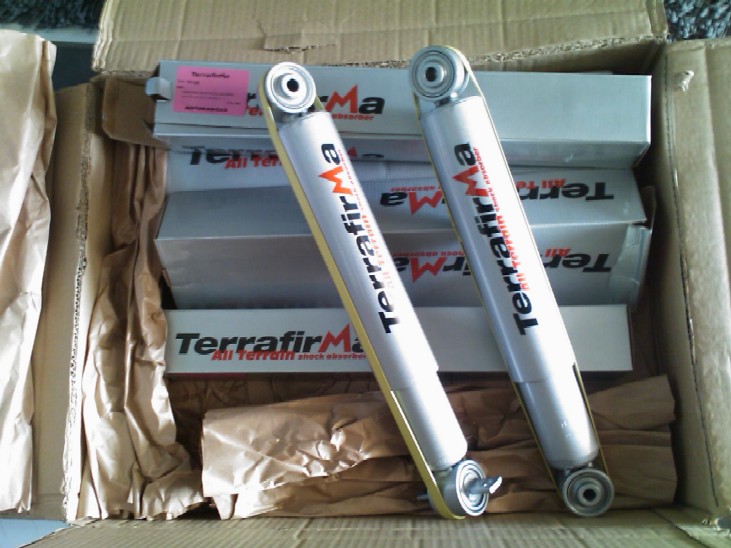
In the previous picture above you can also see the new shocks and more importantly the +2" extended stainless brake hoses, these are not always fitted by lots of people who do lift their D2, but on mine the factory brake hose was getting "tight" when testing the axle flex and I knew I was going to fit longer shocks as well. There was only one choice for me for the brake hoses, and that's Goodridge ones, they do +2" and +4" and even standard length hoses for the D2, they will not only outlast the factory hoses but adding the additional length will provide peace of mind when offroad. After fitting both the front springs and the SLS spacers I did use Nanocom to "trim" the rear height sensor settings a little so the vehicle sat nice and level front to back. (top picture) So we have covered the springs and brake lines, what about the shocks ? well again that's a mine field of choice and what works for you may not suit another. I originally intended to complete the suspension with OME shocks, but I could not really find out how much longer travel they are compared to the factory shocks, but also as with the springs they are quite costly and would have added a significant amount to the suspension upgrade cost. I had also read a few posts etc on various message boards ref the OME shocks and how some were disappointed with them and tended to fit other makes with OME springs which I have read no bad stuff about at all during my research. I decided in the end to go with a relatively "unknown" make and try the +2" All Terrain shocks by Terrafirma, their stuff is quite new to the Land Rover world and in particular the Discovery 2, but they seem to get rave reports on 99% of their products.
I must say I was impressed with the look of them once I got them out the box, so if they performed as good as they look I would be very happy.
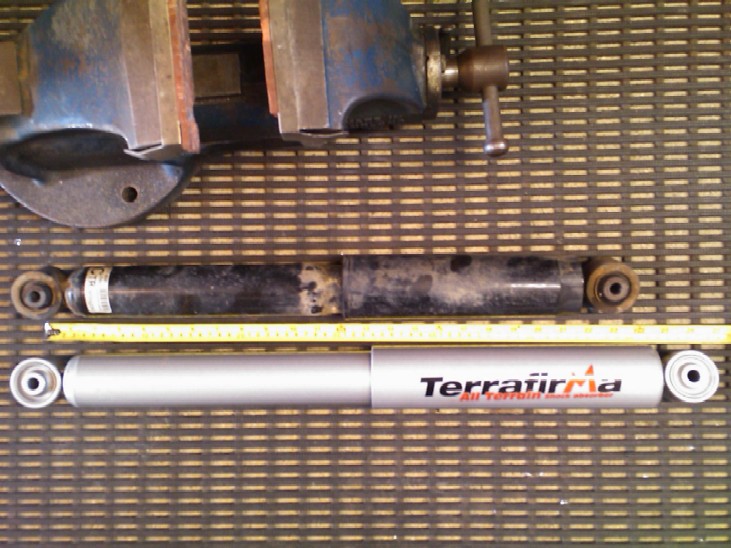
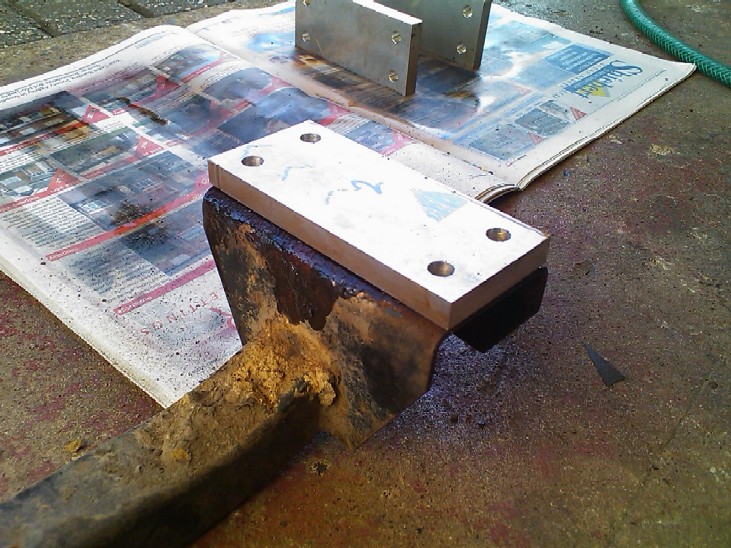
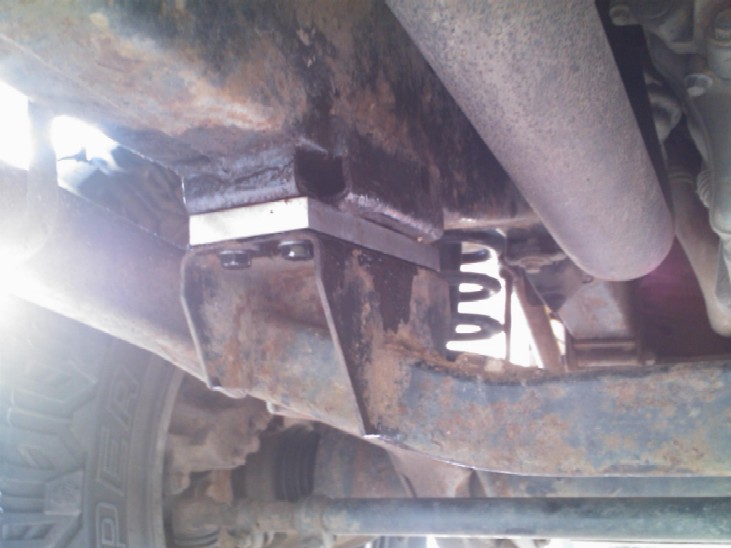
Above is a comparison to show the extended length V the factory shocks. One thing I did notice was the front shock lower mount seems to be more substantial on the Terrafirma's than it is on the factory D2 ones, so hopefully they will last a lot longer. So, we have covered the SLS spacers, the front springs, extended brake lines and front and rear shocks, anything else ? well yes there is. As with any mods, and especially suspension ones you quite often create "other" issues....well the D2 is no different in that respect. Now because the front shocks now allow the front axle to droop further, the front propshaft can now contact the front cross member, I'm not sure how many people have actually addressed this issue, but if you test the flex on your car you may well find the same thing. NOTE :- when fitting front spring spacers under the spring seats as opposed to lift springs the front prop WILL 100% contact the front cross member EVEN with factory shocks as you have technically already "pushed" the axle down by 2 inches, so the "mod" below should definitely be done if you go that route. It seems mad to "lower" something after you are initially intending to lift the vehicle away from the ground, but it has to be done to stop any possible damage in my opinion. When comparing my friends car that has front spacers and mine when using OME springs, the amount we needed to drop the cross member seemed to be approx the same. To do this I used some Ali block, cut and filed it to shape.........used the cross member to drill it off
Coated it with some anti corrosion spray to help reduce the dissimilar metal corrosion
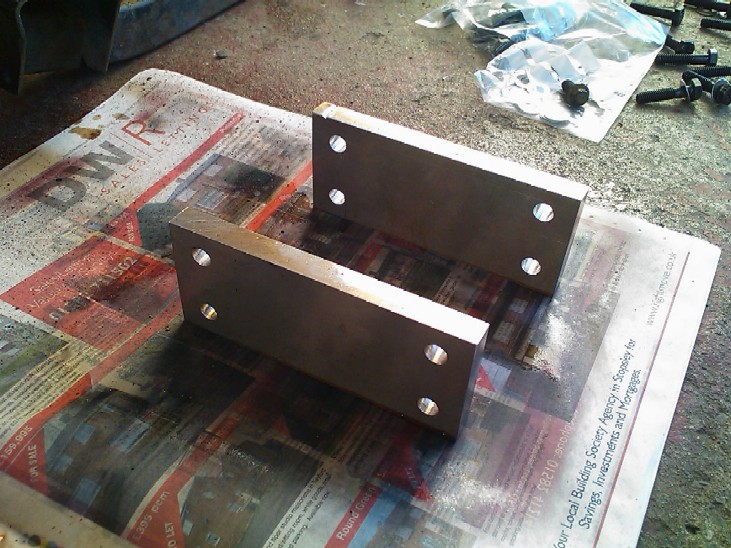
and simply fitted it between the chassis and the cross member using longer bolts.
She still drives superbly on the road and even better offroad with additional size of the 265/75 tyres on the 16" rims. Overall I'm extremely happy with the suspension setup now. Things still to do include "possible" ABS wire extensions as they are pretty tight on full flex, you can "add" some more length to the factory ABS looms by feeding some of the wires down through the grommets and re-positioning the ABS wheel arch Plugs / clips. Also to be done are +2" bump stops, these will be added to the article when completed.
NOTE: to fit the 265/75-16 or bigger spare wheel / tyre onto the rear door carrier, you will have to modify that.....details here
|
|||