![]()
| T-Max EW-9500 "Discreet" Winch Installation |
|
|
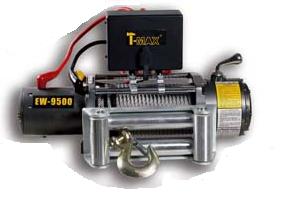
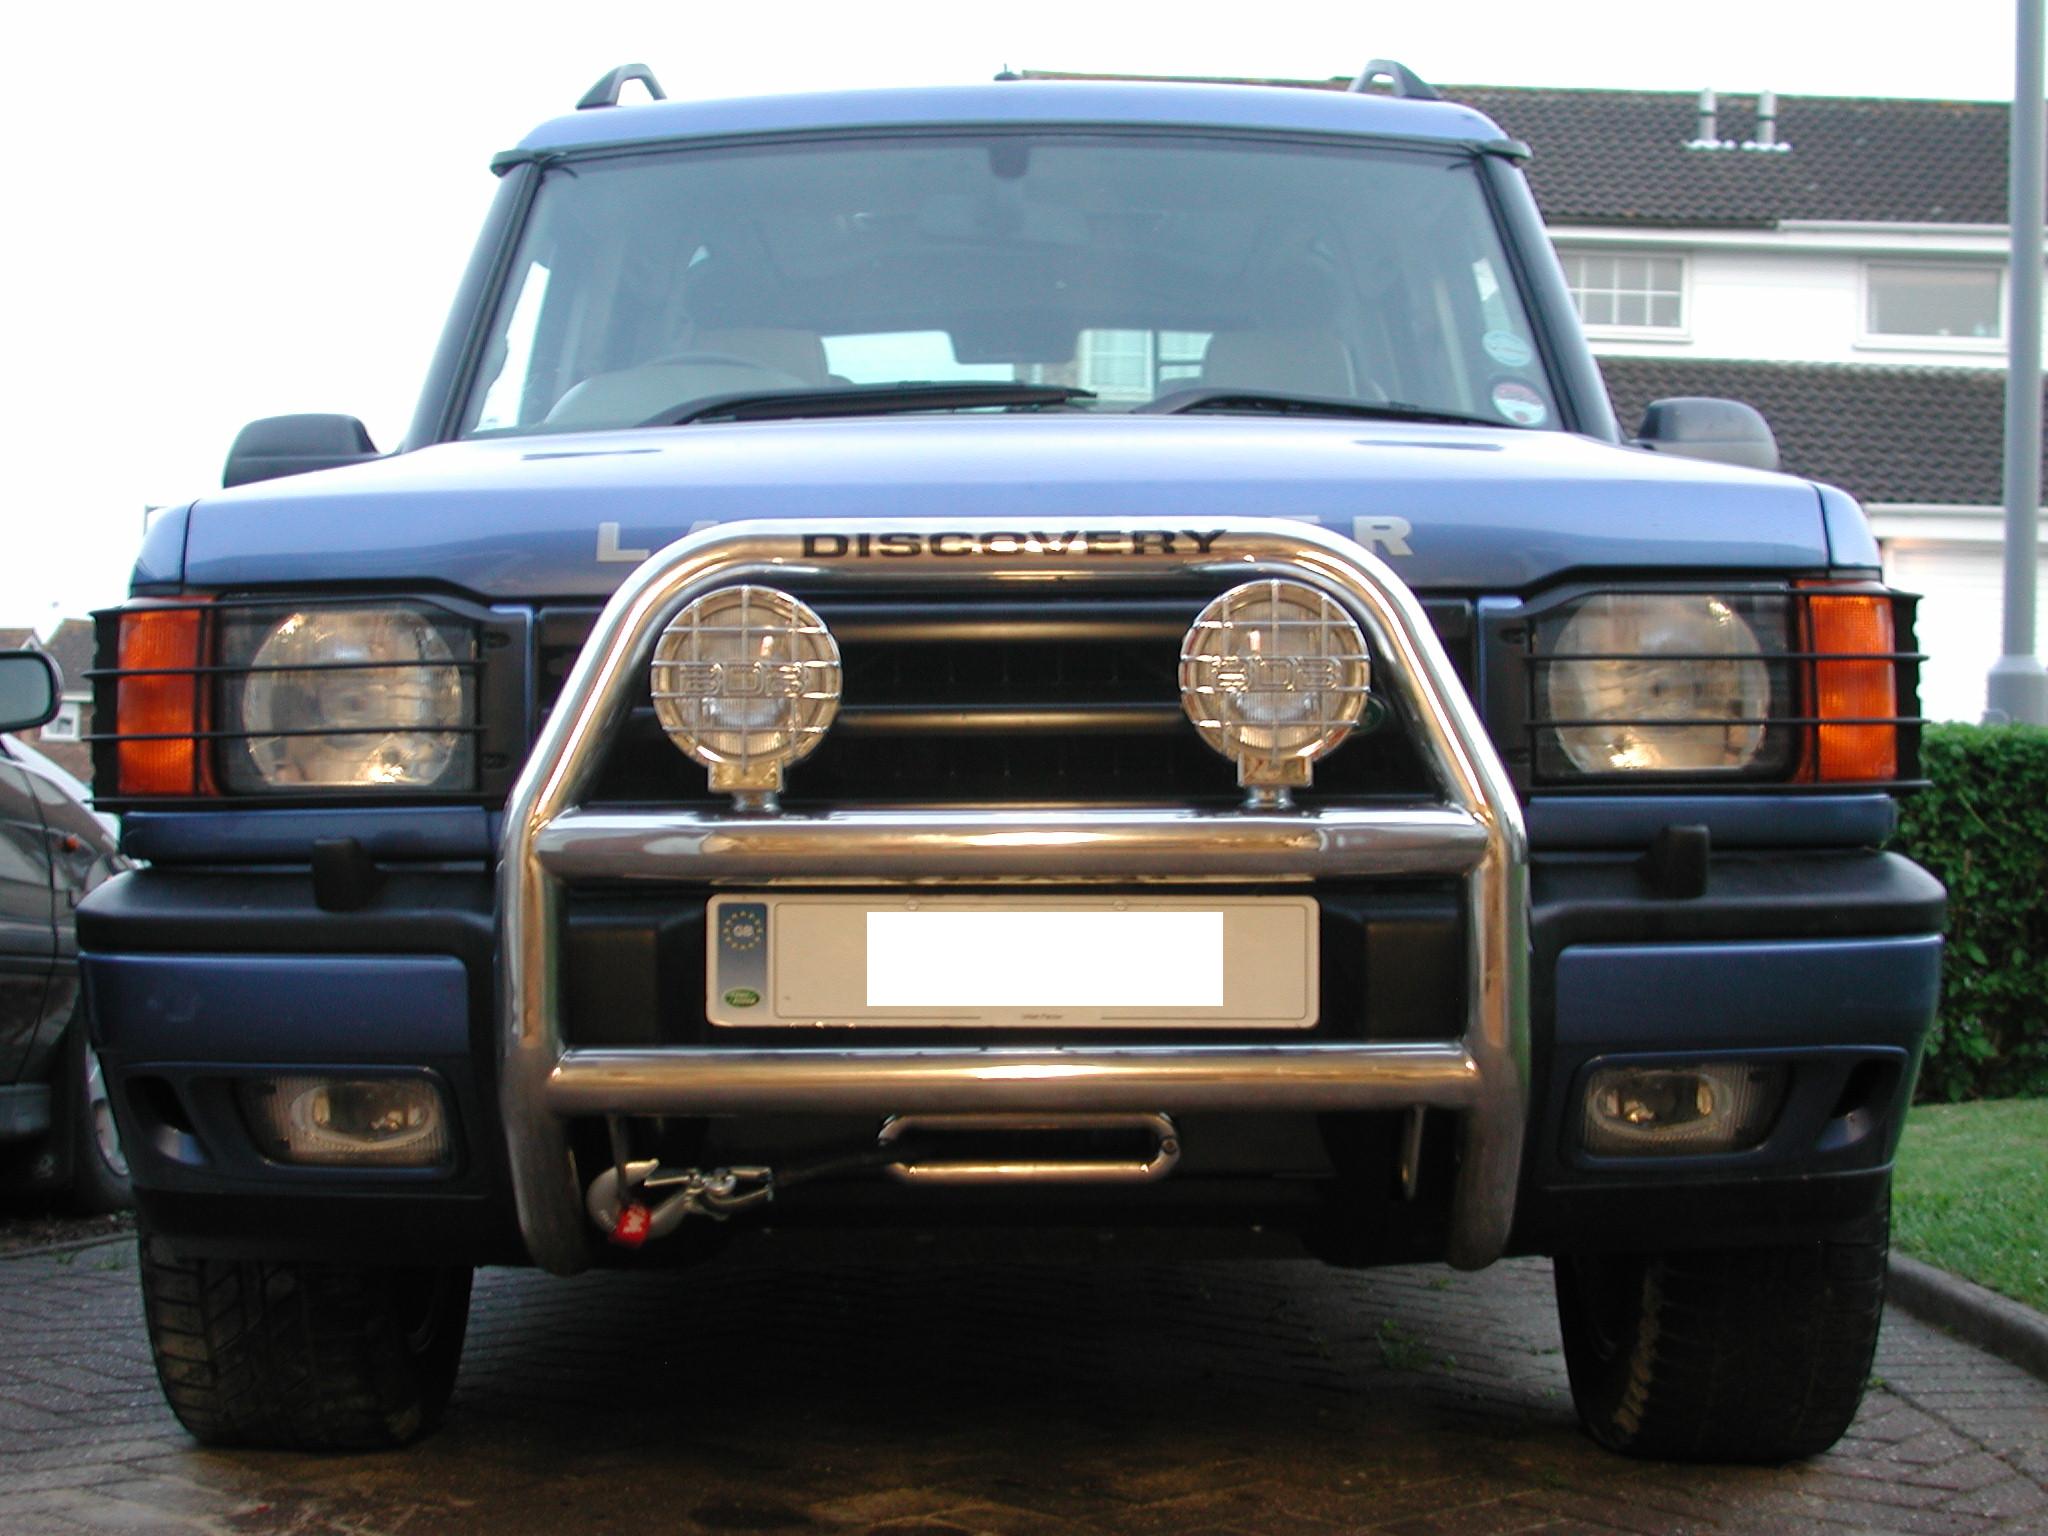
I have always looked at Land Rovers fitted with winches and thought "how cool". Whether I needed one or not is neither here nor there, the point is I wanted one, and once you have it its there if you need it. Winches available to fit to Land Rovers come in all shapes and sizes and more importantly cost!!!! One of the most well known brands is Warn. These are available through land Rover dealers and also fitting kits for particular vehicles, but they are at a premium. I don't doubt the quality of Warn winches, its just I could not bring myself to part with approx £800 for one when there is "other" choices out there. Winches are now available from as little as £250 for a 9000 Lbs winch thanks to our Chinese friends. I did not want buy an "unknown make", but I also did not really need a top model as I will probably not use it that much. In the End I went with the Australian make T-Max, they certainly have their fair share of off road territory and I'm sure the T-Max will do its job. In the end I went for the EW-9500
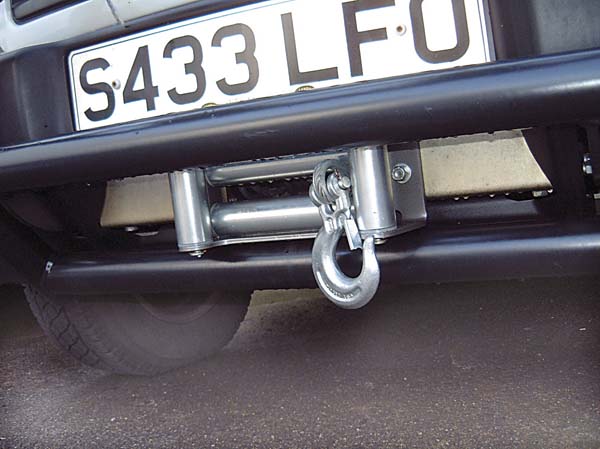
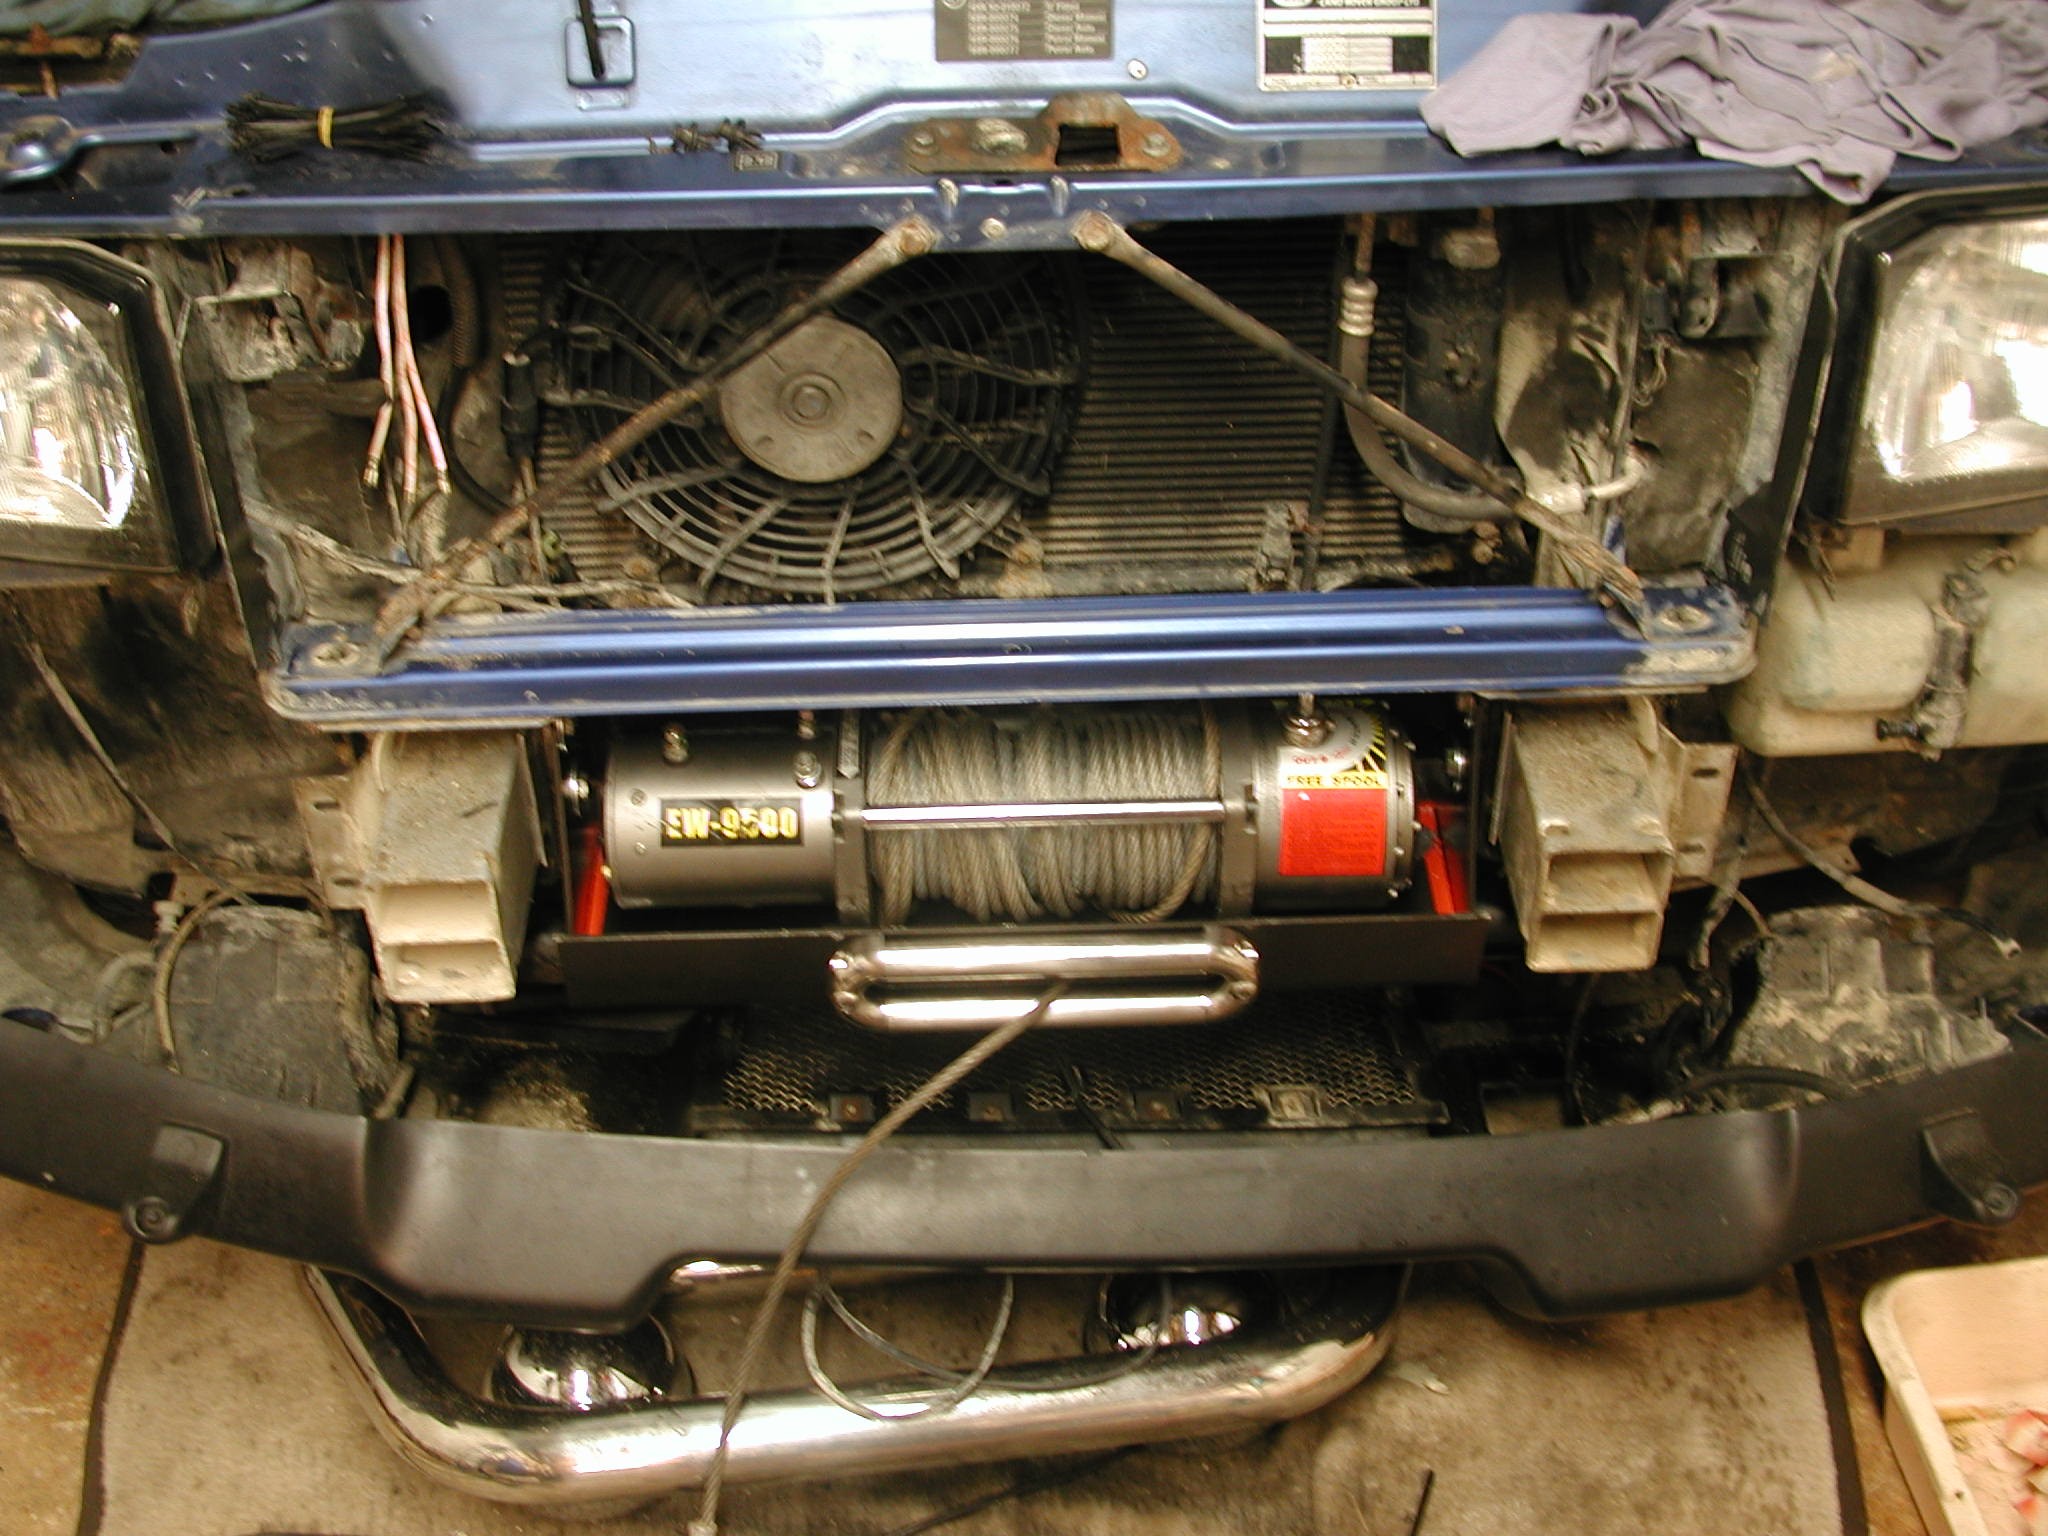
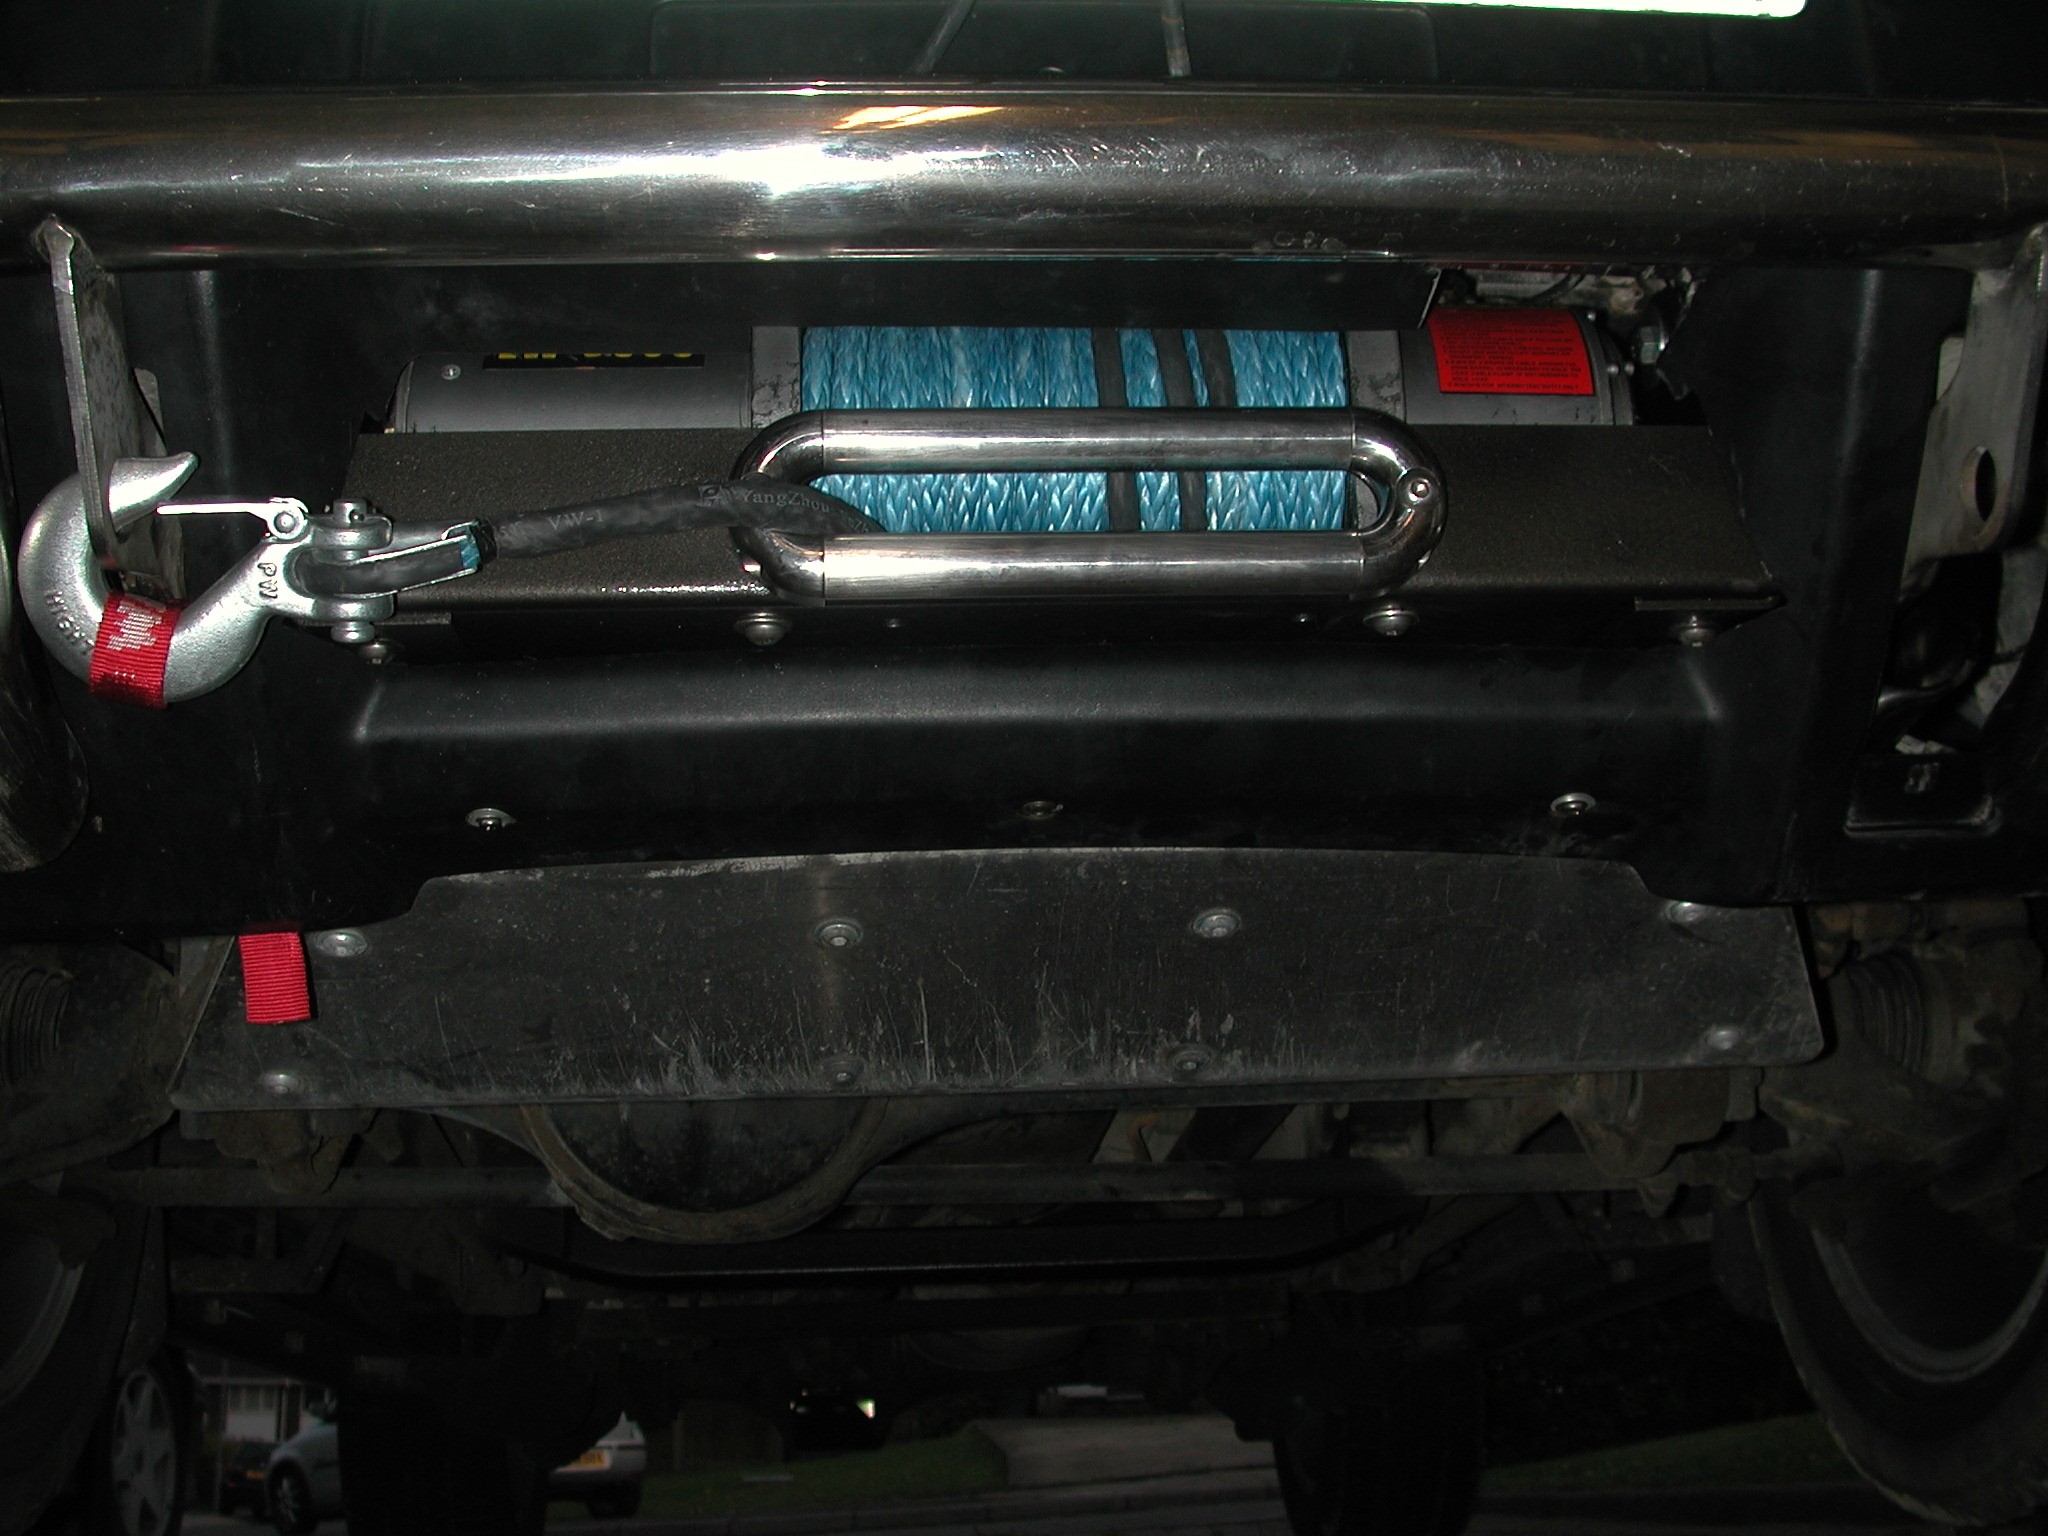
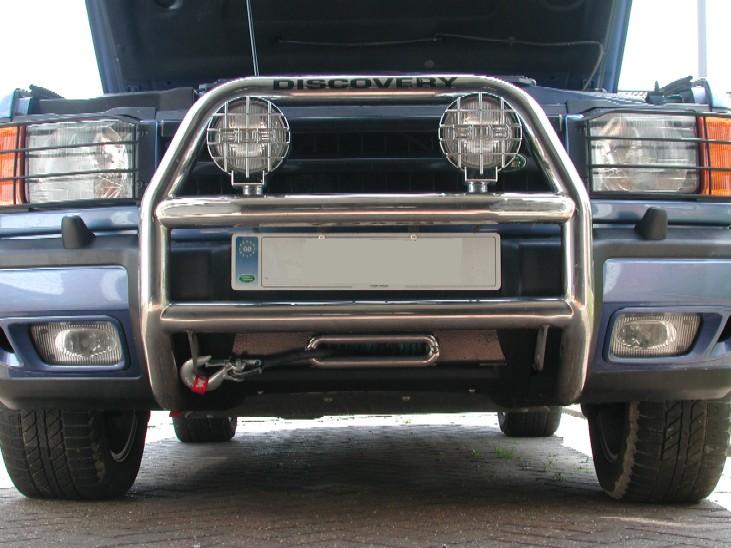
Its name reflects its straight line pull of 9500lbs which is more than adequate for most peoples needs. Its not the fastest winch in the world, but power for £'s it's as good as the rest if not better specified, how long it will last or perform who knows, but I have read some good reviews on them which helped in my decision when looking for one. I never bought mine "new" but got it at a great price, and its hardly been used !!. The winch when "new" comes with a wander remote lead, roller fairlead and long + and - cables to connect to your battery Mine never had the long cables with it, and no roller fairlead either, This did not really worry me as I fully intended to use a "synthetic" rope and roller fairleads should not really be used with those as they can "snag" and damage the rope. Also because of how I was going to install my winch the roller fairlead would not be "ideal" for the look I wanted to achieve. Mounting the winch is the biggest issue for you to work out, I wanted mine to be as "discreet" as possible but still fully usable so I purchased a "discreet" winch plate for the Discovery 2 from http://www.mailorder4x4.com . The plate is made by Bearmach who also do lots of other stuff for Land Rovers and have been for many years. This is what it looks like installed, this picture shows a roller fairlead.
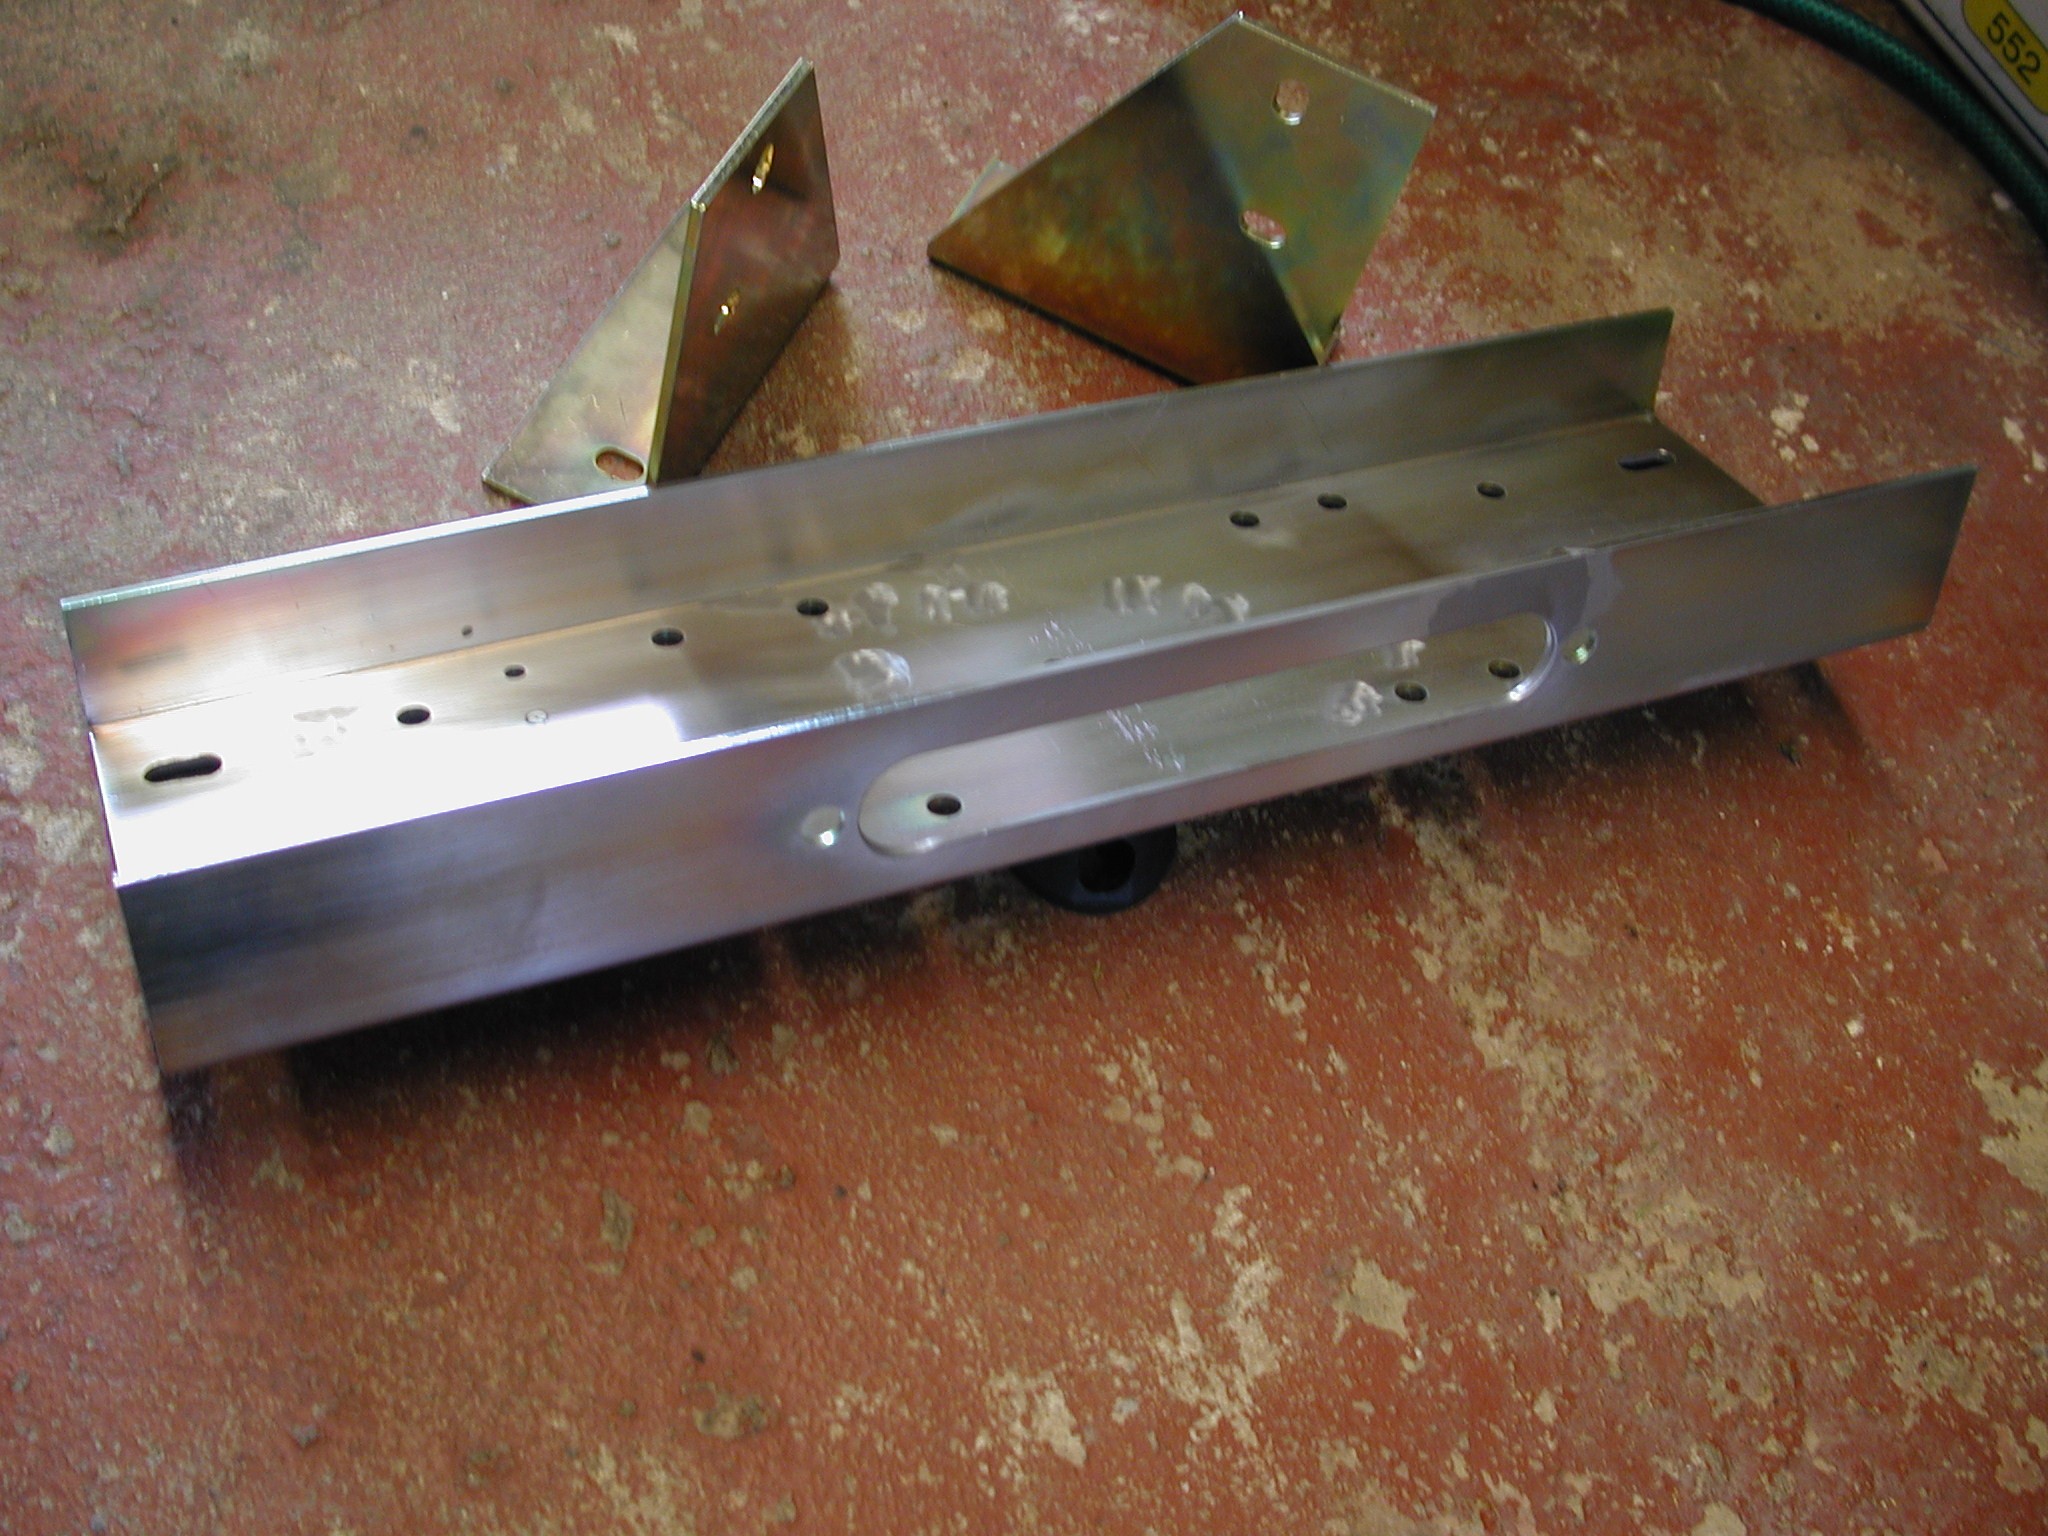
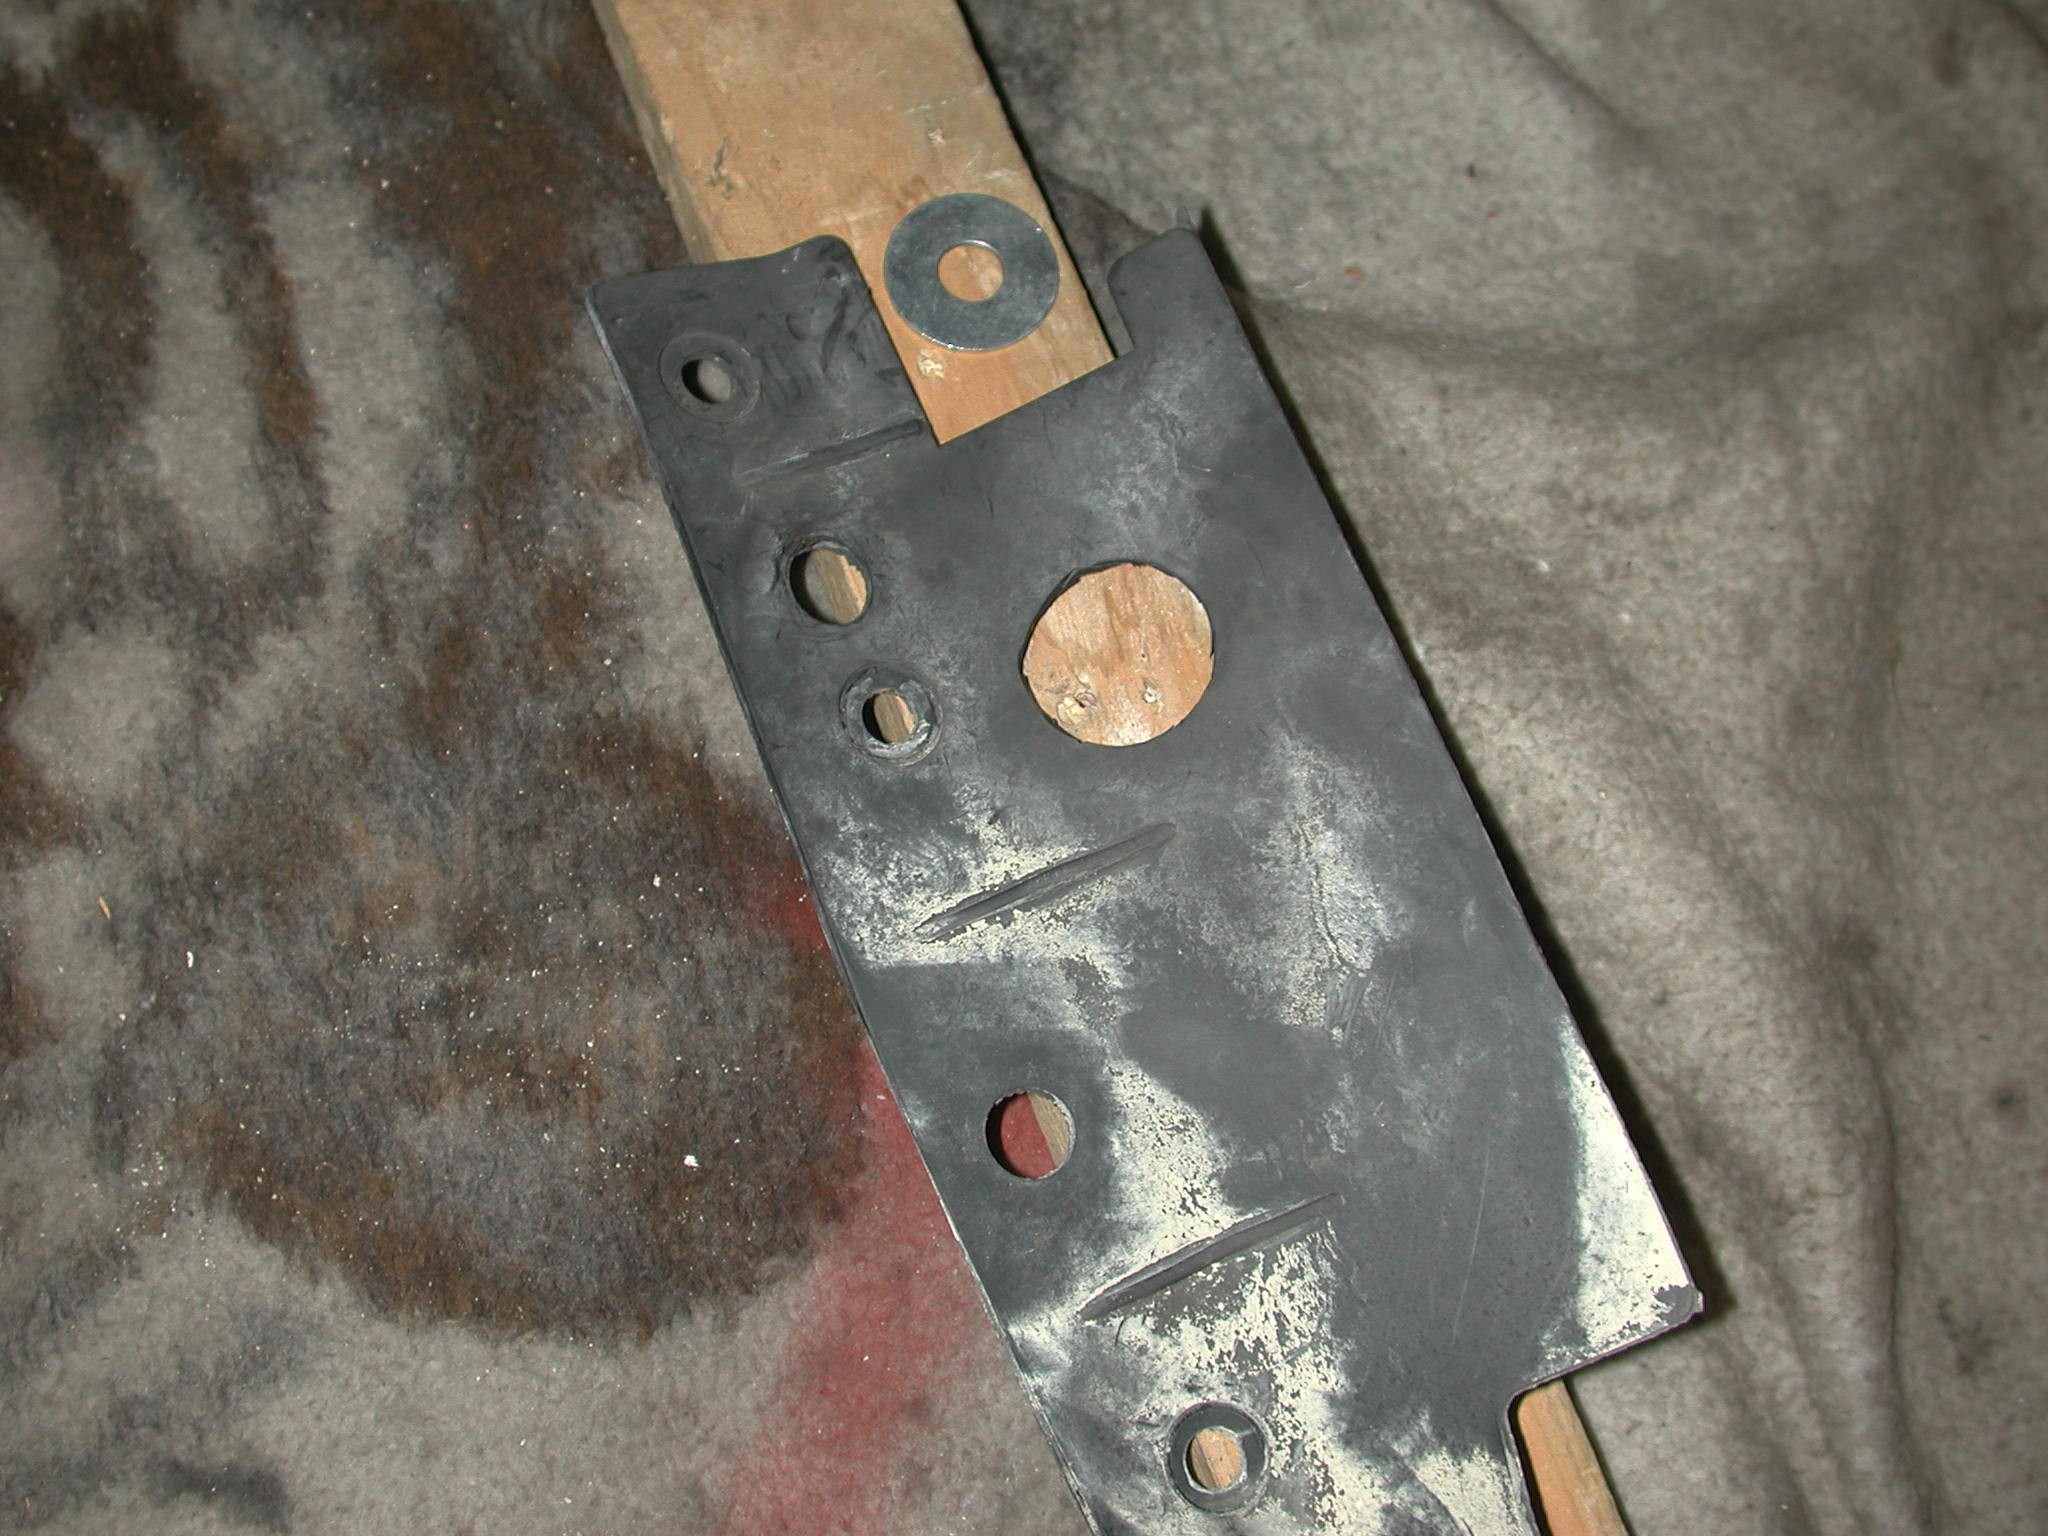
here is what you get, the main plate and to side brackets to bolt to the chassis rails.
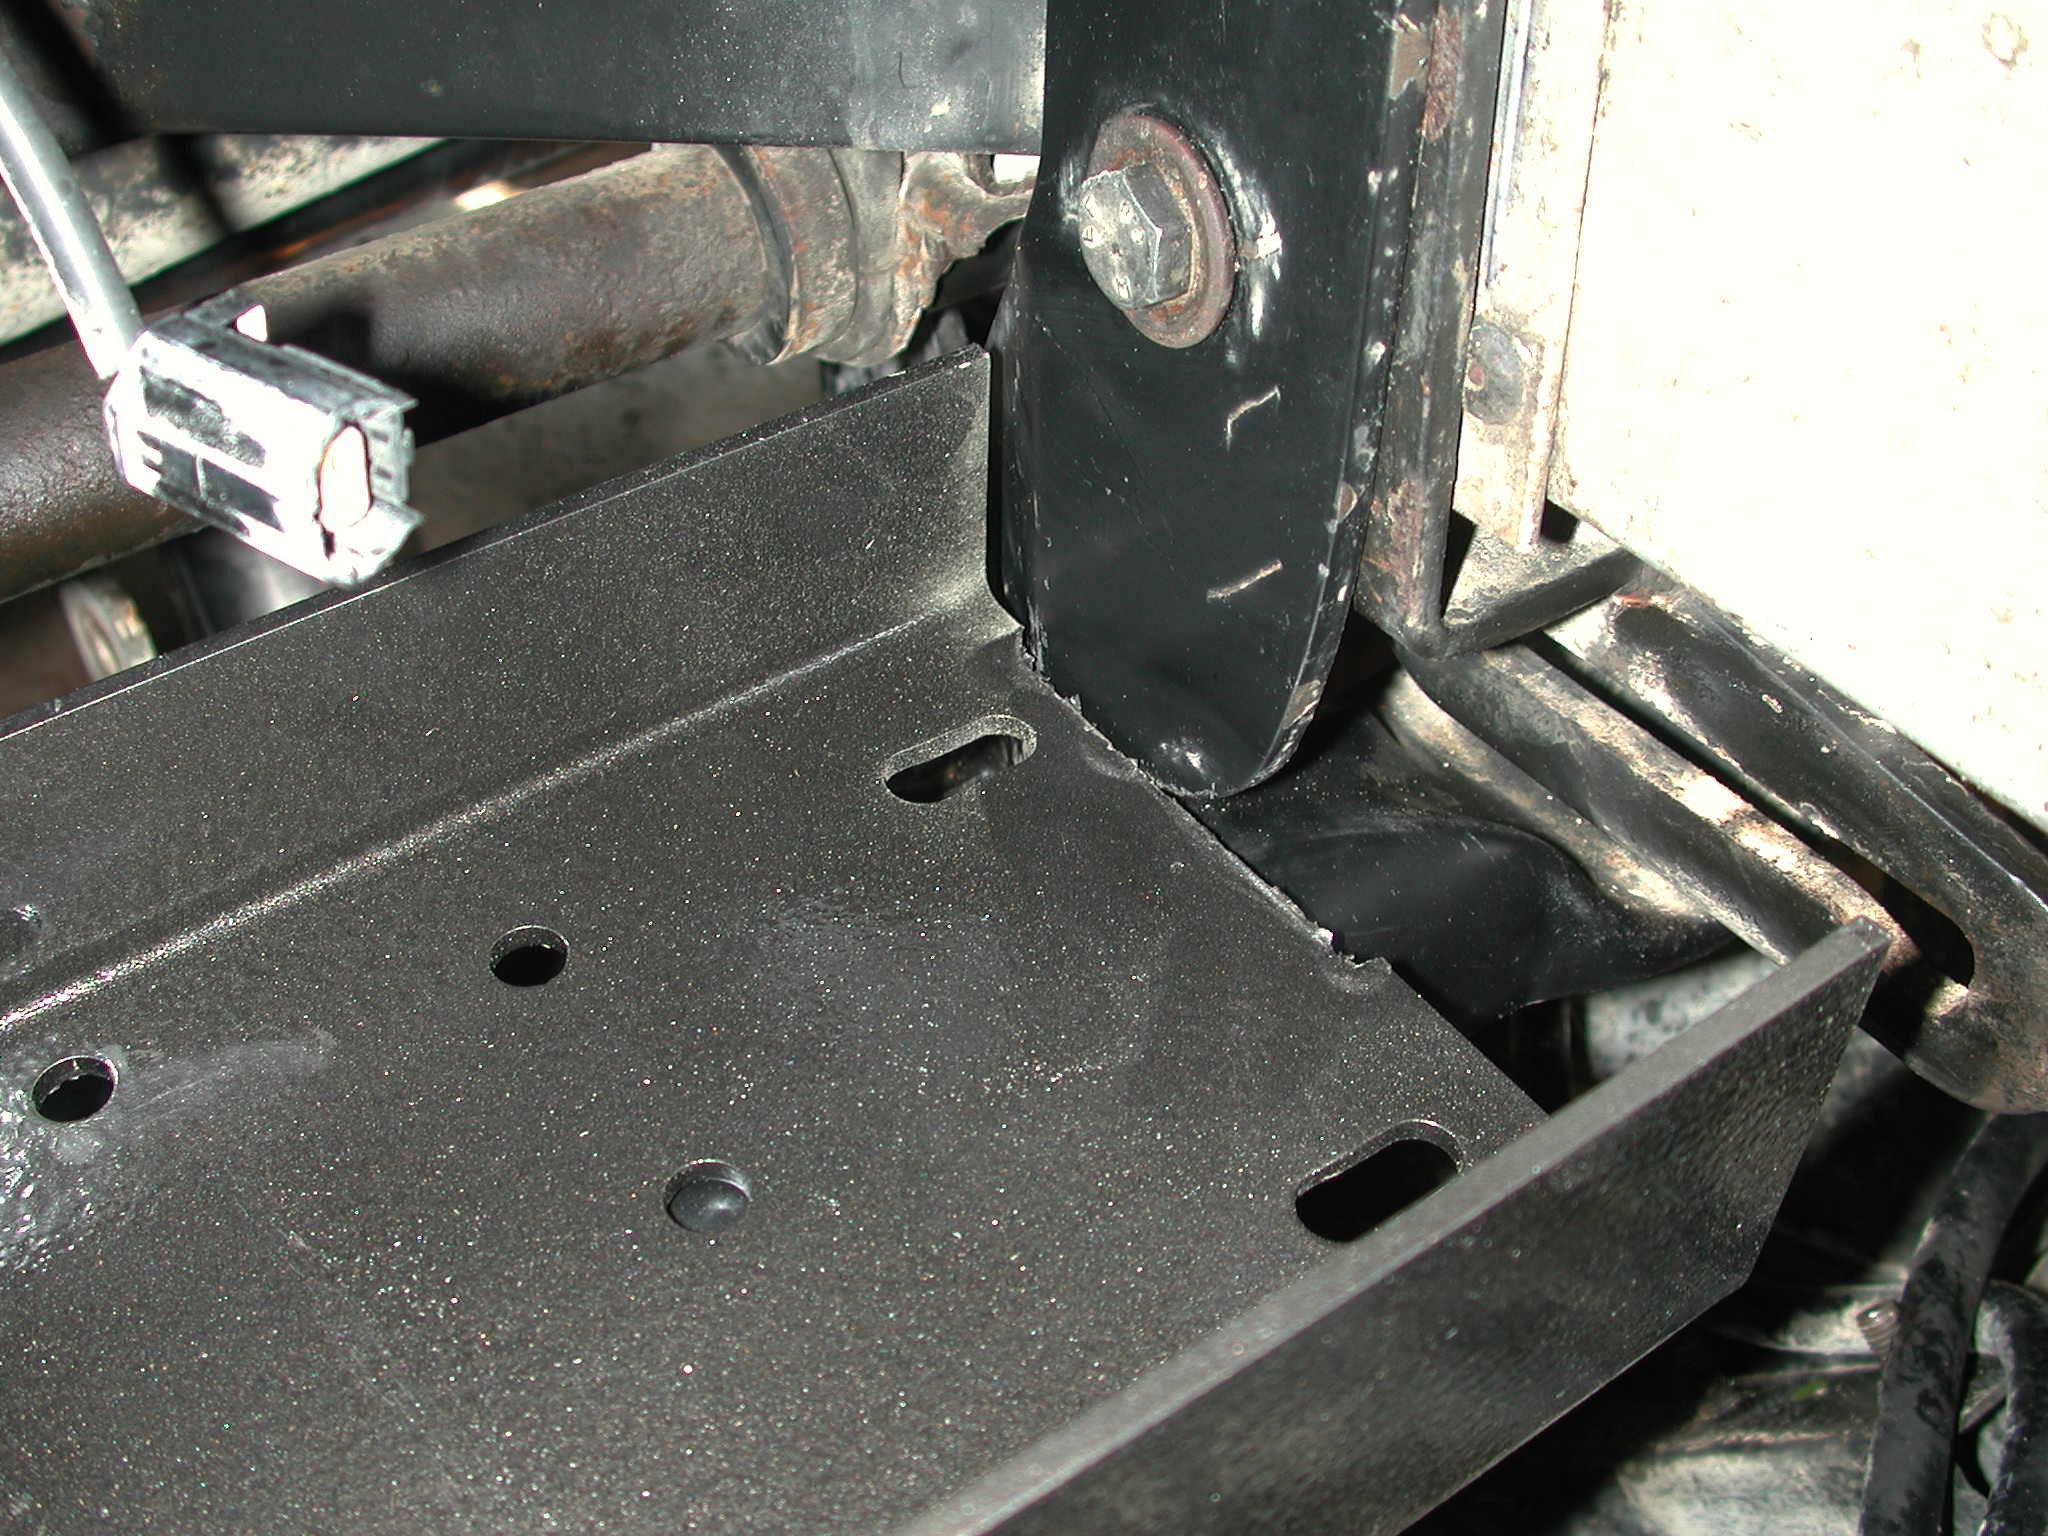
The Winch plate is zinc coated and comes pre-drilled for "most" winches and the fairlead hole is "originally" square, but this picture shows it modified for my fairlead, you will see that later on. I also made the holes for the side brackets into bigger slots because my car is already fitted with a factory A bar, and a steering guard which all bolt to the same location, so the width between the chassis rails is quite considerably reduced, so I had to account for this as much as possible before I attempted fitting the plate to the car
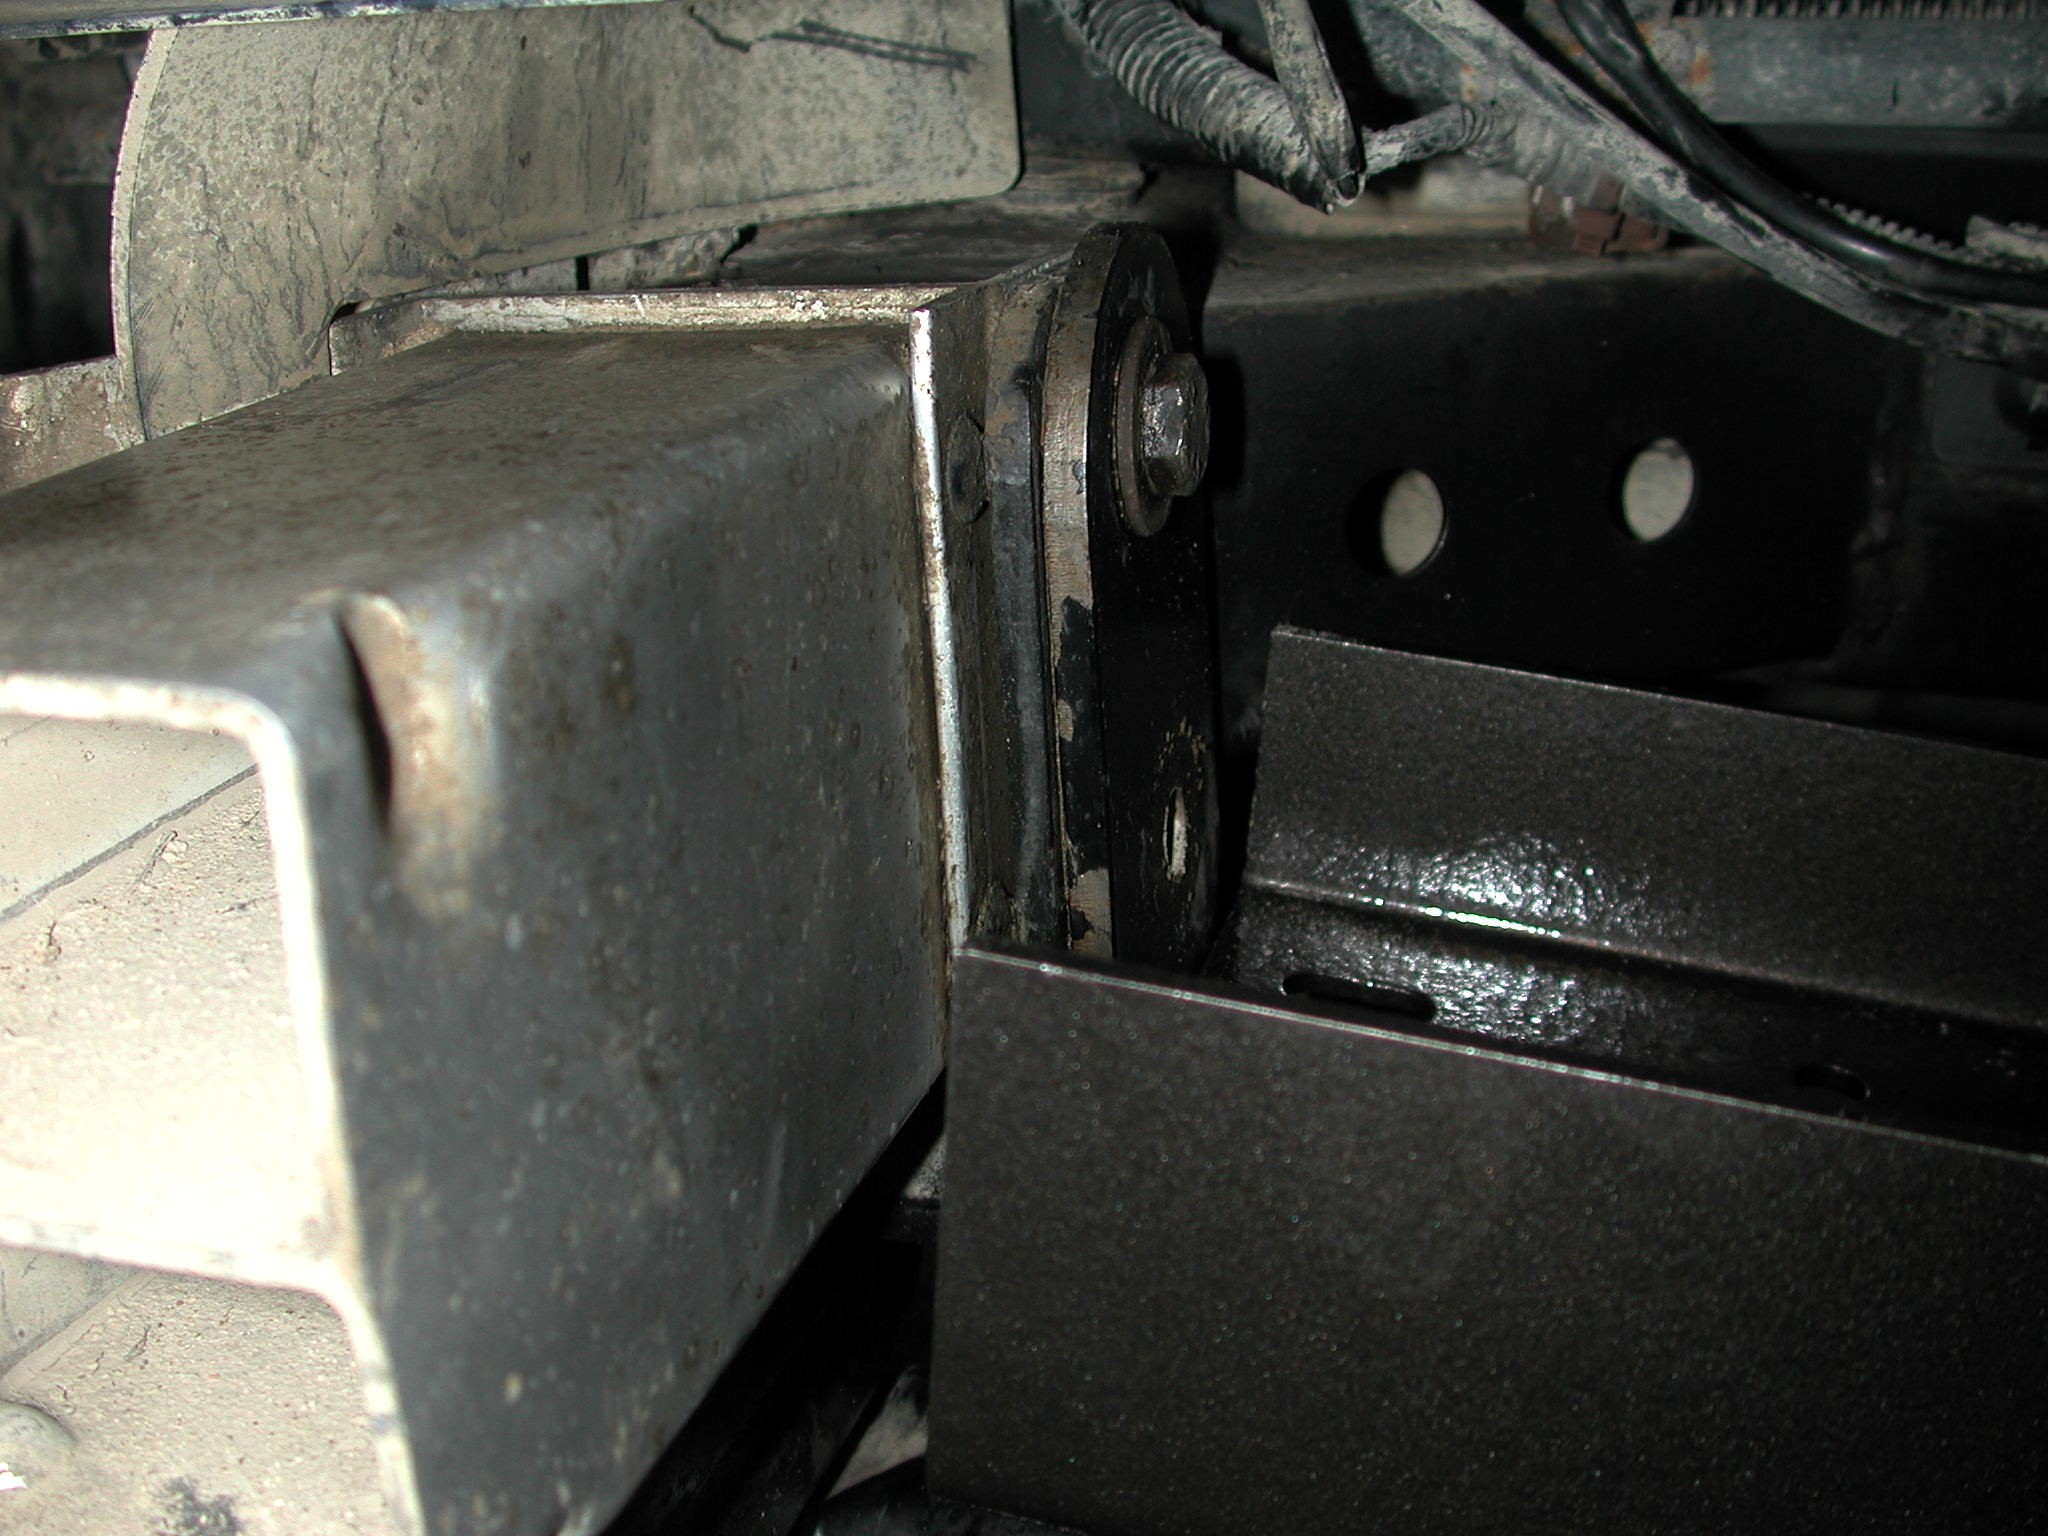
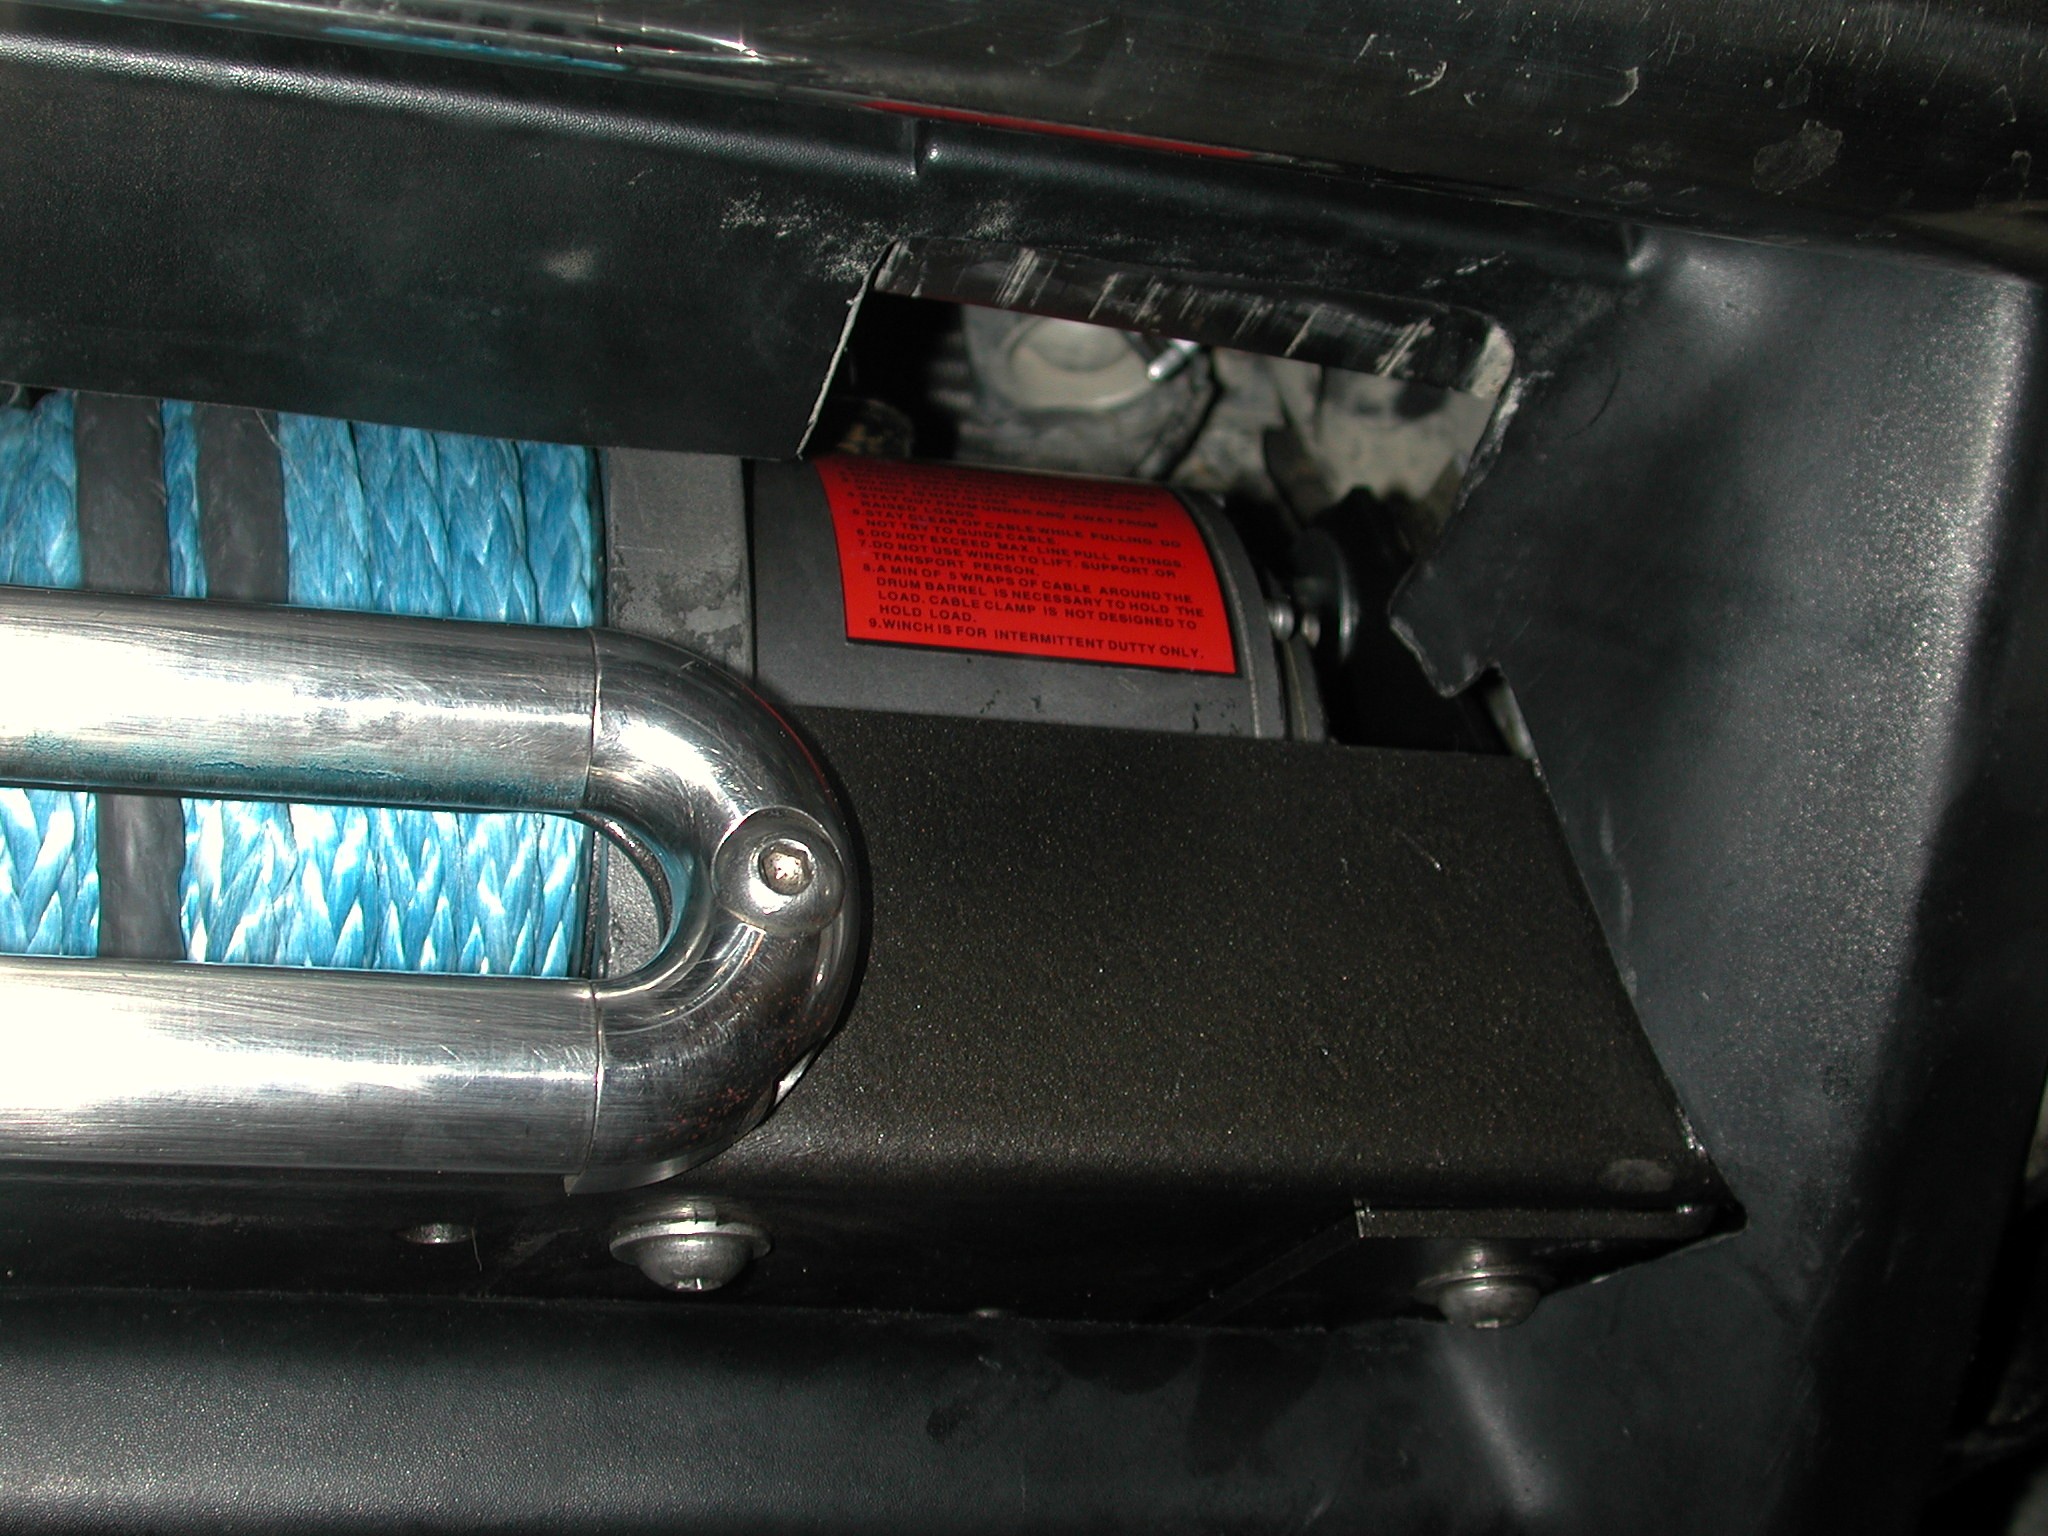
Here above you can see just one side, You can see the ali "crashcan", then the A bar bracket , then inside that the mantec steering guard as well, so the total distance between the chassis rails is overall nearly 3/4 inch smaller than a Disco with no other addons, to this I would be also be adding the winch plate side brackets either side !! NOTE, "if" you have other addons as I do, you will need longer bolts to go through the chassis rails Below is the Fairlead I have used. You can get aluminum billet fairleads pretty cheap, but dirt and muck etc on the winch line can quickly wear them out, so I bought a stainless one also machined from a billet. Its extremely heavy for its size, but its beautifully made and as you can see by the picture is has a larger opening which is why I had to make my winch plate opening bigger to stop the rope getting damaged on the plate edges.
If I'm honest, the only negative thing about the stainless fairlead is that there is very little margin between the fixing holes and the winch opening, but there is enough to just about make the plate hole the same size. I also made sure all the sharp edges were removed from the plate opening as well, if your using a steel winch rope, then there is no need to do that at all. So after removing the A bar, and front bumper, I tried the plate for fitment, As you can see its to long and wont go completely flat, this also does not allow for the thickness of the side brackets either, You can also see I painted the winch plate black to.
So after a "few" cutting discs and a little more modification around the edges, it fitted in nice and snug. Cutting the plate obviously ruined my paint job, so it was all re-painted again before final installation
In total I had to remove approx the thickness of the the side brackets on either end of the plate and for about 2/3 of its depth, finally it fitted in lovely and was bolted to the chassis rails with new longer bolts and the brackets to the plate with some stainless button head bolts and nuts
Next it was a case of putting the winch into the plate and bolting it in.
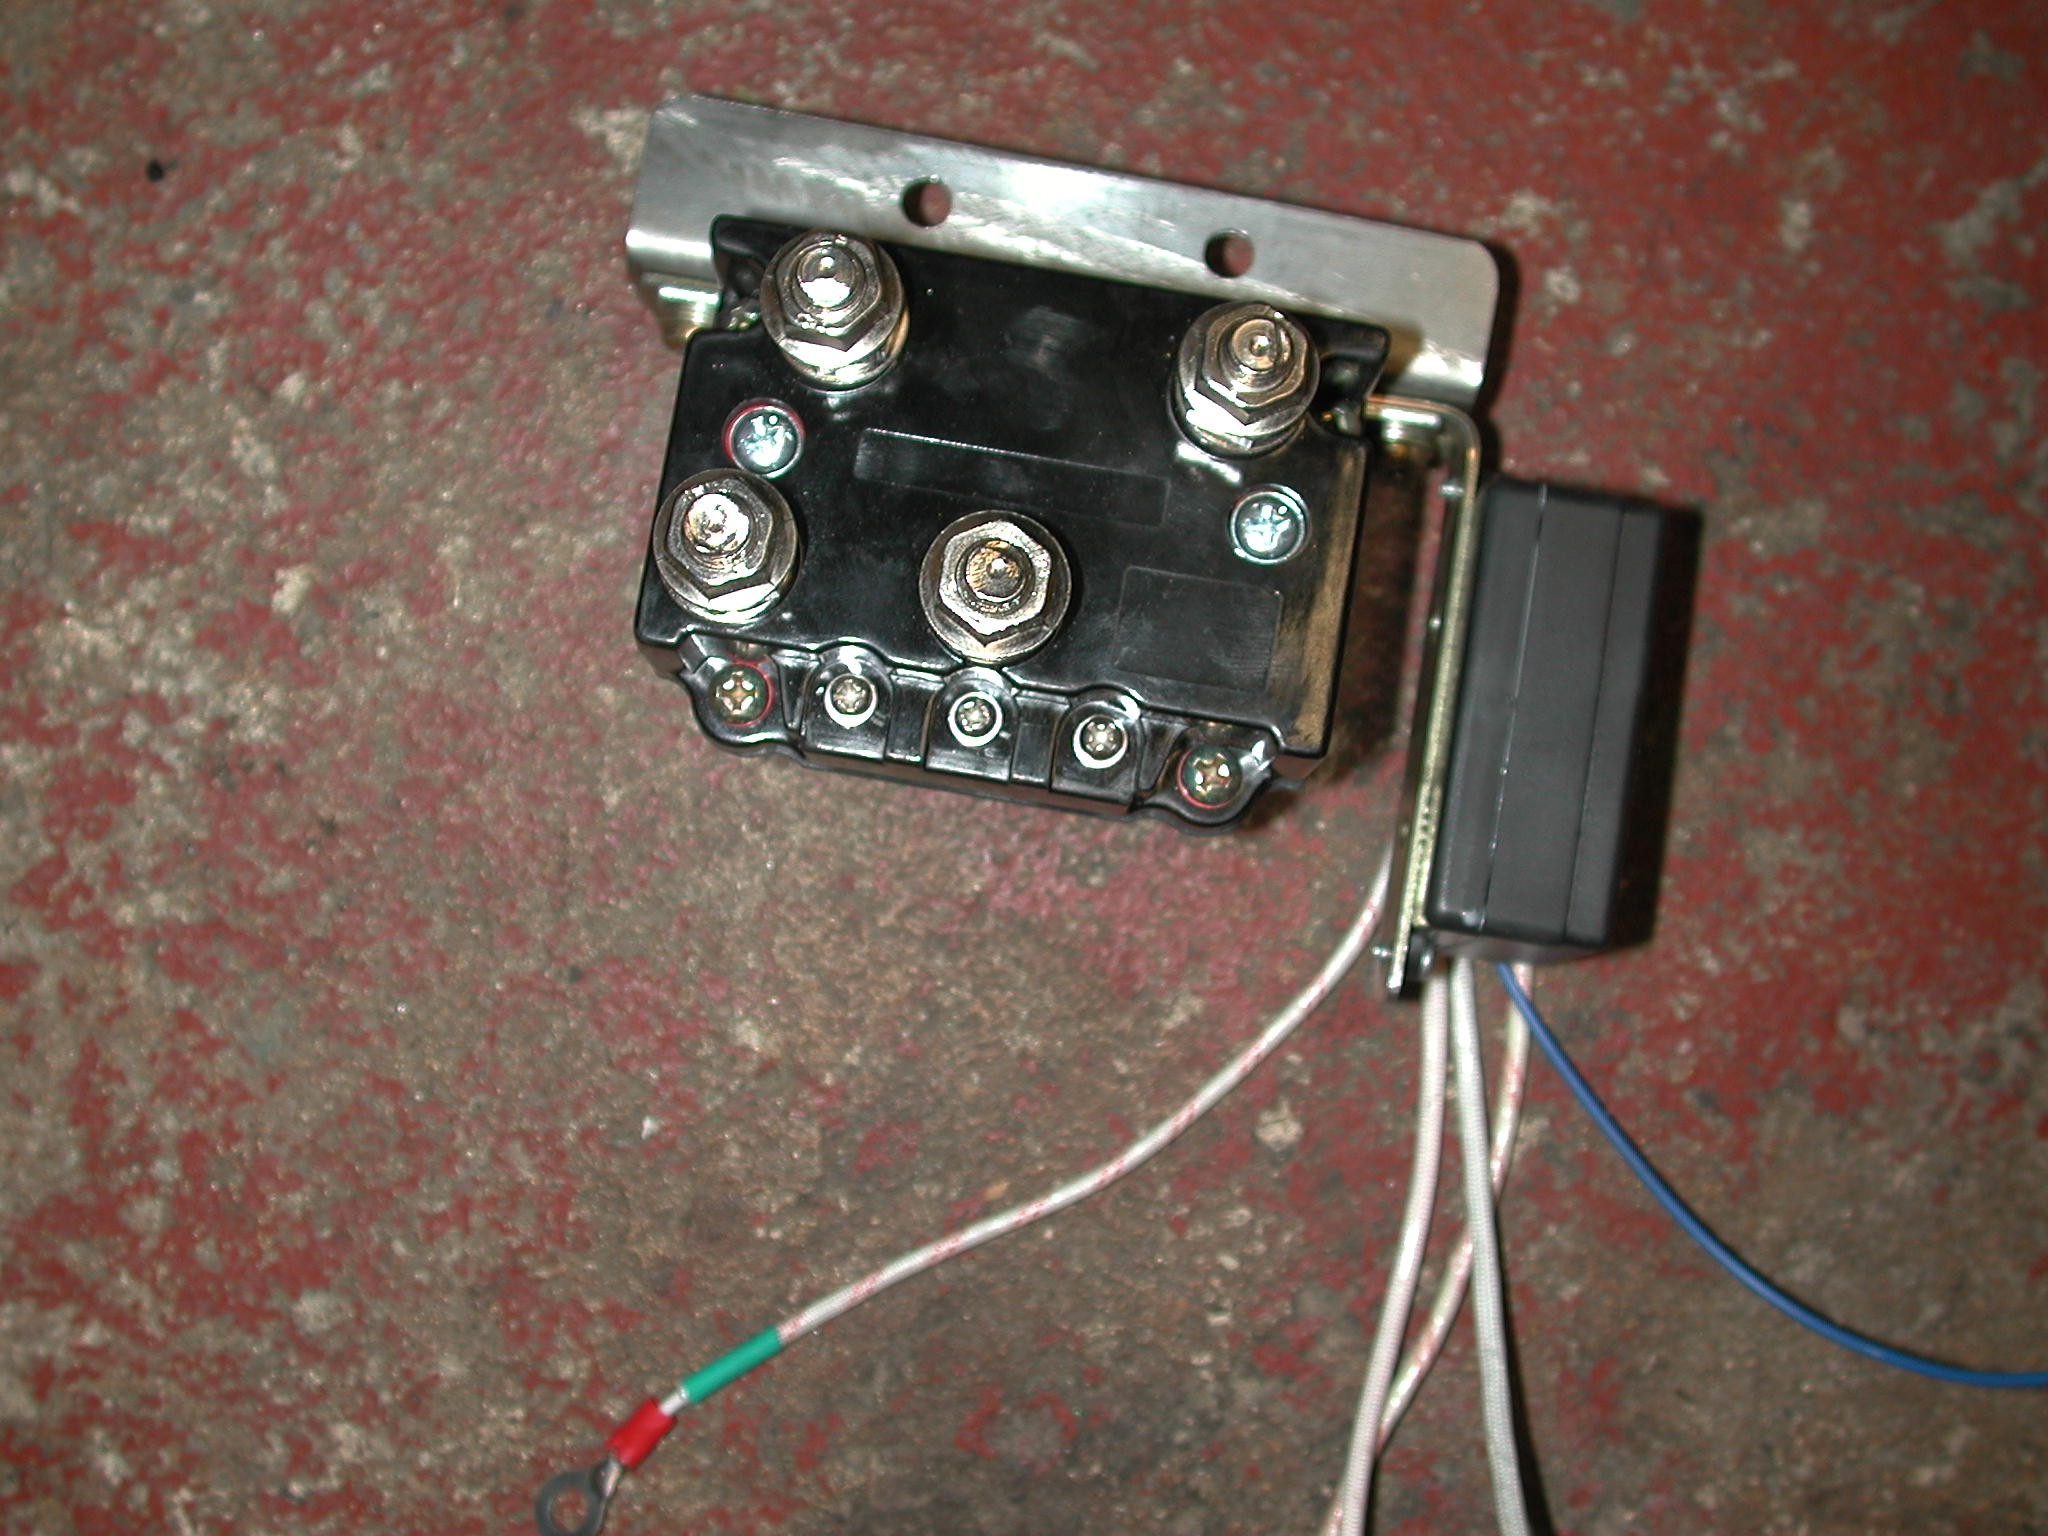
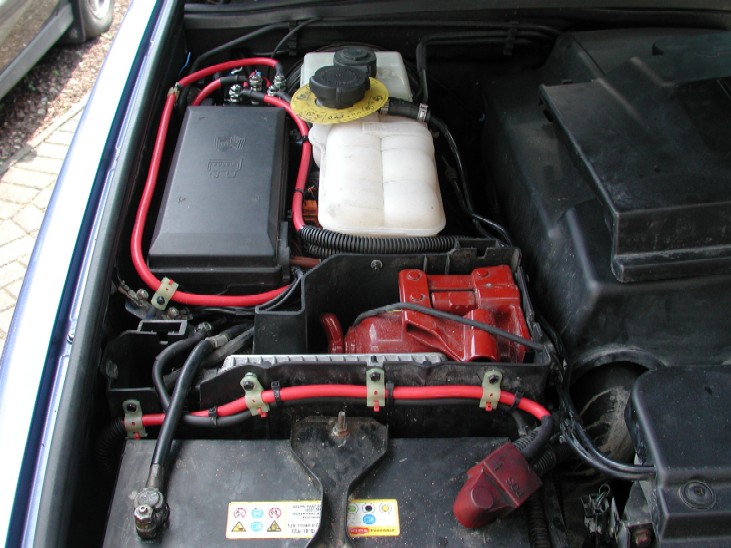
Because I'm using a discreet mount there is no room on the winch for the solenoid pack, so that was taken off, I won't be using the "factory" solenoids anyway as its even to big to re-locate and squeeze under the bonnet anywhere either. Re locating the solenoids into the engine bay is always a good idea to give them more protection when off road... NOTE the T-Max winch has the motor earth on the bottom of the motor, so its a good idea to connect this up before you fit the winch into the tray as it won't be possible to do it afterwards. Next was the issue of the winch solenoids. As I stated earlier the factory solenoids are probably the "weakest" part of the winch, so I replaced them with an "Albright" solenoid pack which is much smaller and neater and easier to find a home for in the engine bay.
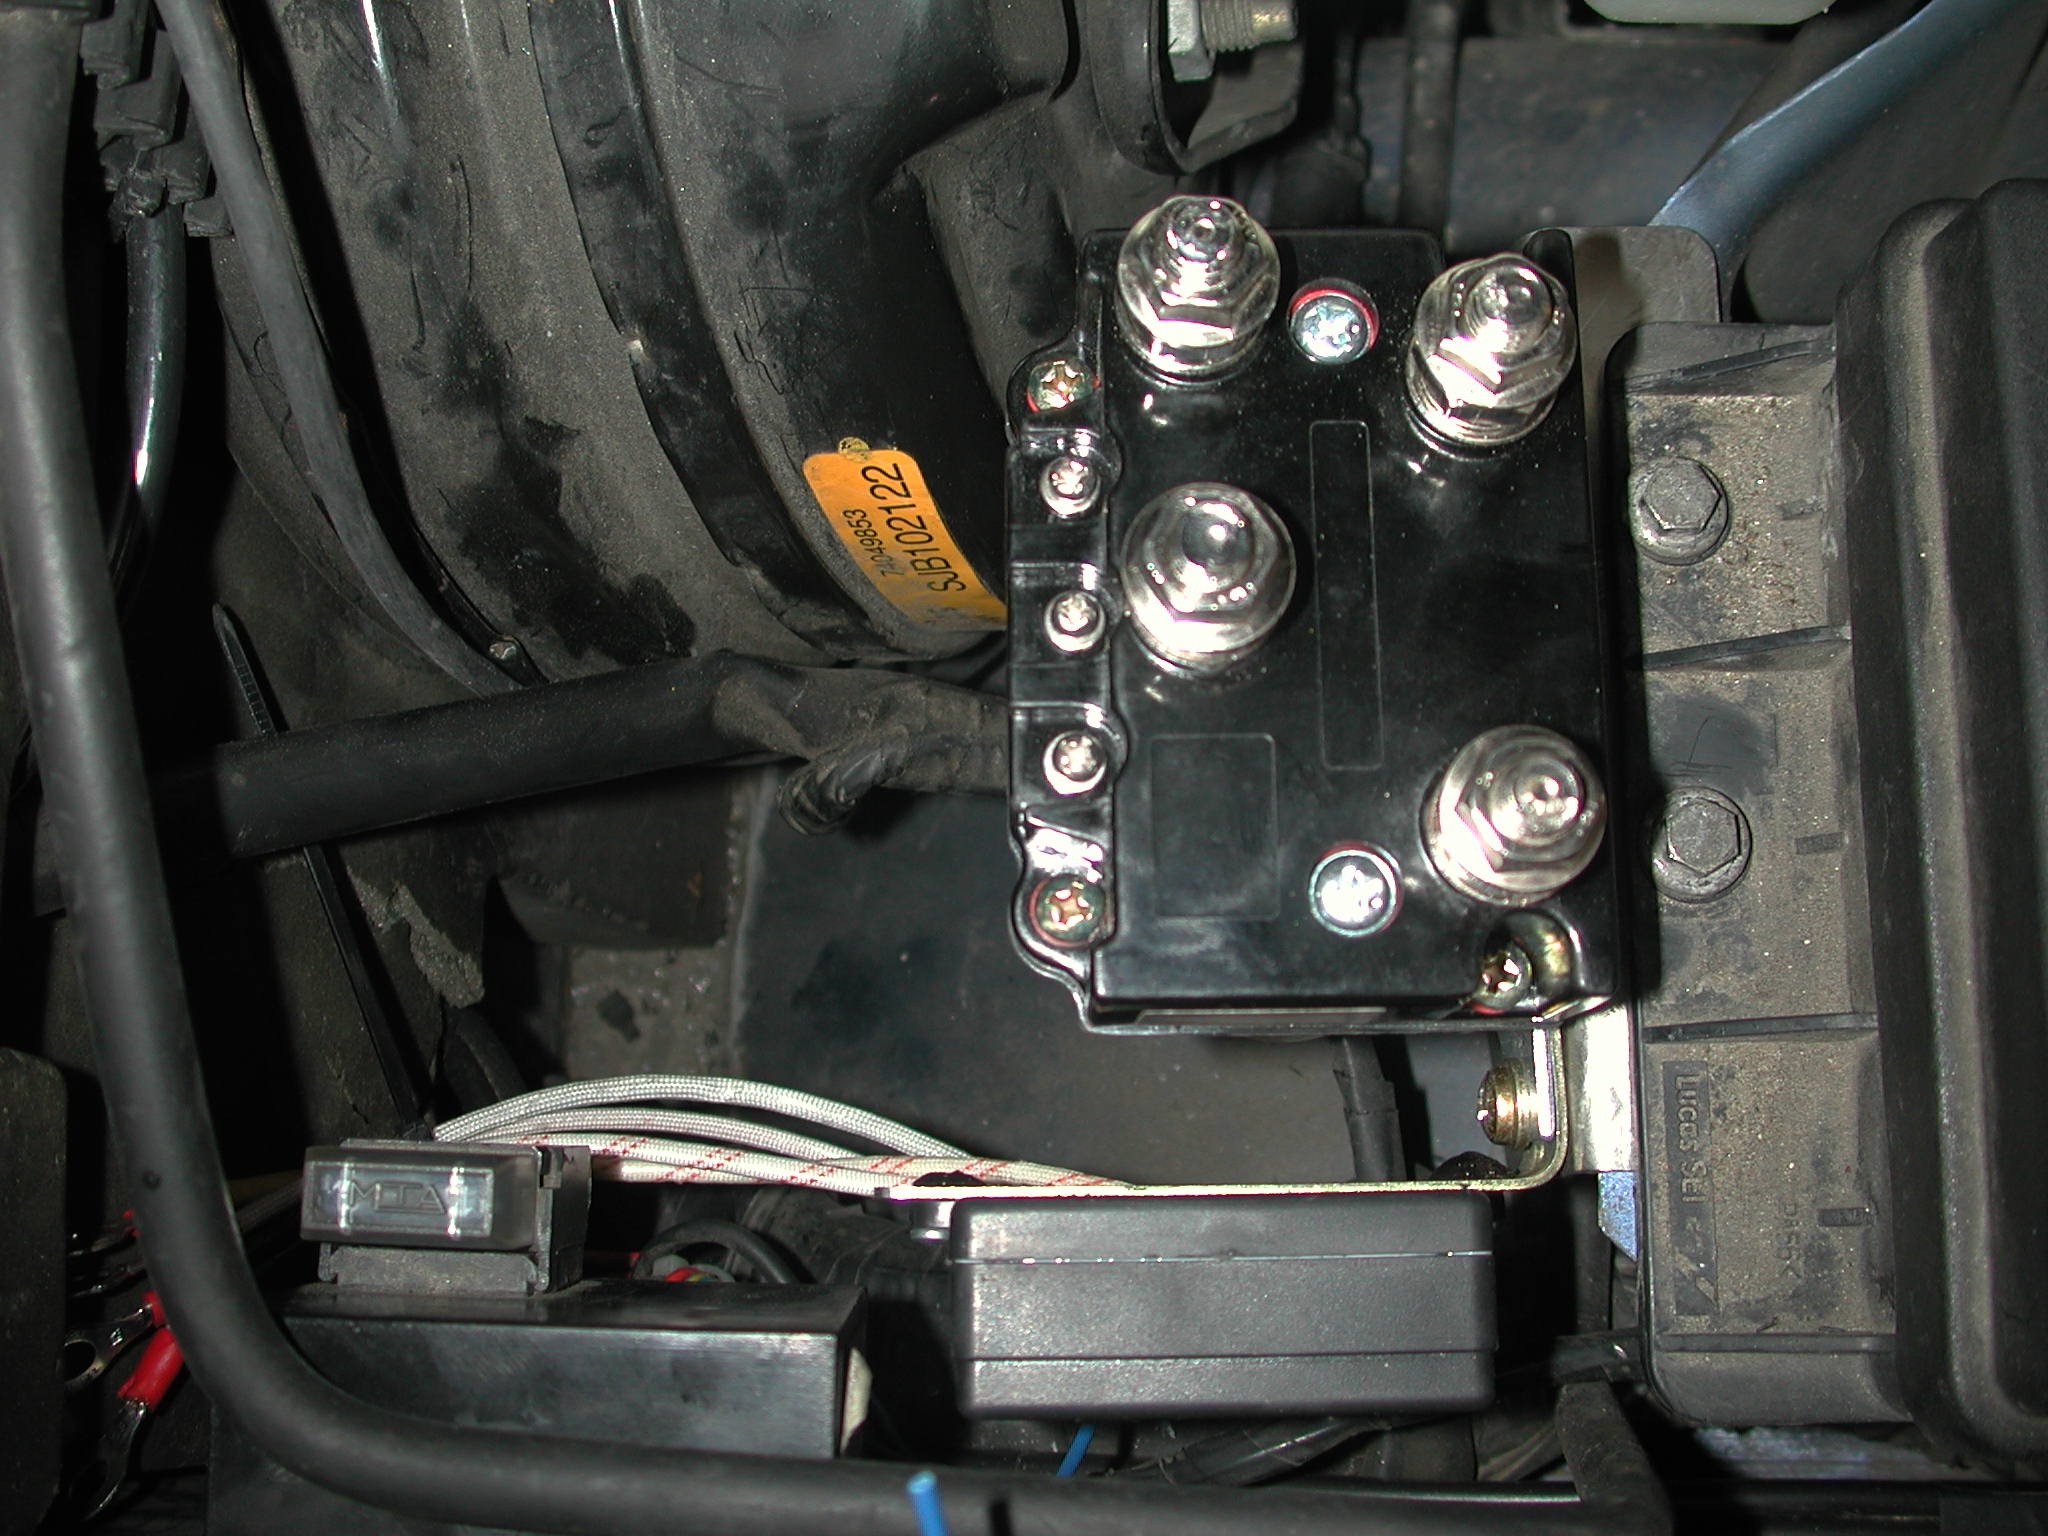
Here is what it looks like, I manufactured a small bracket from stainless steel to fix it to, Also I made another bracket and attached to the side is the "wireless" remote control box. The bracket was made to fit onto the end of the engine bay fuse box using the existing fasteners in that location. Because my car has the factory spot light kit installed, it comes with a large control box that is actually in the location that I wanted to use, the bracket part of the spot light relay can be "split" apart and that makes it much smaller and easier to move to where you want, so I re-located that to the side of the wing to allow room for the solenoids and wireless control box to fit.
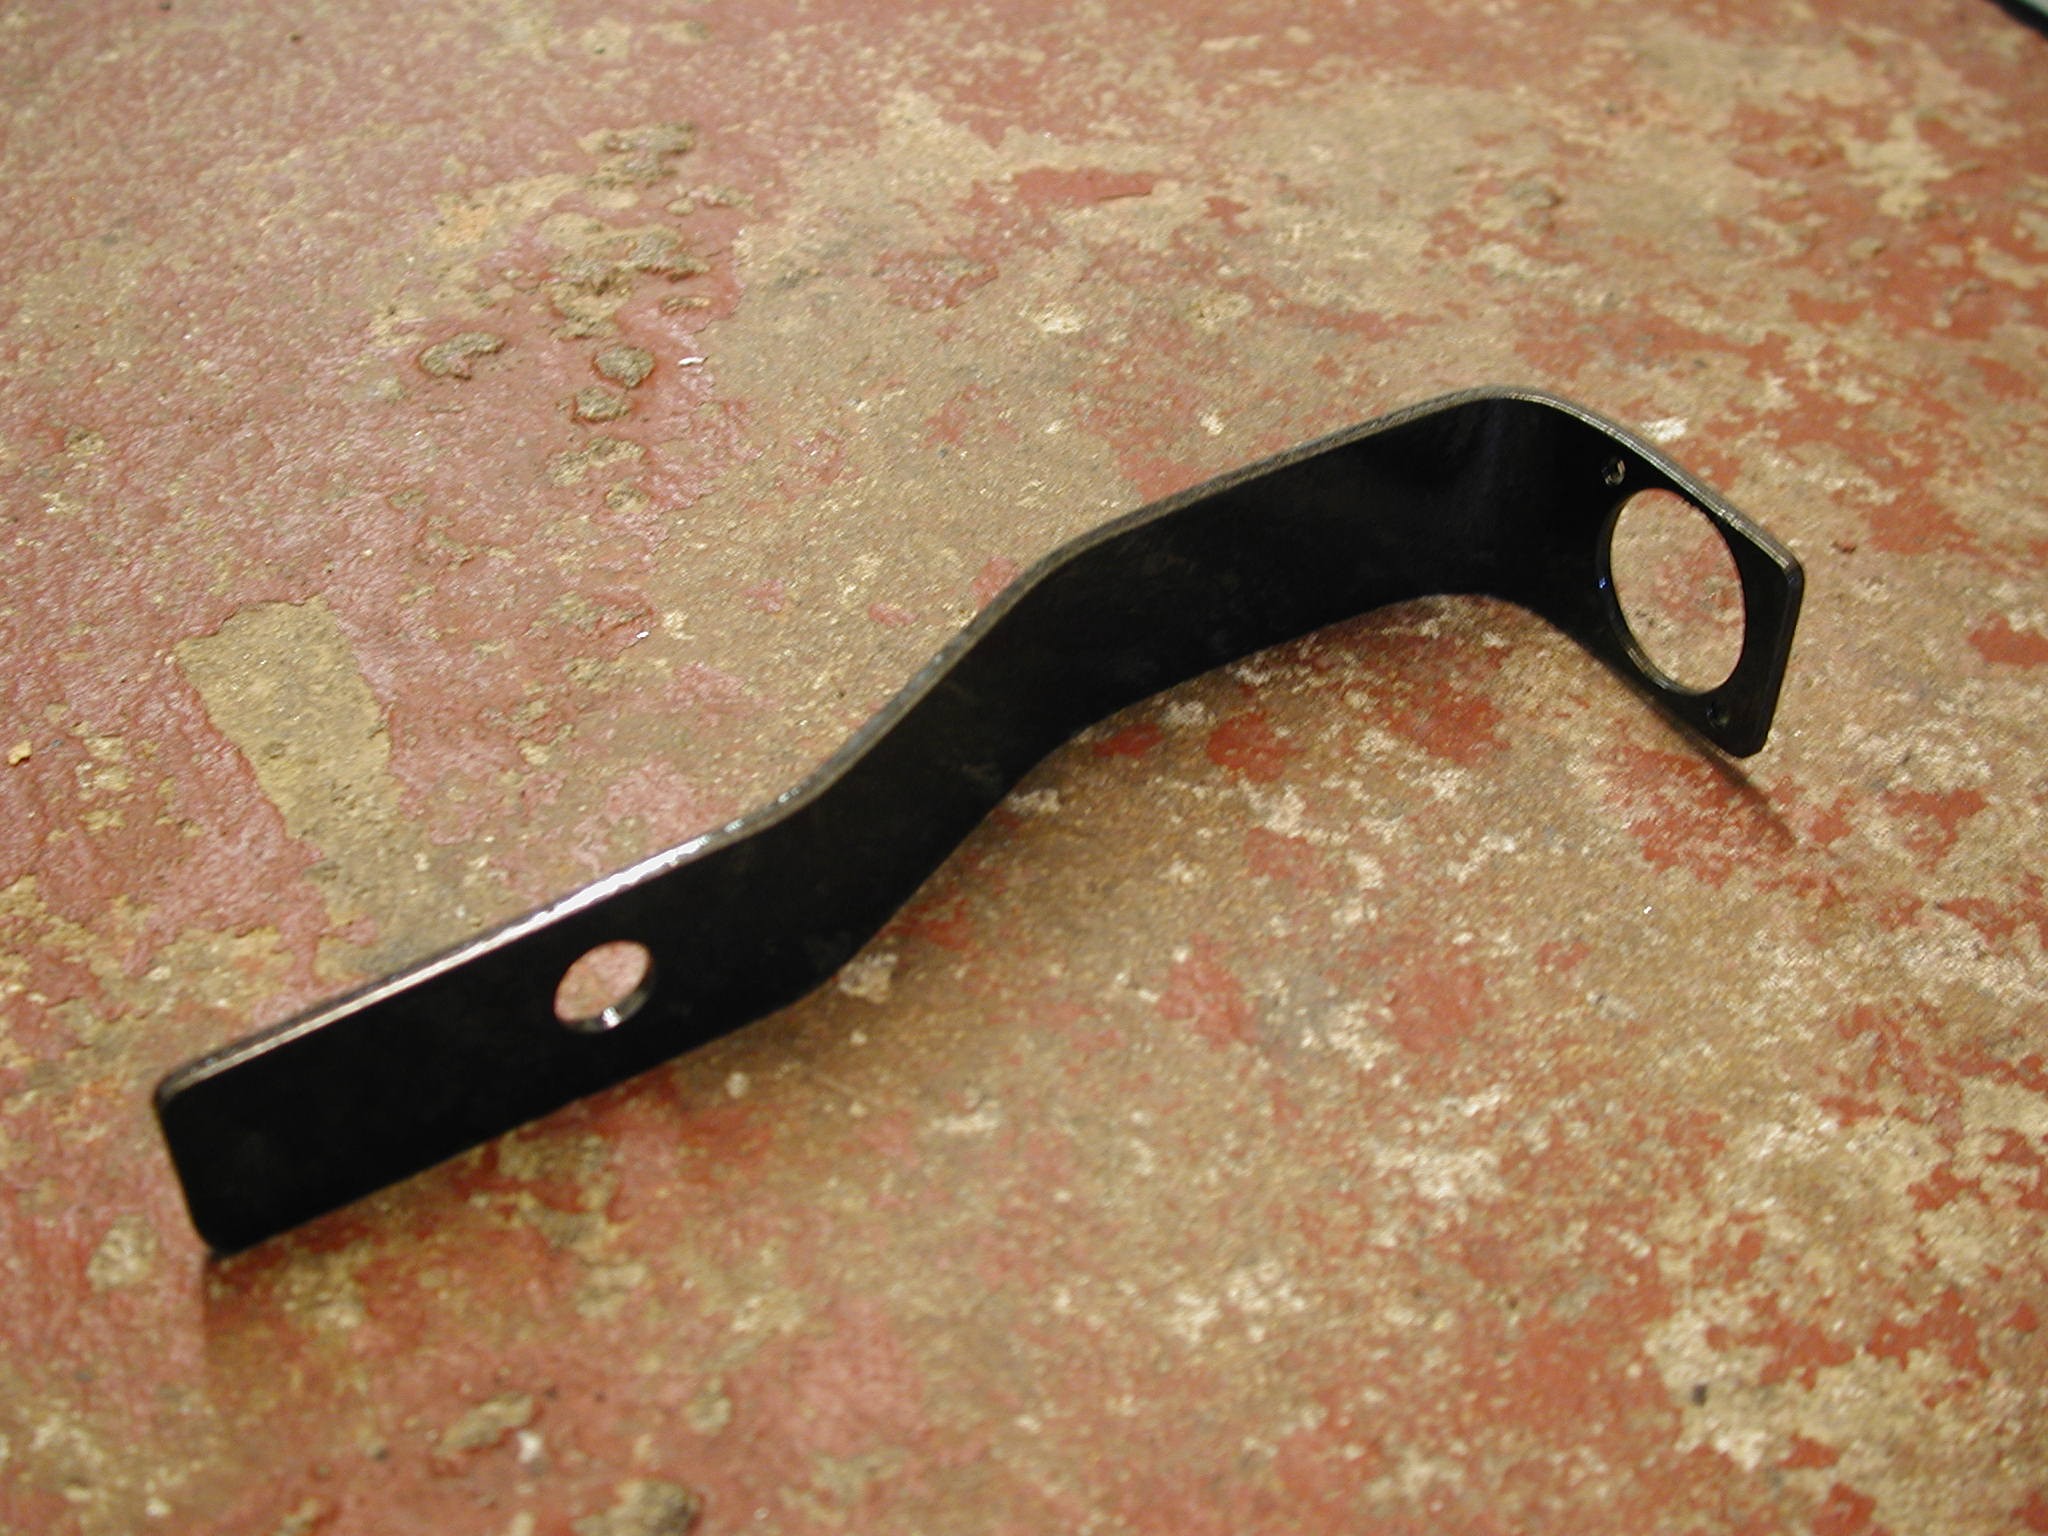
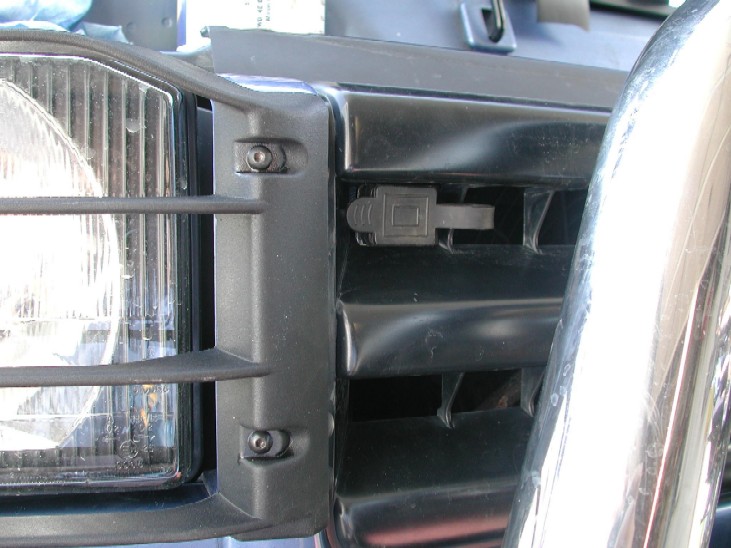
Next was the factory winch remote, which is plug in 12ft wander lead with the hand control on the end. The Socket for the wander lead is fitted to the front of the factory winch solenoid box. So this was removed and I looked for a place to fit this on the car. Many people drill a hole into the front grille and fit it there, but I wanted to avoid as much as possible drilling holes etc etc, so if it was all removed later on, then it would still look as if nothing was ever there. After choosing my location, I made up a small bracket to fit the socket, and sprayed it black to.
The socket fits into the large hole, and the small hole fixes onto the horn mounting on the right hand side of the car
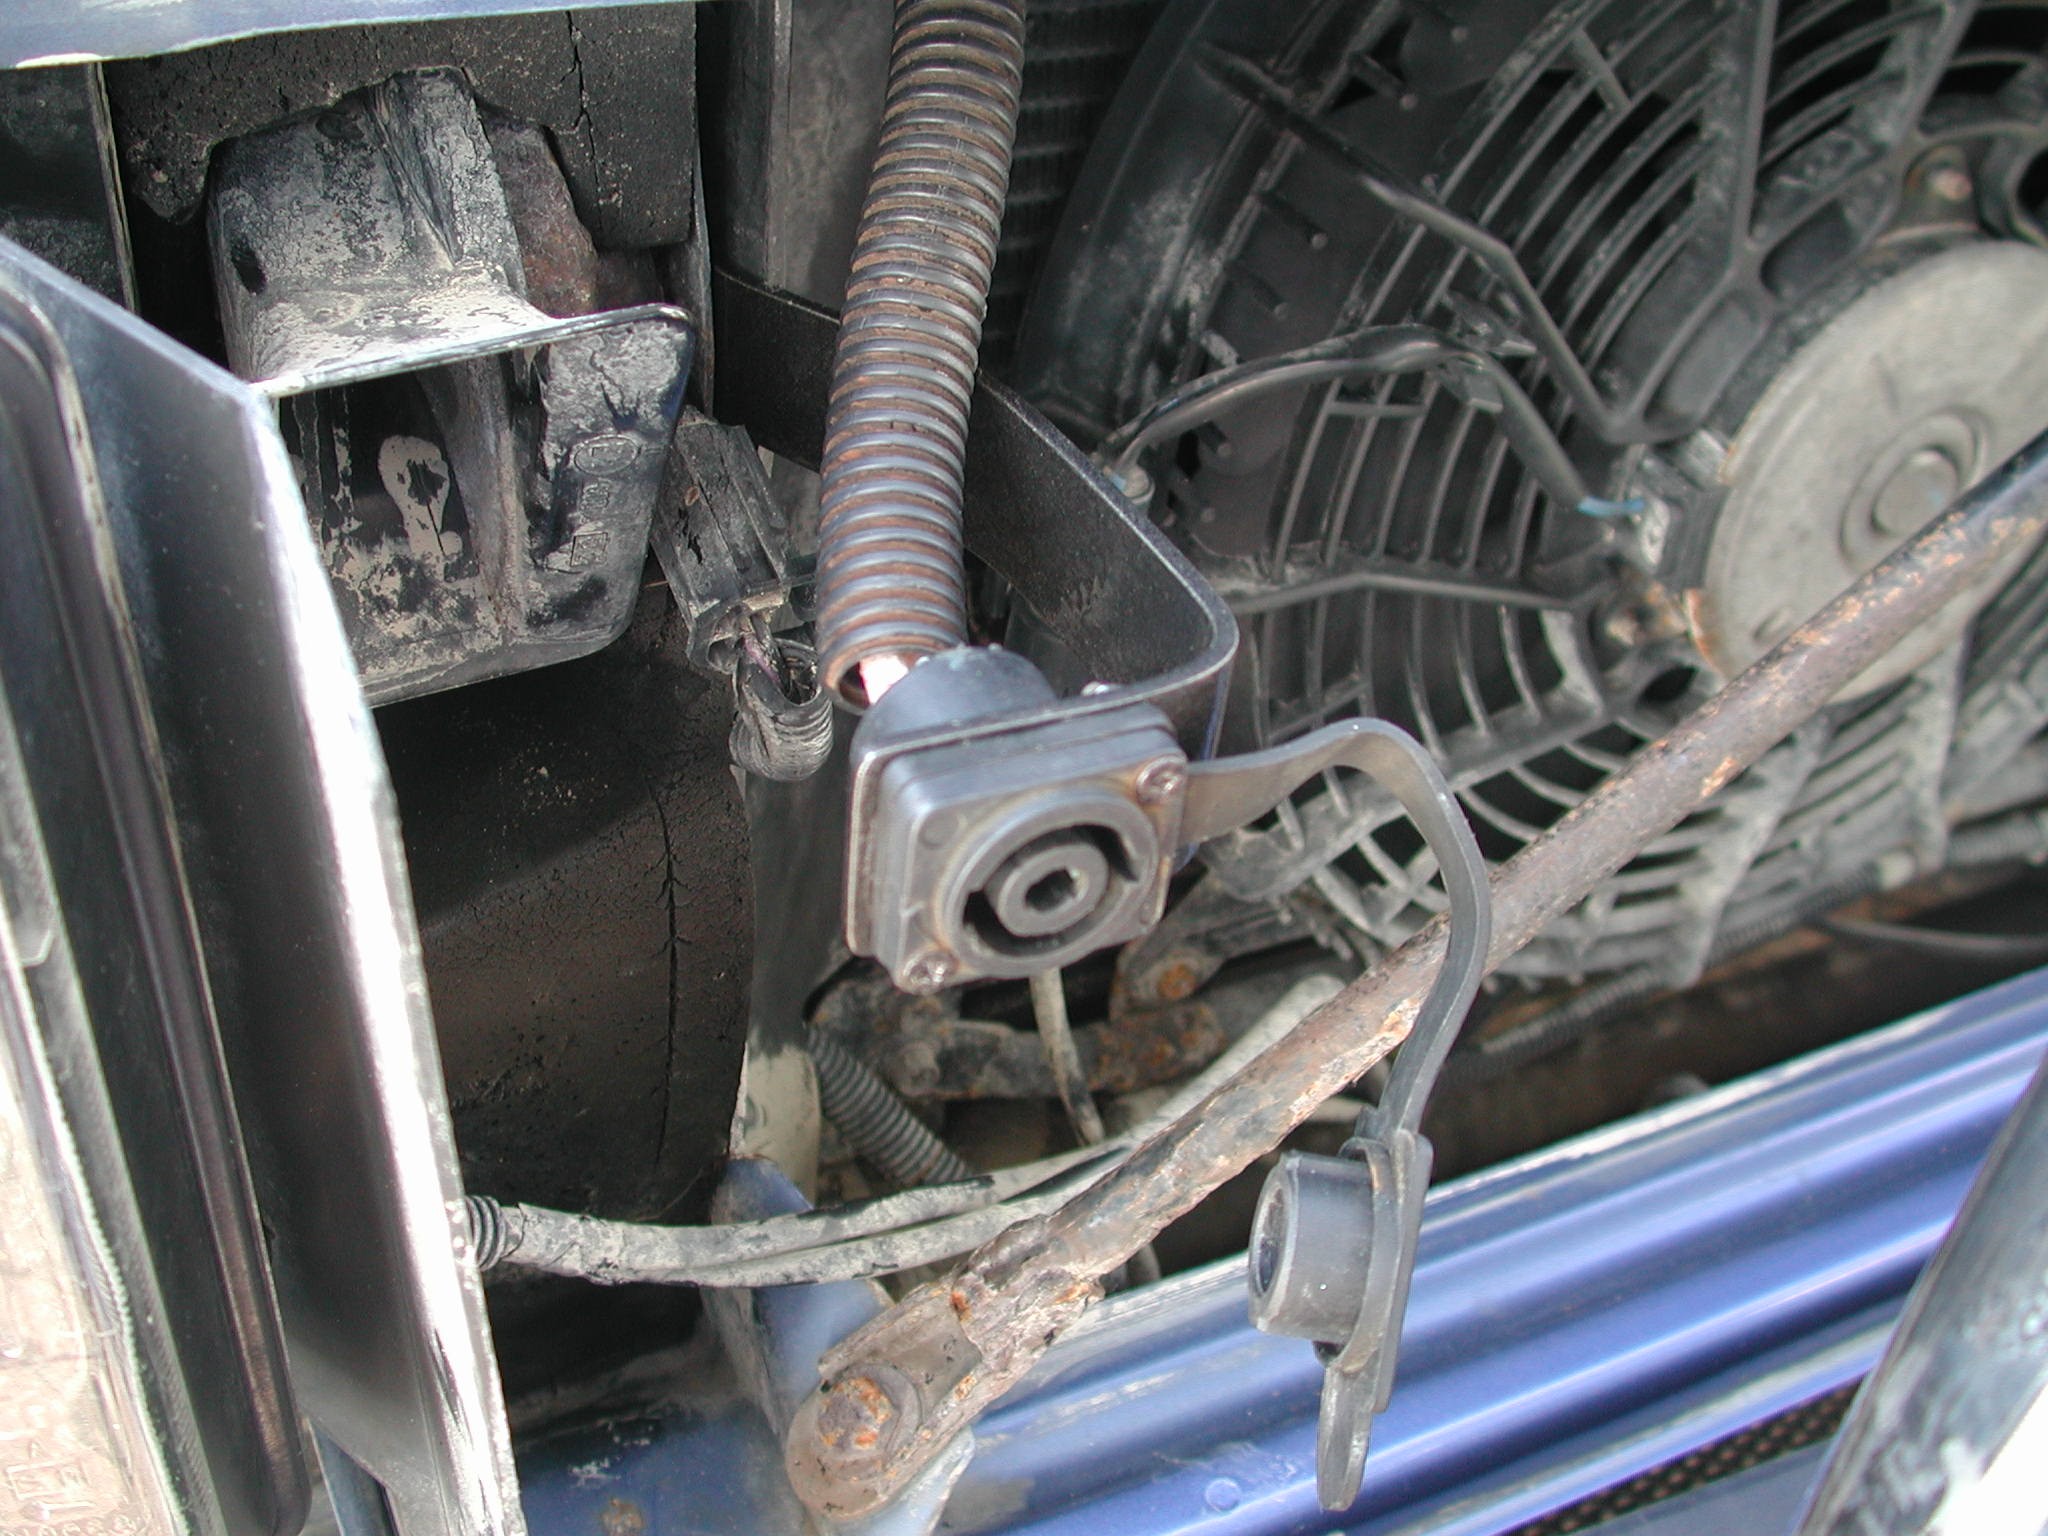
The wires were connected and lengthened to run right up to the new solenoid pack. As they pass next to the radiator and up into the engine bay they run through some plastic conduit to protect them. The "bends" in the bracket were to allow it to protrude through the edge of front grille. So when the grills all back in it looks like below
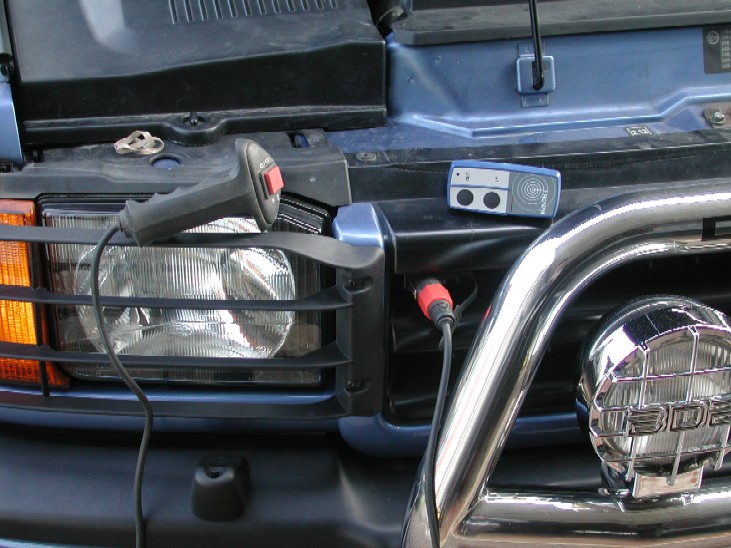
So I have the choice of the original "wander lead" and the Wireless remote!!!
Next was to get some cables to the winch itself. It actually proved very difficult for me to get some battery cable at a reasonable price locally, so I went back to Vehicle Wiring products and ordered 6 meters of red and 4 meters of black 25 mm2 battery cable. This is the same size that was fitted to my factory solenoids so I kept it the same. You could go bigger but never smaller. Battery cable is not very flexible, so if you go to big you will have more difficulty in routing it to where you want it. I also Bought some crimp terminals for the cable and I have my own hydraulic crimper to make the cables myself to the ideal length
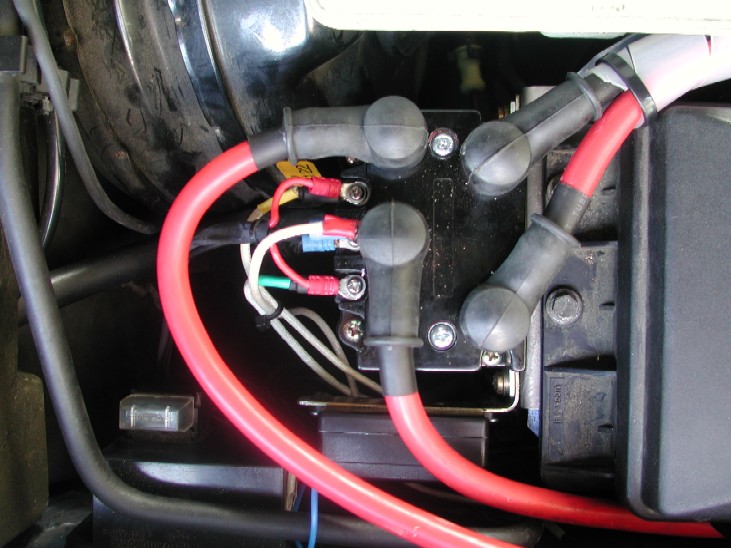
I connected them up to the winch as per the wring diagram. On T-max Winches one of the cables is Black, but its LIVE so always check and double check what goes where !! with your particular winch model. The cables already had rubber boots on them which I swapped over from my factory solenoid pack. There is 3 cables on the top, 2 red, one of which is motor power the other the out power and the black is the in power. To get the cables into the engine bay is pretty straightforward as there is plenty of room up the side of the radiator, however there is a rubber "panel" that fills the gap, you could simply flex it out the way, but I chose to cut a hole in it using a large penny washer.
The washer was big enough to allow all three cables + some more protective conduit to pass through into the engine bay.
Here you can see the 4th cable, the motor earth which I installed earlier as I fitted the winch and it runs through higher up next to the wander lead remote socket wires. The cables go into the engine bay, run by the ECU / Jack box and up to the solenoid by via the neatest best route I could find.
Where possible the cables are 'p' clipped to hold them in place, and where needed more plastic conduit was fitted to protect them
Here's all the cables terminating at the solenoid pack, once I had crimped the terminals on I also added some heat shrink here and at the winch end to help keep the cables clean and protected. You can also see the 3 wires from the remote wander socket connected on the 2 outer "small" terminals and onto the + from the battery on the solenoid pack. The middle small terminal is an earth. Now here I added some waterproof "boots" to the connections to protect them and to stop anything that could possibly touch then and cause a short. Also the wireless remote box is fully wired up to.
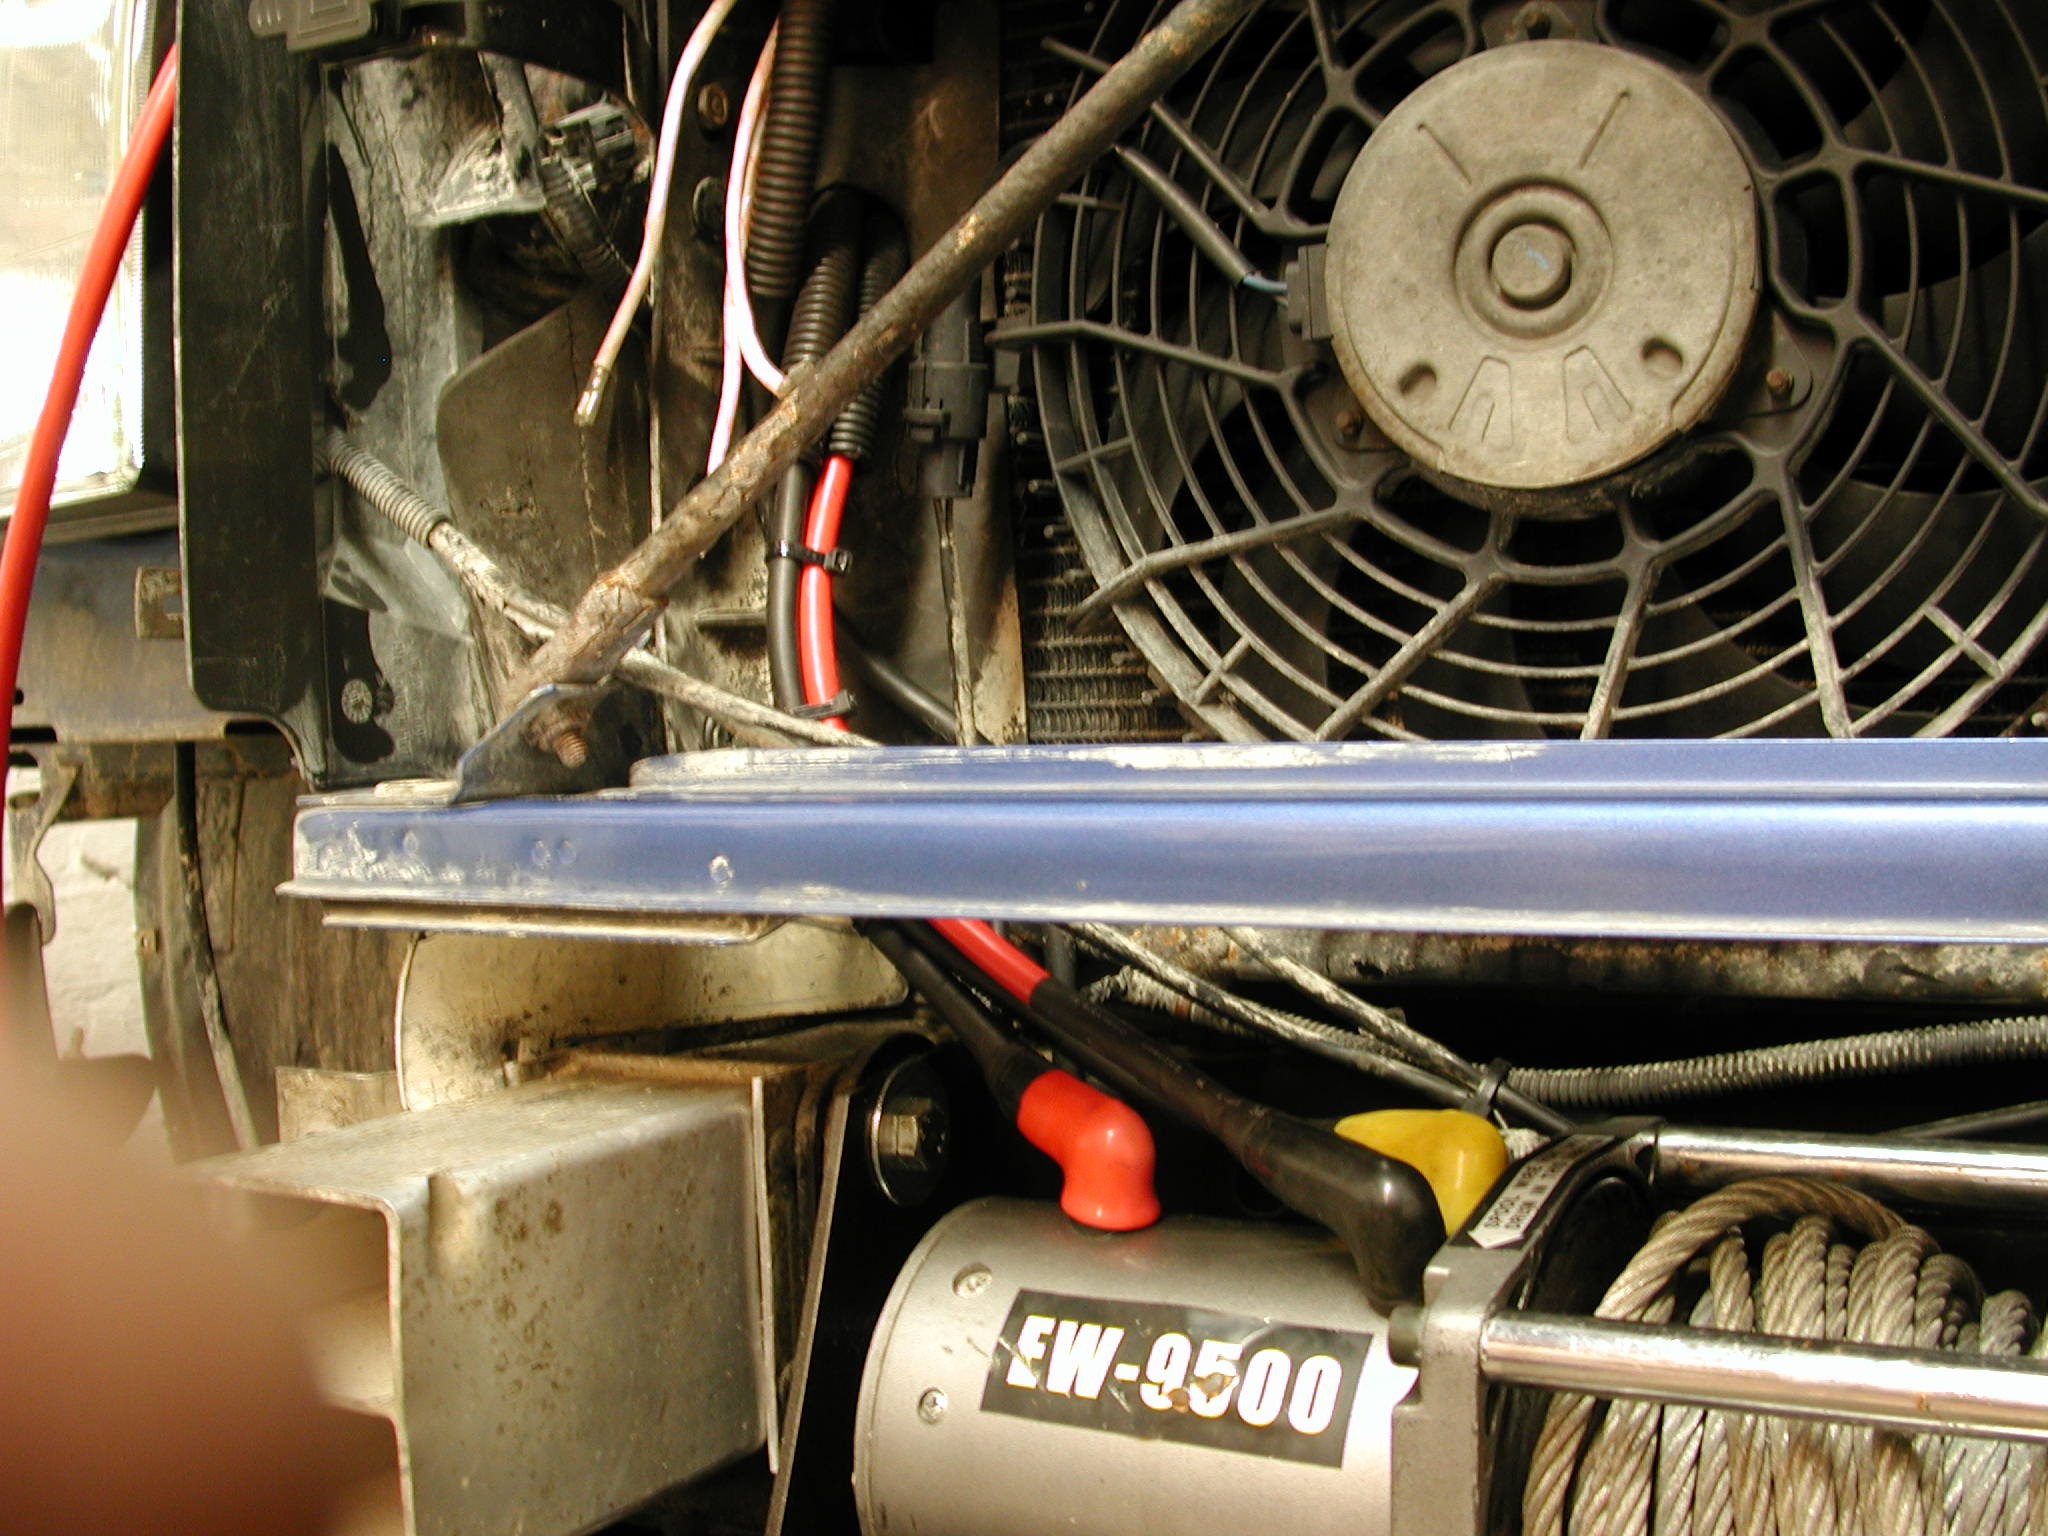
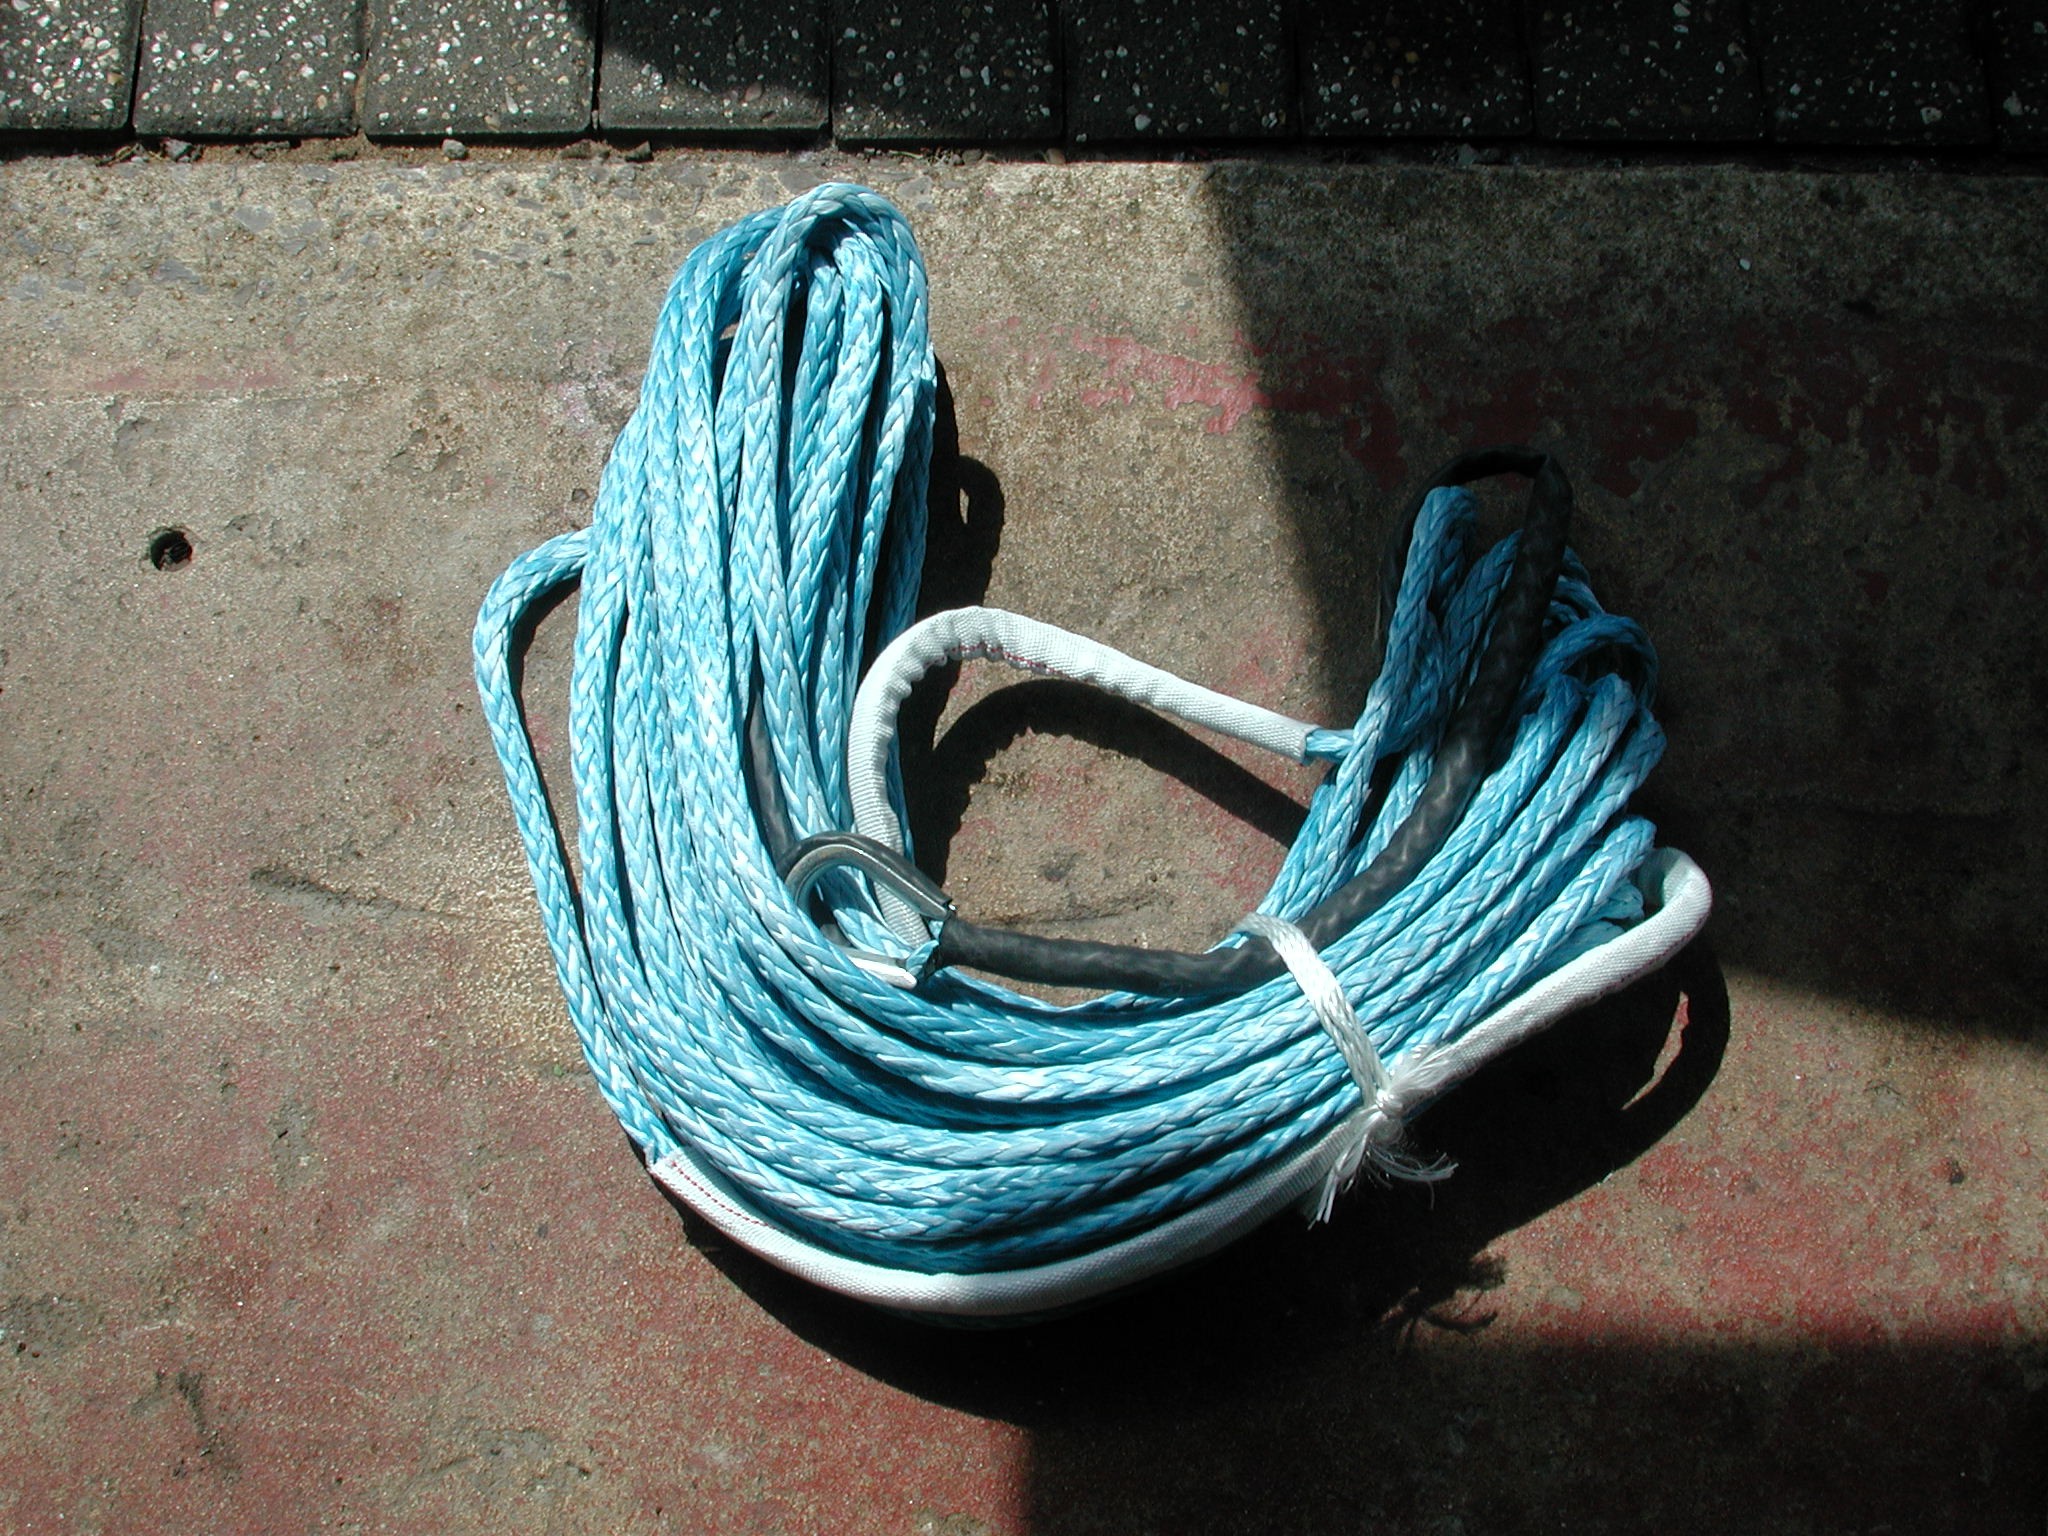
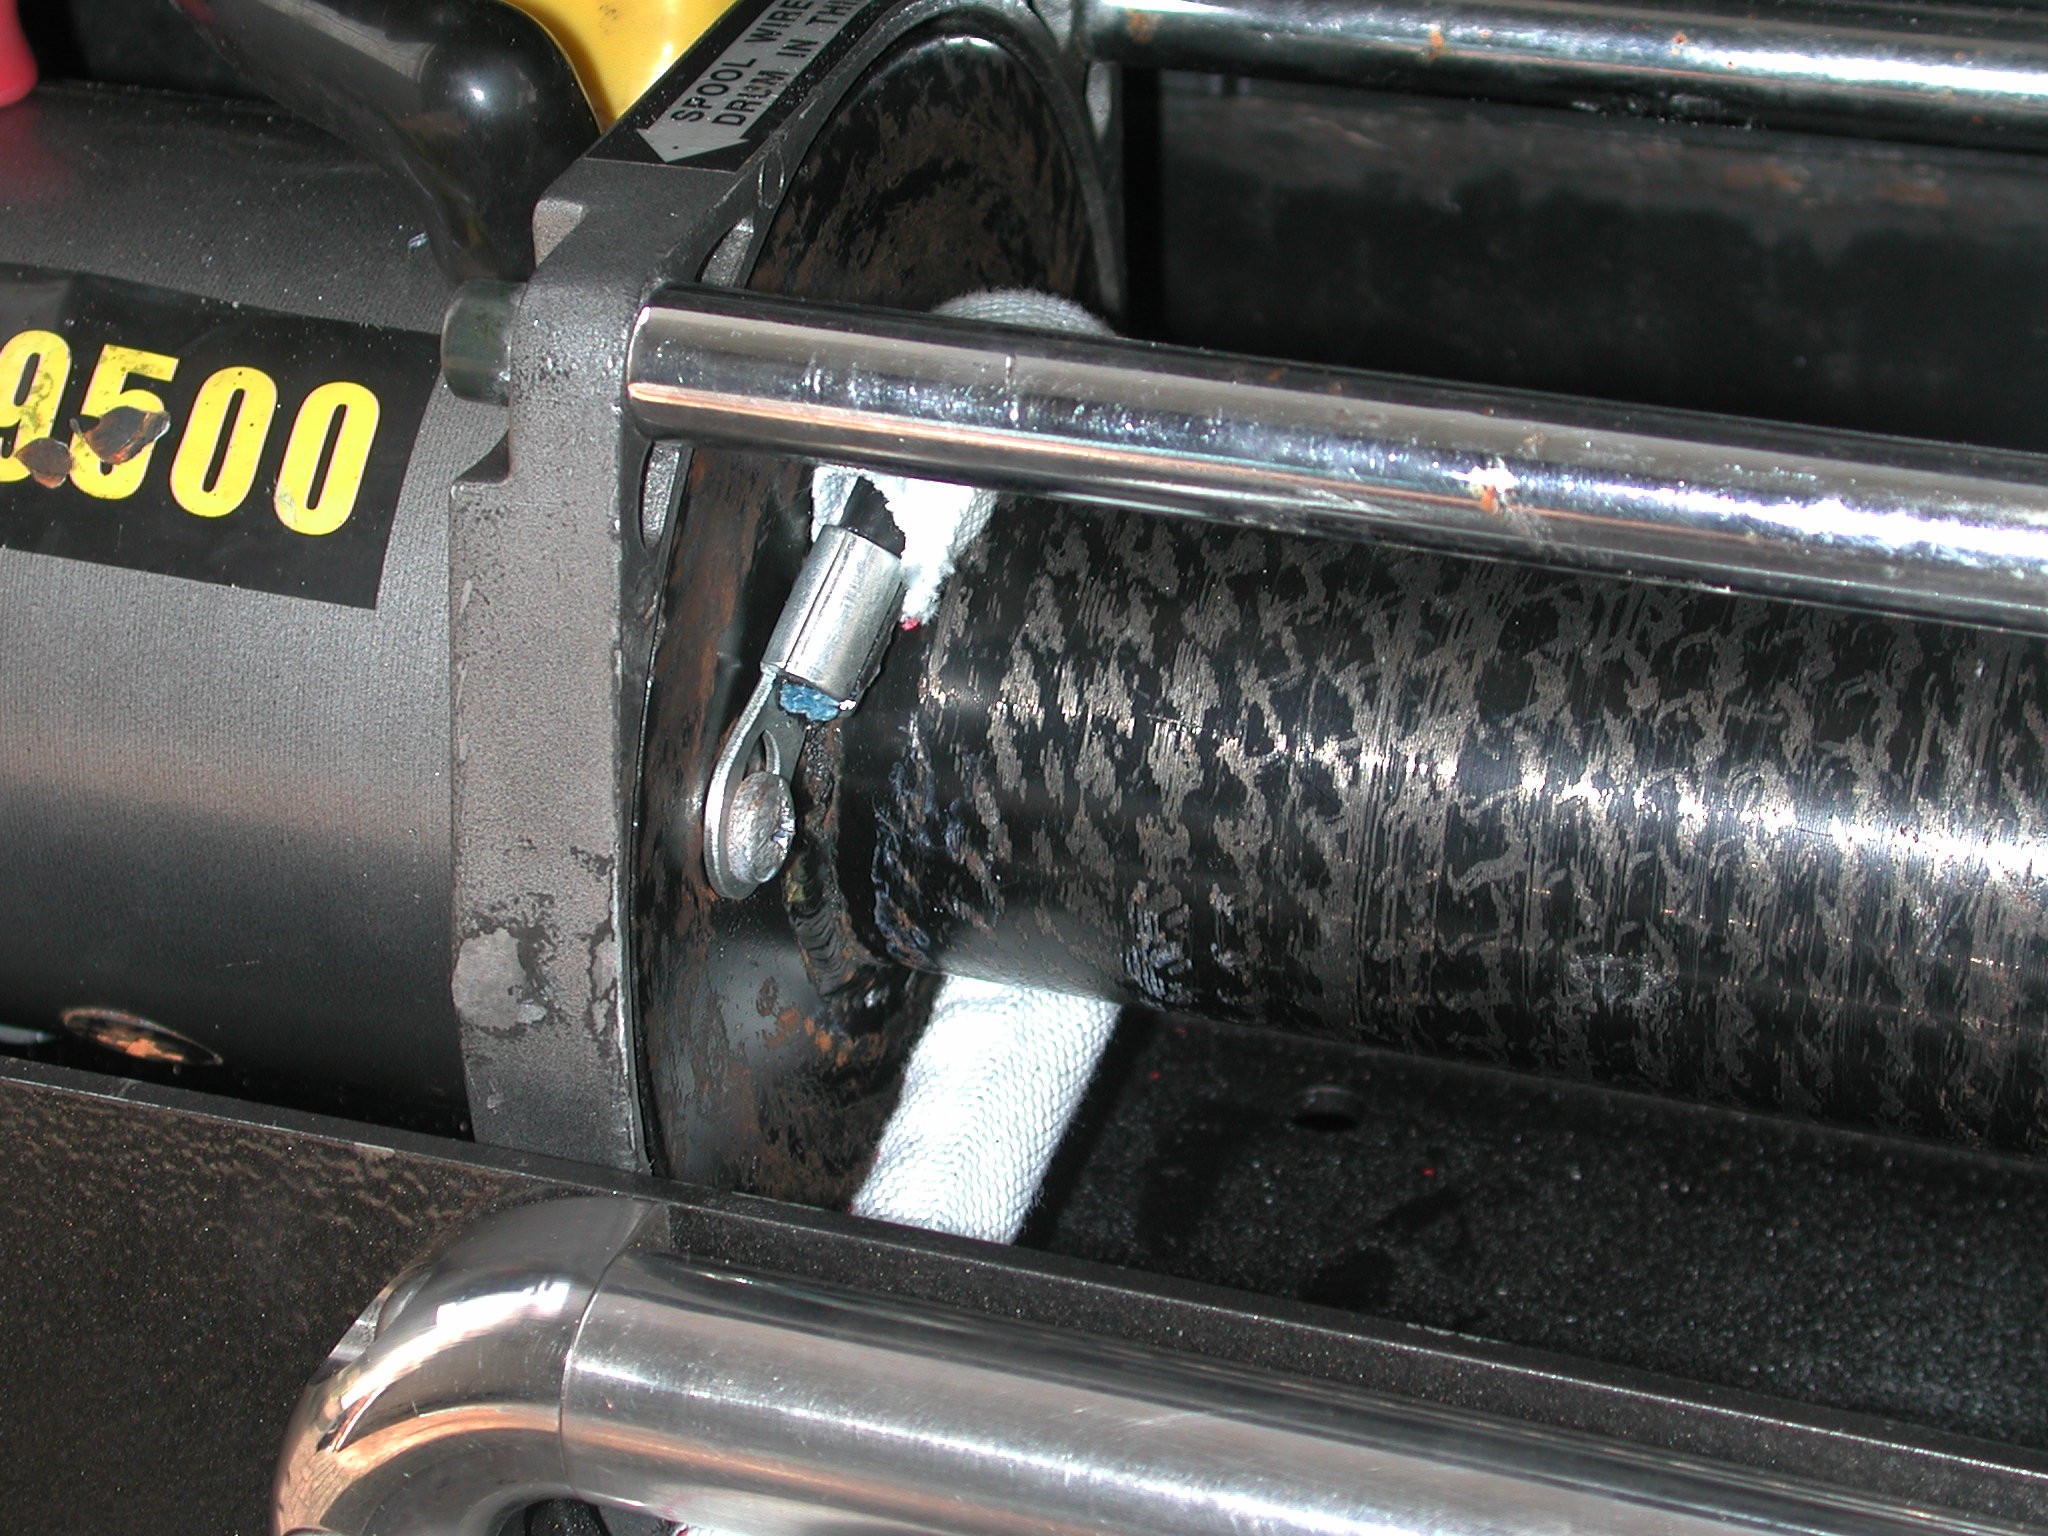
So, The winch was now functional and was really good fun to try for the first time !!. Again because I have a "discreet" mount so the winch is pretty much hidden when the bumper is back on, I took the opportunity to spool of the steel wire rope and fit my new synthetic winch rope. ALWAYS make sure you spool your rope onto the drum as per your winch manufacturers instructions.
The rope is held at the motor end with a ring terminal and screw, then its just a case of powering the winch in an feeding the new rope onto the drum as neatly as possible.
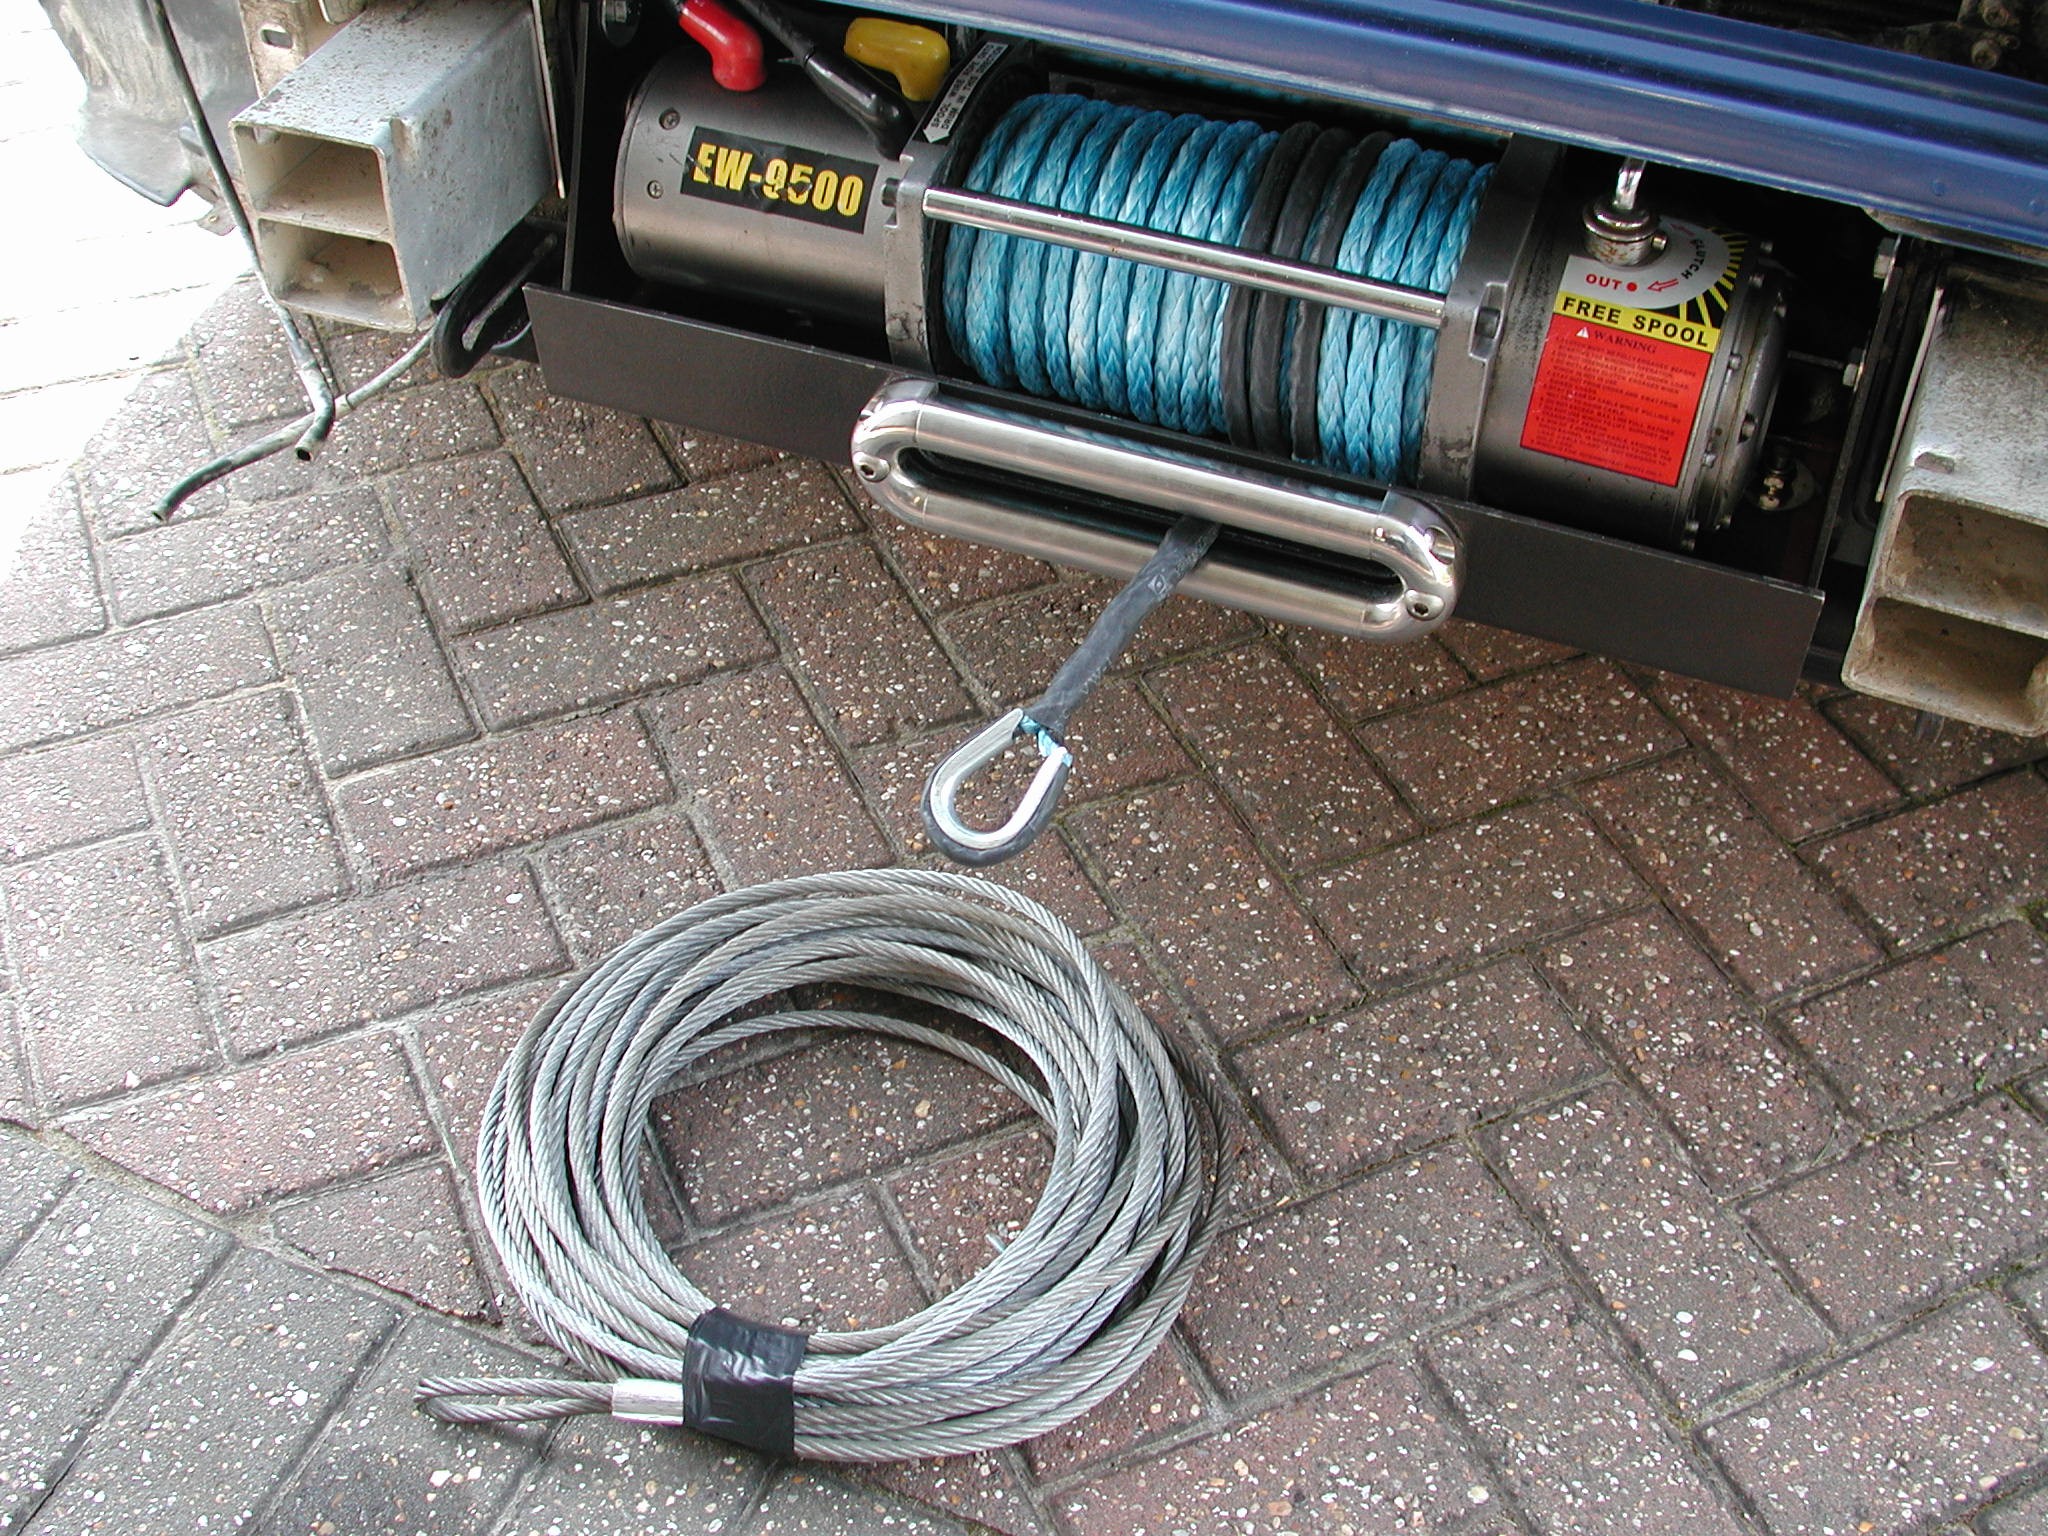
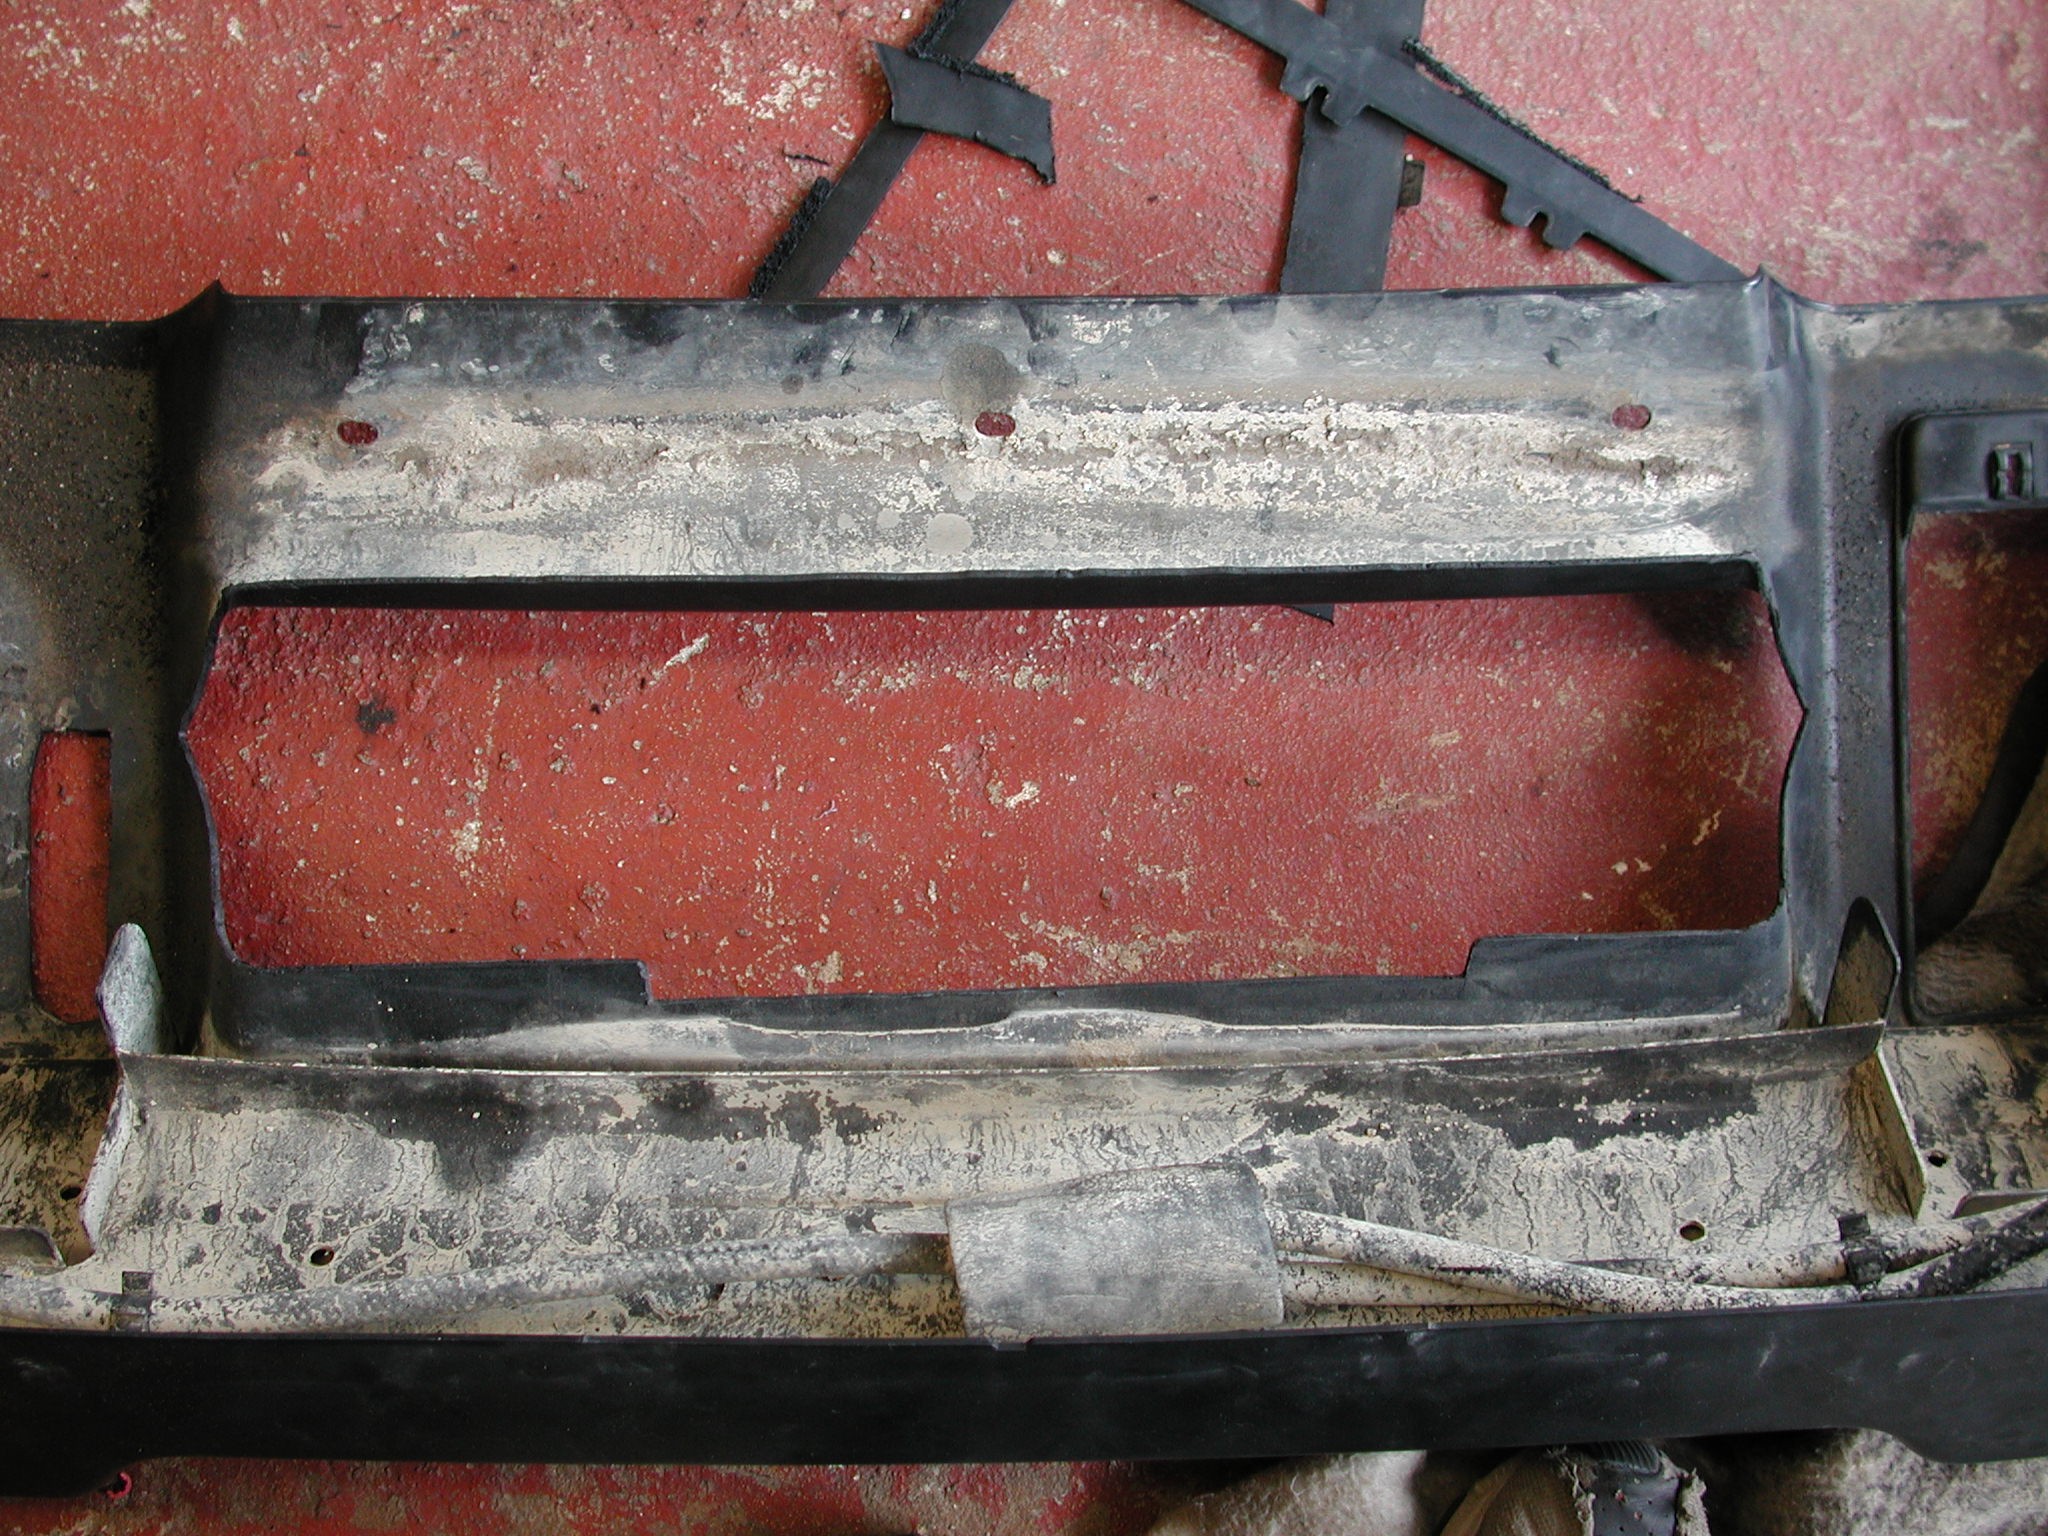
Out with the old and on with the new!!!. Despite the fact the synthetic rope is a LOT safer should it ever break as there is hardly any whiplash in it, it also weighs a LOT less to. I weighed my wire rope once it was coiled up like above, and believe it or not it was 8Kg's !!, so that drops the weight of the winch from 34 - 26 Kg's. a Big difference !! It looks Nice in blue to !! :o) So, the winch is now bolted in, wired up, new rope fitted etc, now the bumper has to be re-fitted. You have to "modify" your front bumper to accommodate the winch plate / tray. So there's a LOT of cutting to be done. I used a Dremmel like tool with a high speed cutter which I found made light work of the plastic. How ever because you don't know exactly what has to come of, it takes many many trial fitments of the bumper with more being removed each time till it fits nice a neat.
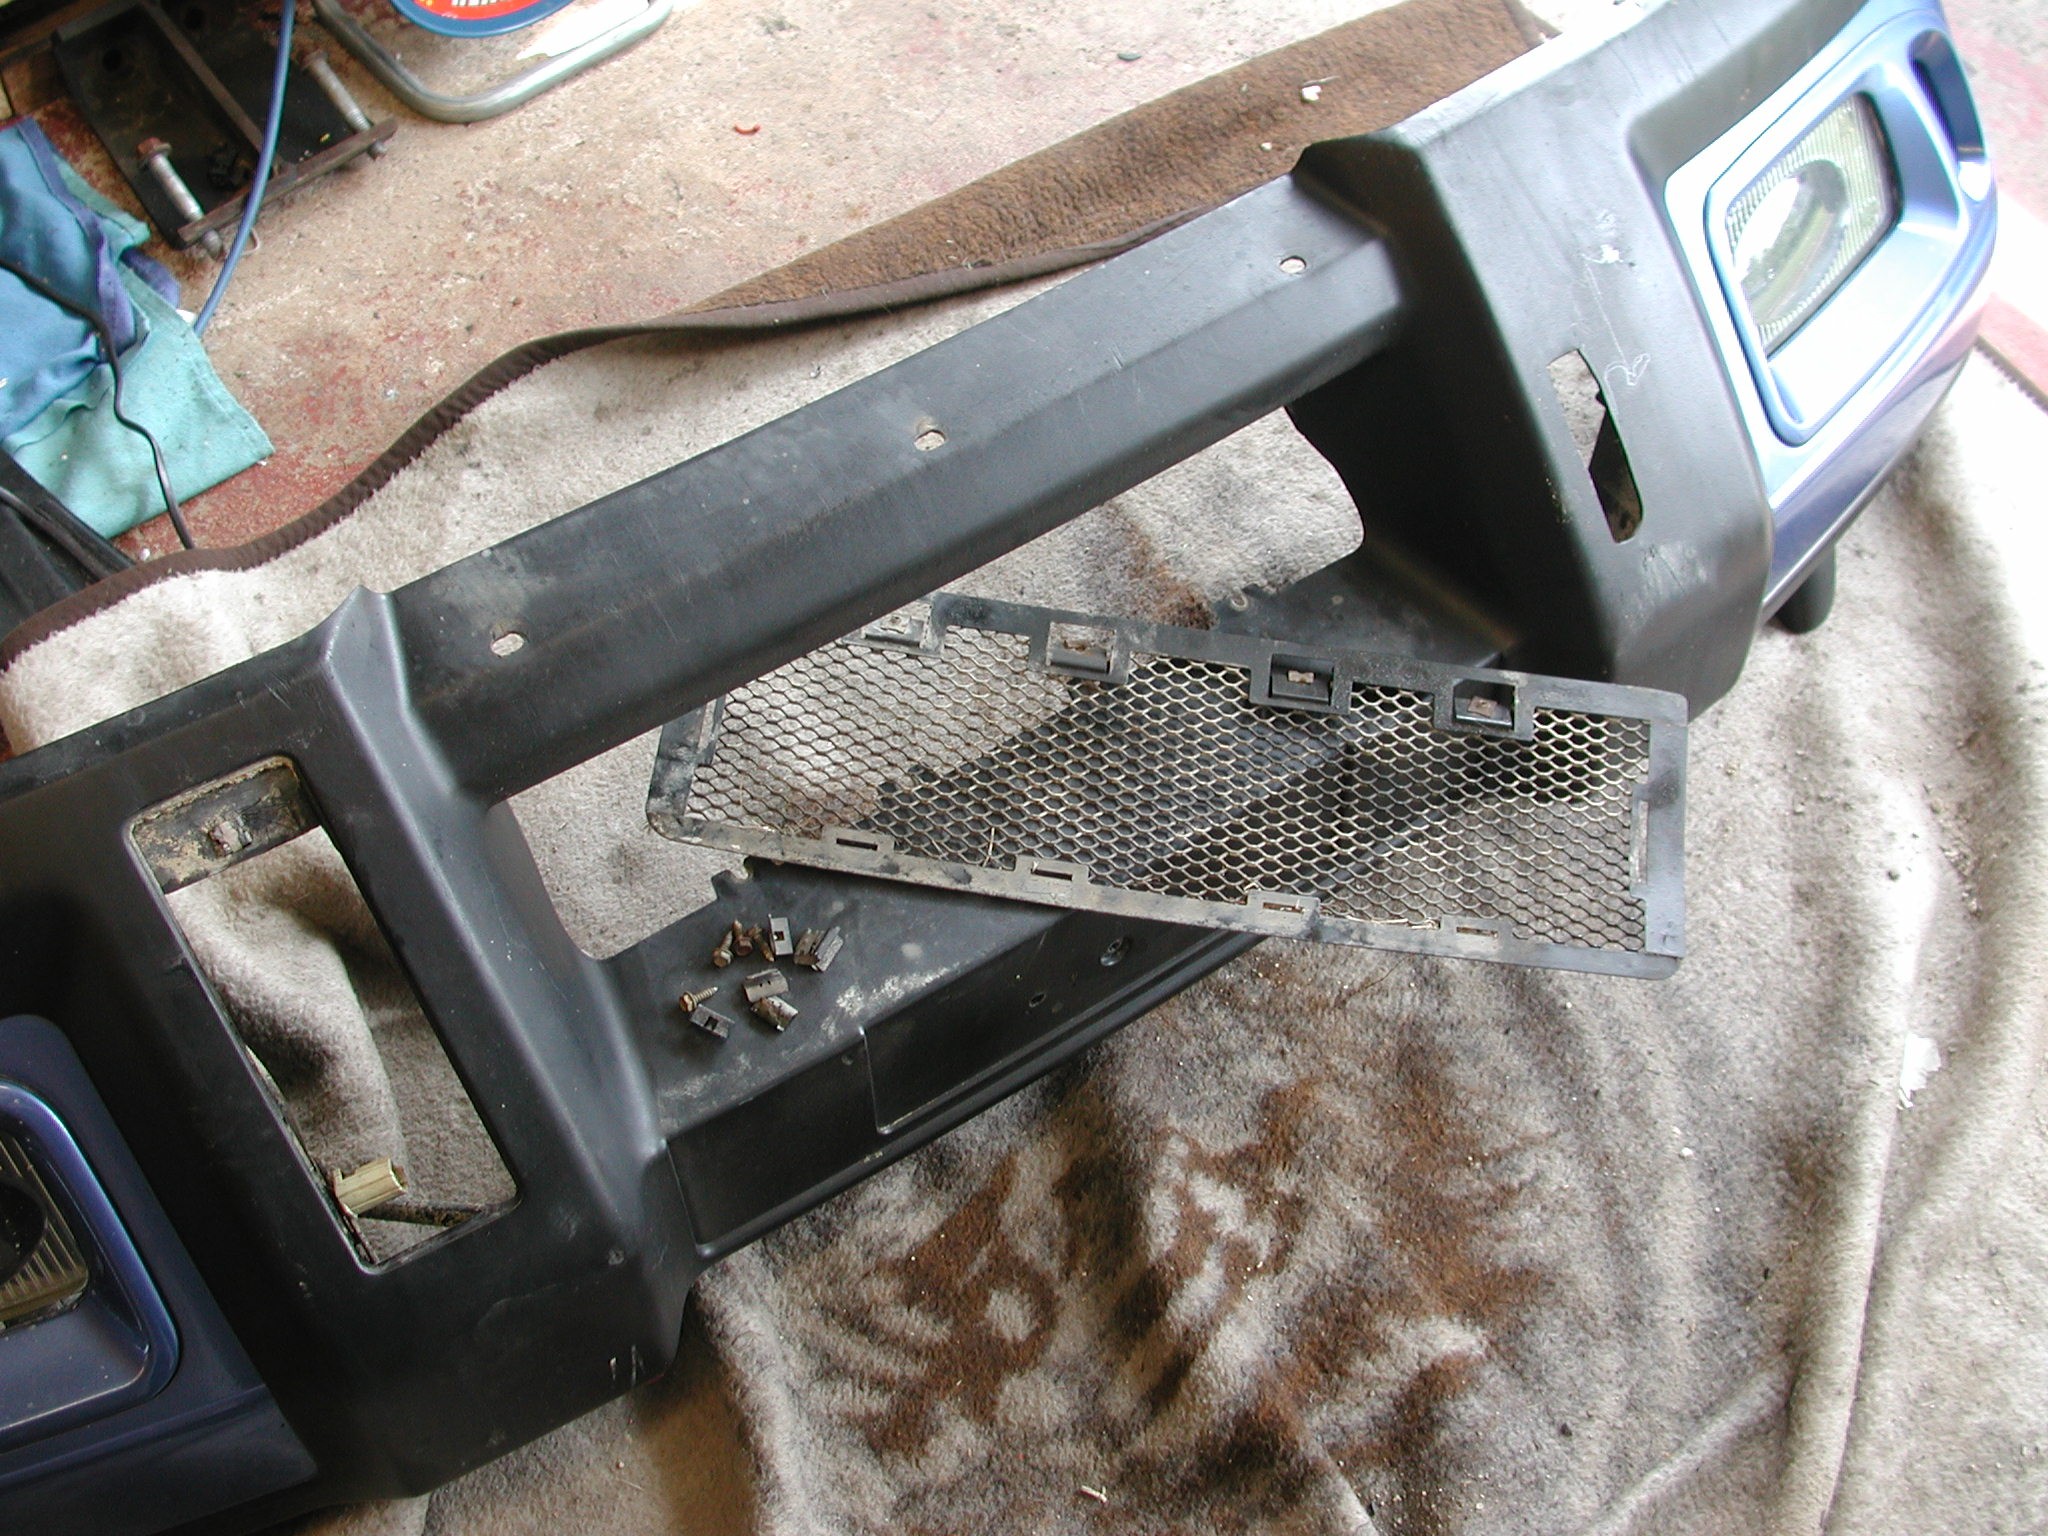
To start with you have to remove the lower mesh screen from the bumper, it simply unbolts along the top and unclips at the bottom. then its time to start cutting !!. I cannot tell you exactly what to take off, but its much better if you do a bit at a time and trial fit the bumper many times to get it right so you don't take to much off and spoil the look
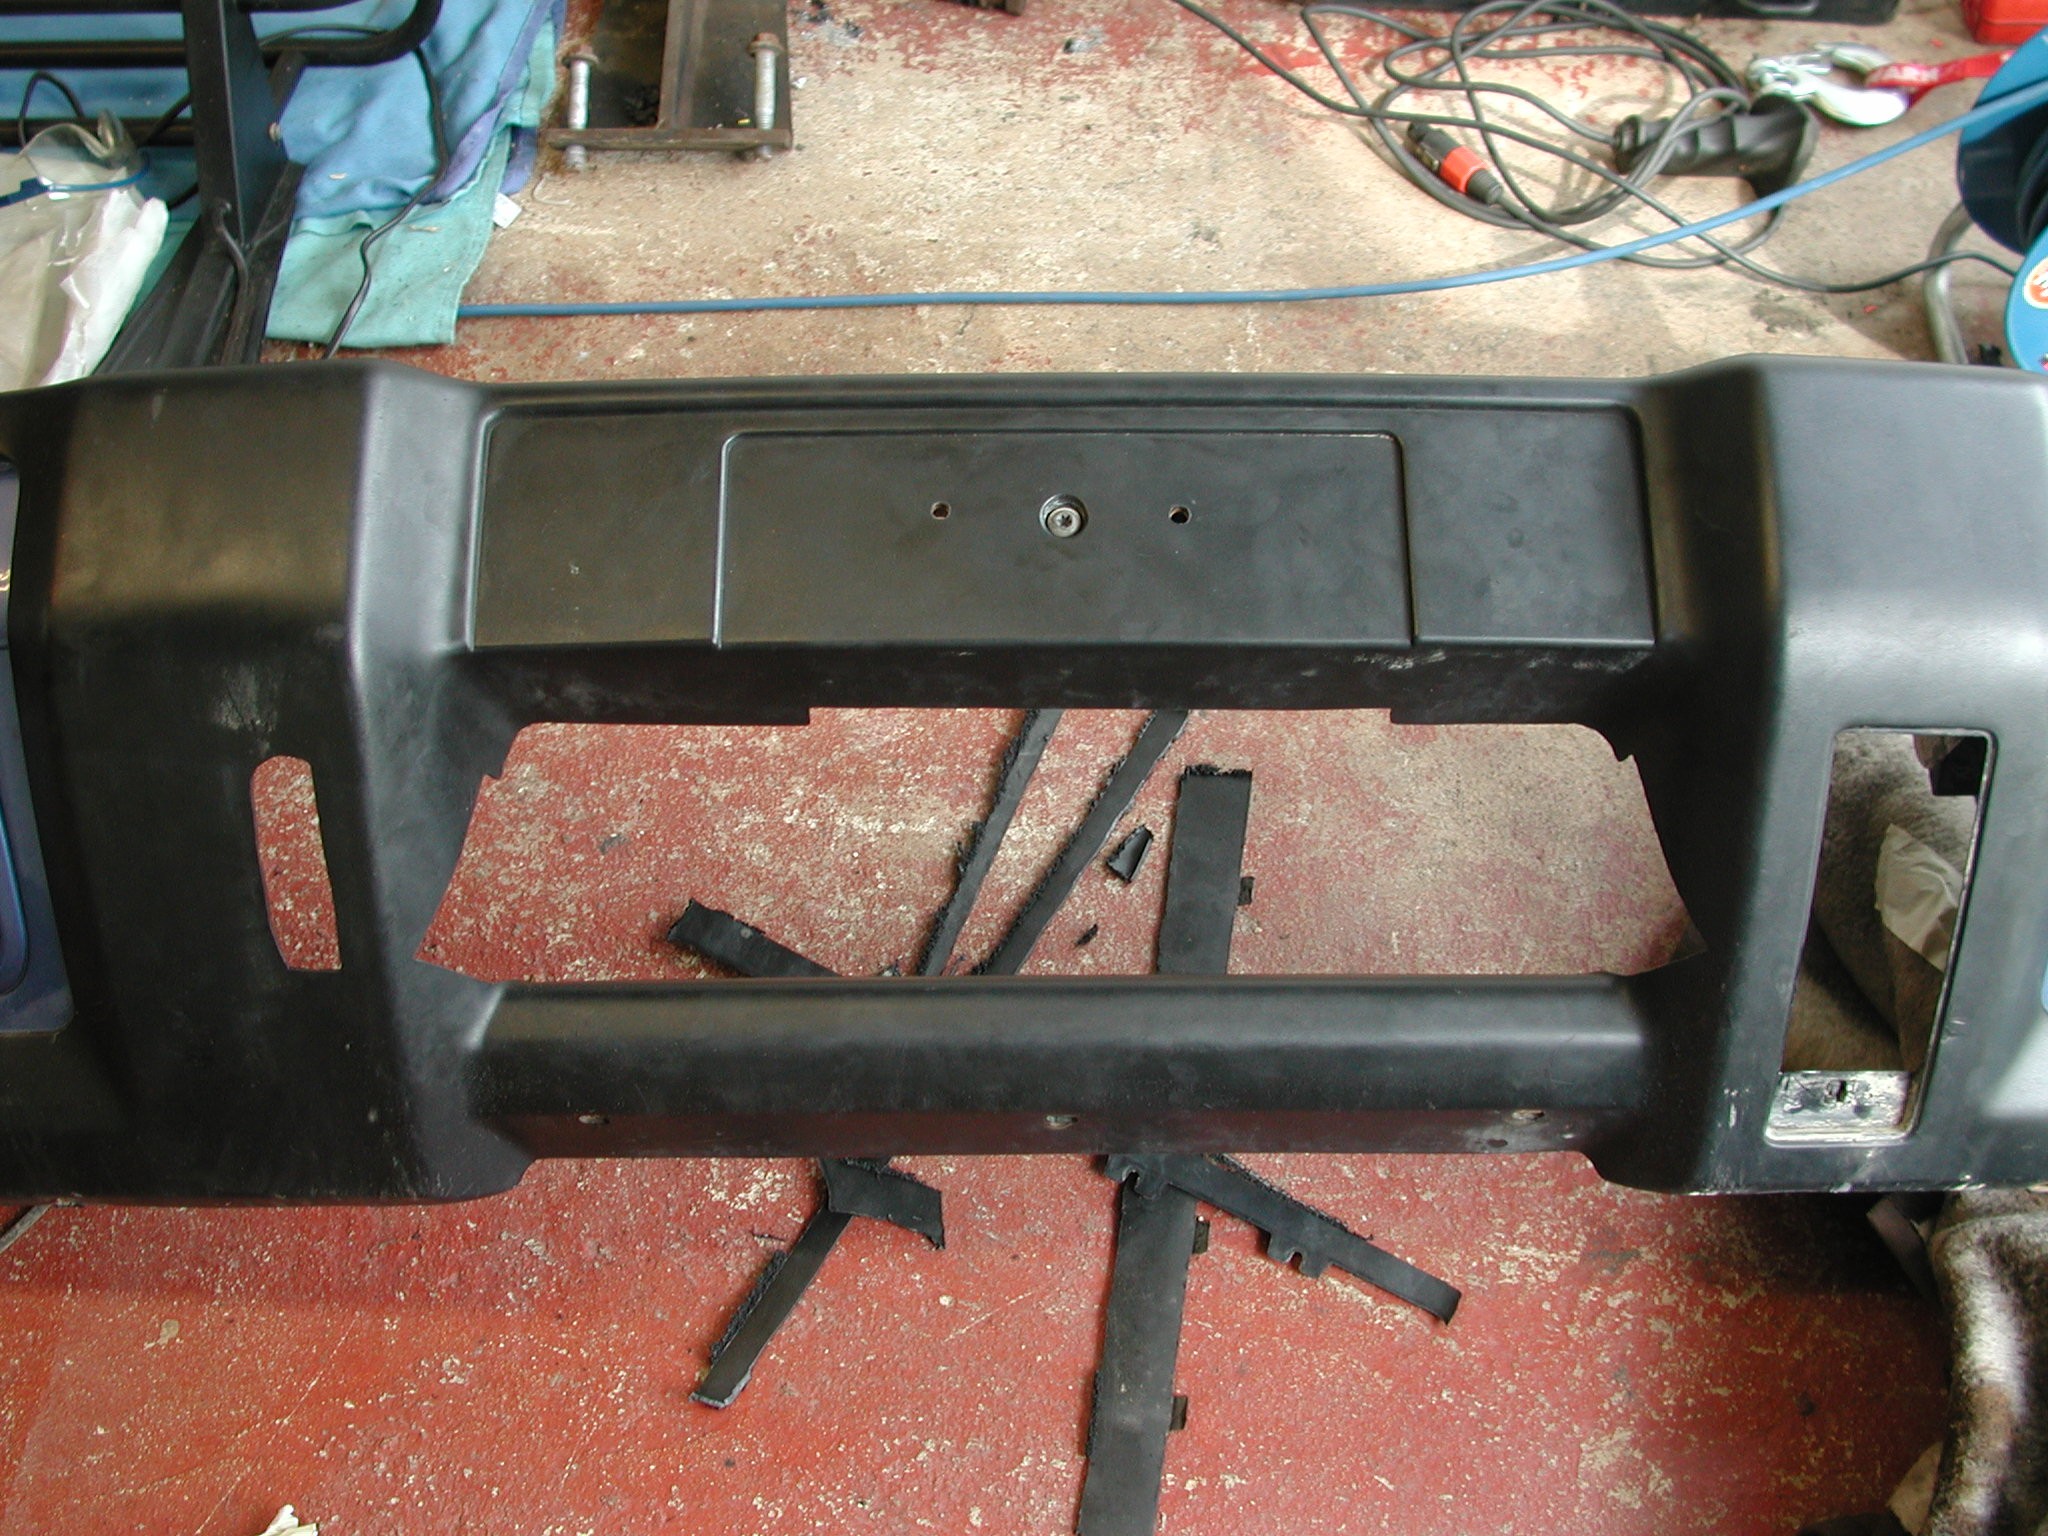
There is quite a lot of "large" bits to come off, and many small cuts to that you will make. Above you can see the "finished" shape. DON'T copy mine, as all cars will be slightly different, do it to your own vehicle and take your time to get it right
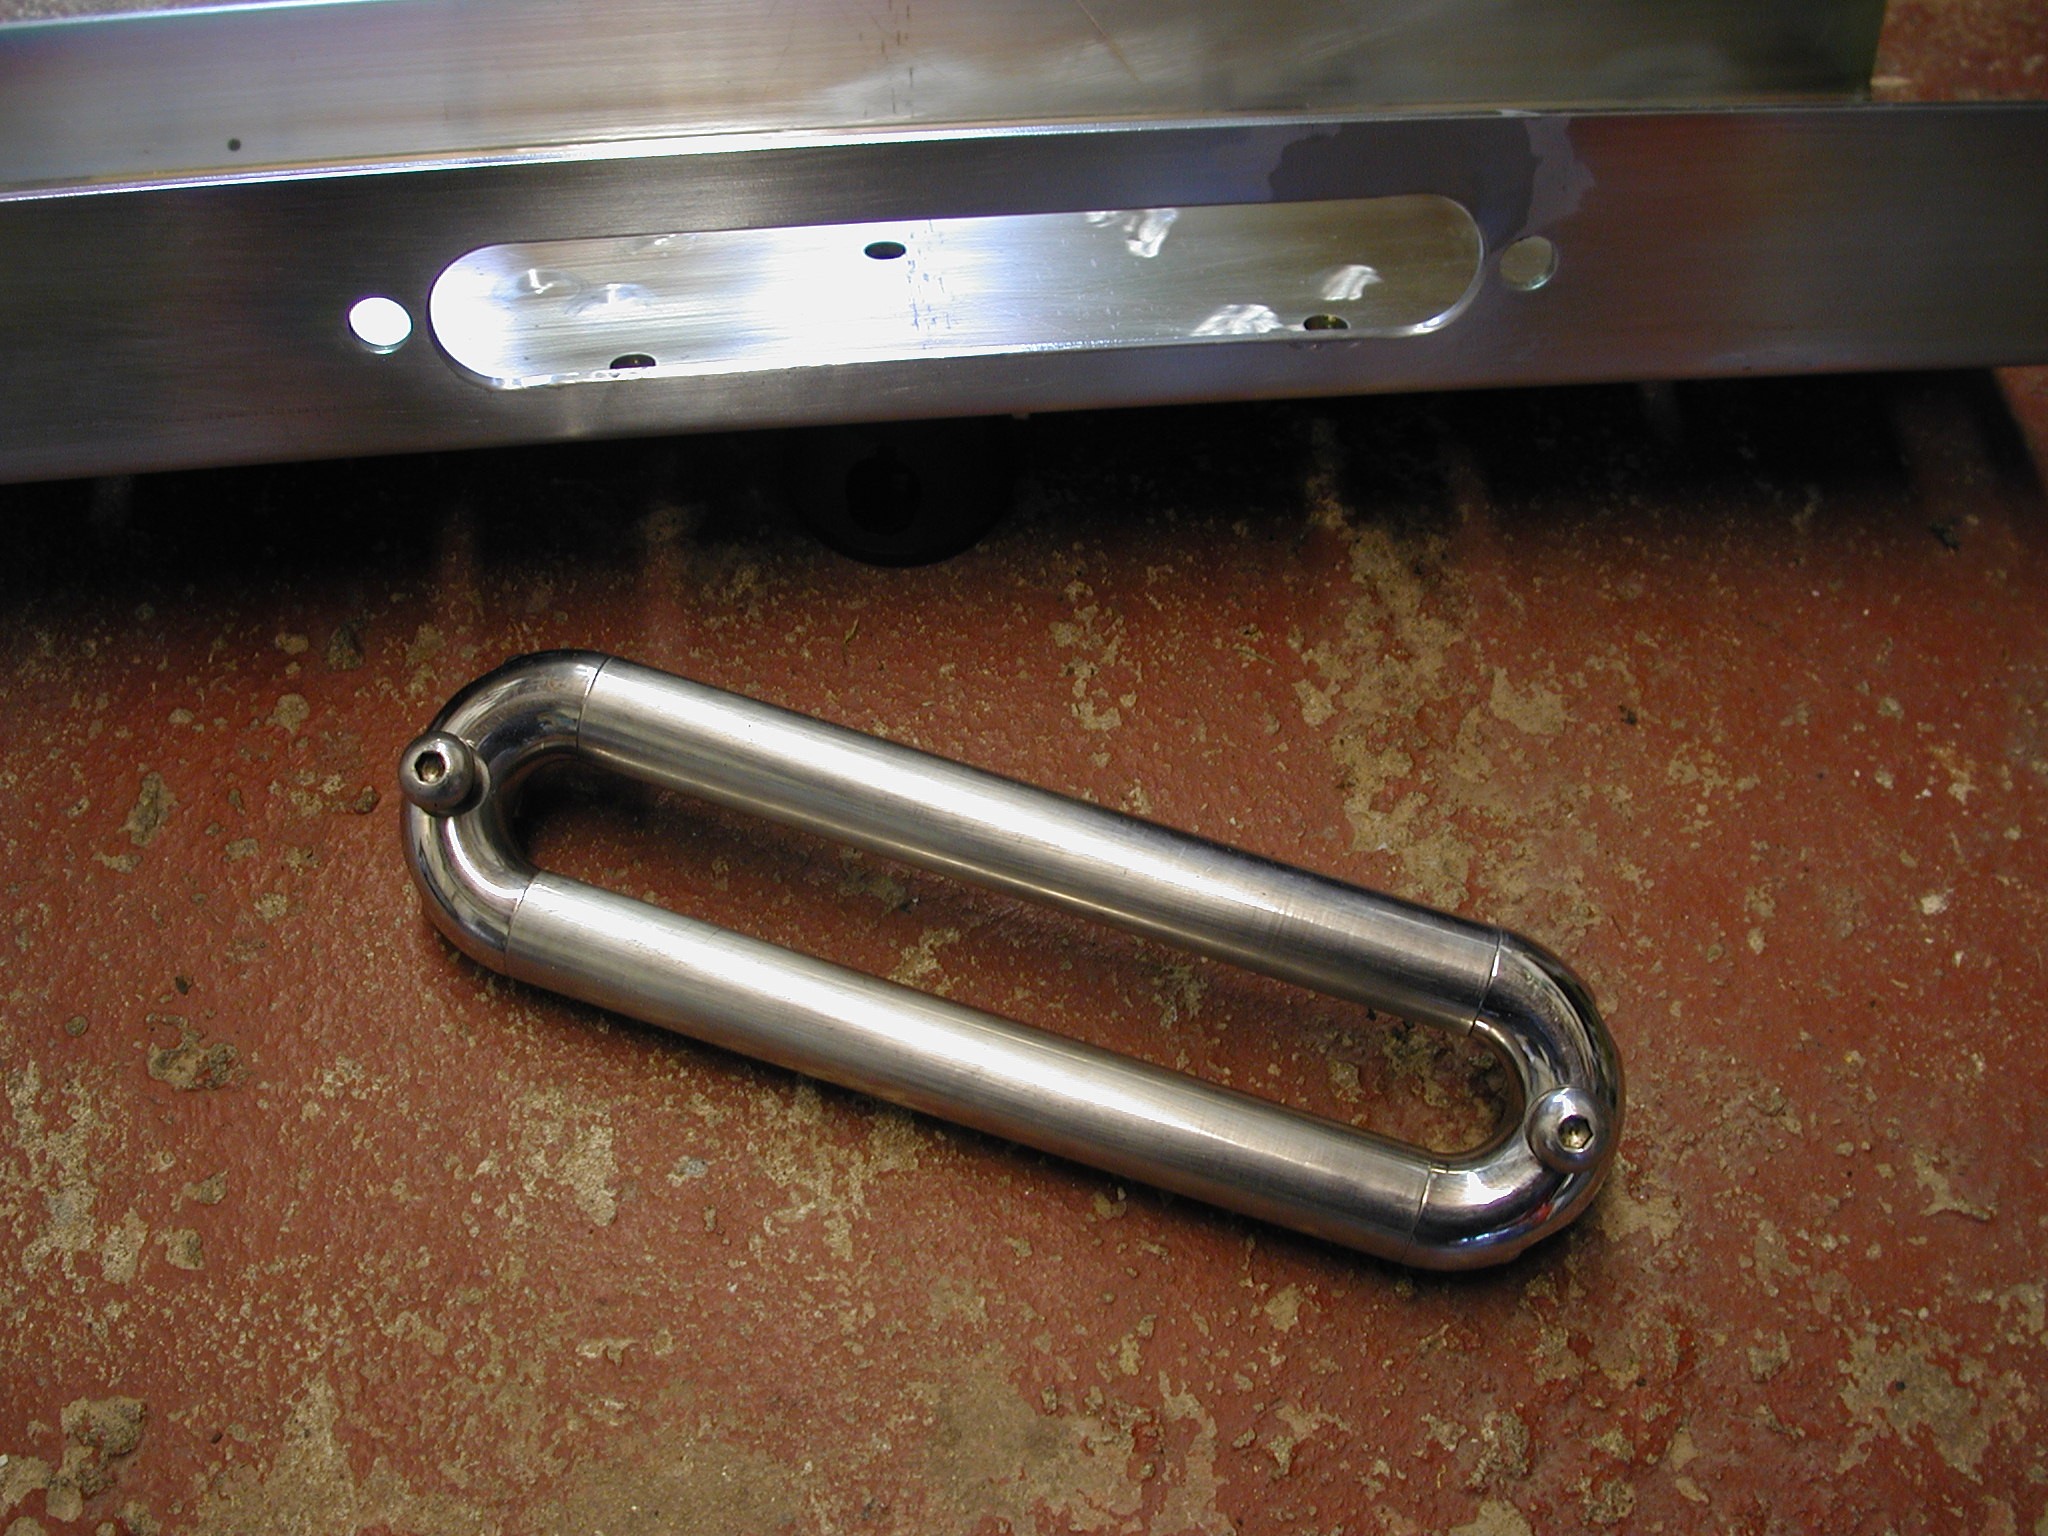
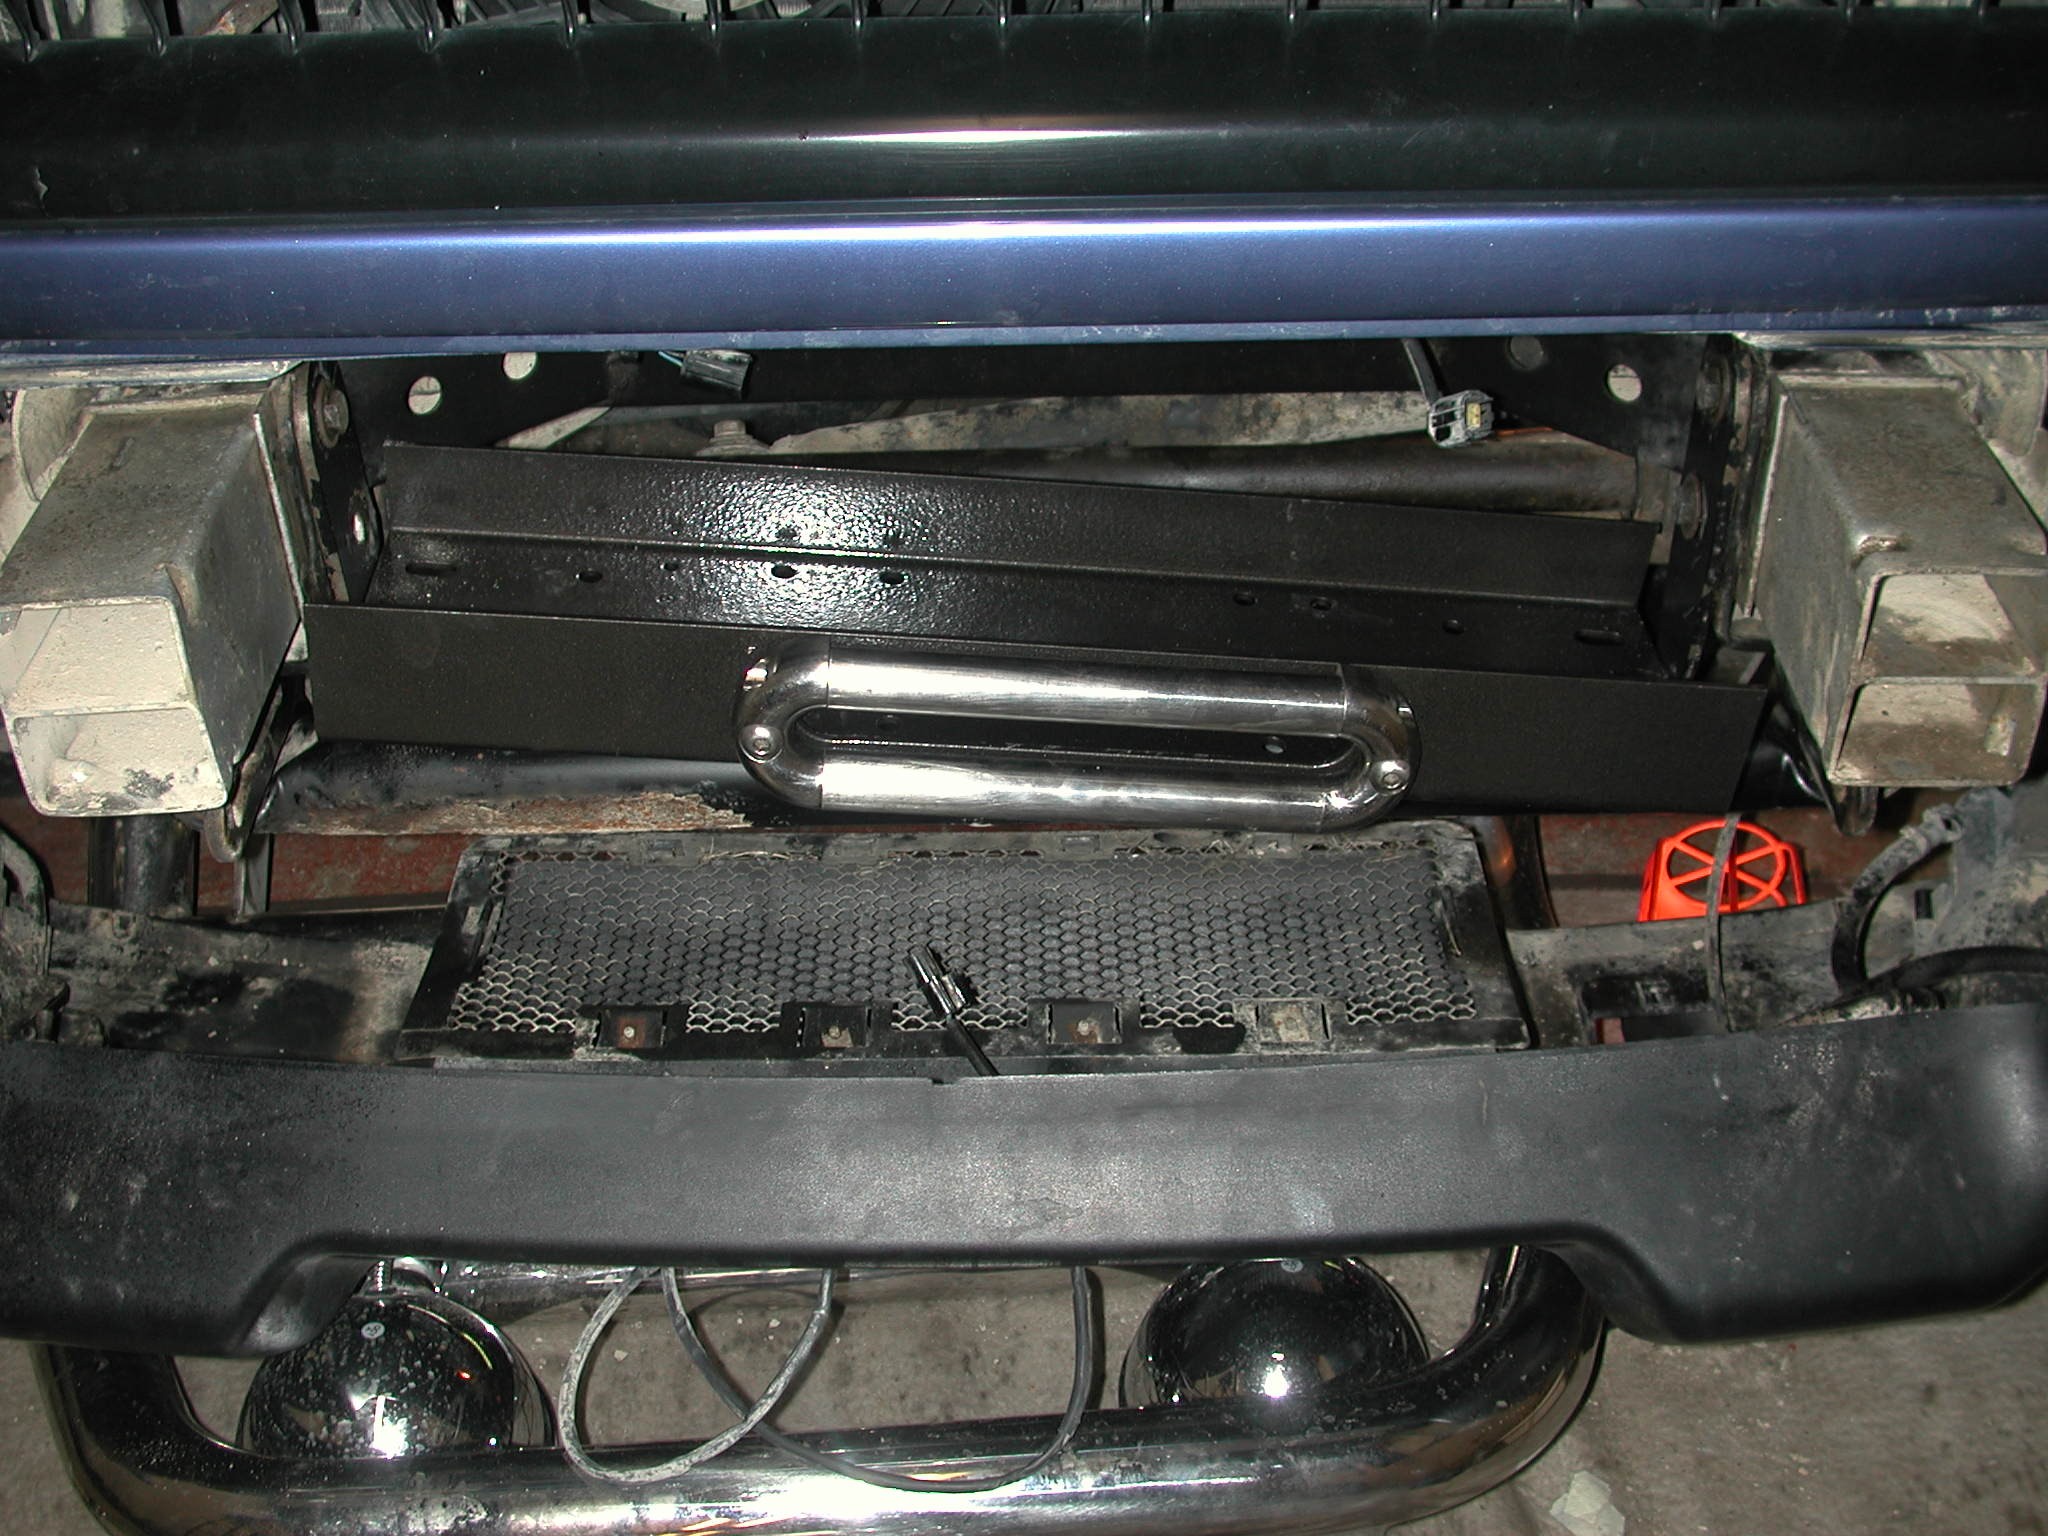
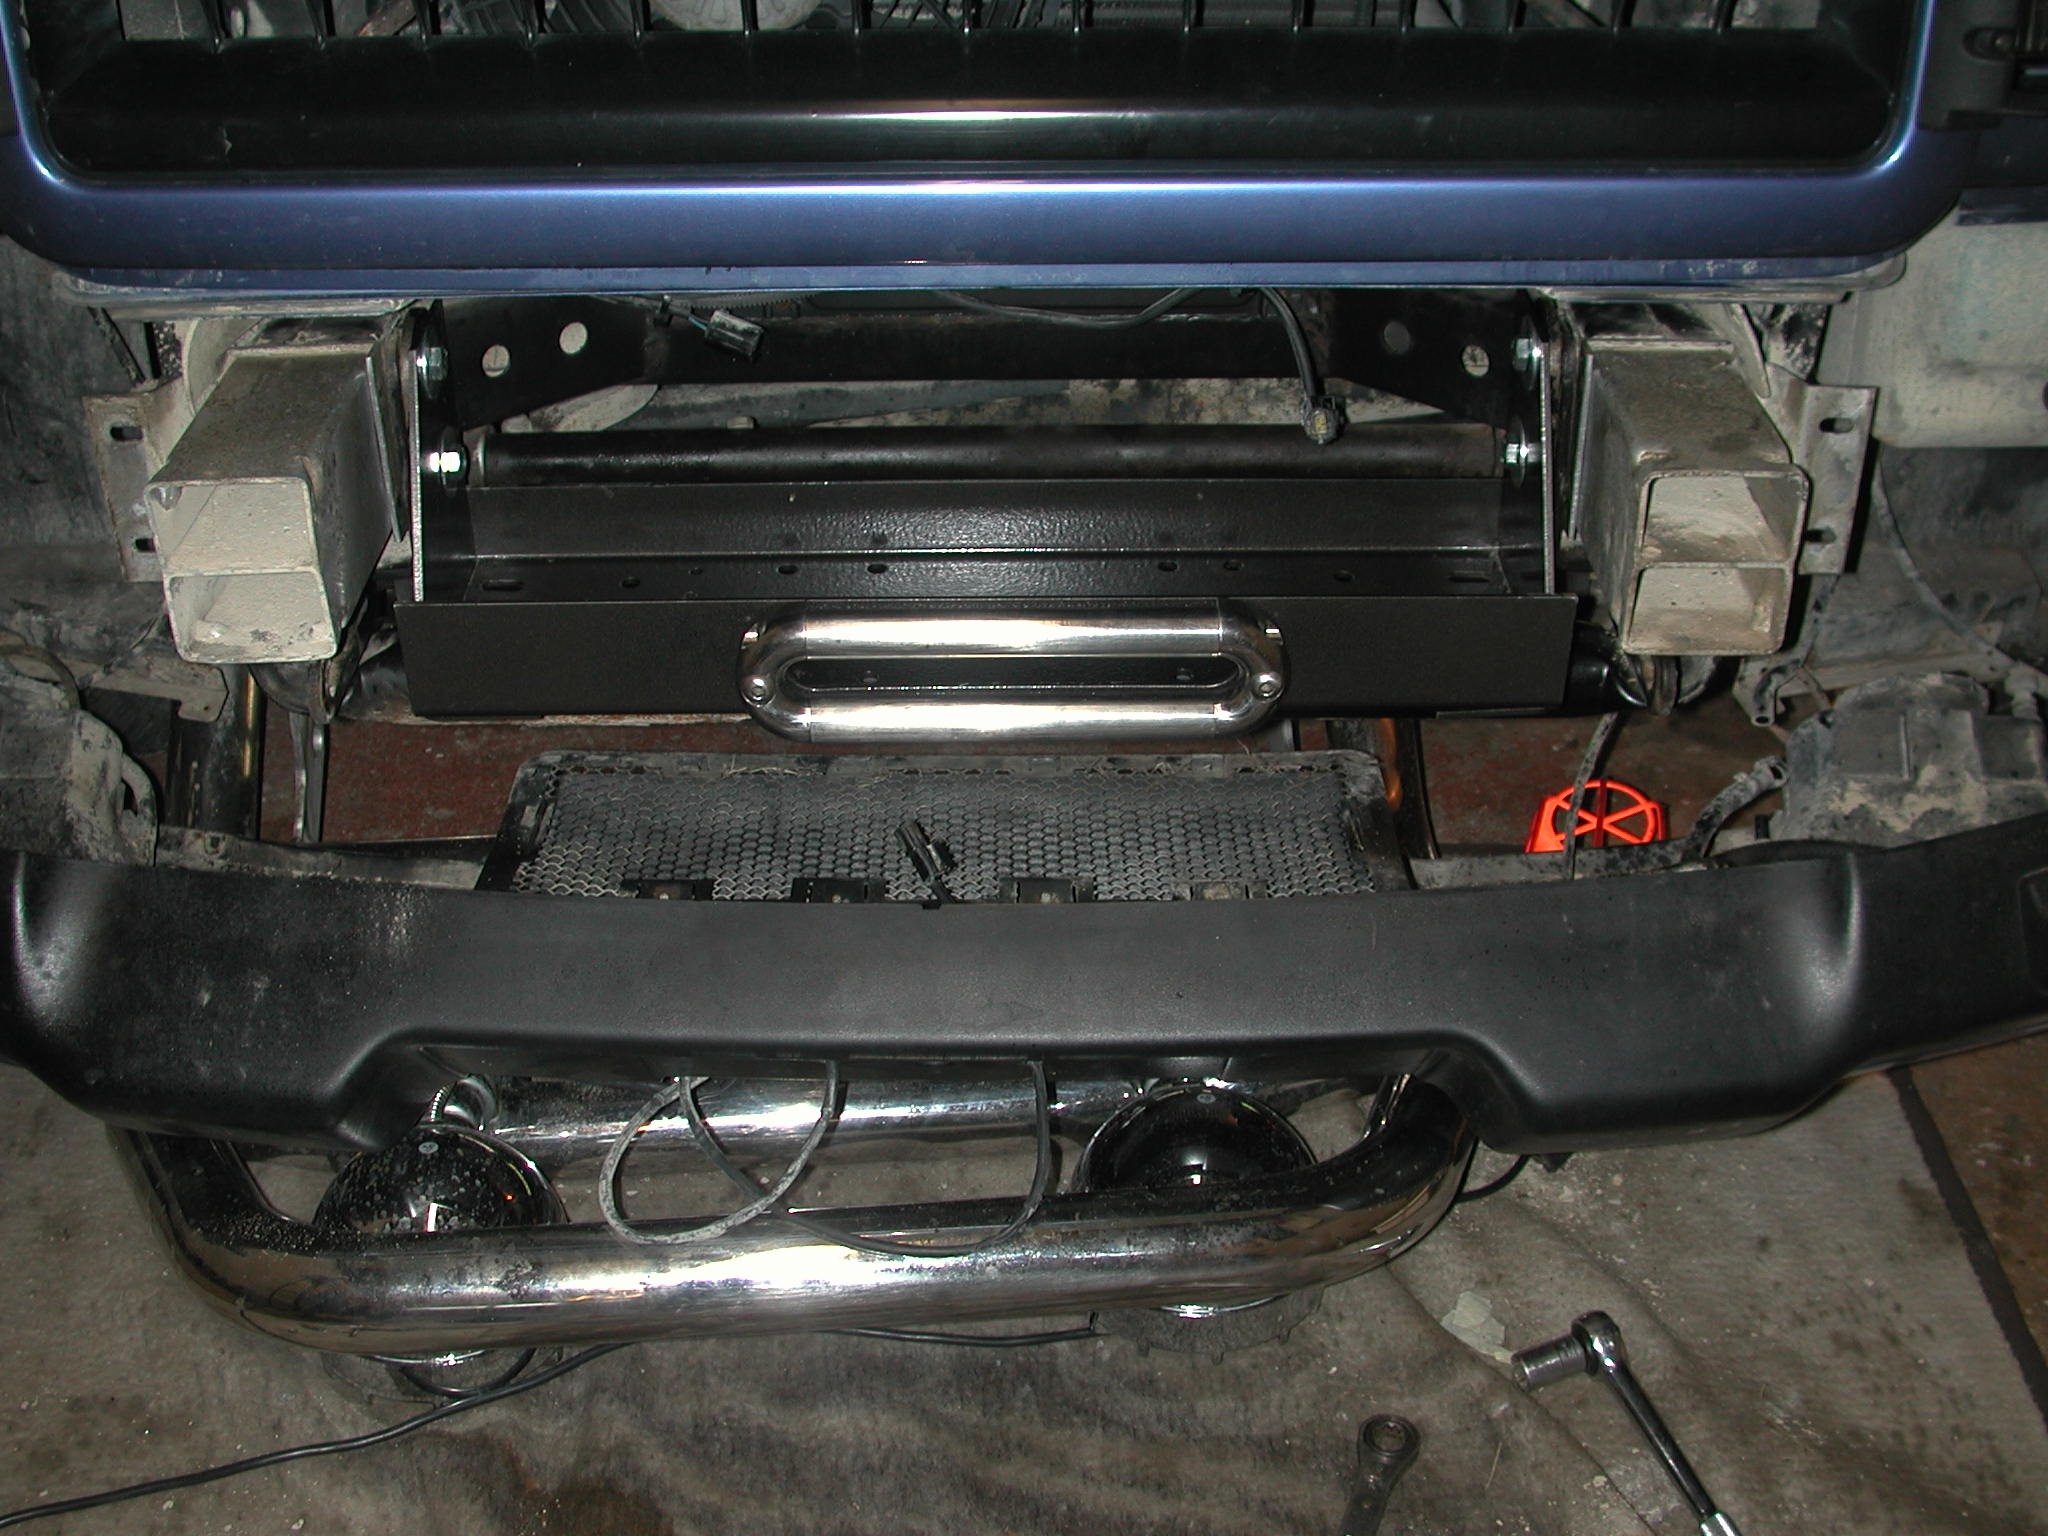
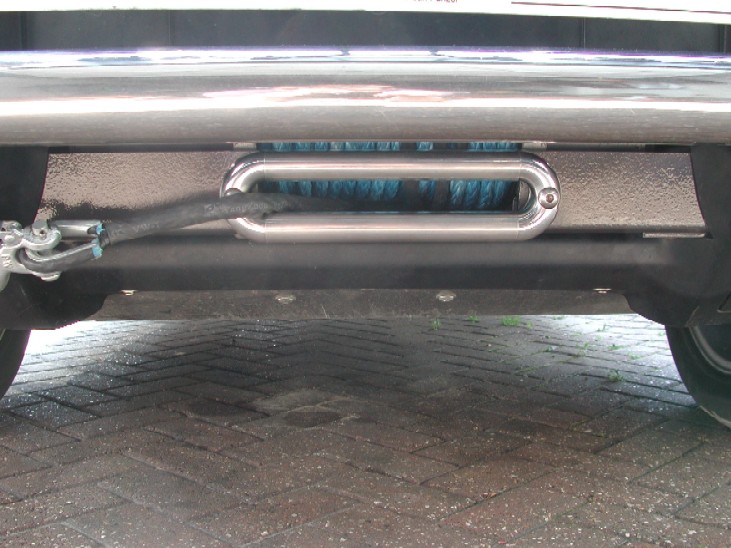
Here is a inside view complete with some devils pit clay!!...I did clean it before re-fitting it !! The final look now with bumper re-installed carefully around the new winch plate so you don't damage your new painted plate. oh and don't forget to fit your hook on the end to ;o)
On the right of this picture and below you can also see I cut an extra portion out of the bumper, this is needed because of the "discreet" plate, you still need access to the manual clutch lever on the winch gearbox, this cutout allows you to get your hand in to use the clutch for free spooling the rope of the drum etc.
I 'm REALLY pleased how it all turned out as I was bit concerned that the A bar may get in the way, but as you can see it sits very nicely just below it, and the hook can be clipped onto the A bar recovery points when not in use |